

概述
上一篇文章我们对自定义控件进行了一个大体的知识介绍。今天就来学习自定义一个简单的写字板控件。
先来看看效果图
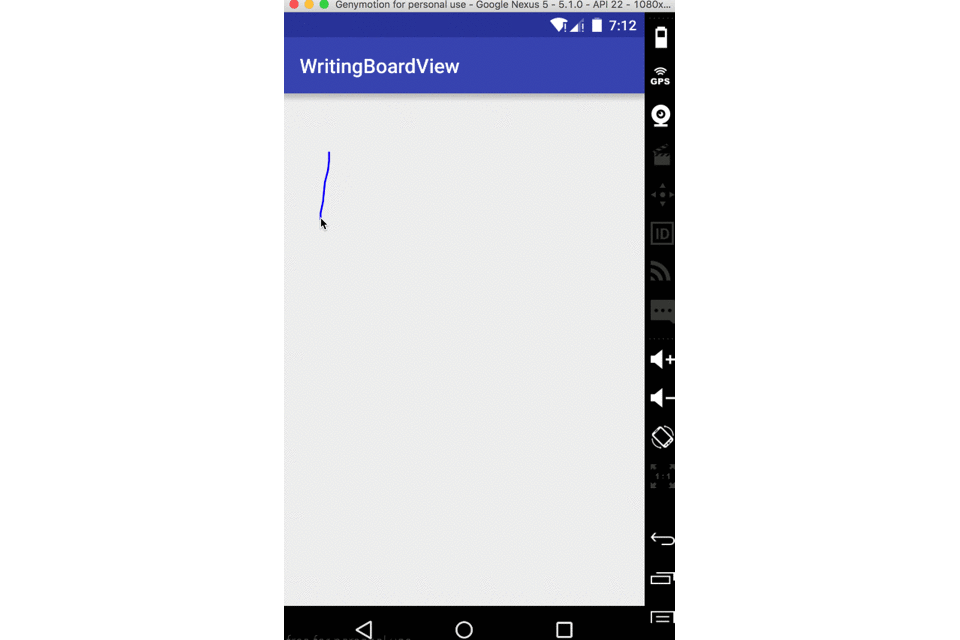
就是简单的根据手指写下的轨迹去画出内容
实现
在上一篇文章里提到了android官方给出的自定义控件需要考虑以下几点:
- 创建View
- 处理View的布局
- 绘制View
- 与用户进行交互
- 优化已定义的View
就按照这个步骤来完成今天的自定义控件
1、创建View
上篇提到创建View这一步的时候要考虑的就是很简单的自定义属性的声明、使用。
今天的控件可以有一些什么自定义属性呢?要实现写字板,其实就是三个东西:写字板的颜色、笔的颜色、笔的粗细。所以接下来自定义属性。
定义了就是为了要使用
简单的设置了boardBackground、paintWidth和paintColor属性
使用这里只需要注意命名空间,android提供给我们的用android,我们可以自定义我们属性的命名空间
写法为:xmlns:你取的名=”http://schemas.android.com/apk/res-auto”,这里的res-auto可以换成你控件的包名
在XML布局文件中设置的属性要在自定义属性中获取到,所以我们必须实现带有Context, AttributeSet的构造方法
    private int mBoardBackground;
    private int mPaintColor;
    private int mPaintWidth;
    private Path mPath;
    private Paint mPaint;

    public WritingBoardView(Context context) {
        this(context,null);
    }

    public WritingBoardView(Context context, AttributeSet attrs) {
        this(context, attrs,0);
    }

    public WritingBoardView(Context context, AttributeSet attrs, int defStyleAttr) {
        super(context, attrs, defStyleAttr);
        init(context,attrs);
    }


 private void init(Context context,AttributeSet attrs) {
        TypedArray a = context.obtainStyledAttributes(attrs,R.styleable.WritingBoardView);
        mBoardBackground =   a.getColor(R.styleable.WritingBoardView_boardBackground,Color.WHITE);
        mPaintColor =   a.getColor(R.styleable.WritingBoardView_paintColor,Color.BLUE);
        mPaintWidth = a.getDimensionPixelSize(R.styleable.WritingBoardView_paintWidth,
                (int) TypedValue.applyDimension(TypedValue.COMPLEX_UNIT_DIP,5,getResources().getDisplayMetrics()));
        a.recycle();
        mPaint = new Paint();
        mPath = new Path();
        setBackgroundColor(mBoardBackground);
        mPaint.setColor(mPaintColor);
        mPaint.setStrokeWidth(mPaintWidth);
        mPaint.setStyle(Paint.Style.STROKE);
        mPaint.setAntiAlias(true);
    }
上面代码确保了每个构造方法最终都调用了第三个构造方法里的init(context,attrs) 方法来获取自定义属性和初始化一些信息
通过固定的写法、简单的获取到自定义属性,并且给当前view设置背景、为Paint设置了样式和颜色。完成写字板很重要的就是这里的Path类。
先来介绍一下Path类
看构造方法的注释
/**
 * The Path class encapsulates compound (multiple contour) geometric paths
 * consisting of straight line segments, quadratic curves, and cubic curves.
 * It can be drawn with canvas.drawPath(path, paint), either filled or stroked
 * (based on the paint's Style), or it can be used for clipping or to draw
 * text on a path.
 */
public class Path {

    ...

}
大体就是说Path封装了由了直线和各种曲线组成几何图形信息。我们可以调用canvas通过drawPath方法来画一些东西。
我们最终的draw就是需要用到drawPath
Path里包含了很多设置几何图形的方法如addRect、addArc。
今天重点说用到的两个方法:
  /**
     * Set the beginning of the next contour to the point (x,y).
     *
     * @param x The x-coordinate of the start of a new contour
     * @param y The y-coordinate of the start of a new contour
     */
    public void moveTo(float x, float y) {
        native_moveTo(mNativePath, x, y);
    }
moveTo方法就是设置下一个连线或者图形最开始的位置。
/**
     * Add a line from the last point to the specified point (x,y).
     * If no moveTo() call has been made for this contour, the first point is
     * automatically set to (0,0).
     *
     * @param x The x-coordinate of the end of a line
     * @param y The y-coordinate of the end of a line
     */
    public void lineTo(float x, float y) {
        isSimplePath = false;
        native_lineTo(mNativePath, x, y);
    }
lineTo方法简单的添加一条上一个点到当前点的线。
有了这两个方法我们就可以实线写字板了
2、处理View的布局
由于这个自定义控件本身就需要一块内容当写字板,所以就不用特别的布局处理了,只是在mode为UNSPECIFIED的时候可能会导致布局显示不出来。
在这里就不进行特殊处理了。
3、绘制View、与用户进行交互
由于该控件本身就需要交互才产生效果,所以之前的两步放在一起考虑了。
上面说到过Canvas有一个drawPath方法。drawPath最后绘制出来什么样其实是看Path里包含的信息。
我们要实现实时显示手写的内容,只需要在滑动的时候获取的坐标通过Path的lineTo方法将线一点一点的连起来。
当手指抬起再落下的时候应该又是一条新的线,所以在落下的时候我们需要调用moveTo方法来为下一条轨迹设置一个起点。
 @Override
    public boolean onTouchEvent(MotionEvent event) {
        float touchX = event.getX();
        float touchY = event.getY();
        switch (event.getAction()){
            case MotionEvent.ACTION_DOWN:
                mPath.moveTo(touchX,touchY);
                break;
            case MotionEvent.ACTION_MOVE:
                mPath.lineTo(touchX,touchY);
                break;
            case MotionEvent.ACTION_UP:
                break;
        }
        invalidate();
        return true;
    }
在onTouch中return true表示要处理当前事件。并且在每一次操作调用invalidate来绘制界面,我们的onDraw 方法只需要简单的调用drawPath就可以了
 @Override
    protected void onDraw(Canvas canvas) {
        super.onDraw(canvas);
        canvas.drawPath(mPath,mPaint);
    }
总结
其实就是通过手指的触摸事件来控制轨迹的改变,按照固定的模式,一个简单的自定义控件就大功告成啦!
一个简单的写字板就基本完成了,当然你感兴趣可以扩展一下,加上在运行时改变画笔的颜色、画板的颜色。添加字体擦除去的功能。
最后别忘记给我点个赞评论支持下!哈哈
