

Introduction
In this tutorial, we are going to dive deep into two fundamental concepts: URLs and Forms. In the process, we are going to explore many other concepts like creating reusable templates and installing third-party libraries. We are also going to write plenty of unit tests.
If you are following this tutorial series since the first part, coding your project and following the tutorial step by step, you may need to update your models.py before starting:
boards/models.py
class Topic(models.Model):
    # other fields...
    # Add `auto_now_add=True` to the `last_updated` field
    last_updated = models.DateTimeField(auto_now_add=True)

class Post(models.Model):
    # other fields...
    # Add `null=True` to the `updated_by` field
    updated_by = models.ForeignKey(User, null=True, related_name='+')
Now run the commands with the virtualenv activated:
python manage.py makemigrations
python manage.py migrate
If you already have null=True in the updated_by field and the auto_now_add=True in the last_updated field, you can safely ignore the instructions above.
If you prefer to use my source code as a starting point, you can grab it on GitHub.
The current state of the project can be found under the release tag v0.2-lw. The link below will take you to the right place:
The development will follow from here.
URLs
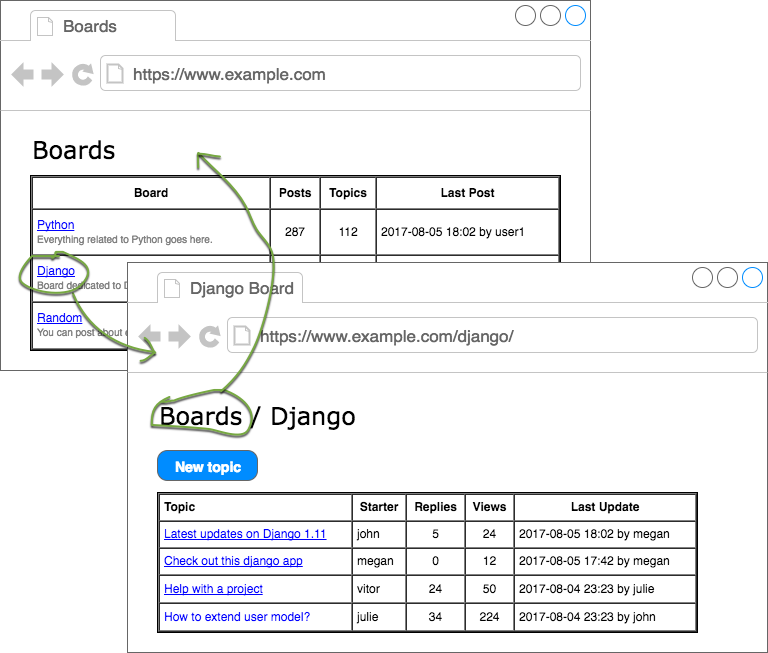
Proceeding with the development of our application, now we have to implement a new page to list all the topics that belong to a given Board. Just to recap, below you can see the wireframe we draw in the previous tutorial:
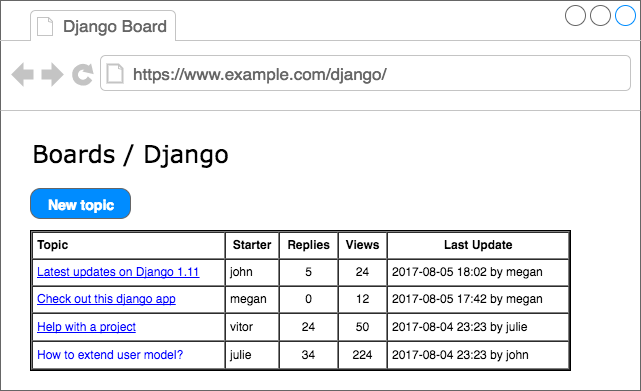
Figure 1: Boards project wireframe listing all topics in the Django board.
We will start by editing the urls.py inside the myproject folder:
myproject/urls.py
from django.conf.urls import url
from django.contrib import admin

from boards import views

urlpatterns = [
    url(r'^$', views.home, name='home'),
    url(r'^boards/(?P<pk>\d+)/$', views.board_topics, name='board_topics'),
    url(r'^admin/', admin.site.urls),
]
This time let’s take a moment and analyze the urlpatterns and url.
The URL dispatcher and URLconf (URL configuration) are fundamental parts of a Django application. In the beginning, it can look confusing; I remember having a hard time when I first started developing with Django.
In fact, right now the Django Developers are working on a proposal to make simplified routing syntax. But for now, as per the version 1.11, that’s what we have. So let’s try to understand how it works.
A project can have many urls.py distributed among the apps. But Django needs a url.py to use as a starting point. This special urls.py is called root URLconf. It’s defined in the settings.py file.
myproject/settings.py
ROOT_URLCONF = 'myproject.urls'It already comes configured, so you don’t need to change anything here.
When Django receives a request, it starts searching for a match in the project’s URLconf. It starts with the first entry of the urlpatterns variable, and test the requested URL against each url entry.
If Django finds a match, it will pass the request to the view function, which is the second parameter of the url. The order in the urlpatterns matters, because Django will stop searching as soon as it
finds a match. Now, if Django doesn’t find a match in the URLconf, it will raise a 404 exception, which is the error code for Page Not Found.
This is the anatomy of the url function:
def url(regex, view, kwargs=None, name=None):
# ...- regex: A regular expression for matching URL patterns in strings. Note that these regular expressions do not search GET or POST parameter. In a request to http://127.0.0.1:8000/boards/?page=2 only /boards/ will be processed.
- view: A view function used to process the user request for a matched URL. It also accepts the return of the django.conf.urls.include function, which is used to reference an external urls.py file. You can, for example, use it to define a set of app specific URLs, and include it in the root URLconf using a prefix. We will explore more on this concept later on.
- kwargs: Arbitrary keyword arguments that’s passed to the target view. It is normally used to do some simple customization on reusable views. We don’t use it very often.
- name: A unique identifier for a given URL. This is a very important feature. Always remember to name your URLs. With this, you can change a specific URL in the whole project by just changing the regex. So it’s important to never hard code URLs in the views or templates, and always refer to the URLs by its name.
Basic URLs
Basic URLs are very simple to create. It’s just a matter of matching strings. For example, let’s say we wanted to create an “about” page, it could be defined like this:
from django.conf.urls import url
from boards import views

urlpatterns = [
    url(r'^$', views.home, name='home'),
    url(r'^about/$', views.about, name='about'),
]
We can also create deeper URL structures:
from django.conf.urls import url
from boards import views

urlpatterns = [
    url(r'^$', views.home, name='home'),
    url(r'^about/$', views.about, name='about'),
    url(r'^about/company/$', views.about_company, name='about_company'),
    url(r'^about/author/$', views.about_author, name='about_author'),
    url(r'^about/author/vitor/$', views.about_vitor, name='about_vitor'),
    url(r'^about/author/erica/$', views.about_erica, name='about_erica'),
    url(r'^privacy/$', views.privacy_policy, name='privacy_policy'),
]
Those are some examples of simple URL routing. For all the examples above, the view function will follow this structure:
def about(request):
    # do something...
    return render(request, 'about.html')

def about_company(request):
    # do something else...
    # return some data along with the view...
    return render(request, 'about_company.html', {'company_name': 'Simple Complex'})
Advanced URLs
A more advanced usage of URL routing is achieved by taking advantage of the regex to match certain types of data and create dynamic URLs.
For example, to create a profile page, like many services do like github.com/vitorfs or twitter.com/vitorfs, where “vitorfs” is my username, we can do the following:
from django.conf.urls import url
from boards import views

urlpatterns = [
    url(r'^$', views.home, name='home'),
    url(r'^(?P<username>[\w.@+-]+)/$', views.user_profile, name='user_profile'),
]
This will match all valid usernames for a Django User model.
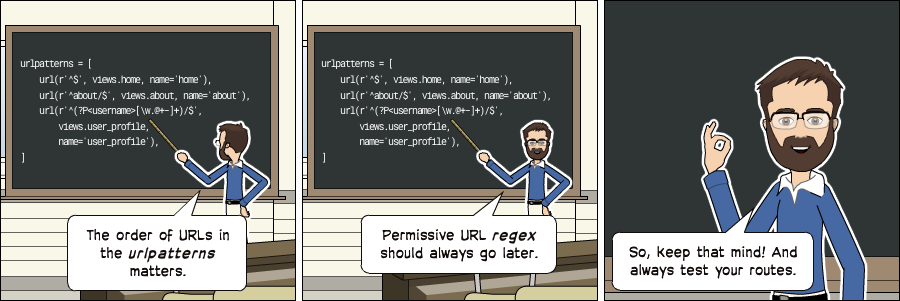
Now observe that the example above is a very permissive URL. That means it will match lot’s of URL patterns because it is defined in the root of the URL, with no prefix like /profile/<username>/. In this case, if we wanted to define a URL named /about/, we would have do define it before the username URL pattern:
from django.conf.urls import url
from boards import views

urlpatterns = [
    url(r'^$', views.home, name='home'),
    url(r'^about/$', views.about, name='about'),
    url(r'^(?P<username>[\w.@+-]+)/$', views.user_profile, name='user_profile'),
]
If the “about” page was defined after the username URL pattern, Django would never find it, because the word “about” would match the username regex, and the view user_profile would be processed instead of the about view function.
There are some side effects to that. For example, from now on, we would have to treat “about” as a forbidden username, because if a user picked “about” as their username, this person would never see their profile page.
Sidenote: If you want to design cool URLs for user profiles, the easiest solution to avoid URL collision is by adding a prefix like /u/vitorfs/, or like Medium does /@vitorfs/, where "@" is the prefix.
If you want no prefix at all, consider using a list of forbidden names like this: github.com/shouldbee/r…. Or another example is an application I developed when I was learning Django; I created my list at the time: github.com/vitorfs/par….
Those collisions are very common. Take GitHub for example; they have this URL to list all the repositories you are currently watching: github.com/watching. Someone registered a username on GitHub with the name "watching," so this person can't see his profile page. We can see a user with this username exists by trying this URL: github.com/watching/re… which was supposed to list the user's repositories, like mine for example github.com/vitorfs/rep….
The whole idea of this kind of URL routing is to create dynamic pages where part of the URL will be used as an identifier for a certain resource, that will be used to compose a page. This identifier can be an integer ID or a string for example.
Initially, we will be working with the Board ID to create a dynamic page for the Topics. Let’s read again the example I gave at the beginning of the URLs section:
url(r'^boards/(?P<pk>\d+)/$', views.board_topics, name='board_topics')The regex \d+ will match an integer of arbitrary size. This integer will be used to retrieve the Board from the database. Now observe that we wrote the regex as (?P<pk>\d+), this is telling Django
to capture the value into a keyword argument named pk.
Here is how we write a view function for it:
def board_topics(request, pk):
    # do something...
Because we used the (?P<pk>\d+) regex, the keyword argument in the board_topics must be named pk.
If we wanted to use any name, we could do it like this:
url(r'^boards/(\d+)/$', views.board_topics, name='board_topics')Then the view function could be defined like this:
def board_topics(request, board_id):
    # do something...
Or like this:
def board_topics(request, id):
    # do something...
The name wouldn’t matter. But it’s a good practice to use named parameters because when we start composing bigger URLs capturing multiple IDs and variables, it will be easier to read.
Sidenote: PK or ID?
PK stands for Primary Key. It's a shortcut for accessing a model's primary key. All Django models have this attribute.
For the most cases, using the pk property is the same as id. That's because if we don't define a primary key for a model, Django will automatically create an AutoField named id, which will be
its primary key.
If you defined a different primary key for a model, for example, let's say the field email is your primary key. To access it you could either use obj.email or obj.pk.
Using the URLs API
It’s time to write some code. Let’s implement the topic listing page (see Figure 1) I mentioned at the beginning of the URLs section.
First, edit the urls.py adding our new URL route:
myproject/urls.py
from django.conf.urls import url
from django.contrib import admin

from boards import views

urlpatterns = [
    url(r'^$', views.home, name='home'),
    url(r'^boards/(?P<pk>\d+)/$', views.board_topics, name='board_topics'),
    url(r'^admin/', admin.site.urls),
]
Now let’s create the view function board_topics:
boards/views.py
from django.shortcuts import render
from .models import Board

def home(request):
    # code suppressed for brevity

def board_topics(request, pk):
    board = Board.objects.get(pk=pk)
    return render(request, 'topics.html', {'board': board})
In the templates folder, create a new template named topics.html:
templates/topics.html
{% load static %}<!DOCTYPE html>
<html>
  <head>
    <meta charset="utf-8">
    <title>{{ board.name }}</title>
    <link rel="stylesheet" href="{% static 'css/bootstrap.min.css' %}">
  </head>
  <body>
    <div class="container">
      <ol class="breadcrumb my-4">
        <li class="breadcrumb-item">Boards</li>
        <li class="breadcrumb-item active">{{ board.name }}</li>
      </ol>
    </div>
  </body>
</html>
Note: For now we are simply creating new HTML templates. No worries, in the following section I will show you how to create reusable templates.
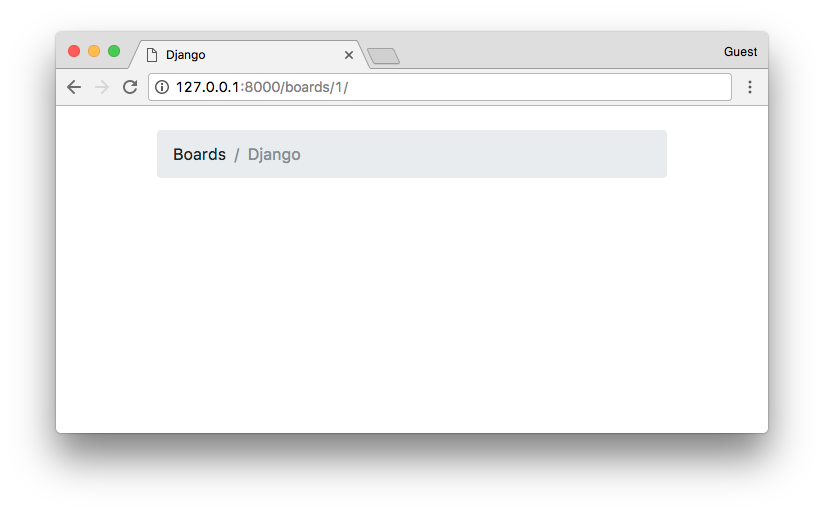
Now check the URL http://127.0.0.1:8000/boards/1/ in a web browser. The result should be the following page:
Time to write some tests! Edit the tests.py file and add the following tests in the bottom of the file:
boards/tests.py
from django.core.urlresolvers import reverse
from django.urls import resolve
from django.test import TestCase
from .views import home, board_topics
from .models import Board

class HomeTests(TestCase):
    # ...

class BoardTopicsTests(TestCase):
    def setUp(self):
        Board.objects.create(name='Django', description='Django board.')

    def test_board_topics_view_success_status_code(self):
        url = reverse('board_topics', kwargs={'pk': 1})
        response = self.client.get(url)
        self.assertEquals(response.status_code, 200)

    def test_board_topics_view_not_found_status_code(self):
        url = reverse('board_topics', kwargs={'pk': 99})
        response = self.client.get(url)
        self.assertEquals(response.status_code, 404)

    def test_board_topics_url_resolves_board_topics_view(self):
        view = resolve('/boards/1/')
        self.assertEquals(view.func, board_topics)
A few things to note here. This time we used the setUp method. In the setup method, we created a Board instance, so to use it in the tests. We have to do that because the Django testing suite doesn’t run your tests
against the current database. To run the tests Django creates a new database on the fly, apply all the model migrations, run the tests, and when it’s done, it destroys the testing database.
So in the setUp method, we prepare the environment to run the tests, so to simulate a scenario.
- The
test_board_topics_view_success_status_codemethod: is testing if Django is returning a status code 200 (success) for an existing Board. - The
test_board_topics_view_not_found_status_codemethod: is testing if Django is returning a status code 404 (page not found) for a Board that doesn’t exist in the database. - The
test_board_topics_url_resolves_board_topics_viewmethod: is testing if Django is using the correct view function to render the topics.
Now it’s time to run the tests:
python manage.py testAnd the output:
Creating test database for alias 'default'...
System check identified no issues (0 silenced).
.E...
======================================================================
ERROR: test_board_topics_view_not_found_status_code (boards.tests.BoardTopicsTests)
----------------------------------------------------------------------
Traceback (most recent call last):
# ...
boards.models.DoesNotExist: Board matching query does not exist.

----------------------------------------------------------------------
Ran 5 tests in 0.093s

FAILED (errors=1)
Destroying test database for alias 'default'...
The test test_board_topics_view_not_found_status_code failed. We can see in the Traceback it returned an exception “boards.models.DoesNotExist: Board matching query does not exist.”
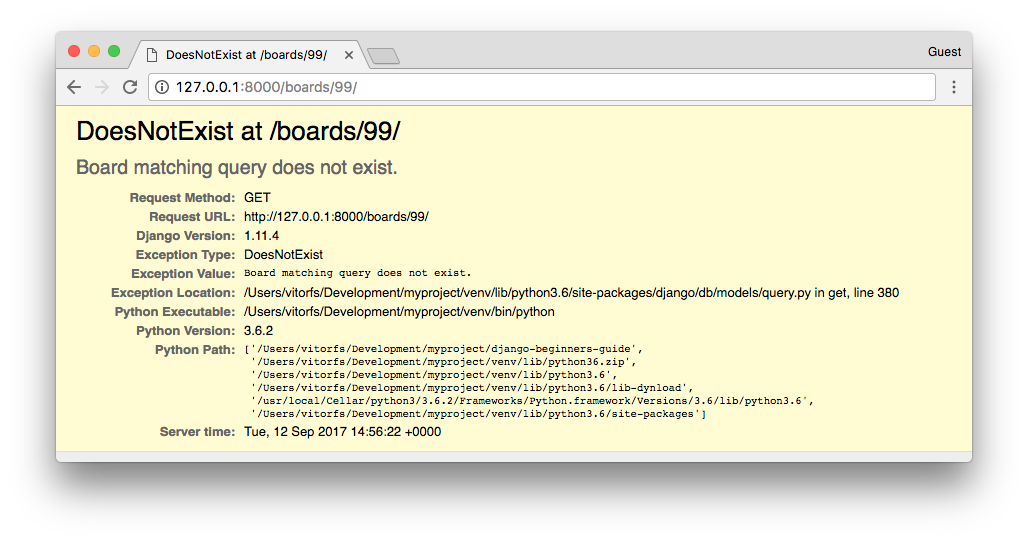
In production with DEBUG=False, the visitor would see a 500 Internal Server Error page. But that’s not the behavior we want.
We want to show a 404 Page Not Found. So let’s refactor our view:
boards/views.py
from django.shortcuts import render
from django.http import Http404
from .models import Board

def home(request):
    # code suppressed for brevity

def board_topics(request, pk):
    try:
        board = Board.objects.get(pk=pk)
    except Board.DoesNotExist:
        raise Http404
    return render(request, 'topics.html', {'board': board})
Let’s test again:
python manage.py testCreating test database for alias 'default'...
System check identified no issues (0 silenced).
.....
----------------------------------------------------------------------
Ran 5 tests in 0.042s
OK
Destroying test database for alias 'default'...Yay! Now it’s working as expected.
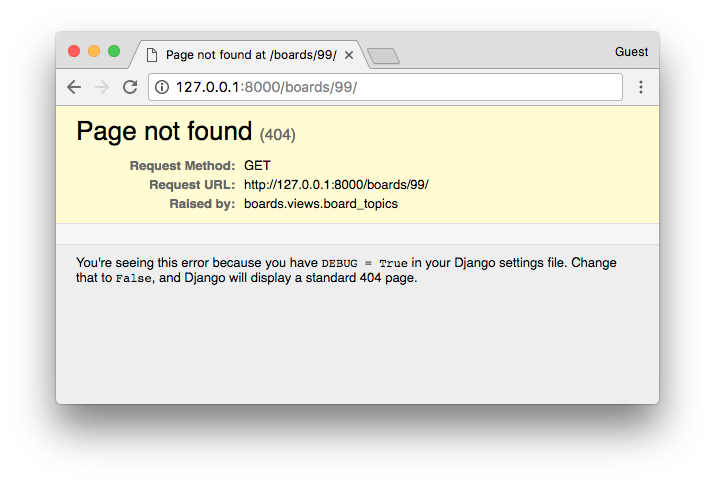
This is the default page Django show while with DEBUG=False. Later on, we can customize the 404 page to show something else.
Now that’s a very common use case. In fact, Django has a shortcut to try to get an object, or return a 404 with the object does not exist.
So let’s refactor the board_topics view again:
from django.shortcuts import render, get_object_or_404
from .models import Board

def home(request):
    # code suppressed for brevity

def board_topics(request, pk):
    board = get_object_or_404(Board, pk=pk)
    return render(request, 'topics.html', {'board': board})
Changed the code? Test it.
python manage.py testCreating test database for alias 'default'...
System check identified no issues (0 silenced).
.....
----------------------------------------------------------------------
Ran 5 tests in 0.052s
OK
Destroying test database for alias 'default'...Didn’t break anything. We can proceed with the development.
The next step now is to create the navigation links in the screens. The homepage should have a link to take the visitor to the topics page of a given Board. Similarly, the topics page should have a link back to the homepage.
We can start by writing some tests for the HomeTests class:
boards/tests.py
class HomeTests(TestCase):
    def setUp(self):
        self.board = Board.objects.create(name='Django', description='Django board.')
        url = reverse('home')
        self.response = self.client.get(url)

    def test_home_view_status_code(self):
        self.assertEquals(self.response.status_code, 200)

    def test_home_url_resolves_home_view(self):
        view = resolve('/')
        self.assertEquals(view.func, home)

    def test_home_view_contains_link_to_topics_page(self):
        board_topics_url = reverse('board_topics', kwargs={'pk': self.board.pk})
        self.assertContains(self.response, 'href="{0}"'.format(board_topics_url))
Observe that now we added a setUp method for the HomeTests as well. That’s because now we are going to need a Board instance and also we moved the url and response to the setUp, so we can reuse the same response in the new test.
The new test here is the test_home_view_contains_link_to_topics_page. Here we are using the assertContains method to test if the response body contains a given text. The text we are using in the test, is the href part of an a tag. So basically we are testing if the response body has the text href="/boards/1/".
Let’s run the tests:
python manage.py testCreating test database for alias 'default'...
System check identified no issues (0 silenced).
....F.
======================================================================
FAIL: test_home_view_contains_link_to_topics_page (boards.tests.HomeTests)
----------------------------------------------------------------------
# ...
AssertionError: False is not true : Couldn't find 'href="/boards/1/"' in response
----------------------------------------------------------------------
Ran 6 tests in 0.034s
FAILED (failures=1)
Destroying test database for alias 'default'...Now we can write the code that will make this test pass.
Edit the home.html template:
templates/home.html
<!-- code suppressed for brevity -->
<tbody>
  {% for board in boards %}
    <tr>
      <td>
        <a href="{% url 'board_topics' board.pk %}">{{ board.name }}</a>
        <small class="text-muted d-block">{{ board.description }}</small>
      </td>
      <td class="align-middle">0</td>
      <td class="align-middle">0</td>
      <td></td>
    </tr>
  {% endfor %}
</tbody>
<!-- code suppressed for brevity -->
So basically we changed the line:
{{ board.name }}To:
<a href="{% url 'board_topics' board.pk %}">{{ board.name }}</a>Always use the {% url %} template tag to compose the applications URLs. The first parameter is the name of the URL (defined in the URLconf, i.e., the urls.py), then you can pass an arbitrary number
of arguments as needed.
If it were a simple URL, like the homepage, it would be just {% url 'home' %}.
Save the file and run the tests again:
python manage.py testCreating test database for alias 'default'...
System check identified no issues (0 silenced).
......
----------------------------------------------------------------------
Ran 6 tests in 0.037s
OK
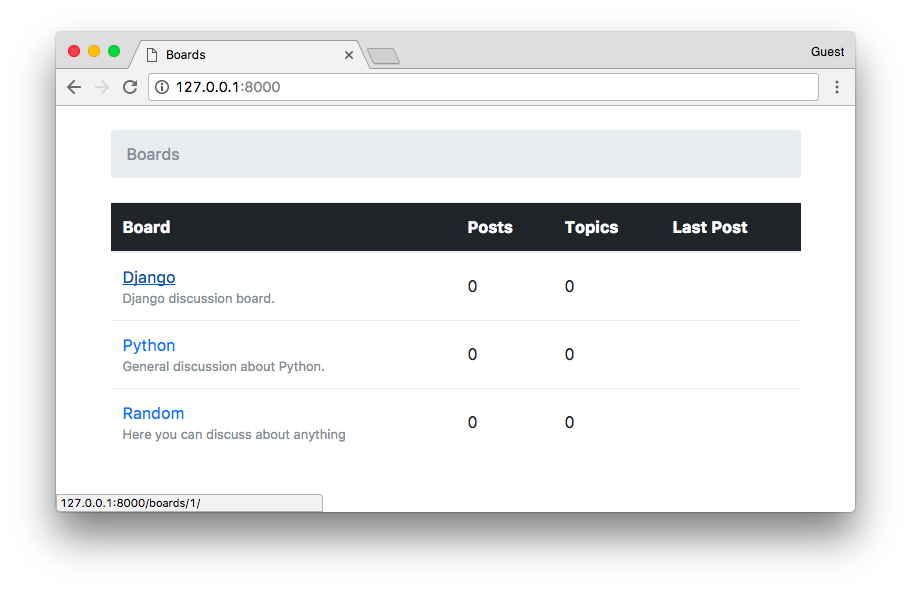
Destroying test database for alias 'default'...Good! Now we can check how it looks like in the web browser:
Now the link back. We can write the test first:
boards/tests.py
class BoardTopicsTests(TestCase):
    # code suppressed for brevity...

    def test_board_topics_view_contains_link_back_to_homepage(self):
        board_topics_url = reverse('board_topics', kwargs={'pk': 1})
        response = self.client.get(board_topics_url)
        homepage_url = reverse('home')
        self.assertContains(response, 'href="{0}"'.format(homepage_url))
Run the tests:
python manage.py testCreating test database for alias 'default'...
System check identified no issues (0 silenced).
.F.....
======================================================================
FAIL: test_board_topics_view_contains_link_back_to_homepage (boards.tests.BoardTopicsTests)
----------------------------------------------------------------------
Traceback (most recent call last):
# ...
AssertionError: False is not true : Couldn't find 'href="/"' in response
----------------------------------------------------------------------
Ran 7 tests in 0.054s
FAILED (failures=1)
Destroying test database for alias 'default'...Update the board topics template:
templates/topics.html
{% load static %}<!DOCTYPE html>
<html>
  <head><!-- code suppressed for brevity --></head>
  <body>
    <div class="container">
      <ol class="breadcrumb my-4">
        <li class="breadcrumb-item"><a href="{% url 'home' %}">Boards</a></li>
        <li class="breadcrumb-item active">{{ board.name }}</li>
      </ol>
    </div>
  </body>
</html>
Run the tests:
python manage.py testCreating test database for alias 'default'...
System check identified no issues (0 silenced).
.......
----------------------------------------------------------------------
Ran 7 tests in 0.061s
OK
Destroying test database for alias 'default'...
As I mentioned before, URL routing is a fundamental part of a web application. With this knowledge, we should be able to proceed with the development. Next, to complete the section about URLs, you will find a summary of useful URL patterns.
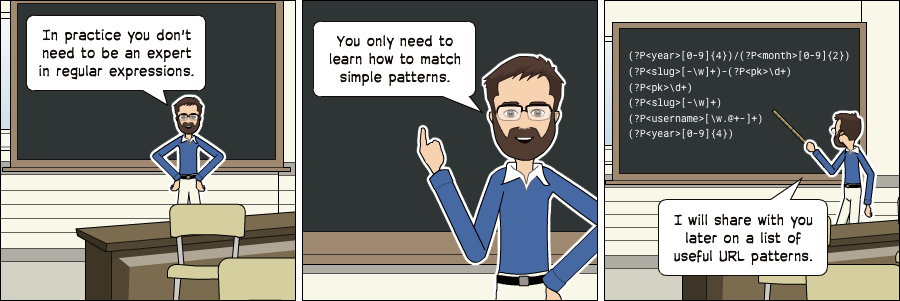
List of Useful URL Patterns
The trick part is the regex. So I prepared a list of the most used URL patterns. You can always refer to this list when you need a specific URL.
| Primary Key AutoField | |
|---|---|
| Regex | (?P<pk>\d+) |
| Example | url(r'^questions/(?P<pk>\d+)/$', views.question, name='question') |
| Valid URL | /questions/934/ |
| Captures | {'pk': '934'} |
| Slug Field | |
|---|---|
| Regex | (?P<slug>[-\w]+) |
| Example | url(r'^posts/(?P<slug>[-\w]+)/$', views.post, name='post') |
| Valid URL | /posts/hello-world/ |
| Captures | {'slug': 'hello-world'} |
| Slug Field with Primary Key | |
|---|---|
| Regex | (?P<slug>[-\w]+)-(?P<pk>\d+) |
| Example | url(r'^blog/(?P<slug>[-\w]+)-(?P<pk>\d+)/$', views.blog_post, name='blog_post') |
| Valid URL | /blog/hello-world-159/ |
| Captures | {'slug': 'hello-world', 'pk': '159'} |
| Django User Username | |
|---|---|
| Regex | (?P<username>[\w.@+-]+) |
| Example | url(r'^profile/(?P<username>[\w.@+-]+)/$', views.user_profile, name='user_profile') |
| Valid URL | /profile/vitorfs/ |
| Captures | {'username': 'vitorfs'} |
| Year | |
|---|---|
| Regex | (?P<year>[0-9]{4}) |
| Example | url(r'^articles/(?P<year>[0-9]{4})/$', views.year_archive, name='year') |
| Valid URL | /articles/2016/ |
| Captures | {'year': '2016'} |
| Year / Month | |
|---|---|
| Regex | (?P<year>[0-9]{4})/(?P<month>[0-9]{2}) |
| Example | url(r'^articles/(?P<year>[0-9]{4})/(?P<month>[0-9]{2})/$', views.month_archive, name='month') |
| Valid URL | /articles/2016/01/ |
| Captures | {'year': '2016', 'month': '01'} |
You can find more details about those patterns in this post: List of Useful URL Patterns.
Reusable Templates
Until now we’ve been copying and pasting HTML repeating several parts of the HTML document, which is not very sustainable in the long run. It’s also a bad practice.
In this section we are going to refactor our HTML templates, creating a master page and only adding the unique part for each template.
Create a new file named base.html in the templates folder:
templates/base.html
{% load static %}<!DOCTYPE html>
<html>
  <head>
    <meta charset="utf-8">
    <title>{% block title %}Django Boards{% endblock %}</title>
    <link rel="stylesheet" href="{% static 'css/bootstrap.min.css' %}">
  </head>
  <body>
    <div class="container">
      <ol class="breadcrumb my-4">
        {% block breadcrumb %}
        {% endblock %}
      </ol>
      {% block content %}
      {% endblock %}
    </div>
  </body>
</html>
This is going to be our master page. Every template we create, is going to extend this special template. Observe now we introduced the {% block %} tag. It is used to reserve a space in the template, which a “child”
template (which extends the master page) can insert code and HTML within that space.
In the case of the {% block title %} we are also setting a default value, which is “Django Boards.” It will be used if we don’t set a value for the {% block title %} in a child template.
Now let’s refactor our two templates: home.html and topics.html.
templates/home.html
{% extends 'base.html' %}

{% block breadcrumb %}
  <li class="breadcrumb-item active">Boards</li>
{% endblock %}

{% block content %}
  <table class="table">
    <thead class="thead-inverse">
      <tr>
        <th>Board</th>
        <th>Posts</th>
        <th>Topics</th>
        <th>Last Post</th>
      </tr>
    </thead>
    <tbody>
      {% for board in boards %}
        <tr>
          <td>
            <a href="{% url 'board_topics' board.pk %}">{{ board.name }}</a>
            <small class="text-muted d-block">{{ board.description }}</small>
          </td>
          <td class="align-middle">0</td>
          <td class="align-middle">0</td>
          <td></td>
        </tr>
      {% endfor %}
    </tbody>
  </table>
{% endblock %}
The first line in the home.html template is {% extends 'base.html' %}. This tag is telling Django to use the base.html template as a master page. After that, we are using the the blocks to
put the unique content of the page.
templates/topics.html
{% extends 'base.html' %}

{% block title %}
  {{ board.name }} - {{ block.super }}
{% endblock %}

{% block breadcrumb %}
  <li class="breadcrumb-item"><a href="{% url 'home' %}">Boards</a></li>
  <li class="breadcrumb-item active">{{ board.name }}</li>
{% endblock %}

{% block content %}
    <!-- just leaving it empty for now. we will add core here soon. -->
{% endblock %}
In the topics.html template, we are changing the {% block title %} default value. Notice that we can reuse the default value of the block by calling {{ block.super }}. So here we are playing with the
website title, which we defined in the base.html as “Django Boards.” So for the “Python” board page, the title will be “Python - Django Boards,” for the “Random” board the title will be “Random - Django Boards.”
Now let’s run the tests and see we didn’t break anything:
python manage.py testCreating test database for alias 'default'...
System check identified no issues (0 silenced).
.......
----------------------------------------------------------------------
Ran 7 tests in 0.067s
OK
Destroying test database for alias 'default'...Great! Everything is looking good.
Now that we have the base.html template, we can easily add a top bar with a menu:
templates/base.html
{% load static %}<!DOCTYPE html>
<html>
  <head>
    <meta charset="utf-8">
    <title>{% block title %}Django Boards{% endblock %}</title>
    <link rel="stylesheet" href="{% static 'css/bootstrap.min.css' %}">
  </head>
  <body>

    <nav class="navbar navbar-expand-lg navbar-dark bg-dark">
      <div class="container">
        <a class="navbar-brand" href="{% url 'home' %}">Django Boards</a>
      </div>
    </nav>

    <div class="container">
      <ol class="breadcrumb my-4">
        {% block breadcrumb %}
        {% endblock %}
      </ol>
      {% block content %}
      {% endblock %}
    </div>
  </body>
</html>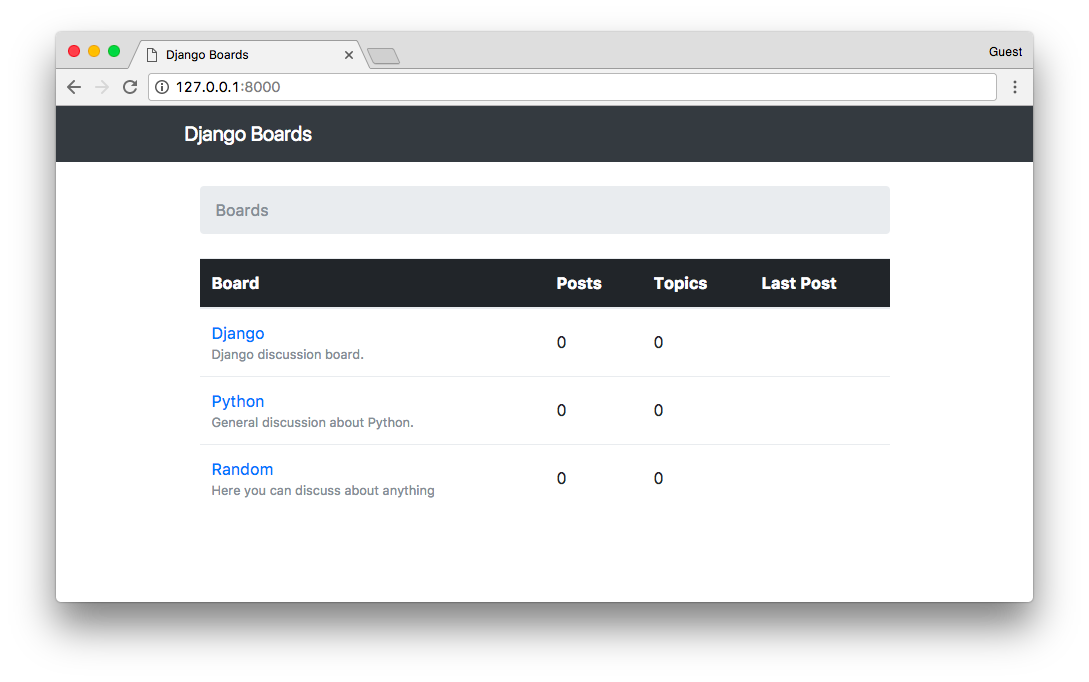
The HTML I used is part of the Bootstrap 4 Navbar Component.
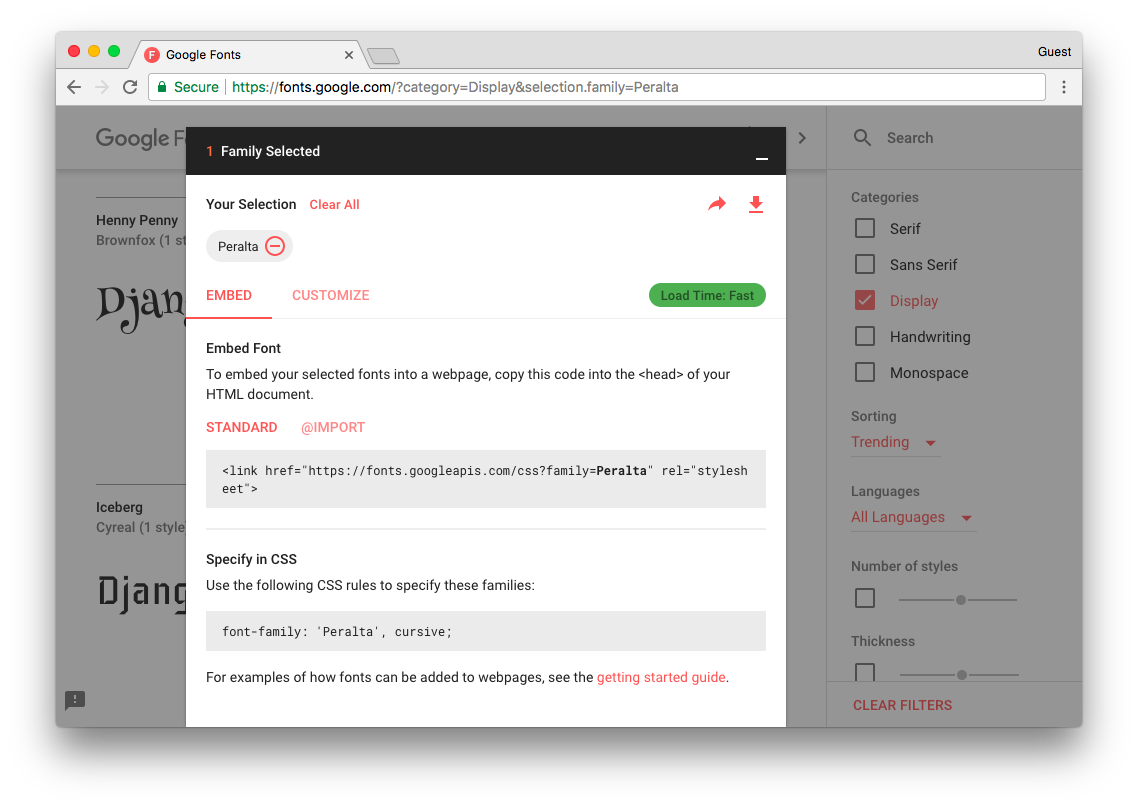
A nice touch I like to add is to change the font in the “logo” (.navbar-brand) of the page.
Go to fonts.google.com, type “Django Boards” or whatever name you gave to your project then click on apply to all fonts. Browse a bit, find one that you like.
Add the font in the base.html template:
{% load static %}<!DOCTYPE html>
<html>
  <head>
    <meta charset="utf-8">
    <title>{% block title %}Django Boards{% endblock %}</title>
    <link href="https://fonts.googleapis.com/css?family=Peralta" rel="stylesheet">
    <link rel="stylesheet" href="{% static 'css/bootstrap.min.css' %}">
    <link rel="stylesheet" href="{% static 'css/app.css' %}">
  </head>
  <body>
    <!-- code suppressed for brevity -->
  </body>
</html>
Now create a new CSS file named app.css inside the static/css folder:
static/css/app.css
.navbar-brand {
  font-family: 'Peralta', cursive;
}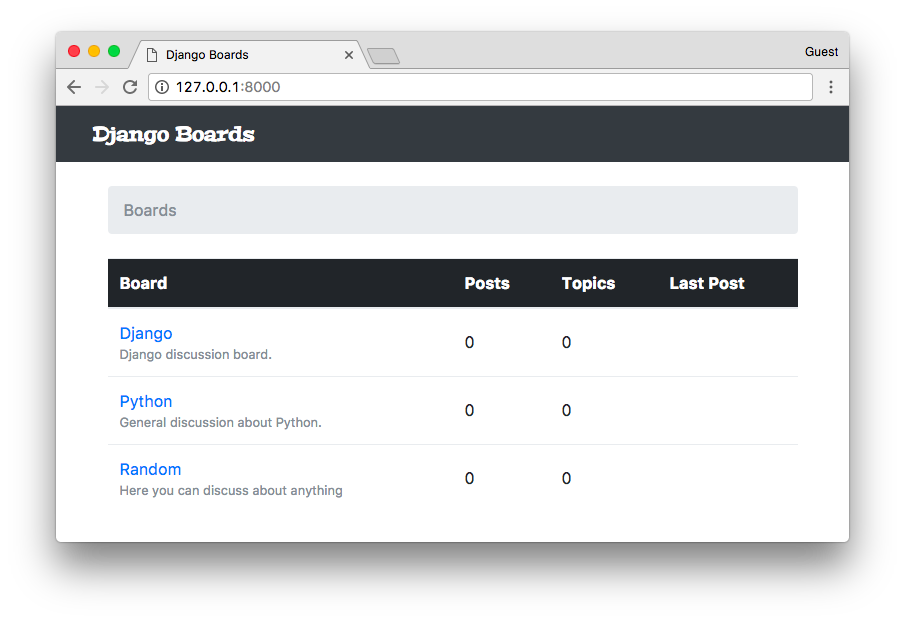
Forms
Forms are used to deal with user input. It’s a very common task in any web application or website. The standard way to do it is through HTML forms, where the user input some data, submit it to the server, and then the server does something with it.
Form processing is a fairly complex task because it involves interacting with many layers of an application. There are also many issues to take care. For example, all data submitted to the server comes in a string format, so we have to transform it into a proper data type (integer, float, date, etc.) before doing anything with it. We have to validate the data regarding the business logic of the application. We also have to clean, sanitize the data properly so to avoid security issues such as SQL Injection and XSS attacks.
Good news is that the Django Forms API makes the whole process a lot easier, automating a good chunk of this work. Also, the final result is a much more secure code than most programmers would be able to implement by themselves. So, no matter how simple the HTML form is, always use the forms API.
How Not Implement a Form
At first, I thought about jumping straight to the forms API. But I think it would be a good idea for us to spend some time trying to understand the underlying details of form processing. Otherwise, it will end up looking like magic, which is a bad thing, because when things go wrong, you have no idea where to look for the problem.
With a deeper understanding of some programming concepts, we can feel more in control of the situation. Being in control is important because it let us write code with more confidence. The moment we know exactly what is going on, it’s much easier to implement a code of predictable behavior. It’s also a lot easier to debug and find errors because you know where to look at.
Anyway, let’s start by implementing the form below:
It’s one of the wireframes we draw in the previous tutorial. I now realize this may be a bad example to start because this particular form involves processing data of two different models: Topic (subject) and Post (message).
There’s another important aspect that we haven’t discussed it so far, which is user authentication. We are only supposed to show this screen for authenticated users. This way we can tell who created a Topic or a Post.
So let’s abstract some details for now and focus on understanding how to save user input in the database.
First thing, let’s create a new URL route named new_topic:
myproject/urls.py
from django.conf.urls import url
from django.contrib import admin

from boards import views

urlpatterns = [
    url(r'^$', views.home, name='home'),
    url(r'^boards/(?P<pk>\d+)/$', views.board_topics, name='board_topics'),
    url(r'^boards/(?P<pk>\d+)/new/$', views.new_topic, name='new_topic'),
    url(r'^admin/', admin.site.urls),
]
The way we are building the URL will help us identify the correct Board.
Now let’s create the new_topic view function:
boards/views.py
from django.shortcuts import render, get_object_or_404
from .models import Board

def new_topic(request, pk):
    board = get_object_or_404(Board, pk=pk)
    return render(request, 'new_topic.html', {'board': board})
For now, the new_topic view function is looking exactly the same as the board_topics. That’s on purpose, let’s take a step at a time.
Now we just need a template named new_topic.html to see some code working:
templates/new_topic.html
{% extends 'base.html' %}

{% block title %}Start a New Topic{% endblock %}

{% block breadcrumb %}
  <li class="breadcrumb-item"><a href="{% url 'home' %}">Boards</a></li>
  <li class="breadcrumb-item"><a href="{% url 'board_topics' board.pk %}">{{ board.name }}</a></li>
  <li class="breadcrumb-item active">New topic</li>
{% endblock %}

{% block content %}

{% endblock %}
For now we just have the breadcrumb assuring the navigation. Observe that we included the URL back to the board_topics view.
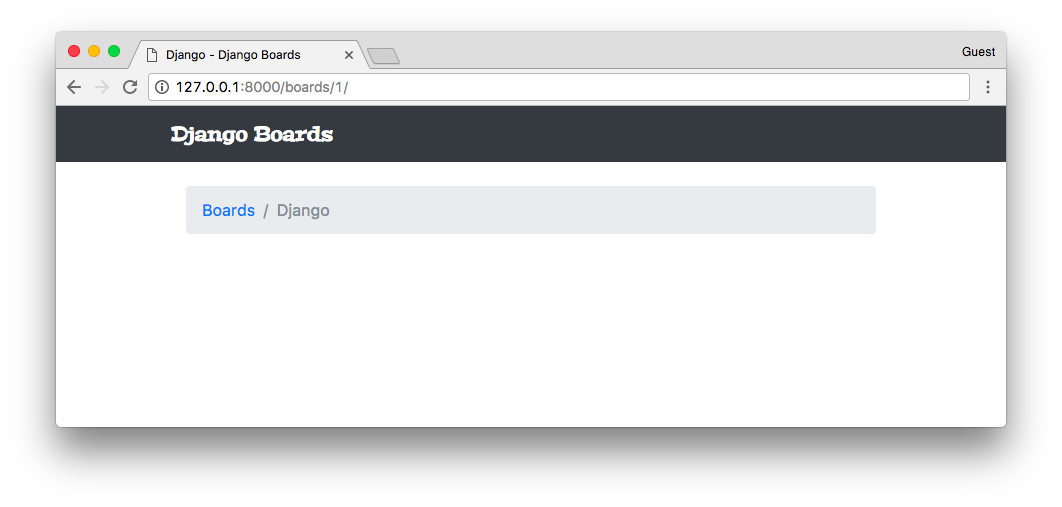
Open the URL http://127.0.0.1:8000/boards/1/new/. The result, for now, is the following page:
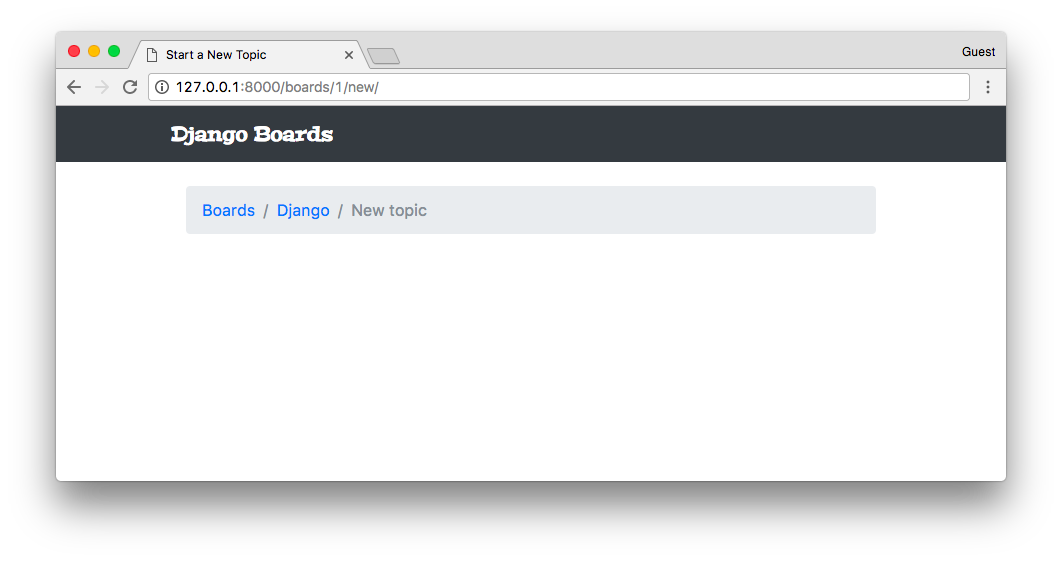
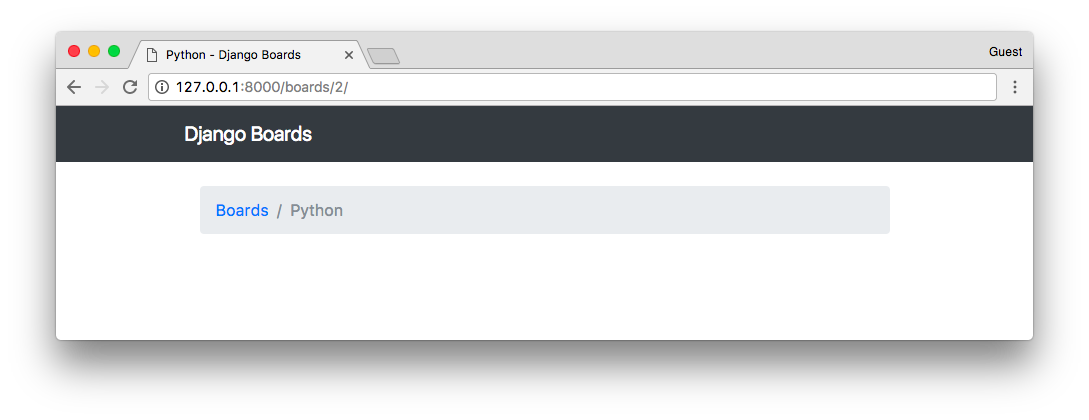
We still haven’t implemented a way to reach this new page, but if we change the URL to http://127.0.0.1:8000/boards/2/new/, it should take us to the Python Board:
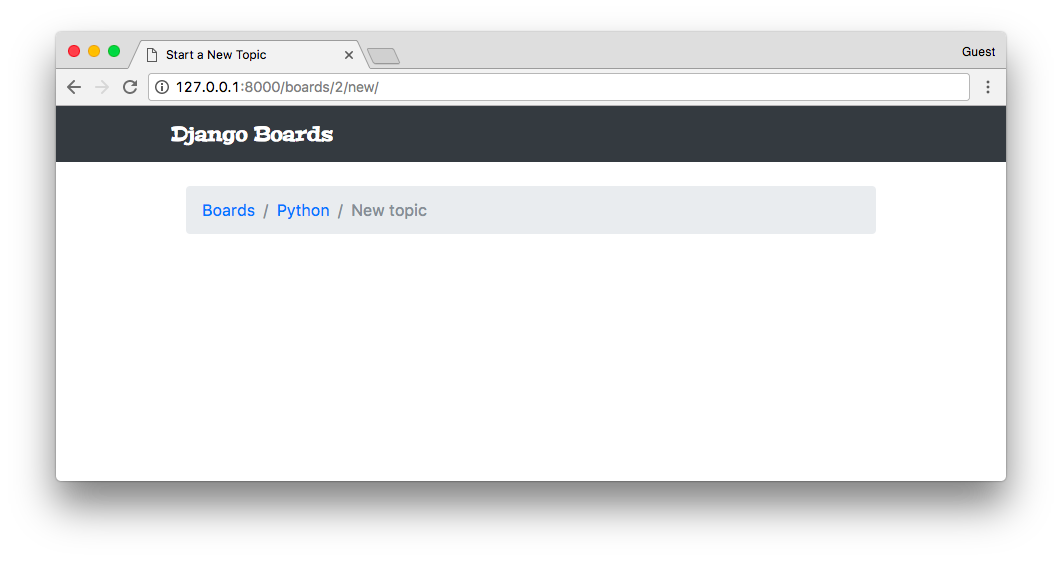
Note:
The result may be different for you if you haven't followed the steps from the previous tutorial. In my case, I have three Board instances in the database, being Django = 1, Python = 2, and Random = 3. Those numbers are the IDs from the database, used from the URL to identify the right resource.
We can already add some tests:
boards/tests.py
from django.core.urlresolvers import reverse
from django.urls import resolve
from django.test import TestCase
from .views import home, board_topics, new_topic
from .models import Board

class HomeTests(TestCase):
    # ...

class BoardTopicsTests(TestCase):
    # ...

class NewTopicTests(TestCase):
    def setUp(self):
        Board.objects.create(name='Django', description='Django board.')

    def test_new_topic_view_success_status_code(self):
        url = reverse('new_topic', kwargs={'pk': 1})
        response = self.client.get(url)
        self.assertEquals(response.status_code, 200)

    def test_new_topic_view_not_found_status_code(self):
        url = reverse('new_topic', kwargs={'pk': 99})
        response = self.client.get(url)
        self.assertEquals(response.status_code, 404)

    def test_new_topic_url_resolves_new_topic_view(self):
        view = resolve('/boards/1/new/')
        self.assertEquals(view.func, new_topic)

    def test_new_topic_view_contains_link_back_to_board_topics_view(self):
        new_topic_url = reverse('new_topic', kwargs={'pk': 1})
        board_topics_url = reverse('board_topics', kwargs={'pk': 1})
        response = self.client.get(new_topic_url)
        self.assertContains(response, 'href="{0}"'.format(board_topics_url))
A quick summary of the tests of our new class NewTopicTests:
- setUp: creates a Board instance to be used during the tests
- test_new_topic_view_success_status_code: check if the request to the view is successful
- test_new_topic_view_not_found_status_code: check if the view is raising a 404 error when the Board does not exist
- test_new_topic_url_resolves_new_topic_view: check if the right view is being used
- test_new_topic_view_contains_link_back_to_board_topics_view: ensure the navigation back to the list of topics
Run the tests:
python manage.py testCreating test database for alias 'default'...
System check identified no issues (0 silenced).
...........
----------------------------------------------------------------------
Ran 11 tests in 0.076s
OK
Destroying test database for alias 'default'...Good, now it’s time to start creating the form.
templates/new_topic.html
{% extends 'base.html' %}
{% block title %}Start a New Topic{% endblock %}
{% block breadcrumb %}
<li class="breadcrumb-item"><a href="{% url 'home' %}">Boards</a></li>
<li class="breadcrumb-item"><a href="{% url 'board_topics' board.pk %}">{{ board.name }}</a></li>
<li class="breadcrumb-item active">New topic</li>
{% endblock %}
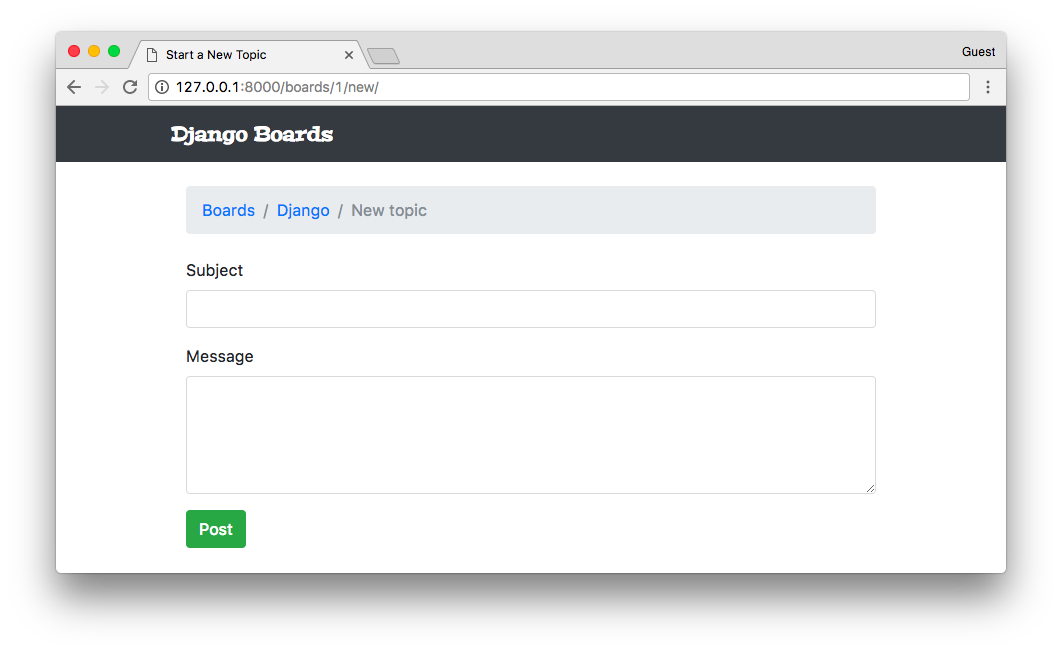
{% block content %}
<form method="post">
{% csrf_token %}
<div class="form-group">
<label for="id_subject">Subject</label>
<input type="text" class="form-control" id="id_subject" name="subject">
</div>
<div class="form-group">
<label for="id_message">Message</label>
<textarea class="form-control" id="id_message" name="message" rows="5"></textarea>
</div>
<button type="submit" class="btn btn-success">Post</button>
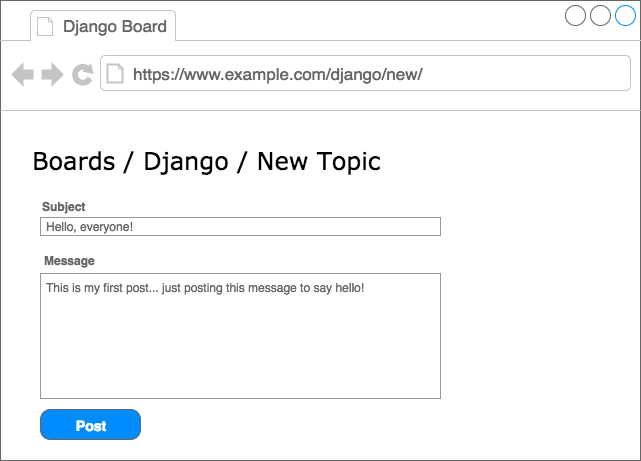
</form>
{% endblock %}This is a raw HTML form created by hand using the CSS classes provided by Bootstrap 4. It looks like this:
In the <form> tag, we have to define the method attribute. This instructs the browser on how we want to communicate with the server. The HTTP spec defines several request methods (verbs). But for the most part,
we will only be using GET and POST request types.
GET is perhaps the most common request type. It’s used to retrieve data from the server. Every time you click on a link or type a URL directly into the browser, you are creating a GET request.
POST is used when we want to change data on the server. So, generally speaking, every time we send data to the server that will result in a change in the state of a resource, we should always send it via POST request.
Django protects all POST requests using a CSRF Token (Cross-Site Request Forgery Token). It’s a security measure to avoid external sites or applications to submit data to our application. Every time the application receives a POST, it will first look for the CSRF Token. If the request has no token, or the token is invalid, it will discard the posted data.
The result of the csrf_token template tag:
{% csrf_token %}Is a hidden field that’s submitted along with the other form data:
<input type="hidden" name="csrfmiddlewaretoken" value="jG2o6aWj65YGaqzCpl0TYTg5jn6SctjzRZ9KmluifVx0IVaxlwh97YarZKs54Y32">Another thing, we have to set the name of the HTML inputs. The name will be used to retrieve the data on the server side.
<input type="text" class="form-control" id="id_subject" name="subject">
<textarea class="form-control" id="id_message" name="message" rows="5"></textarea>
Here is how we retrieve the data:
subject = request.POST['subject']
message = request.POST['message']
So, a naïve implementation of a view that grabs the data from the HTML and start a new topic can be written like this:
from django.contrib.auth.models import User
from django.shortcuts import render, redirect, get_object_or_404
from .models import Board, Topic, Post

def new_topic(request, pk):
    board = get_object_or_404(Board, pk=pk)

    if request.method == 'POST':
        subject = request.POST['subject']
        message = request.POST['message']

        user = User.objects.first()  # TODO: get the currently logged in user

        topic = Topic.objects.create(
            subject=subject,
            board=board,
            starter=user
        )

        post = Post.objects.create(
            message=message,
            topic=topic,
            created_by=user
        )

        return redirect('board_topics', pk=board.pk)  # TODO: redirect to the created topic page

    return render(request, 'new_topic.html', {'board': board})
This view is only considering the happy path, which is receiving the data and saving it into the database. But there are some missing parts. We are not validating the data. The user could submit an empty form or a subject that’s bigger than 255 characters.
So far we are hard-coding the User fields because we haven’t implemented the authentication yet. But there’s an easy way to identify the logged in user. We will get to that part in the next tutorial. Also, we haven’t implemented the view where we will list all the posts within a topic, so upon success, we are redirecting the user to the page where we list all the board topics.
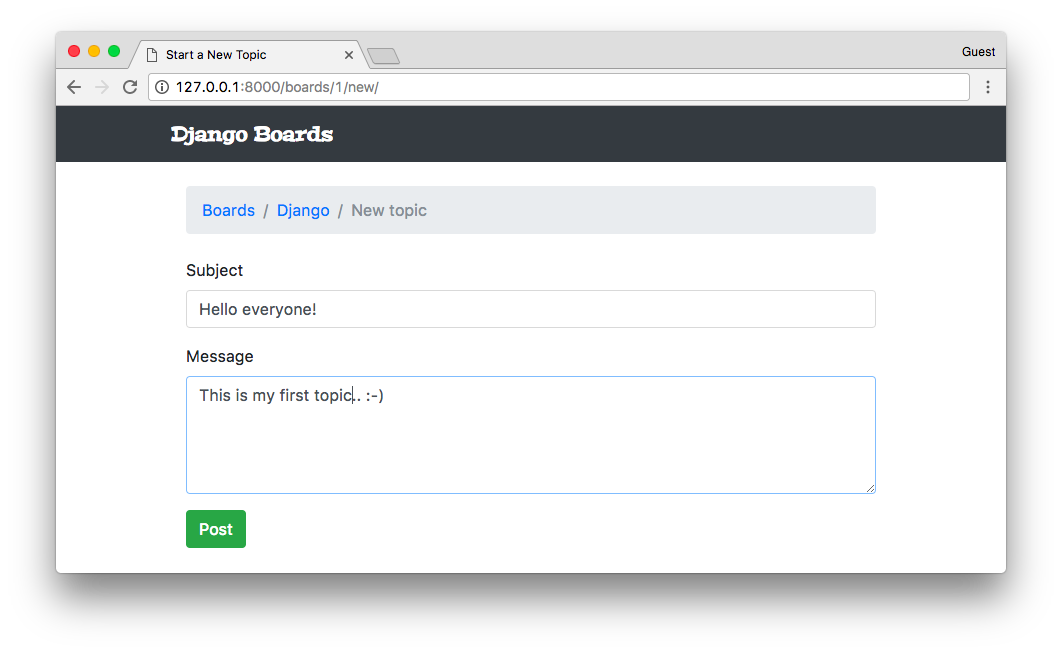
Submitted the form clicking on the Post button:
It looks like it worked. But we haven’t implemented the topics listing yet, so there’s nothing to see here. Let’s edit the templates/topics.html file to do a proper listing:
templates/topics.html
{% extends 'base.html' %}

{% block title %}
  {{ board.name }} - {{ block.super }}
{% endblock %}

{% block breadcrumb %}
  <li class="breadcrumb-item"><a href="{% url 'home' %}">Boards</a></li>
  <li class="breadcrumb-item active">{{ board.name }}</li>
{% endblock %}

{% block content %}
  <table class="table">
    <thead class="thead-inverse">
      <tr>
        <th>Topic</th>
        <th>Starter</th>
        <th>Replies</th>
        <th>Views</th>
        <th>Last Update</th>
      </tr>
    </thead>
    <tbody>
      {% for topic in board.topics.all %}
        <tr>
          <td>{{ topic.subject }}</td>
          <td>{{ topic.starter.username }}</td>
          <td>0</td>
          <td>0</td>
          <td>{{ topic.last_updated }}</td>
        </tr>
      {% endfor %}
    </tbody>
  </table>
{% endblock %}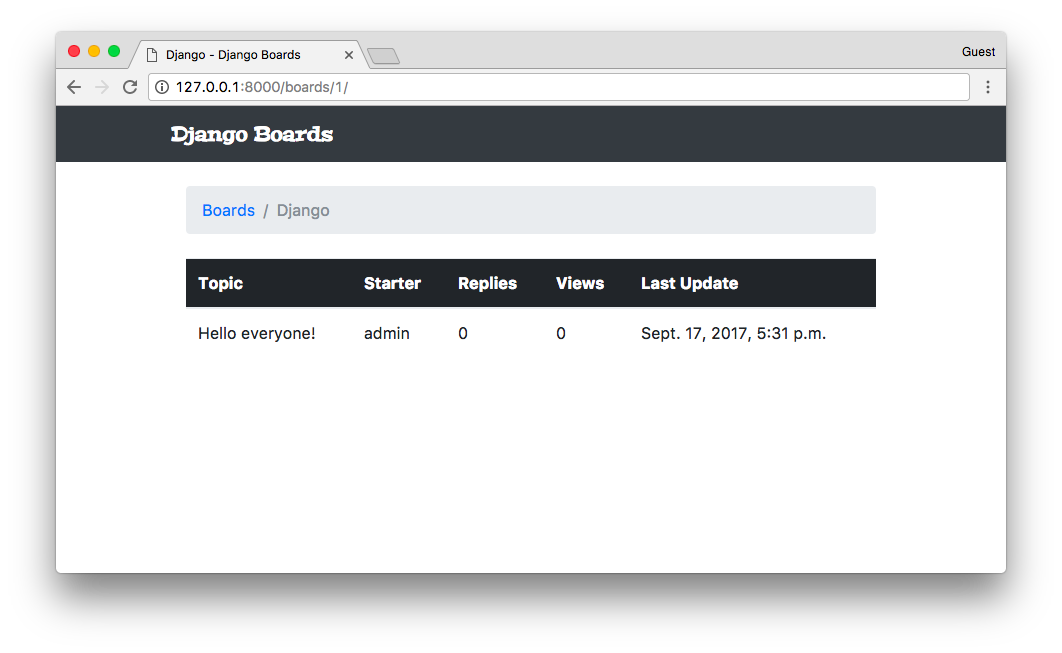
Yep! The Topic we created is here.
Two new concepts here:
We are using for the first time the topics property in the Board model. The topics property is created automatically by Django using a reverse relationship. In the previous steps, we created a Topic instance:
def new_topic(request, pk):
    board = get_object_or_404(Board, pk=pk)

    # ...

    topic = Topic.objects.create(
        subject=subject,
        board=board,
        starter=user
    )
In the line board=board, we set the board field in Topic model, which is a ForeignKey(Board). With that, now our Board instance is aware that it has an Topic instance associated with it.
The reason why we used board.topics.all instead of just board.topics is because board.topics is a Related Manager, which is pretty much similar to a Model Manager, usually
available on the board.objects property. So, to return all topics associated with a given board, we have to run board.topics.all(). To filter some data, we could do board.topics.filter(subject__contains='Hello').
Another important thing to note is that, inside a Python code, we have to use parenthesis: board.topics.all(), because all() is a method. When writing code using the Django Template Language, in an HTML template file,
we don’t use parenthesis, so it’s just board.topics.all.
The second thing is that we are making use of a ForeignKey:
{{ topic.starter.username }}Just create a path through the property using dots. We can pretty much access any property of the User model. If we wanted the user’s email, we could use topic.starter.email.
Since we are already modifying the topics.html template, let’s create the button that takes us to the new topic screen:
templates/topics.html
{% block content %}
  <div class="mb-4">
    <a href="{% url 'new_topic' board.pk %}" class="btn btn-primary">New topic</a>
  </div>

  <table class="table">
    <!-- code suppressed for brevity -->
  </table>
{% endblock %}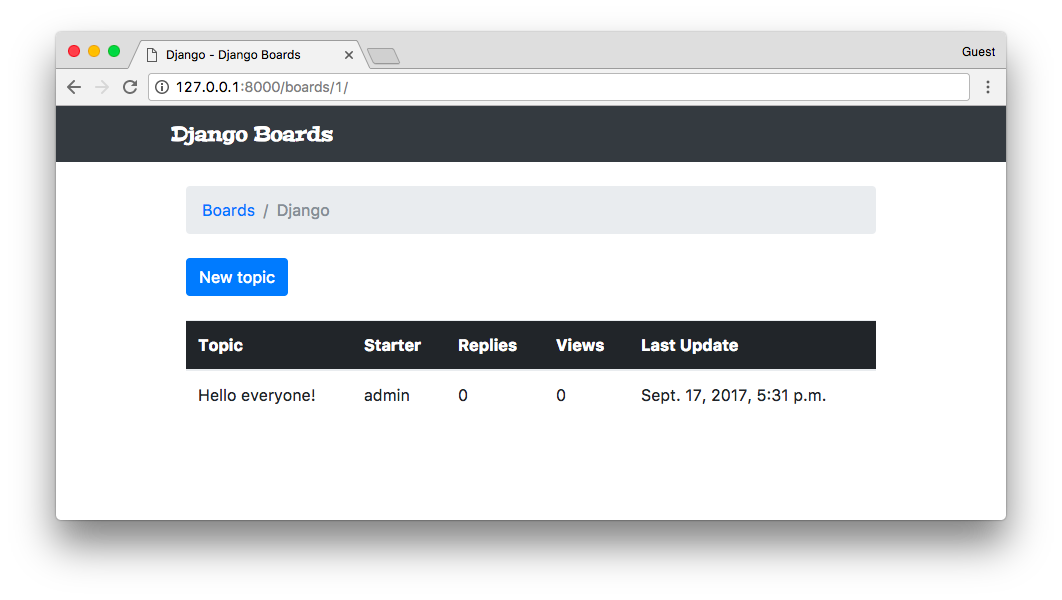
We can include a test to make sure the user can reach the New topic view from this page:
boards/tests.py
class BoardTopicsTests(TestCase):
    # ...

    def test_board_topics_view_contains_navigation_links(self):
        board_topics_url = reverse('board_topics', kwargs={'pk': 1})
        homepage_url = reverse('home')
        new_topic_url = reverse('new_topic', kwargs={'pk': 1})

        response = self.client.get(board_topics_url)

        self.assertContains(response, 'href="{0}"'.format(homepage_url))
        self.assertContains(response, 'href="{0}"'.format(new_topic_url))
Basically here I renamed the old test_board_topics_view_contains_link_back_to_homepage method and add an extra assertContains. This test is now responsible for making sure our view contains the required navigation
links.
Testing The Form View
Before we code the previous form example in a Django way, let’s write some tests for the form processing:
boards/tests.py
''' new imports below '''
from django.contrib.auth.models import User
from .views import new_topic
from .models import Board, Topic, Post

class NewTopicTests(TestCase):
    def setUp(self):
        Board.objects.create(name='Django', description='Django board.')
        User.objects.create_user(username='john', email='john@doe.com', password='123')  # <- included this line here

    # ...

    def test_csrf(self):
        url = reverse('new_topic', kwargs={'pk': 1})
        response = self.client.get(url)
        self.assertContains(response, 'csrfmiddlewaretoken')

    def test_new_topic_valid_post_data(self):
        url = reverse('new_topic', kwargs={'pk': 1})
        data = {
            'subject': 'Test title',
            'message': 'Lorem ipsum dolor sit amet'
        }
        response = self.client.post(url, data)
        self.assertTrue(Topic.objects.exists())
        self.assertTrue(Post.objects.exists())

    def test_new_topic_invalid_post_data(self):
        '''
        Invalid post data should not redirect
        The expected behavior is to show the form again with validation errors
        '''
        url = reverse('new_topic', kwargs={'pk': 1})
        response = self.client.post(url, {})
        self.assertEquals(response.status_code, 200)

    def test_new_topic_invalid_post_data_empty_fields(self):
        '''
        Invalid post data should not redirect
        The expected behavior is to show the form again with validation errors
        '''
        url = reverse('new_topic', kwargs={'pk': 1})
        data = {
            'subject': '',
            'message': ''
        }
        response = self.client.post(url, data)
        self.assertEquals(response.status_code, 200)
        self.assertFalse(Topic.objects.exists())
        self.assertFalse(Post.objects.exists())
First thing, the tests.py file is already starting to get big. We will improve it soon, breaking the tests into several files. But for now, let’s keep working on it.
- setUp: included the
User.objects.create_userto create a User instance to be used in the tests - test_csrf: since the CSRF Token is a fundamental part of processing POST requests, we have to make sure our HTML contains the token.
- test_new_topic_valid_post_data: sends a valid combination of data and check if the view created a Topic instance and a Post instance.
- test_new_topic_invalid_post_data: here we are sending an empty dictionary to check how the application is behaving.
- test_new_topic_invalid_post_data_empty_fields: similar to the previous test, but this time we are sending some data. The application is expected to validate and reject empty subject and message.
Let’s run the tests:
python manage.py testCreating test database for alias 'default'...
System check identified no issues (0 silenced).
........EF.....
======================================================================
ERROR: test_new_topic_invalid_post_data (boards.tests.NewTopicTests)
----------------------------------------------------------------------
Traceback (most recent call last):
...
django.utils.datastructures.MultiValueDictKeyError: "'subject'"
======================================================================
FAIL: test_new_topic_invalid_post_data_empty_fields (boards.tests.NewTopicTests)
----------------------------------------------------------------------
Traceback (most recent call last):
File "/Users/vitorfs/Development/myproject/django-beginners-guide/boards/tests.py", line 115, in test_new_topic_invalid_post_data_empty_fields
self.assertEquals(response.status_code, 200)
AssertionError: 302 != 200
----------------------------------------------------------------------
Ran 15 tests in 0.512s
FAILED (failures=1, errors=1)
Destroying test database for alias 'default'...We have one failing test and one error. Both related to invalid user input. Instead of trying to fix it with the current implementation, let’s make those tests pass using the Django Forms API.
Creating Forms The Right Way
So, we came a long way since we started working with Forms. Finally, it’s time to use the Forms API.
The Forms API is available in the module django.forms. Django works with two types of forms: forms.Form and forms.ModelForm. The Form class is a general purpose form implementation. We can use
it to process data that are not directly associated with a model in our application. A ModelForm is a subclass of Form, and it’s associated with a model class.
Let’s create a new file named forms.py inside the boards’ folder:
boards/forms.py
from django import forms
from .models import Topic

class NewTopicForm(forms.ModelForm):
    message = forms.CharField(widget=forms.Textarea(), max_length=4000)

    class Meta:
        model = Topic
        fields = ['subject', 'message']
This is our first form. It’s a ModelForm associated with the Topic model. The subject in the fields list inside the Meta class is referring to the subject field
in the Topic class. Now observe that we are defining an extra field named message. This refers to the message in the Post we want to save.
Now we have to refactor our views.py:
boards/views.py
from django.contrib.auth.models import User
from django.shortcuts import render, redirect, get_object_or_404
from .forms import NewTopicForm
from .models import Board, Topic, Post

def new_topic(request, pk):
    board = get_object_or_404(Board, pk=pk)
    user = User.objects.first()  # TODO: get the currently logged in user
    if request.method == 'POST':
        form = NewTopicForm(request.POST)
        if form.is_valid():
            topic = form.save(commit=False)
            topic.board = board
            topic.starter = user
            topic.save()
            post = Post.objects.create(
                message=form.cleaned_data.get('message'),
                topic=topic,
                created_by=user
            )
            return redirect('board_topics', pk=board.pk)  # TODO: redirect to the created topic page
    else:
        form = NewTopicForm()
    return render(request, 'new_topic.html', {'board': board, 'form': form})
This is how we use the forms in a view. Let me remove the extra noise so we can focus on the core of the form processing:
if request.method == 'POST':
    form = NewTopicForm(request.POST)
    if form.is_valid():
        topic = form.save()
        return redirect('board_topics', pk=board.pk)
else:
    form = NewTopicForm()
return render(request, 'new_topic.html', {'form': form})
First we check if the request is a POST or a GET. If the request came from a POST, it means the user is submitting some data to the server. So we instantiate a form instance passing the POST data to the form: form = NewTopicForm(request.POST).
Then, we ask Django to verify the data, check if the form is valid if we can save it in the database: if form.is_valid():. If the form was valid, we proceed to save the data in the database using form.save(). The save() method returns an instance of the Model saved into the database. So, since this is a Topic form, it will return the Topic that was created: topic = form.save(). After that, the common path is
to redirect the user somewhere else, both to avoid the user re-submit the form by pressing F5 and also to keep the flow of the application.
Now, if the data was invalid, Django will add a list of errors to the form. After that, the view does nothing and return in the last statement: return render(request, 'new_topic.html', {'form': form}). That means we have to update
the new_topic.html to display errors properly.
If the request was a GET, we just initialize a new and empty form using form = NewTopicForm().
Let’s run the tests and see how is everything:
python manage.py testCreating test database for alias 'default'...
System check identified no issues (0 silenced).
...............
----------------------------------------------------------------------
Ran 15 tests in 0.522s
OK
Destroying test database for alias 'default'...We even fixed the last two tests.
The Django Forms API does much more than processing and validating the data. It also generates the HTML for us.
Let’s update the new_topic.html template to fully use the Django Forms API:
templates/new_topic.html
{% extends 'base.html' %}
{% block title %}Start a New Topic{% endblock %}
{% block breadcrumb %}
<li class="breadcrumb-item"><a href="{% url 'home' %}">Boards</a></li>
<li class="breadcrumb-item"><a href="{% url 'board_topics' board.pk %}">{{ board.name }}</a></li>
<li class="breadcrumb-item active">New topic</li>
{% endblock %}
{% block content %}
<form method="post">
{% csrf_token %}
{{ form.as_p }}
<button type="submit" class="btn btn-success">Post</button>
</form>
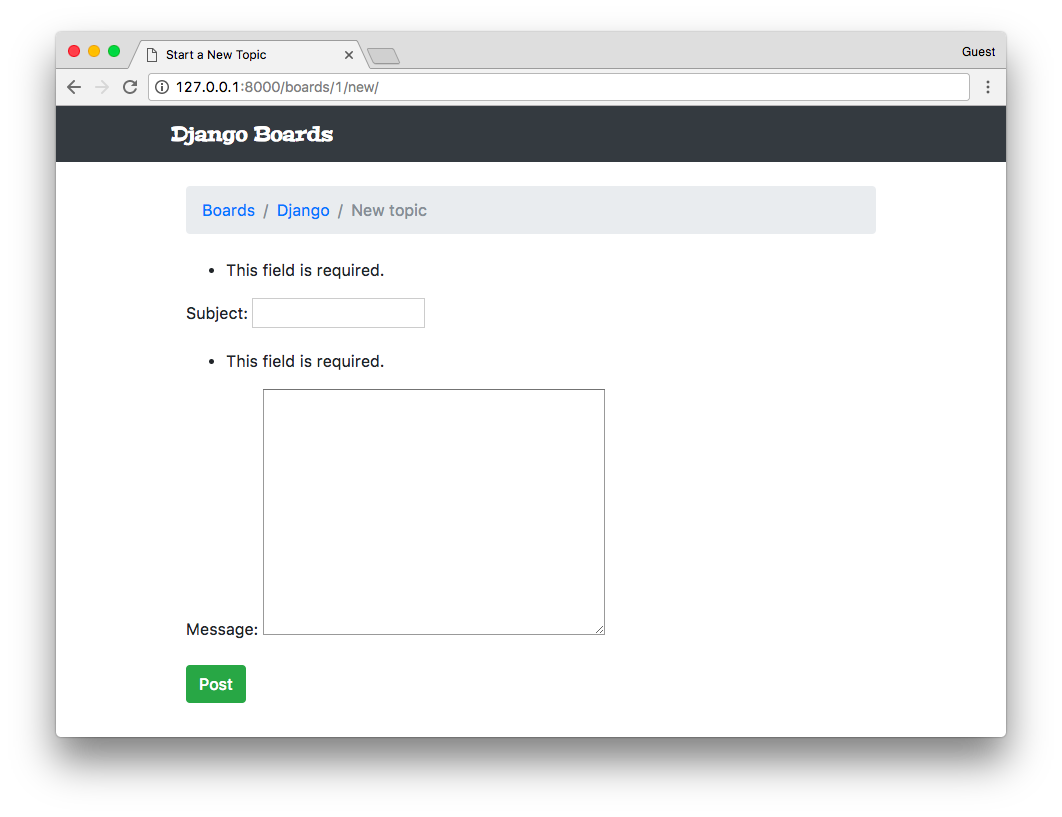
{% endblock %}The form have three rendering options: form.as_table, form.as_ul, and form.as_p. It’s a quick way to render all the fields of a form. As the name suggests, the as_table uses table
tags to format the inputs, the as_ul creates an HTML list of inputs, etc.
Let’s see how it looks like:

Well, our previous form was looking better, right? We are going to fix it in a moment.
It can look broken right now but trust me; there’s a lot of things behind it right now. And it’s extremely powerful. For example, if our form had 50 fields, we could render all the fields just by typing {{ form.as_p }}.
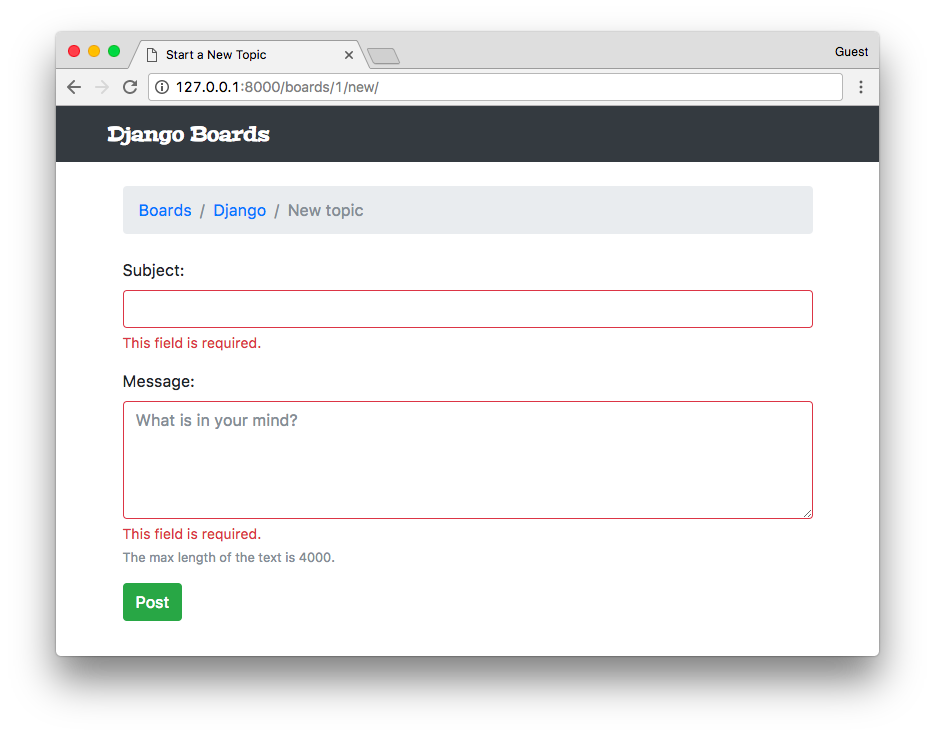
And more, using the Forms API, Django will validate the data and add error messages to each field. Let’s try submitting an empty form:
Note:
If you see something like this:  when you submit the form, that's not Django. It's your
browser doing a pre-validation. To disable it add the
when you submit the form, that's not Django. It's your
browser doing a pre-validation. To disable it add the novalidate attribute to your form tag: <form method="post" novalidate>
You can keep it; there's no problem with it. It's just because our form is very simple right now, and we don't have much data validation to see.
Another important thing to note is that: there is no such a thing as "client-side validation." JavaScript validation or browser validation is just for usability purpose. And also to reduce the number of requests to the server. Data validation should always be done on the server side, where we have full control over the data.
It also handles help texts, which can be defined both in a Form class or in a Model class:
boards/forms.py
from django import forms
from .models import Topic

class NewTopicForm(forms.ModelForm):
    message = forms.CharField(
        widget=forms.Textarea(),
        max_length=4000,
        help_text='The max length of the text is 4000.'
    )

    class Meta:
        model = Topic
        fields = ['subject', 'message']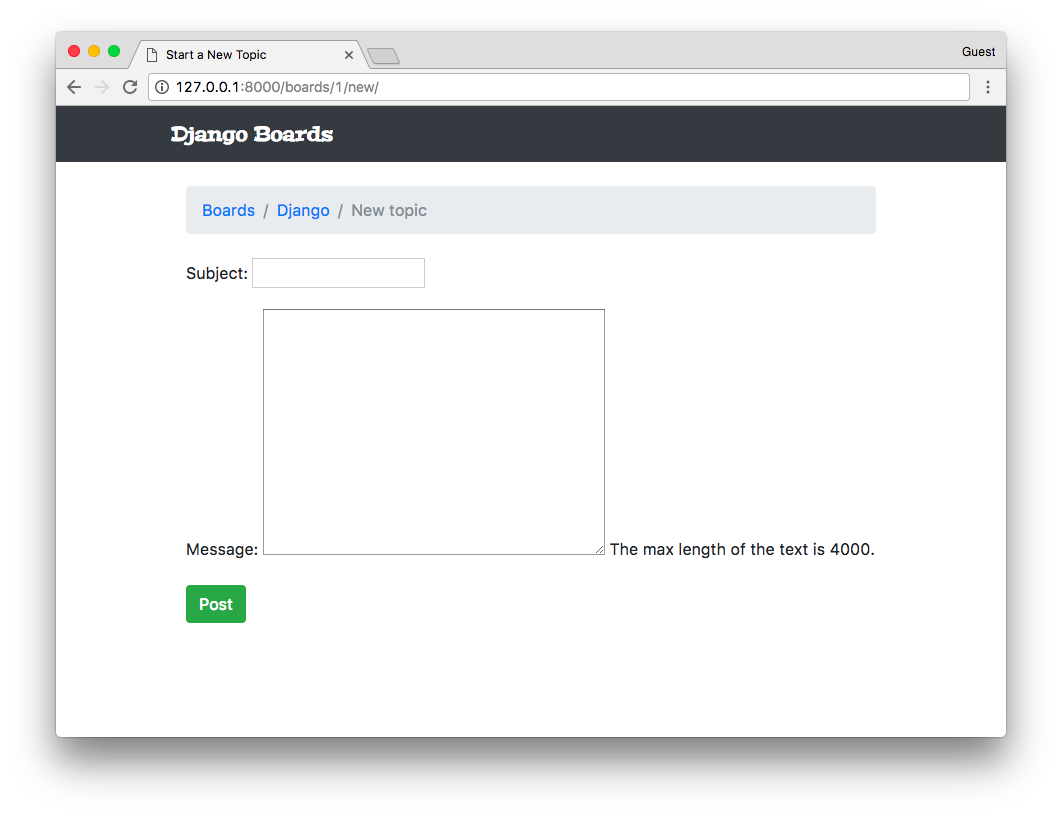
We can also set extra attributes to a form field:
boards/forms.py
from django import forms
from .models import Topic

class NewTopicForm(forms.ModelForm):
    message = forms.CharField(
        widget=forms.Textarea(
            attrs={'rows': 5, 'placeholder': 'What is in your mind?'}
        ),
        max_length=4000,
        help_text='The max length of the text is 4000.'
    )

    class Meta:
        model = Topic
        fields = ['subject', 'message']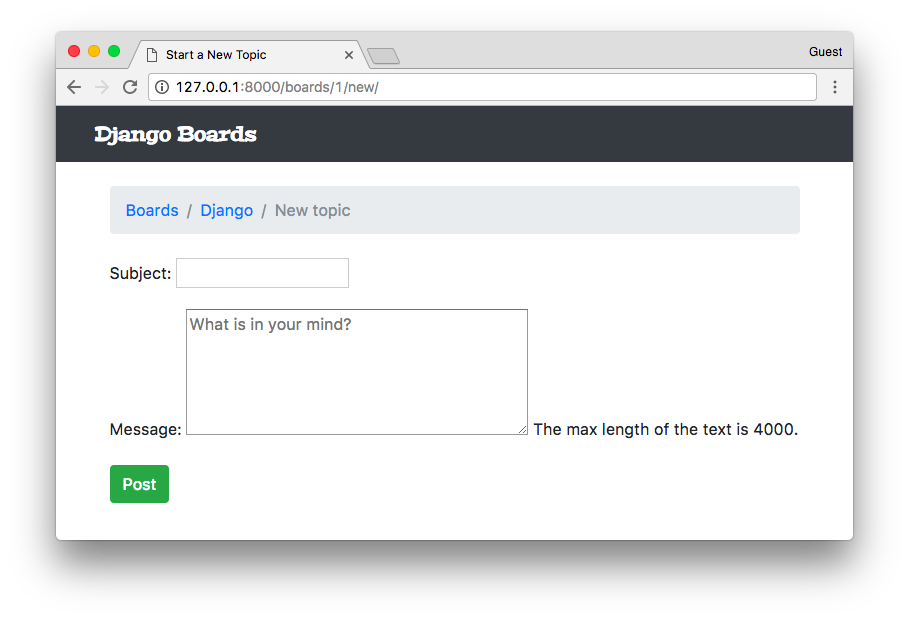
Rendering Bootstrap Forms
Alright, so let’s make things pretty again.
When working with Bootstrap or any other Front-End library, I like to use a Django package called django-widget-tweaks. It gives us more control over the rendering process, keeping the defaults and just adding extra customizations on top of it.
Let’s start off by installing it:
pip install django-widget-tweaksNow add it to the INSTALLED_APPS:
myproject/settings.py
INSTALLED_APPS = [
    'django.contrib.admin',
    'django.contrib.auth',
    'django.contrib.contenttypes',
    'django.contrib.sessions',
    'django.contrib.messages',
    'django.contrib.staticfiles',

    'widget_tweaks',

    'boards',
]
Now let’s take it into use:
templates/new_topic.html
{% extends 'base.html' %}

{% load widget_tweaks %}

{% block title %}Start a New Topic{% endblock %}

{% block breadcrumb %}
  <li class="breadcrumb-item"><a href="{% url 'home' %}">Boards</a></li>
  <li class="breadcrumb-item"><a href="{% url 'board_topics' board.pk %}">{{ board.name }}</a></li>
  <li class="breadcrumb-item active">New topic</li>
{% endblock %}

{% block content %}
  <form method="post" novalidate>
    {% csrf_token %}

    {% for field in form %}
      <div class="form-group">
        {{ field.label_tag }}

        {% render_field field class="form-control" %}

        {% if field.help_text %}
          <small class="form-text text-muted">
            {{ field.help_text }}
          </small>
        {% endif %}
      </div>
    {% endfor %}

    <button type="submit" class="btn btn-success">Post</button>
  </form>
{% endblock %}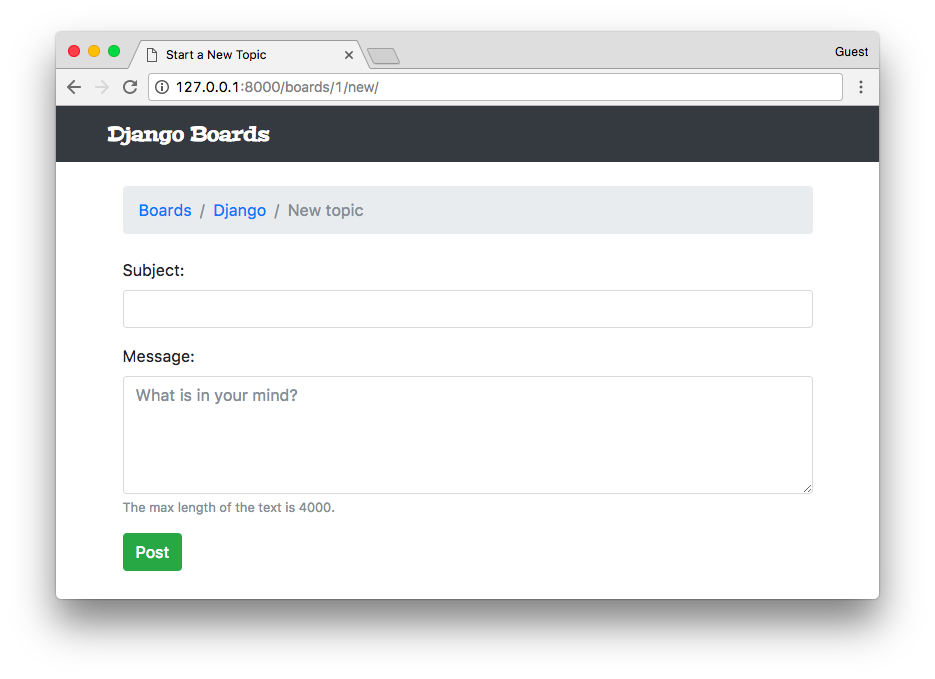
There it is! So, here we are using the django-widget-tweaks. First, we load it in the template by using the {% load widget_tweaks %} template tag. Then the usage:
{% render_field field class="form-control" %}The render_field tag is not part of Django; it lives inside the package we installed. To use it we have to pass a form field instance as the first parameter, and then after we can add arbitrary HTML attributes to complement it. It
will be useful because then we can assign classes based on certain conditions.
Some examples of the render_field template tag:
{% render_field form.subject class="form-control" %}
{% render_field form.message class="form-control" placeholder=form.message.label %}
{% render_field field class="form-control" placeholder="Write a message!" %}
{% render_field field style="font-size: 20px" %}
Now to implement the Bootstrap 4 validation tags, we can change the new_topic.html template:
templates/new_topic.html
<form method="post" novalidate>
{% csrf_token %}
{% for field in form %}
<div class="form-group">
{{ field.label_tag }}
{% if form.is_bound %}
{% if field.errors %}
{% render_field field class="form-control is-invalid" %}
{% for error in field.errors %}
<div class="invalid-feedback">
{{ error }}
</div>
{% endfor %}
{% else %}
{% render_field field class="form-control is-valid" %}
{% endif %}
{% else %}
{% render_field field class="form-control" %}
{% endif %}
{% if field.help_text %}
<small class="form-text text-muted">
{{ field.help_text }}
</small>
{% endif %}
</div>
{% endfor %}
<button type="submit" class="btn btn-success">Post</button>
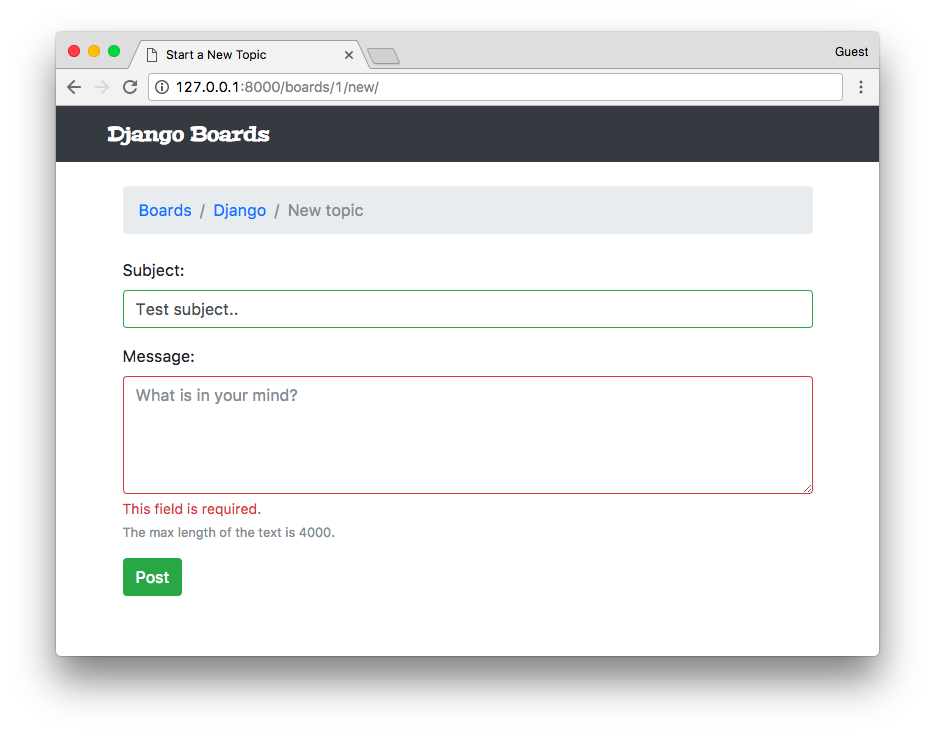
</form>The result is this:
So, we have three different rendering states:
- Initial state: the form has no data (is not bound)
- Invalid: we add the
.is-invalidCSS class and add error messages in an element with a class.invalid-feedback. The form field and the messages are rendered in red. - Valid: we add the
.is-validCSS class so to paint the form field in green, giving feedback to the user that this field is good to go.
Reusable Forms Templates
The template code looks a little bit complicated, right? Well, the good news is that we can reuse this snippet across the project.
In the templates folder, create a new folder named includes:
myproject/
 |-- myproject/
 |    |-- boards/
 |    |-- myproject/
 |    |-- templates/
 |    |    |-- includes/    <-- here!
 |    |    |-- base.html
 |    |    |-- home.html
 |    |    |-- new_topic.html
 |    |    +-- topics.html
 |    +-- manage.py
 +-- venv/
Now inside the includes folder, create a file named form.html:
templates/includes/form.html
{% load widget_tweaks %}

{% for field in form %}
  <div class="form-group">
    {{ field.label_tag }}

    {% if form.is_bound %}
      {% if field.errors %}
        {% render_field field class="form-control is-invalid" %}
        {% for error in field.errors %}
          <div class="invalid-feedback">
            {{ error }}
          </div>
        {% endfor %}
      {% else %}
        {% render_field field class="form-control is-valid" %}
      {% endif %}
    {% else %}
      {% render_field field class="form-control" %}
    {% endif %}

    {% if field.help_text %}
      <small class="form-text text-muted">
        {{ field.help_text }}
      </small>
    {% endif %}
  </div>
{% endfor %}
Now we change our new_topic.html template:
templates/new_topic.html
{% extends 'base.html' %}

{% block title %}Start a New Topic{% endblock %}

{% block breadcrumb %}
  <li class="breadcrumb-item"><a href="{% url 'home' %}">Boards</a></li>
  <li class="breadcrumb-item"><a href="{% url 'board_topics' board.pk %}">{{ board.name }}</a></li>
  <li class="breadcrumb-item active">New topic</li>
{% endblock %}

{% block content %}
  <form method="post" novalidate>
    {% csrf_token %}
    {% include 'includes/form.html' %}
    <button type="submit" class="btn btn-success">Post</button>
  </form>
{% endblock %}
As the name suggests, the {% include %} is used to include HTML templates in another template. It’s a very useful way to reuse HTML components in a project.
The next form we implement, we can simply use {% include 'includes/form.html' %} to render it.
Adding More Tests
Now we are using Django Forms; we can add more tests to make sure it is running smoothly:
boards/tests.py
# ... other imports
from .forms import NewTopicForm

class NewTopicTests(TestCase):
    # ... other tests

    def test_contains_form(self):  # <- new test
        url = reverse('new_topic', kwargs={'pk': 1})
        response = self.client.get(url)
        form = response.context.get('form')
        self.assertIsInstance(form, NewTopicForm)

    def test_new_topic_invalid_post_data(self):  # <- updated this one
        '''
        Invalid post data should not redirect
        The expected behavior is to show the form again with validation errors
        '''
        url = reverse('new_topic', kwargs={'pk': 1})
        response = self.client.post(url, {})
        form = response.context.get('form')
        self.assertEquals(response.status_code, 200)
        self.assertTrue(form.errors)
Now we are using the assertIsInstance method for the first time. Basically we are grabbing the form instance in the context data, and checking if it is a NewTopicForm. In the last test, we added the self.assertTrue(form.errors) to make sure the form is showing errors when the data is invalid.
Conclusions
In this tutorial, we focused on URLs, Reusable Templates, and Forms. As usual, we also implement several test cases. That’s how we develop with confidence.
Our tests file is starting to get big, so in the next tutorial, we are going to refactor it to improve the maintainability so to sustain the growth of our code base.
We are also reaching a point where we need to interact with the logged in user. In the next tutorial, we are going to learn everything about authentication and how to protect our views and resources.
I hope you enjoyed the third part of this tutorial series! The forth part is coming out next week, on Sep 25, 2017. If you would like to get notified when the forth part is out, you can subscribe to our mailing list.
The source code of the project is available on GitHub. The current state of the project can be found under the release tag v0.3-lw. The link below will take you to the right place:
