

—— 以webpack文档部署为例子
Overview
Some friends and I have been running webpack-china for a few months.
After a few months effort, most doc translation job have also been done. We keep tracking the master and you will see Chinese version does not lag behind too much.
However it has been a while that we need to manually deploy the site. With the help of Travis-Ci and Github webhook, we finally make it an auto process.
Travis-CI is used for building your code that you need to publish and push them to your gh-pages branch. Github webhook then takes over the job and sends a request to your hosting server. When your server gets the request, it would run a script to pull the latest code from gh-page. The site then finish all the updating steps.

Travis-CI
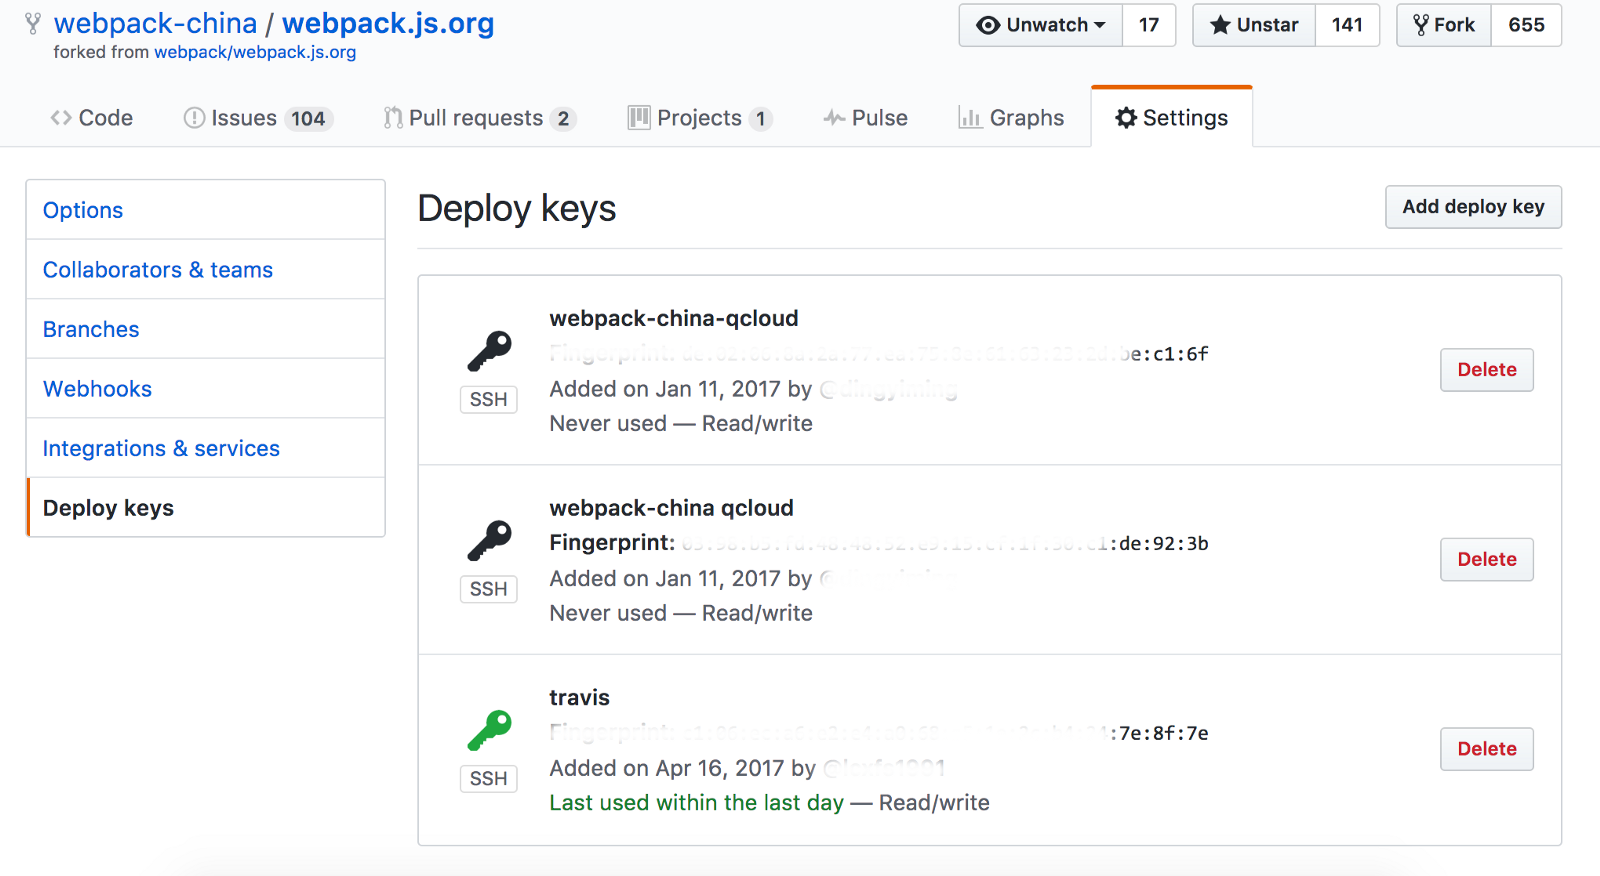
Here I will use webpack-china/webpack.js.org as an example. The repository is forked from webpack/webpack.js.org. But we have to modify it a bit.

This file is the configuration for Travis-CI. Not much difference from other project, branches means which branches will be watched by Travis-Ci. Node.js is used as the major programing language. Node 6.0 environment will be set up. The most important file should be deploy.sh. This file contains the commands used for deployment.
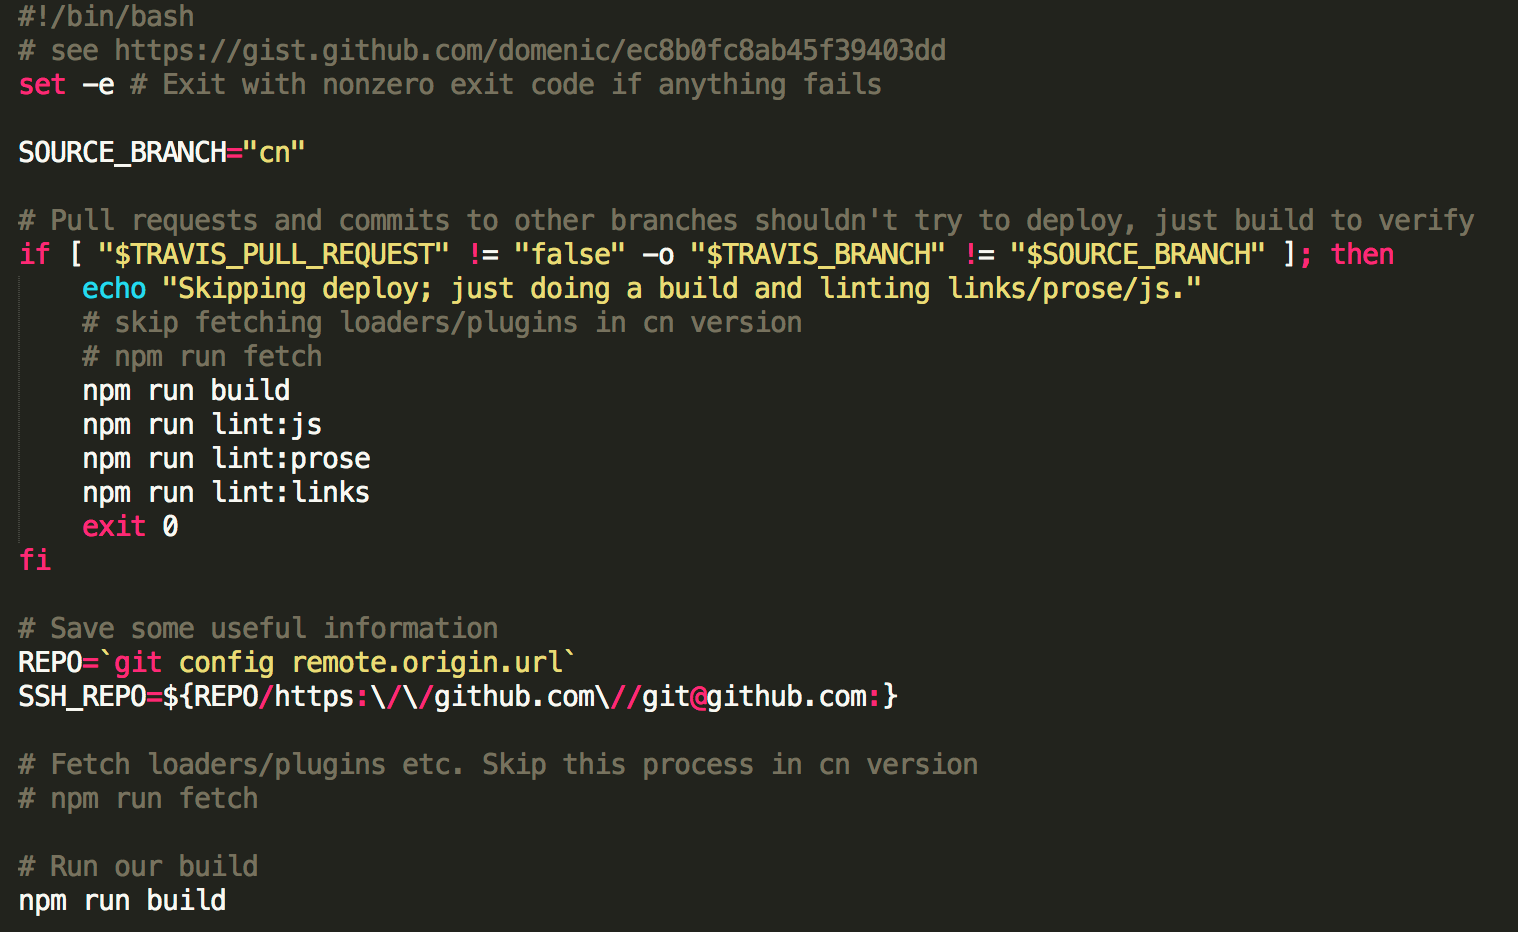
The 1st part of deploy.sh script is used for building the site. Ready releasing code will be put under build folder when you run
npm run build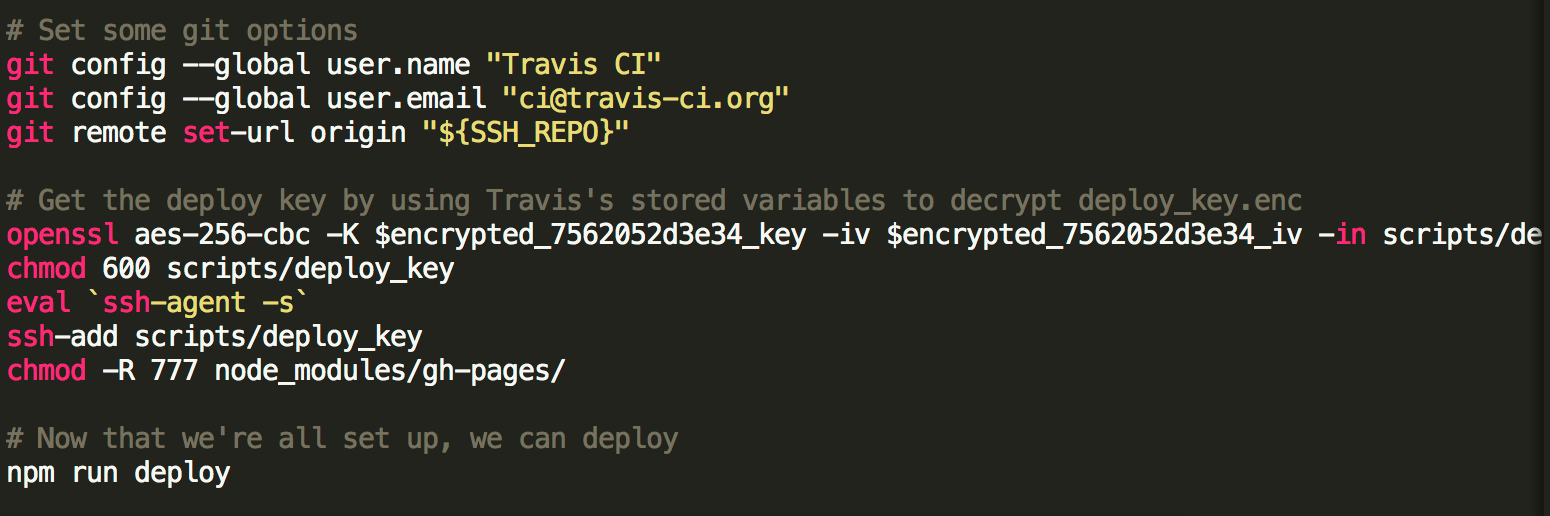
The 2nd part of the script is aiming for pushing code to gh-pages branch. But how does Travis-CI know get the permission to access your repo?
SSH Key does the trick for you. Please follow this guide, Generating a new SSH key to generate SSH Key. (Please do it under your local repository folder)
example code:
ssh-keygen -t rsa -b 4096 -C ci@travis-ci.org

Enter file in which to save the key (/var/root/.ssh/id_rsa): deploy_key
When you are asked to enter passphrase, please type enter to skip.
Enter passphrase (empty for no passphrase):Then open deploy_key.pub and copy whole file content. Add that deploy key to your repository at https://github.com/<your name>/<your repo>/settings/keys.
Next, install travis client tool to upload SSH Key information to the Travis-CI.
After installation, run
travis encrypt-file deploy_key
Add the script to deploy.sh under scripts folder and also add deploy_key.enc to scripts folder. Append scripts/ to delopy_key and deploy_key in this script as follows,
openssl aes-256-cbc -K $encrypted_7562052d3e34_key -iv $encrypted_7562052d3e34_iv -in scripts/deploy_key.enc -out scripts/deploy_key -dPlease do not to upload deploy_key.pub.
If it prompts login info, try
travis loginThen you can push everything to the repository and Travis-CI will build and push things for you.
One more thing to note is that npm run deploy in deploy.sh is used here which use gh-pages library to push code to gh-pages.
GitHub Webhook

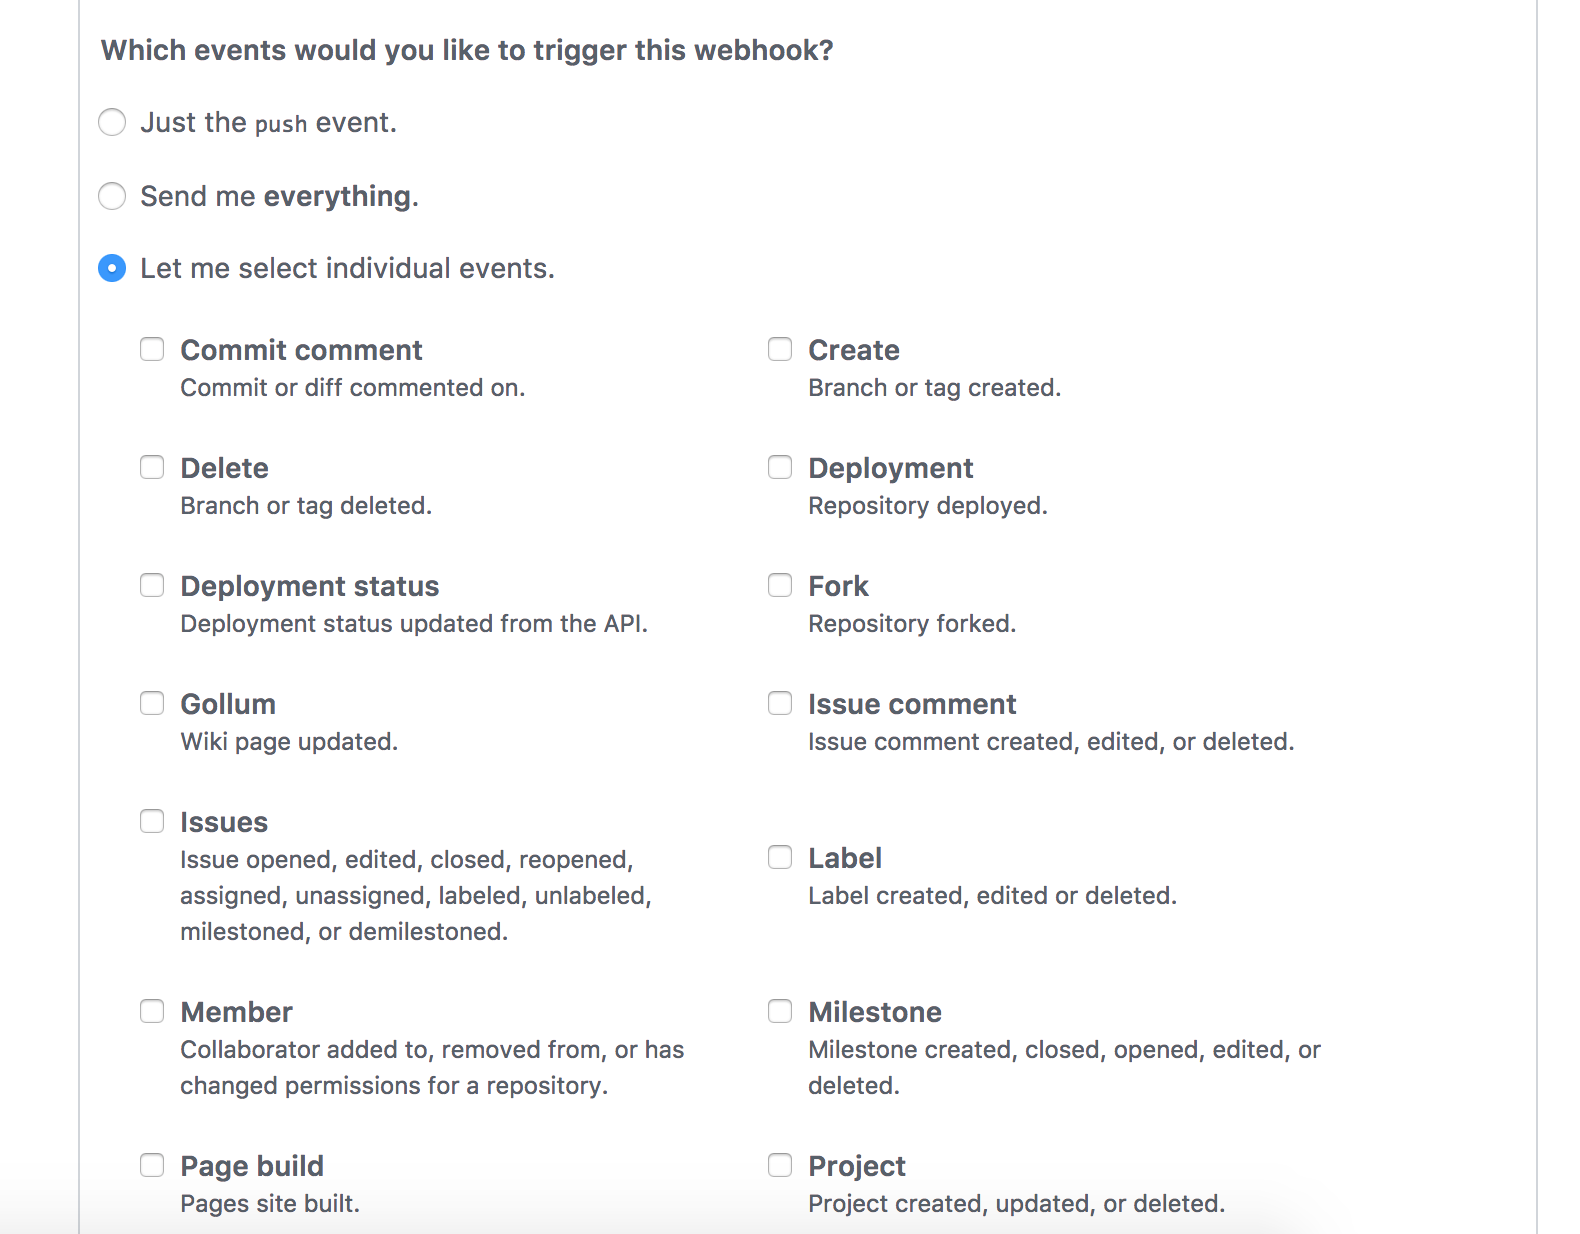
Add a webhook in your project (1st part of Github Webhook) and you can specify when Github will send the request (2nd part of Github Webhook).

Then you need to deploy a small app (pm2 is recommended to persist the app process) to respond to Github Webhook.
codePath is the path where accommodate production code from gh-pages branch.
updateCommand,
cd ${codePath};sudo git fetch — all;sudo git reset — hard origin/gh-pages;is to fetch all stuff from gh-pages branch and only show the latest record.
Don’t forget to configure your nginx/apache to serve your static files in codePath.
