

简述
本文主要记录 Assimp库的编译和使用,可能会有不准确的地方,还望多多指正共同学习~
Assimp是Open Asset Import Library(开放的资产导入库)的缩写。Assimp能够导入很多种不同的模型文件格式(并也能够导出部分的格式),它会将所有的模型数据加载至Assimp的通用数据结构中
Assimp编译
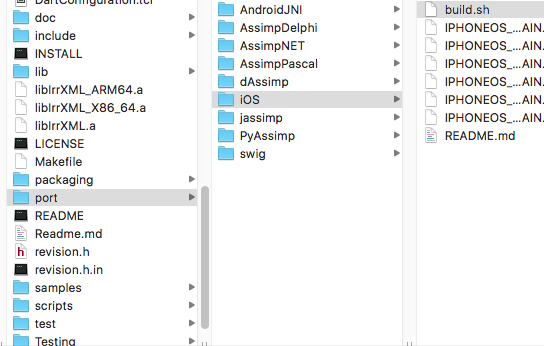
这里是库的github地址Assimp,下载下来 我们还要编译成iOS可用的库(这里踩坑不少/(ㄒoㄒ)/~~)
配置CMAKE环境
CMake是个开源的跨平台自动化建构系统,想要编译Assimp 先要配置好它~ CMake官网 在官网下载CMake
然后将Cmake链接至终端
sudo "/Applications/CMake.app/Contents/bin/cmake-gui" --install
编译 Assimp.a
切换至目标路径
执行下面命令~
//将你需要支持的架构输入 一般就是X86 和 arm64
./build.sh --stdlib=libc++ --archs="arm64 x86_64"
这是你的 lib文件夹下就是这个样子的~
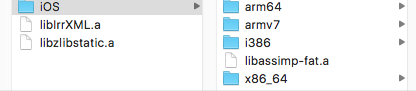
XML.a只支持 X86架构~ 我们还需要额外编译它
XML.a
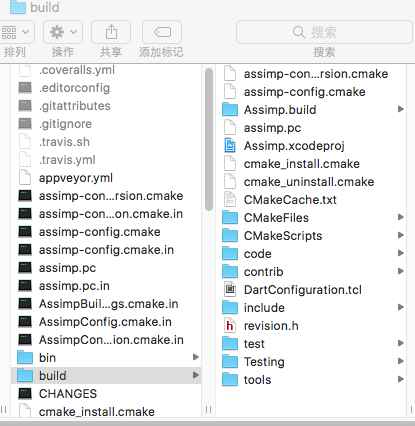
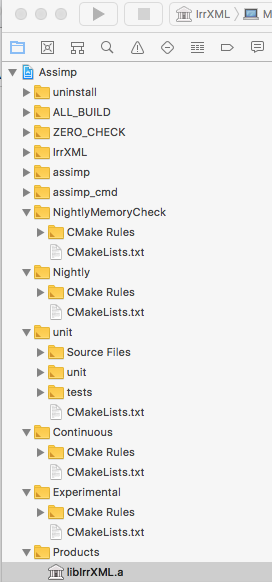
这时就要使用CMake客户端了~ 创建一个空的build文件夹~,使用Xcode 默认配置生成~

这时就根据需要编译出自己需要的静态库即可了~~
Assimp使用
模型结构
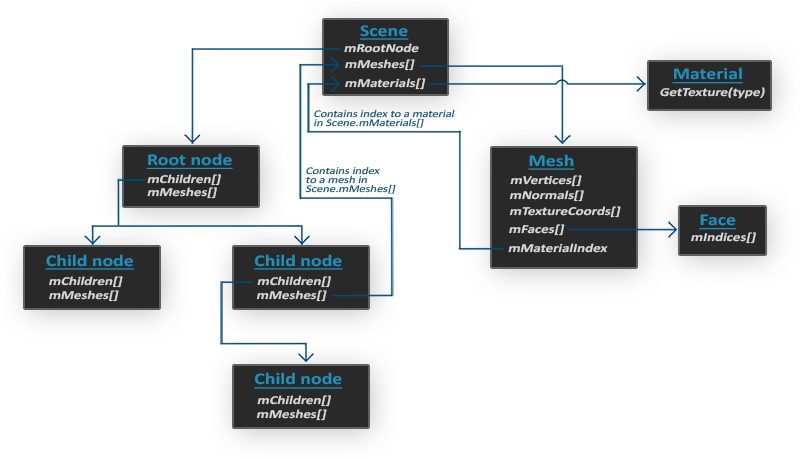
当Assimp加载模型时,会将模型数据加载到Scene(场景)对象中.
Scene中会有一个Mesh(网格)对象,在Mesh中包含着渲染所需的所有数据,如顶点,法向量,纹理坐标... 在Mesh中包含一个Material对象,其中是关于材质的数据(镜面贴图,漫反射贴图,法向量贴图....) 在Mesh中还包含了许多Face,Face其实是指物体的渲染图元,一个面包含了组成图元的顶点索引(这里其实就相当于之前讲到的EBO)
Scene中会包含一个根节点,在根节点之下会有很多子节点~节点中有指向Mesh中数据的索引
所以我们需要做的就是将Scene中的节点遍历,然后将节点中的数据提取出来,以适合的格式输入到着色器中~~(๑•ᴗ•๑)
代码
定义 Mesh类 和 Model类 Mesh类对应每个节点的网格数据,Model则对应Scene对象~
我展示的代码主要是和Assimp相关的内容~ 也就是如何从模型中提取需要的数据,其他一些常规地方我就不浪费篇幅了~(๑•ᴗ•๑)
头文件
#include "assimp/Importer.hpp"
#include "assimp/scene.h"
#include "assimp/postprocess.h"
属性
//顶点
struct Vertex {
    glm::vec3 Position;
    glm::vec3 Normal;
    glm::vec2 TexCoords;
};

struct Vertex {
    glm::vec3 Position;
    glm::vec3 Normal;
    glm::vec2 TexCoords;
};

class Mesh {
    std::vector<Vertex> vertices;       //顶点
    std::vector<unsigned int> indices;  //索引
    std::vector<Texture> textures;      //纹理

    unsigned int VAO, VBO, EBO;
    }


class Model{
    std::vector<Texture> textures_loaded;   //缓冲纹理,避免多次加载
    std::vector<Mesh> meshes;               //节点数据数组
    std::string directory;                  //加载路径
    }
加载Scene
遍历根节点及其下属所有子节点
        Assimp::Importer import;

        //获取Scene
        const aiScene *scene = import.ReadFile(path, aiProcess_Triangulate | aiProcess_FlipUVs);

        if(!scene || scene->mFlags & AI_SCENE_FLAGS_INCOMPLETE || !scene->mRootNode)
        {
            printf("ERROR::ASSIMP:: %s",import.GetErrorString());
            return;
        }
        directory = path.substr(0, path.find_last_of('/'));

        processNode(scene->mRootNode, scene);
ReadFile将指定路径的模型加载,Path为路径,后面的是加载时的额外处理
aiProcess_Triangulate将加载的图元变换为三角形aiProcess_FlipUVs翻转纹理坐标Y轴(OpenGL的纹理Y轴是翻的~)aiProcess_GenNormals若模型不包含法向量的话,就为每个顶点创建法线aiProcess_SplitLargeMeshes将较大的网格分割为较小的网格(当渲染有最大顶点数量要求时)aiProcess_OptimizeMeshes将较小的网格们拼接为较大的一个网格(减少绘制调用) 指令大全~~
    void processNode(aiNode *node, const aiScene *scene){
        //提取节点数据~
        for(unsigned int i = 0; i < node->mNumMeshes; i++)
        {

            aiMesh *mesh = scene->mMeshes[node->mMeshes[i]];
            meshes.push_back(processMesh(mesh, scene));
        }
        //递归遍历
        for(unsigned int i = 0; i < node->mNumChildren; i++)
        {
            processNode(node->mChildren[i], scene);
        }
    }
提取节点网格数据
    Mesh processMesh(aiMesh *mesh, const aiScene *scene) {

        //需要提取的数据~
        std::vector<Vertex> vertices;
        std::vector<unsigned int> indices;
        std::vector<Texture> textures;

        //将顶点数据提取
        for(unsigned int i = 0; i < mesh->mNumVertices; i++)
        {
            Vertex vertex;
            glm::vec3 vector;
            // positions
            vector.x = mesh->mVertices[i].x;
            vector.y = mesh->mVertices[i].y;
            vector.z = mesh->mVertices[i].z;
            vertex.Position = vector;
            // normals
            vector.x = mesh->mNormals[i].x;
            vector.y = mesh->mNormals[i].y;
            vector.z = mesh->mNormals[i].z;
            vertex.Normal = vector;

            if(mesh->mTextureCoords[0])             {
                glm::vec2 vec;

                vec.x = mesh->mTextureCoords[0][i].x;
                vec.y = mesh->mTextureCoords[0][i].y;
                vertex.TexCoords = vec;
            }
            else
                vertex.TexCoords = glm::vec2(0.0f, 0.0f);


            vertices.push_back(vertex);
        }


        //将索引数据提取
        for(unsigned int i = 0; i < mesh->mNumFaces; i++)
        {
            aiFace face = mesh->mFaces[i];

            for(unsigned int j = 0; j < face.mNumIndices; j++)
                indices.push_back(face.mIndices[j]);
        }

        //将纹理数据提取(漫反射纹理,镜面纹理...)
        aiMaterial* material = scene->mMaterials[mesh->mMaterialIndex];

        std::vector<Texture> diffuseMaps = loadMaterialTextures(material, aiTextureType_DIFFUSE, "texture_diffuse");
        textures.insert(textures.end(), diffuseMaps.begin(), diffuseMaps.end());

        std::vector<Texture> specularMaps = loadMaterialTextures(material, aiTextureType_SPECULAR, "texture_specular");
        textures.insert(textures.end(), specularMaps.begin(), specularMaps.end());

        std::vector<Texture> normalMaps = loadMaterialTextures(material, aiTextureType_HEIGHT, "texture_normal");
        textures.insert(textures.end(), normalMaps.begin(), normalMaps.end());

        std::vector<Texture> heightMaps = loadMaterialTextures(material, aiTextureType_AMBIENT, "texture_height");
        textures.insert(textures.end(), heightMaps.begin(), heightMaps.end());

        return Mesh(vertices, indices, textures);
    }
    std::vector<Texture> loadMaterialTextures(aiMaterial *mat, aiTextureType type,std::string typeName)  {
        std::vector<Texture> textures;
        for(unsigned int i = 0; i < mat->GetTextureCount(type); i++)
        {
            aiString str;
            mat->GetTexture(type, i, &str);
            //检查纹理是否之前已经加载过,
            bool skip = false;
            for(unsigned int j = 0; j < textures_loaded.size(); j++)
            {
                if(std::strcmp(textures_loaded[j].path.data(), str.C_Str()) == 0)
                {
                    textures.push_back(textures_loaded[j]);
                    skip = true; // a texture with the same filepath has already been loaded, continue to next one. (optimization)
                    break;
                }
            }
            if(!skip)
            {
                //若纹理未加载,则加载
                Texture texture;
                texture.id = TextureFromFile(str.C_Str(), this->directory);
                texture.type = typeName;
                texture.path = str.C_Str();
                textures.push_back(texture);
                textures_loaded.push_back(texture);
            }
        }
        return textures;
    }

    //将纹理加载,输入到着色器
    unsigned int TextureFromFile(const char *path, const std::string &directory, bool gamma)
{
    std::string filename = std::string(path);
    filename = directory + '/' + filename;

    unsigned int textureID;
    glGenTextures(1, &textureID);

    int width, height, nrComponents;
    unsigned char *data = stbi_load(filename.c_str(), &width, &height, &nrComponents, 0);
    if (data)
    {
        GLenum format;
        if (nrComponents == 1)
            format = GL_RED;
        else if (nrComponents == 3)
            format = GL_RGB;
        else if (nrComponents == 4){

            for (int i = 0; i<width*height; i++ ) {
                char tR = data[i*4+2];
                data[i*4+2] = data[i*4];
                data[i*4] = tR;
            }
            format = GL_RGBA;
        }
        glBindTexture(GL_TEXTURE_2D, textureID);
        glTexImage2D(GL_TEXTURE_2D, 0, format, width, height, 0, format, GL_UNSIGNED_BYTE, data);
        glGenerateMipmap(GL_TEXTURE_2D);

        glTexParameteri(GL_TEXTURE_2D, GL_TEXTURE_WRAP_S, GL_REPEAT);
        glTexParameteri(GL_TEXTURE_2D, GL_TEXTURE_WRAP_T, GL_REPEAT);
        glTexParameteri(GL_TEXTURE_2D, GL_TEXTURE_MIN_FILTER, GL_LINEAR_MIPMAP_LINEAR);
        glTexParameteri(GL_TEXTURE_2D, GL_TEXTURE_MAG_FILTER, GL_LINEAR);

        stbi_image_free(data);
    }
    else
    {
        //std::cout << "Texture failed to load at path: " << path << std::endl;
        printf("Texture failed to load at path: %s",path);
        stbi_image_free(data);
    }

    return textureID;
}
注意
在加载模型数据时,需要注意的是 模型并不一定会提供完整的贴图,例如 有的简单模型,建模师有可能不会为其添加贴图,而是给模型设置一种高光材质,以节约资源.这时 材质信息存储在mtl文件中,而且还有可能连mtl文件也没有, 这时 则需要我们添加默认材质~
.mtl文件(Material Library File)是材质库文件,描述的是物体的材质信息,ASCII存储,任何文本编辑器可以将其打开和编辑。一个.mtl文件可以包含一个或多个材质定义,对于每个材质都有其颜色,纹理和反射贴图的描述,应用于物体的表面和顶点。想详细了解的朋友们可以看这里.obj文件格式与.mtl文件格式
绘制
绘制就很简单了,将提取出来的每个网格的数据 传入着色器就好~
    void Draw(GLuint program){

        glBindVertexArray(VAO);
        unsigned int diffuseNr = 1;
        unsigned int specularNr = 1;
        for(unsigned int i = 0; i < textures.size(); i++)
        {
            glActiveTexture(GL_TEXTURE0 + i);
            std::stringstream ss;
            std::string number;
            std::string name = textures[i].type;
            if(name == "texture_diffuse")
                ss << diffuseNr++;
            else if(name == "texture_specular")
                ss << specularNr++;
            number = ss.str();

            glUniform1i(glGetUniformLocation(program, ("material." + name + number).c_str()), i);

            glBindTexture(GL_TEXTURE_2D, textures[i].id);
        }
        glActiveTexture(GL_TEXTURE0);
        glDrawElements(GL_TRIANGLES, indices.size(), GL_UNSIGNED_INT, 0);

    }
在着色器中,也就是将获取的顶点数据 和 纹理 按照需要进行输出就好了~ 和 绘制木箱子无异~
结尾
我对这一块的内容也并不是十分熟练,所以Assimp使用这里有些粗略,以后有啥新的收获也会补上~ 倒是Assimp库编译那里 我是踩了好多坑~ 最后才弄好的~
模型大家可以到这里下载一些免费(难免有坑的)模型试一试 Free3D
希望能帮到大家吧,要是文中有不对的地方 还望多多指教呀~ 共同学习(๑•ᴗ•๑)
