

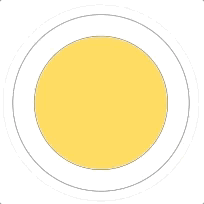
最终效果

实现思路
动画的表现形式是颜色以及大小的变化,整体效果可以看做多个单独的波纹效果的叠加。因此我们可以创建多个CALayer,分别赋予CABasicAnimation动画,组成最终的动画效果。
因此我们先从单个波纹扩散效果来尝试,然后根据时间差将效果叠加起来。
代码
1.新建动画 View RippleAnimationView,动画效果在animationLayer上实现。
新建RippleAnimationView类,继承自UIView,设置扩散倍数,然后重写- (void)drawRect:(CGRect)rect方法,在方法内部新建承载动画的animationLayer。
#import <UIKit/UIKit.h>

@interface RippleAnimationView : UIView

/**
 设置扩散倍数。默认1.423倍
 */
@property (nonatomic, assign) CGFloat multiple;

- (instancetype)initWithFrame:(CGRect)frame;

@end


@implementation RippleAnimationView

- (instancetype)initWithFrame:(CGRect)frame {
    self = [super initWithFrame:frame];

    if (self) {
        self.backgroundColor = [UIColor clearColor];
       _multiple = 1.423;
    }

    return self;
}

- (void)drawRect:(CGRect)rect {

    CALayer *animationLayer = [CALayer layer];

    // 加入动画

    [self.layer addSublayer:animationLayer];
}
2.创建单个扩散的动画承载CALayer,实现扩散效果。
- 首先实现缩放动画
- (CABasicAnimation *)scaleAnimation {
    CABasicAnimation *scaleAnimation = [CABasicAnimation animationWithKeyPath:@"transform.scale"];

    scaleAnimation.fromValue = @1;
    scaleAnimation.toValue = @(_multiple);
    scaleAnimation.beginTime = CACurrentMediaTime();
    scaleAnimation.duration = 3;
    scaleAnimation.repeatCount = HUGE;// 重复次数设置为无限

    return scaleAnimation;
}
- 新建
CALayer,并在layer上加载动画。然后将这个Layer放在animationLayer上。
- (void)drawRect:(CGRect)rect {

    CALayer *animationLayer = [CALayer layer];

    // 新建缩放动画
    CABasicAnimation *animation = [self scaleAnimation];

    // 新建一个动画 Layer,将动画添加上去
    CALayer *pulsingLayer = [self pulsingLayer:rect animation:animation];

    //将动画 Layer 添加到 animationLayer
    [animationLayer addSublayer:pulsingLayer];

    [self.layer addSublayer:animationLayer];
}

- (CALayer *)pulsingLayer:(CGRect)rect animation:(CABasicAnimation *)animation {
    CALayer *pulsingLayer = [CALayer layer];

    pulsingLayer.borderWidth = 0.5;
    pulsingLayer.borderColor = [UIColor blackColor].CGColor;
    pulsingLayer.frame = CGRectMake(0, 0, rect.size.width, rect.size.height);
    pulsingLayer.cornerRadius = rect.size.height / 2;

    [pulsingLayer addAnimation:animation forKey:@"plulsing"];

    return pulsingLayer;
}
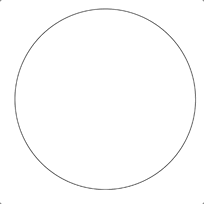
可以看看现在的效果是这样的
3. 加入背景色以及边框色的渐变效果,将单一的缩放动画合并为动画组CAAnimationGroup。
(ps: 除了改变背景色,还要设置并改变边框色的更主要原因是去除锯齿)
// 设置一个初始化颜色的宏
#define ColorWithAlpha(r,g,b,a) [UIColor colorWithRed:r/255.0 green:g/255.0 blue:b/255.0 alpha:a]

- (void)drawRect:(CGRect)rect {

    CALayer *animationLayer = [CALayer layer];

    // 这里同时创建[缩放动画、背景色渐变、边框色渐变]三个简单动画
    NSArray *animationArray = [self animationArray];

    // 将三个动画合并为一个动画组
    CAAnimationGroup *animationGroup = [self animationGroupAnimations:animationArray];

    //修改方法,将原先添加的动画由“简单动画”改为“动画组”
    CALayer *pulsingLayer = [self pulsingLayer:rect animation:animationGroup];

    //将动画 Layer 添加到 animationLayer
    [animationLayer addSublayer:pulsingLayer];

    [self.layer addSublayer:animationLayer];
}

- (NSArray *)animationArray {
    NSArray *animationArray = nil;

    CABasicAnimation *scaleAnimation = [self scaleAnimation];
    CAKeyframeAnimation *borderColorAnimation = [self borderColorAnimation];
    CAKeyframeAnimation *backgroundColorAnimation = [self backgroundColorAnimation];
    animationArray = @[scaleAnimation, backgroundColorAnimation, borderColorAnimation];

    return animationArray;
}


- (CAAnimationGroup *)animationGroupAnimations:(NSArray *)array {
    CAAnimationGroup *animationGroup = [CAAnimationGroup animation];

    animationGroup.beginTime = CACurrentMediaTime();
    animationGroup.duration = 3;
    animationGroup.repeatCount = HUGE;
    animationGroup.animations = array;
    animationGroup.removedOnCompletion = NO;
    return animationGroup;
}


- (CABasicAnimation *)scaleAnimation {
    CABasicAnimation *scaleAnimation = [CABasicAnimation animationWithKeyPath:@"transform.scale"];

    scaleAnimation.fromValue = @1;
    scaleAnimation.toValue = @(_multiple);
    return scaleAnimation;
}


// 使用关键帧动画,使得颜色动画不要那么的线性变化
- (CAKeyframeAnimation *)backgroundColorAnimation {
    CAKeyframeAnimation *backgroundColorAnimation = [CAKeyframeAnimation animation];

    backgroundColorAnimation.keyPath = @"backgroundColor";
    backgroundColorAnimation.values = @[(__bridge id)ColorWithAlpha(255, 216, 87, 0.5).CGColor,
                                        (__bridge id)ColorWithAlpha(255, 231, 152, 0.5).CGColor,
                                        (__bridge id)ColorWithAlpha(255, 241, 197, 0.5).CGColor,
                                        (__bridge id)ColorWithAlpha(255, 241, 197, 0).CGColor];
    backgroundColorAnimation.keyTimes = @[@0.3,@0.6,@0.9,@1];
    return backgroundColorAnimation;
}

- (CAKeyframeAnimation *)borderColorAnimation {
    CAKeyframeAnimation *borderColorAnimation = [CAKeyframeAnimation animation];

    borderColorAnimation.keyPath = @"borderColor";
    borderColorAnimation.values = @[(__bridge id)ColorWithAlpha(255, 216, 87, 0.5).CGColor,
                                    (__bridge id)ColorWithAlpha(255, 231, 152, 0.5).CGColor,
                                    (__bridge id)ColorWithAlpha(255, 241, 197, 0.5).CGColor,
                                    (__bridge id)ColorWithAlpha(255, 241, 197, 0).CGColor];
    borderColorAnimation.keyTimes = @[@0.3,@0.6,@0.9,@1];
    return borderColorAnimation;
}

- (CALayer *)pulsingLayer:(CGRect)rect animation:(CAAnimationGroup *)animationGroup {
    CALayer *pulsingLayer = [CALayer layer];

    pulsingLayer.borderWidth = 0.5;
    pulsingLayer.borderColor = ColorWithAlpha(255, 216, 87, 0.5).CGColor;
    pulsingLayer.frame = CGRectMake(0, 0, rect.size.width, rect.size.height);
    pulsingLayer.cornerRadius = rect.size.height / 2;

    [pulsingLayer addAnimation:animationGroup forKey:@"plulsing"];

    return pulsingLayer;
}
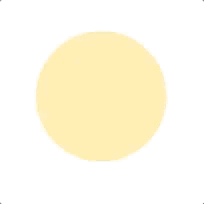
现在就有种渐变的感觉了
4. 同时创建三个扩散动画的CALyer,将开始动画的时间错开,同时添加到animationLayer上。
// 设置静态常量 pulsingCount ,表示 Layer 的数量
static NSInteger const pulsingCount = 3;

// 设置静态常量 animationDuration ,表示动画时间
static double const animationDuration = 3;


- (void)drawRect:(CGRect)rect {

    CALayer *animationLayer = [CALayer layer];

    // 利用 for 循环创建三个动画 Layer
    for (int i = 0; i < pulsingCount; i++) {
        NSArray *animationArray = [self animationArray];

        // 通过传入参数 i 计算,错开动画时间
        CAAnimationGroup *animationGroup = [self animationGroupAnimations:animationArray index:i];
        CALayer *pulsingLayer = [self pulsingLayer:rect animation:animationGroup];
        [animationLayer addSublayer:pulsingLayer];
    }

    [self.layer addSublayer:animationLayer];
}

... ...

- (CAAnimationGroup *)animationGroupAnimations:(NSArray *)array index:(int)index {
    CAAnimationGroup *animationGroup = [CAAnimationGroup animation];

    animationGroup.beginTime = CACurrentMediaTime() + (double)(index * animationDuration) / (double)pulsingCount;
    animationGroup.duration = animationDuration;
    animationGroup.repeatCount = HUGE;
    animationGroup.animations = array;
    animationGroup.removedOnCompletion = NO;
    return animationGroup;
}

... ...
然后效果有点……一言难尽……
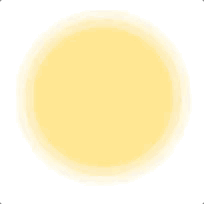
真是很有纪律性的变化啊~~好吧,只需要加入动画曲线就好了
5. 最后加入动画速度曲线
... ...

- (CAAnimationGroup *)animationGroupAnimations:(NSArray *)array index:(int)index {
    CAAnimationGroup *animationGroup = [CAAnimationGroup animation];

    animationGroup.beginTime = CACurrentMediaTime() + (double)(index * animationDuration) / (double)pulsingCount;
    animationGroup.duration = animationDuration;
    animationGroup.repeatCount = HUGE;
    animationGroup.animations = array;
    animationGroup.removedOnCompletion = NO;

    // 添加动画曲线。关于其他的动画曲线,也可以自行尝试
    animationGroup.timingFunction = [CAMediaTimingFunction functionWithName:kCAMediaTimingFunctionDefault];

    return animationGroup;
}

... ...
如果需要点扩散,那就设置 frame 极小,同时扩散倍数增大即可。
将动画View垫在另一个圆形View之下即可实现最上方的效果。关闭背景色,重调边框色和边框宽度即可实现第二种效果。
最后
demo及代码 在这里。
个人的动画汇总帖在这里 动画实践系列。
欢迎交流意见 mervin1024@163.com.
