

原文地址:https://github.com/SmallStoneSK/Blog/issues/1
1. 前言
近日,被安排做一个开场动画的任务。虽然RN提供了Animated来自定义动画,但是本次动画中的元素颇多,交互甚烦。。。在完成任务的同时,发现很多步骤其实是重复的,于是封装了一个小组件记录一下,分享给大家。
2. 初步尝试
分析一下:虽然这次的动画需求步骤挺多的,但是把每一步动画拆解成step1, step2, step3, step4... 讲道理应该还是能够实现的吧?嗯,用Animated.Value()创建值,然后再配上Animated.timing应该就好了。
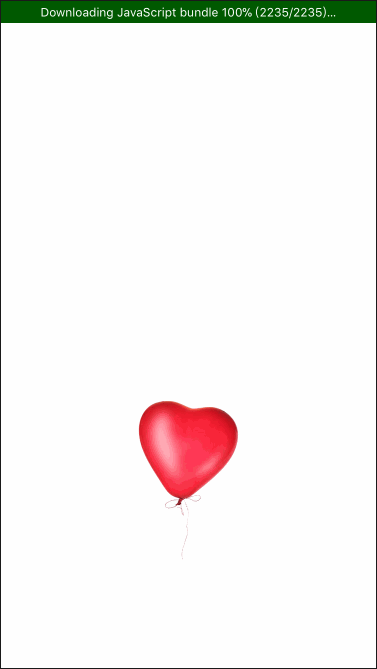
想到这,反手就是创建一个demo.js,先做个往上飘的气球试试先吧。
export class Demo1 extends PureComponent {

  constructor(props) {
    super(props);
  }

  componentWillMount() {
    this._initAnimation();
  }

  componentDidMount() {
    this._playAnimation();
  }

  _initAnimation() {
    this.topAnimatedValue = new Animated.Value(400);
    this.balloonStyle = {
      position: 'absolute',
      left: 137.5,
      top: this.topAnimatedValue.interpolate({
        inputRange: [-999999, 999999],
        outputRange: [-999999, 999999]
      })
    };
  }

  _playAnimation() {
    Animated.timing(this.topAnimatedValue, {
      toValue: 200,
      duration: 1500
    }).start();
  }

  render() {
    return (
      <View style={styles.demoContainer}>
        <Animated.Image
          style={[styles.balloonImage, this.balloonStyle]}
          source={require('../../pic/demo1/balloon.png')}
          />
      </View>
    );
  }
}
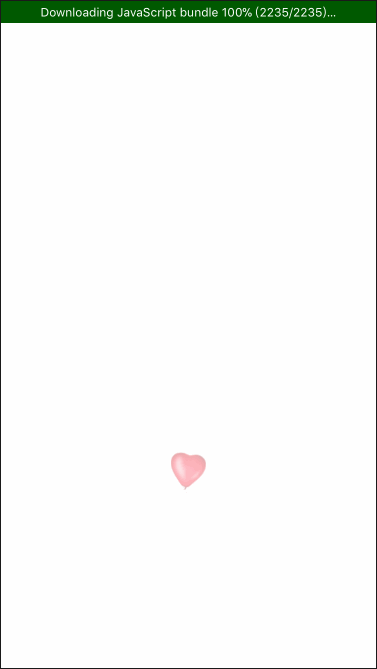
当然,这是再简单不过的基础动画了。。。如果我们让这里的气球一开始最好先是从底部的一个点放大,并且有一个渐入的效果,完了之后再往上飘,这该怎么实现呢?于是代码变成了这样:
export class Demo1 extends PureComponent {

  ...

  _interpolateAnimation(animatedValue, inputRange, outputRange) {
    return animatedValue.interpolate({inputRange, outputRange});
  }

  _initAnimation() {

    this.opacityAnimatedValue = new Animated.Value(0);
    this.scaleAnimatedValue = new Animated.Value(0);
    this.topAnimatedValue = new Animated.Value(400);

    this.balloonStyle = {
      position: 'absolute',
      left: 137.5,
      opacity: this._interpolateAnimation(this.opacityAnimatedValue, [0, 1], [0, 1]),
      top: this._interpolateAnimation(this.topAnimatedValue, [-999999, 999999], [-999999, 999999]),
      transform:[{scale: this._interpolateAnimation(this.scaleAnimatedValue, [0, 1], [0, 1])}]
    };
  }

  _playAnimation() {
    Animated.sequence([
      this.step1(),
      this.step2()
    ]).start();
  }

  step1() {
    return Animated.parallel([
      Animated.timing(this.opacityAnimatedValue, {
        toValue: 1,
        duration: 500
      }),
      Animated.timing(this.scaleAnimatedValue, {
        toValue: 1,
        duration: 500
      })
    ]);
  }

  step2() {
    return Animated.timing(this.topAnimatedValue, {
      toValue: 200,
      duration: 1500
    });
  }

  ...
}
插句话:在动画衔接的时候,还是纠结了一下。因为Animated提供的方法还是比较多的,这里用到了sequence、parallel,分别可以让动画顺序执行和并行。除此之外,animtaion的start方法是支持传入一个回调函数的,表示在当前动画运行结束的时候会触发这个回调。所以我们还可以这么写:
  _playAnimation() {
    this.step1(() => this.step2());	// 不同之处1:step2作为step1动画结束之后的回调传入
  }

  step1(callback) {
    Animated.parallel([
      Animated.timing(this.opacityAnimatedValue, {
        toValue: 1,
        duration: 500
      }),
      Animated.timing(this.scaleAnimatedValue, {
        toValue: 1,
        duration: 500
      })
    ]).start(() => {
      callback && callback();	// 不同之处2:调用传入的回调
    });
  }

  step2() {
    Animated.timing(this.topAnimatedValue, {
      toValue: 200,
      duration: 1500
    }).start();
  }
虽然同样能够实现效果,但是还是觉得这种方式不是很舒服,所以弃之。。。
到这里,我们已经对这个气球做了渐变、放大、平移等3项操作。但是,如果有5个气球,还有其他各种元素又该怎么办呢?这才一个气球我们就已经用了opacityAnimatedValue,scaleAnimatedValue,topAnimatedValue三个变量来控制,更多的动画元素那直就gg,不用下班了。。。
3. 实现升级
说实话,要做这么个东西,怎么就那么像在做一个PPT呢。。。
“屏幕就好比是一张PPT背景图;每一个气球就是PPT上的元素;你可以通过拖动鼠标来摆放各个气球,我可以用绝对定位来确定每个气球的位置;至于动画嘛,刚才的demo已经证明并不难实现,无非就是控制透明度、xy坐标、缩放比例罢了。”
想到这,心中不免一阵窃喜。哈哈,有路子了,可以对PPT上的这些元素封装一个通用的组件,然后提供常用的一些动画方法,剩下的事情就是调用这些动画方法组装成更复杂的动画了。新建一个PPT:“出现、飞跃、淡化、浮入、百叶窗、棋盘。。。”看着这令人眼花缭乱的各种动画,我想了下:嗯,我还是从最简单的做起吧。。。
首先,我们可以将动画分成两种:一次性动画和循环动画。
其次,作为一个元素,它可以用作动画的属性主要包括有:opacity, x, y, scale, angle等(这里先只考虑了二维平面的,其实还可以延伸扩展成三维立体的)。
最后,基本动画都可以拆解为这几种行为:出现/消失、移动、缩放、旋转。
3.1 一次性动画
想到这,反手就是创建一个新文件,代码如下:
// Comstants.js
export const INF = 999999999;

// Helper.js
export const Helper = {
  sleep(millSeconds) {
    return new Promise(resolve => {
      setTimeout(() => resolve(), millSeconds);
    });
  },
  animateInterpolate(animatedValue, inputRange, outputRange) {
    if(animatedValue && animatedValue.interpolate) {
      return animatedValue.interpolate({inputRange, outputRange});
    }
  }
};

// AnimatedContainer.js
import {INF} from "./Constants";
import {Helper} from "./Helper";

export class AnimatedContainer extends PureComponent {

  constructor(props) {
    super(props);
  }

  componentWillMount() {
    this._initAnimationConfig();
  }

  _initAnimationConfig() {

    const {initialConfig} = this.props;
    const {opacity = 1, scale = 1, x = 0, y = 0, rotate = 0} = initialConfig;

    // create animated values: opacity, scale, x, y, rotate
    this.opacityAnimatedValue = new Animated.Value(opacity);
    this.scaleAnimatedValue = new Animated.Value(scale);
    this.rotateAnimatedValue = new Animated.Value(rotate);
    this.xAnimatedValue = new Animated.Value(x);
    this.yAnimatedValue = new Animated.Value(y);

    this.style = {
      position: 'absolute',
      left: this.xAnimatedValue,
      top: this.yAnimatedValue,
      opacity: Helper.animateInterpolate(this.opacityAnimatedValue, [0, 1], [0, 1]),
      transform: [
        {scale: this.scaleAnimatedValue},
        {rotate: Helper.animateInterpolate(this.rotateAnimatedValue, [-INF, INF], [`-${INF}rad`, `${INF}rad`])}
      ]
    };
  }

  show() {}

  hide() {}

  scaleTo() {}

  rotateTo() {}

  moveTo() {}

  render() {
    return (
      <Animated.View style={[this.style, this.props.style]}>
        {this.props.children}
      </Animated.View>
    );
  }
}

AnimatedContainer.defaultProps = {
  initialConfig: {
    opacity: 1,
    scale: 1,
    x: 0,
    y: 0,
    rotate: 0
  }
};
第一步的骨架这就搭好了,简单到自己都难以置信。。。接下来就是具体实现每一个动画的方法了,先拿show/hide开刀。
show(config = {opacity: 1, duration: 500}) {
  Animated.timing(this.opacityAnimatedValue, {
    toValue: config.opacity,
    duration: config.duration
  }).start();
}

hide(config = {opacity: 0, duration: 500}) {
  Animated.timing(this.opacityAnimatedValue, {
    toValue: config.opacity,
    duration: config.duration
  }).start();
}
试了一下,简直是文美~
但是!仔细一想,却有个很严重的问题,这里的动画衔接该怎处理?要想做一个先show,然后过1s之后再hide的动画该怎么实现?貌似又回到了一开始考虑过的问题。不过这次,我却是用Promise来解决这个问题。于是代码又变成了这样:
sleep(millSeconds) {
  return new Promise(resolve => setTimeout(() => resolve(), millSeconds));
}

show(config = {opacity: 1, duration: 500}) {
  return new Promise(resolve => {
    Animated.timing(this.opacityAnimatedValue, {
      toValue: config.opacity,
      duration: config.duration
    }).start(() => resolve());
  });
}

hide(config = {opacity: 0, duration: 500}) {
  return new Promise(resolve => {
    Animated.timing(this.opacityAnimatedValue, {
      toValue: config.opacity,
      duration: config.duration
    }).start(() => resolve());
  });
}
现在我们再来看刚才的动画,只需这样就能实现:
playAnimation() {
  this.animationRef
    .show()                                 // 先出现
    .sleep(1000)                            // 等待1s
    .then(() => this.animationRef.hide());  // 消失
}
甚至还可以对createPromise这个过程再封装一波:
_createAnimation(animationConfig = []) {
  const len = animationConfig.length;
  if (len === 1) {
    const {animatedValue, toValue, duration} = animationConfig[0];
    return Animated.timing(animatedValue, {toValue, duration});
  } else if (len >= 2) {
    return Animated.parallel(animationConfig.map(config => {
      return this._createAnimation([config]);
    }));
  }
}

_createAnimationPromise(animationConfig = []) {
  return new Promise(resolve => {
    const len = animationConfig.length;
    if(len <= 0) {
      resolve();
    } else {
      this._createAnimation(animationConfig).start(() => resolve());
    }
  });
}

opacityTo(config = {opacity: .5, duration: 500}) {
  return this._createAnimationPromise([{
    toValue: config.opacity,
    duration: config.duration,
    animatedValue: this.opacityAnimatedValue
  }]);
}

show(config = {opacity: 1, duration: 500}) {
  this.opacityTo(config);
}

hide(config = {opacity: 0, duration: 500}) {
  this.opacityTo(config);
}
然后,我们再把其他的几种基础动画(scale, rotate, move)实现也加上:
scaleTo(config = {scale: 1, duration: 1000}) {
  return this._createAnimationPromise([{
    toValue: config.scale,
    duration: config.duration,
    animatedValue: this.scaleAnimatedValue
  }]);
}

rotateTo(config = {rotate: 0, duration: 500}) {
  return this._createAnimationPromise([{
    toValue: config.rotate,
    duration: config.duration,
    animatedValue: this.rotateAnimatedValue
  }]);
}

moveTo(config = {x: 0, y: 0, duration: 1000}) {
  return this._createAnimationPromise([{
    toValue: config.x,
    duration: config.duration,
    animatedValue: this.xAnimatedValue
  }, {
    toValue: config.y,
    duration: config.duration,
    animatedValue: this.yAnimatedValue
  }]);
}
3.2 循环动画
一次性动画问题就这样解决了,再来看看循环动画怎么办。根据平时的经验,一个循环播放的动画一般都会这么写:
roll() {

  this.rollAnimation = Animated.timing(this.rotateAnimatedValue, {
  	toValue: Math.PI * 2,
  	duration: 2000
  });

  this.rollAnimation.start(() => {
  	this.rotateAnimatedValue.setValue(0);
  	this.roll();
  });
}

play() {
  this.roll();
}

stop() {
  this.rollAnimation.stop();
}
没错,就是在一个动画的start中传入回调,而这个回调就是递归地调用播放动画本身这个函数。那要是对应到我们要封装的这个组件,又该怎么实现呢?
思考良久,为了保持和一次性动画API的一致性,我们可以给animatedContainer新增了以下几个函数:
export class AnimatedContainer extends PureComponent {

  ...

  constructor(props) {
    super(props);
    this.cyclicAnimations = {};
  }

  _createCyclicAnimation(name, animations) {
    this.cyclicAnimations[name] = Animated.sequence(animations);
  }

  _createCyclicAnimationPromise(name, animations) {
    return new Promise(resolve => {
      this._createCyclicAnimation(name, animations);
      this._playCyclicAnimation(name);
      resolve();
    });
  }

  _playCyclicAnimation(name) {
    const animation = this.cyclicAnimations[name];
    animation.start(() => {
      animation.reset();
      this._playCyclicAnimation(name);
    });
  }

  _stopCyclicAnimation(name) {
    this.cyclicAnimations[name].stop();
  }

  ...
}
其中,_createCyclicAnimation,_createCyclicAnimationPromise是和一次性动画的API对应的。但是,不同点在于传入的参数发生了很大的变化:animationConfg -> (name, animations)
- name是一个标志符,循环动画之间不能重名。_playCyclicAnimation和_stopCyclicAnimation都是通过name来匹配相应animation并调用的。
- animations是一组动画,其中每个animation是调用_createAnimation生成的。由于循环动画可以是由一组一次性动画组成的,所以在_createCyclicAnimation中也是直接调用了Animated.sequence,而循环播放的实现就在于_playCyclicAnimation中的递归调用。
到这里,循环动画基本也已经封装完毕。再来封装两个循环动画roll(旋转),blink(闪烁)试试:
blink(config = {period: 2000}) {
  return this._createCyclicAnimationPromise('blink', [
    this._createAnimation([{
      toValue: 1,
      duration: config.period / 2,
      animatedValue: this.opacityAnimatedValue
    }]),
    this._createAnimation([{
      toValue: 0,
      duration: config.period / 2,
      animatedValue: this.opacityAnimatedValue
    }])
  ]);
}

stopBlink() {
  this._stopCyclicAnimation('blink');
}

roll(config = {period: 1000}) {
  return this._createCyclicAnimationPromise('roll', [
    this._createAnimation([{
      toValue: Math.PI * 2,
      duration: config.period,
      animatedValue: this.rotateAnimatedValue
    }])
  ]);
}

stopRoll() {
  this._stopCyclicAnimation('roll');
}
4. 实战
忙活了大半天,总算是把AnimatedContainer封装好了。先找个素材练练手吧~可是,找个啥呢?“叮”,只见手机上挖财的一个提醒亮了起来。嘿嘿,就你了,挖财的签到页面真的很适合(没有做广告。。。)效果图如下:
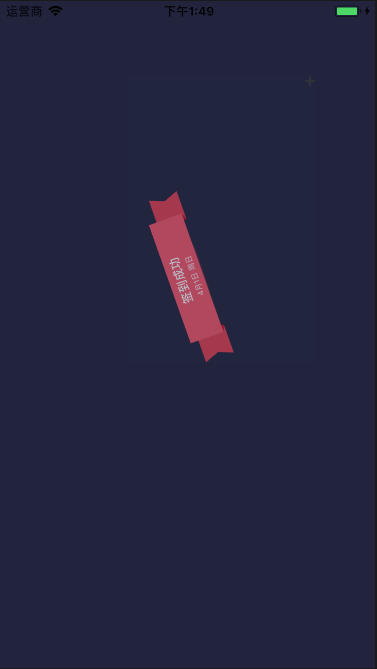
渲染元素的render代码就不贴了,但是我们来看看动画播放的代码:
startOpeningAnimation() {

  // 签到(一次性动画)
  Promise
    .all([
      this._header.show(),
      this._header.scaleTo({scale: 1}),
      this._header.rotateTo({rotate: Math.PI * 2})
    ])
    .then(() => this._header.sleep(100))
    .then(() => this._header.moveTo({x: 64, y: 150}))
    .then(() => Promise.all([
      this._tips.show(),
      this._ladder.sleep(150).then(() => this._ladder.show())
    ]))
    .then(() => Promise.all([
      this._today.show(),
      this._today.moveTo({x: 105, y: 365})
    ]));

  // 星星闪烁(循环动画)
  this._stars.forEach(item => item
    .sleep(Math.random() * 2000)
    .then(() => item.blink({period: 1000}))
  );
}
光看代码,是不是就已经脑补整个动画了~ 肥肠地一目了然,真的是美滋滋。
5. 后续思考
-
讲道理,现在这个AnimatedContainer能够创建的动画还是稍显单薄,仅包含了最基础的一些基本操作。不过,这也说明了还有很大的扩展空间,根据_createCyclicAnimationPromise和_createAnimationPromise这两个函数,可以自由地封装我们想要的各种复杂动画效果。而调用方就只要通过promise的all和then方法来控制动画顺序就行了。个人感觉,甚至有那么一丁点在使用jQuery。。。
-
除此之外,还有一个问题就是:由于这些元素都是绝对定位布局的,那这些元素的x, y坐标值怎么办?在有视觉标注稿的前提下,那感觉还可行。但是一旦元素的数量上去了,那在使用上还是有点麻烦的。。。所以啊,要是有个什么工具能够真的像做PPT一样,支持元素拖拽并实时获得元素的坐标,那就真的是文美了。。。。。。
老规矩,本文代码地址:github.com/SmallStoneS…
