背景
一直以来进行了比较多的微信小程序开发... 总会接触到一些和官方组件或api相关或其无法解决的需求,于是决定在这里小小的整理一下自己的实现(次序不分先后)
自定义组件的使用
-
创建 右键新建
Component -
引用 在你需要引用的文件的
json中定义
"注释": "前面为组件名,后面为路径,这里仅供参考"

{
  "usingComponents": {
    "Menu": "../Components/Menu/Menu",
    "Loading": "../Components/Loading/Loading"
  }
}
- 传入属性
在组件的js中定义你需要的属性名,类型及默认值
properties: {
  theme: {
    type: String,
    value: 'gray'
  }
  ...
},
注意
properties为父组件要传入的数据,组件自身状态还是在data中
然后在wxml中引用即可
<Menu theme="{{theme}}"></Menu>
一键换肤
先创建一个color.wxss来存你的皮肤样式(文件名和位置随意)
/* 黑色主题 */
.bg-black{
  background-color: #363636;
}
.col-black-title{
  color: #ffffff;
}
.col-black-name{
  color: #c3c3c3;
}
class名中必须带一个标志来区分不同主题,推荐使用颜色的英文名..然后在app.wxss中引用
// ~ 为你的文件路径
@import '~/color.wxss';
之后在app.js的globalData中定义一个字段储存你当前主题
globalData: {
  themeArr: ['gray', 'black', 'green', 'orange', 'pink', 'blue'],
  theme: 'black' // gray, black, green, orange, pink, blue
}
然后在js里引用app.js,然后在onLoad里获取theme后setData即可,这里贴上代码
<Menu theme="{{theme}}"></Menu>
<block wx:for="{{themeArr}}" wx:key="{{index}}">
  <view
    class="theme-view-item bg-{{item}} select-{{item == theme}}"
    bindtap='changeTheme'
    data-theme="{{item}}"
  ></view>
</block>
.theme-view-item{
  width: 80rpx;
  height: 40rpx;
  margin: 20rpx;
  border-radius: 10rpx;
}
.select-true{
  transform: scale(1.2,1.2);
}
var app = getApp()

Page({

  data: {
    theme: '',
    themeArr: app.globalData.themeArr
  },

  onLoad: function (options) {
    this.setData({
      theme: app.globalData.theme
    })
  },

  changeTheme(e){
    var theme = e.currentTarget.dataset.theme
    app.globalData.theme = theme
    this.setData({
      theme: theme
    })
  }
})
来个效果图
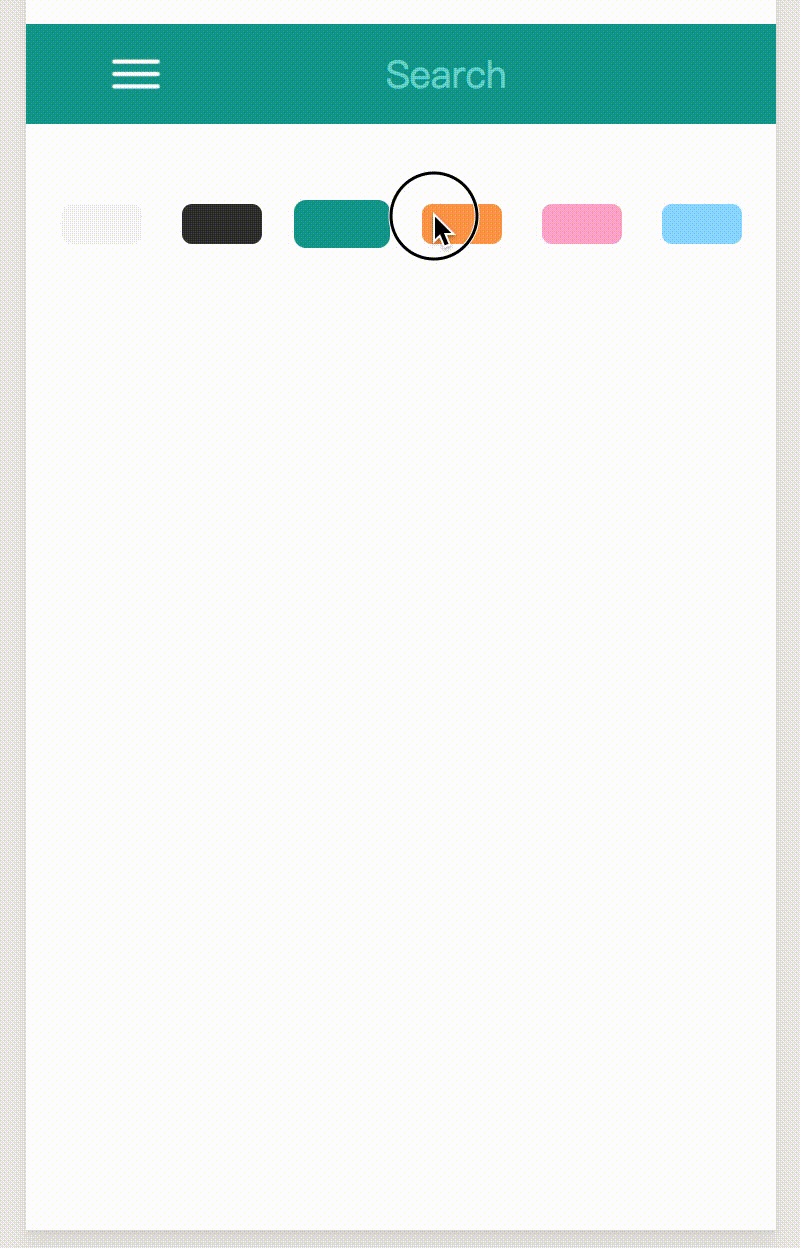
这里你也可以使用
storage来保存theme
加载更多
使用scroll-view
<scroll-view
  scroll-y
  bindscrolltolower='toLow'
  style="height: {{height}}px"
>
scroll-y允许纵向滚动,bindscrolltolower定义了滚动到底部时应该执行的函数,style中使用了js中获取的屏幕可用高度
使用
scroll-y需要指定scroll的高度
onLoad: function (options) {
  wx.getSystemInfo({
    success: (res) => {
      this.setData({
        height: res.windowHeight
      })
    }
  })
},
toLow(){
  this.setData({
    isLoading: true
  })
},
然后在scroll下面放你的loading组件就可以了..
<scroll-view
  scroll-y
  bindscrolltolower='toLow'
  style="height: {{height}}px"
>
  ......
  <view hidden="{{!isLoading}}">
    <Loading></Loading>
  </view>
</scroll-view>
下拉刷新
这个功能用到的都是官方的api,先在app.json中定义允许下拉刷新
"window": {
  ......
  "enablePullDownRefresh": true
}
然后在你的js文件中定义相应的函数
onPullDownRefresh: function () {
  ......
  wx.stopPullDownRefresh()
},
这个点可以看官方文档
自适应
rpx单位是微信小程序中css的尺寸单位,rpx可以根据屏幕宽度进行自适应,如在 iPhone6 上,屏幕宽度为375px,共有750个物理像素,则750rpx= 375px = 750物理像素,1rpx = 0.5px = 1物理像素
如果不懂的话不用考虑太多,在用
px的时候将其大小翻倍使用rpx即可
阻止事件冒泡
假设有如下结构
<view class='A' bindtap='funcA'>
  <view class='B' bindtap='funcB'></view>
</view>
我们在A,B上定义了两个独立的点击事件,懂得事件冒泡的童鞋会发现,如果点击B的话,不仅会执行funcB还会执行funcA,那么如何避免这个问题?
很简单,只需要将不需要冒泡的的绑定函数改成catchtap
<view class='A' bindtap='funcA'>
  <view class='B' catchtap='funcB'></view>
</view>
如何去掉Button的默认边框
微信小程序里button的边框其实是写在after里的,可以在after中进行更改
button::after{
  border: none;
}
或者更改button的position让其不为relative
button{
    position: static;
}
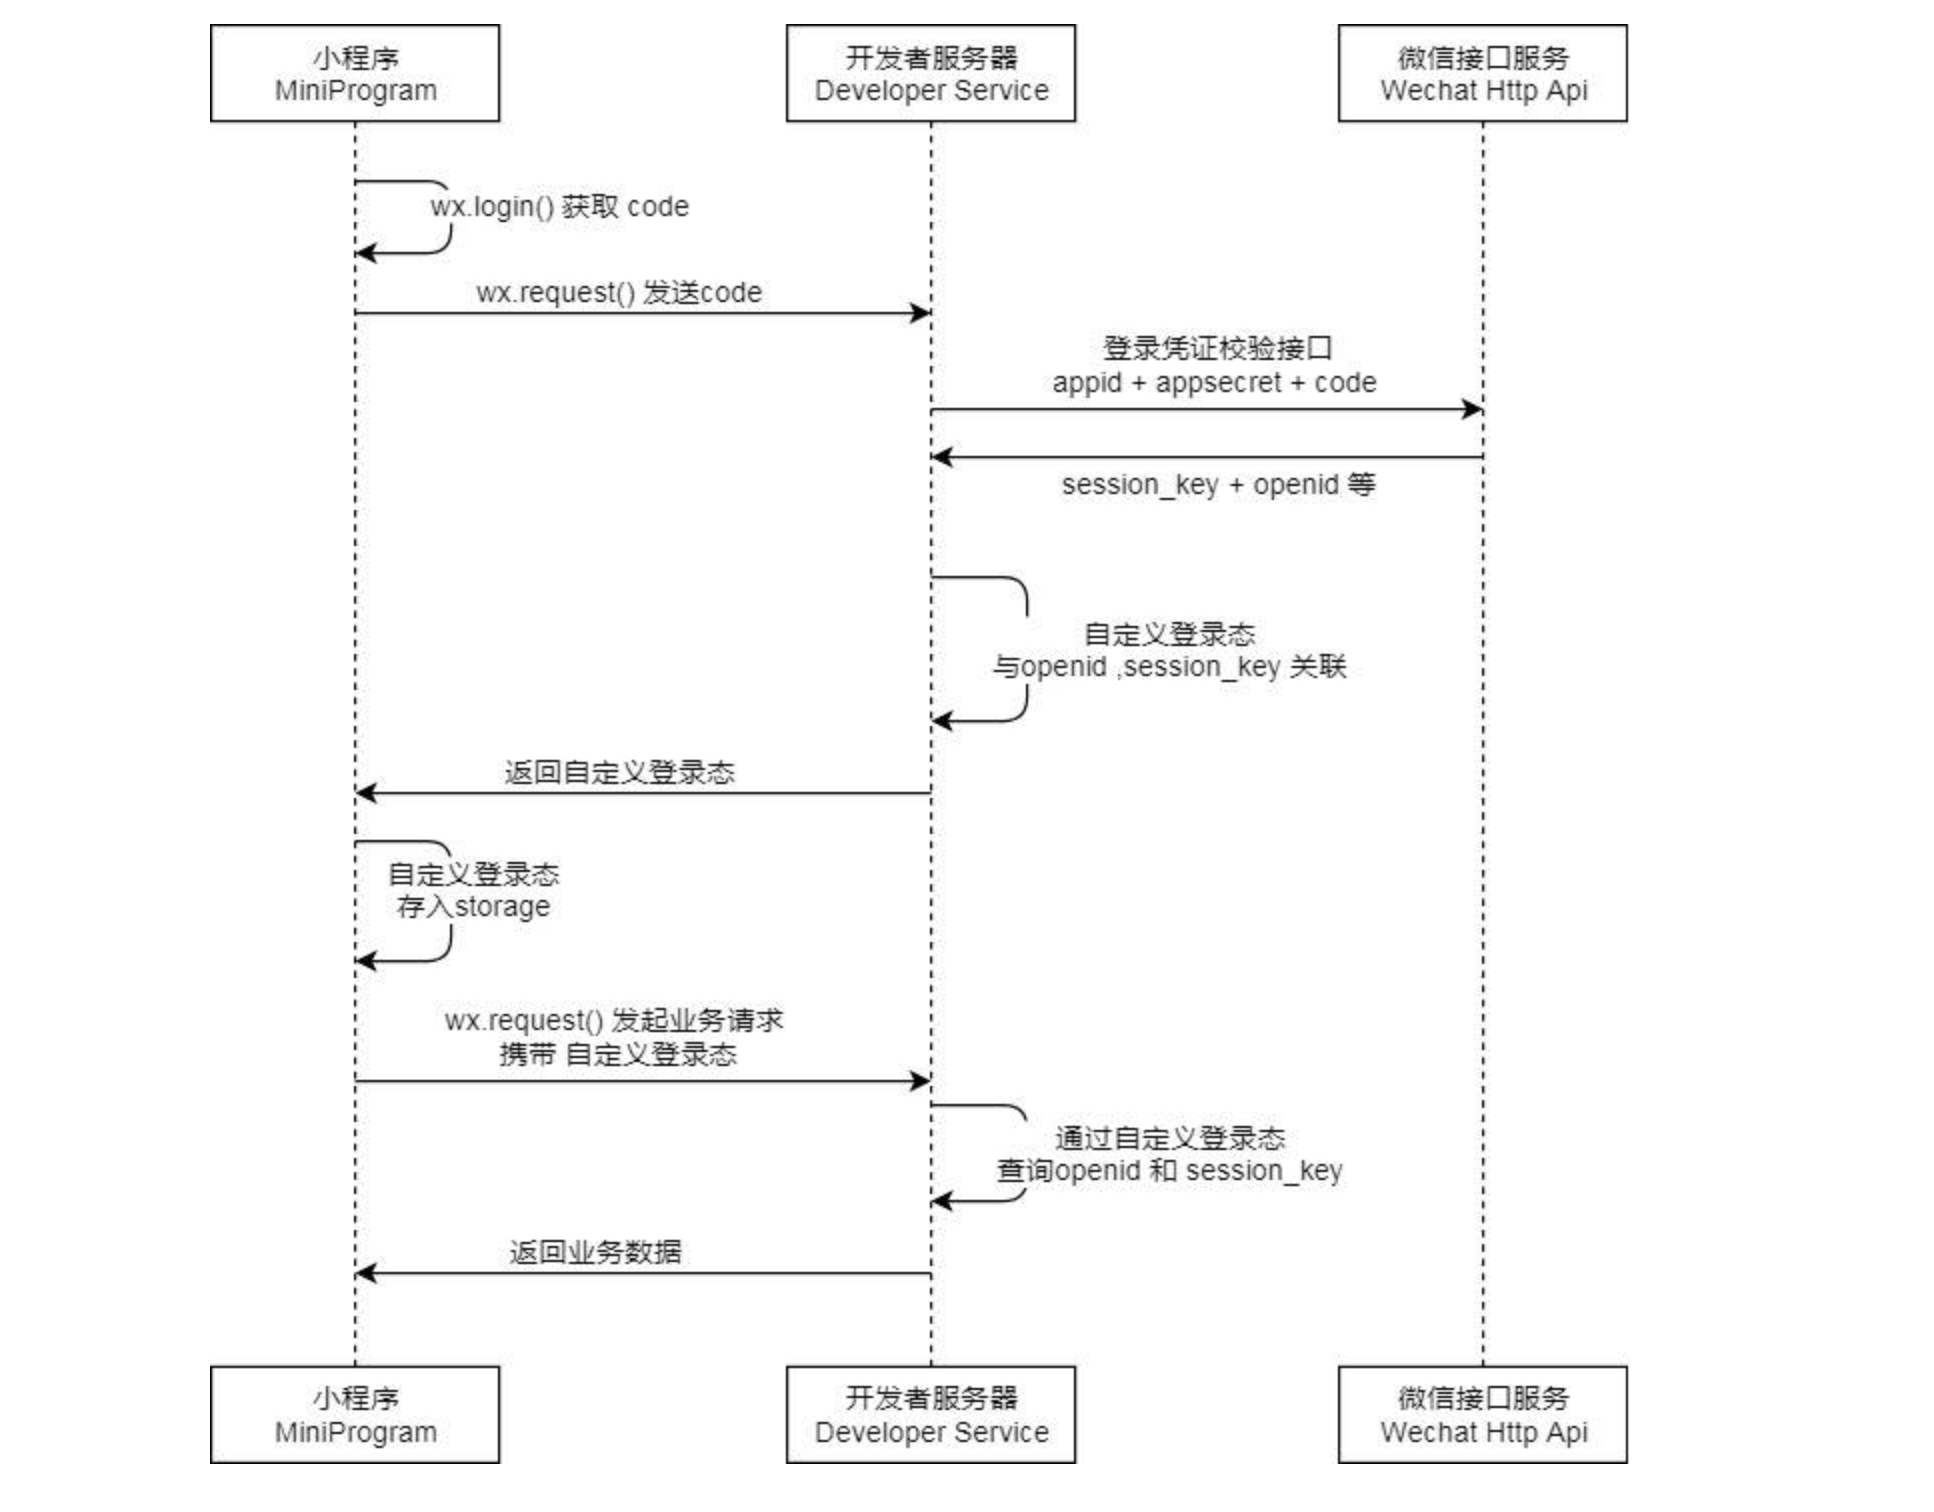
小程序登录接入流程
一张图