

文 / Google Cloud Platform 技术主管 Lak Lakshmanan (@lak_gcp)
来源 | TensorFlow 公众号
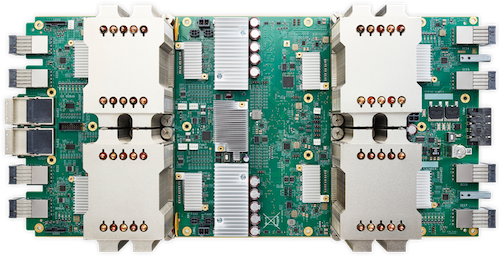
张量处理单元 (TPU) 可加速处理 Google 内各种机器学习工作负载,并可供 Google Cloud 客户使用。您可以在 Cloud TPU 参考模型存储区找到启用 TPU 的顶尖图像模型版本,例如 ResNet 和 AmoebaNet;您还可以使用强大的 Tensor2Tensor 库,在 TPU 上执行文本摘要和问答任务。这些教程会为您分步介绍如何使用当下很多最热门的 Cloud TPU 参考模型。
注:存储区链接 github.com/tensorflow/…
教程链接 cloud.google.com/tpu/docs/tu…
但如果您拥有自定义 TensorFlow 模型,又该如何做呢?在本文中,我会逐步介绍编写自定义估算器以便在 Cloud TPU 上运行的全过程。在此过程中,我会指出需要注意的地方和建议采用的最佳实践。您可以在 GitHub 上找到此解决方案的完整代码;本文仅列出相关代码片段。
注:解决方案的完整代码链接 github.com/GoogleCloud…
自定义 TensorFlow 估算器包含以模型函数传递的基类估算器:
1    def train_and_evaluate(output_dir, nsteps):
2        estimator = tf.estimator.Estimator(
3                            model_fn = model_fn,
4                            model_dir = output_dir)
模型函数会接收特征、标签和模式,并返回 EstimatorSpec。例如,图像分类问题的模型函数可能包含
1    def model_fn(features, labels, mode):
2        # write the model to compute predictions, loss, etc. from the model
3
4        return tf.estimator.EstimatorSpec(
5                    mode=mode,
6                    predictions={"probabilities": probabilities,
7                                         "classid": class_int, "class": class_str},
8                    loss=loss,
9                    train_op=train_op,
10                  eval_metric_ops=evalmetrics,
11                  export_outputs={'classes': tf.estimator.export.PredictOutput(
12                            {"probabilities": probabilities, "classid": class_int,
13                             "class": class_str})}
14            )
TensorFlow 中的 tf.contrib.tpu 包提供了包装器类,可助您以适当方式编写代码,以便在 CPU、GPU 和 Cloud TPU 上运行代码。下面我们就来看看如何以这种不受加速器限制的方式编写自定义估计器。
1.将输入数据转换为 TF 记录
Cloud TPU 的速度非常快,一不小心,您的训练就会变成以读写(“馈入” 和 “馈出”)数据和存储检查点为主。让 TPU 等待输入/输出会造成浪费,所以我们会做几件事以充分利用 TPU 用于计算的时间。
首先是避免在估算器的输入函数中进行数据解析和整理,而是预先将数据转换为 TF 记录。与单个图像文件相比,批量处理 TF 记录更为简单,因为记录本身包含标签,如此可以减少系统必须读取的小型文件数量。我使用 Apache Beam 进行这种转换。您可以在官方 TPU 存储区找到读取 JPEG 和编写 TF 记录的脚本。您可以在 Cloud Dataflow 上大规模地执行 Apache Beam 程序,但如果您的数据源目前不在 Google Cloud 上,则只能在大型 VM 上本地执行此程序(请务必用 pip 安装 apache-beam)。
注:JPEG 和编写 TF 记录链接 github.com/tensorflow/…
TF 记录是字典。对于图像分类,上述管道编写的两个条目很重要,分别是:“image/class/label”(采用 int64)和 “image/encoded”(由 JPEG 文件内容组成)。
2.编写输入函数以读取 TF 记录
与任何估算器一样,您需要编写输入函数,以读取这些 TF 记录。使用 Dataset API 可极大地简化此任务,但还需注意几个问题。在讲解过程中,我会指出这些问题。
以下是我的输入函数:
1    def make_input_fn(pattern, mode, num_cores=8, transpose_input=False):
2        def _set_shapes(batch_size, images, labels):
3            """Statically set the batch_size dimension."""
4                if transpose_input:
5                    images.set_shape(images.get_shape().merge_with(
6                        tf.TensorShape([None, None, None, batch_size])))
7                    labels.set_shape(labels.get_shape().merge_with(
6                        tf.TensorShape([batch_size])))
9                else:
10                    images.set_shape(images.get_shape().merge_with(
11                        tf.TensorShape([batch_size, None, None, None])))
12                    labels.set_shape(labels.get_shape().merge_with(
13                        tf.TensorShape([batch_size])))
14                return images, labels
15
16        def _input_fn(params):
17            batch_size = params['batch_size']
18            is_training = (mode == tf.estimator.ModeKeys.TRAIN)
19
20            # read the dataset
21            dataset = tf.data.Dataset.list_files(pattern, shuffle=is_training)
22            if is_training:
23                dataset = dataset.repeat()
24            def fetch_dataset(filename):
25                buffer_size = 8 * 1024 * 1024 # 8 MiB per file
26                dataset = tf.data.TFRecordDataset(filename, buffer_size=buffer_size)
27                return dataset
28            dataset = dataset.apply(
29                tf.contrib.data.parallel_interleave(
30                    fetch_dataset, cycle_length=64, sloppy=True))
31            dataset = dataset.shuffle(1024)
32
33            # augment and batch
34            dataset = dataset.apply(
35                tf.contrib.data.map_and_batch(
36                    read_and_preprocess, batch_size=batch_size,
37                    num_parallel_batches=num_cores, drop_remainder=True
38                ))
39
40           if transpose_input:
41               dataset = dataset.map(
42                   lambda images, labels: (tf.transpose(images, [1, 2, 3, 0]), labels),
43                   num_parallel_calls=num_cores)
44
45            # assign static shape
46            dataset = dataset.map(
47                functools.partial(_set_shapes, batch_size)
48            )
49
50            # prefetch data while training
51            dataset = dataset.prefetch(tf.contrib.data.AUTOTUNE)
52            return dataset
53
54        return _input_fn
请注意,输入函数采用 params 参数。实际上,这将是传递至训练程序的命令行参数,如此一来,我们便可提取有关数据集的详情,例如训练次数和评估图像。
batch_size 很特别,因为 TPU 有多个核心,而 batch_size 由 TPU 估算器设置,且为有效批次大小。您必须完全返回 batch_size 记录,而不能返回部分填充的批次。由于您会无限期地循环使用训练数据,所以在训练期间不会出现此问题。但这意味着最简单的做法是将评估数据集向下舍入为核心数的倍数。如果核心数为 8,而评估数据集中有 1026 张图像,您只能使用前 1024 张图像进行评估。剩余的 2 张图像则会舍弃。(我们也有方法在 Cloud TPU 中处理最后剩下的部分批次,我就不在此赘述。)
与任何分布式训练一样,您应确保每个工作器看到不同的数据子集,这是由所有文件的并行交错及缓冲区本身内部的记录重排进行处理。
图像分类问题的一个常见需求是通过添加随机裁剪及翻转等方法来增强原始数据。我通过 read_and_preprocess 函数做到这一点。请注意,我将此函数应用于各个 TF 记录并创建了 8 个并行批次,同时舍弃剩余的任何记录(再次提醒,这在训练期间不会造成任何影响,因为您会无限期重复进行训练)。
接下来是转置数据。事实证明,在 TPU 中转置数据以保持批次大小可以极大地提高性能。因此,我们可以根据需要采取此做法。如果我们在 GPU 或 CPU 上运行程序,则 transpose_input 标记会变为 false。
TPU 需要静态大小的张量。尽管我们已确保维持这种情况(通过舍弃剩余的批次),但仍需为核心 TensorFlow 编写 Dataset API,这是更常见的做法。因此,我们调用一个函数,将数据集中的 batch_size 从 None 改为 batch_size。
最后的优化操作至关重要。我们需要预取数据。换句话说,当 TPU 处理一批记录时,我们会通过 I/O 线程寻找并提取下一批次。如此一来,我们便可最大限度地利用 TPU(或 GPU),而且这对 CPU 没有任何影响。
3.处理 TF 记录
(上述)输入函数会设置处理输入内容的方式,但实际的解析操作还需由名为 read_and_preprocess() 的方法执行。此方法如下所示:
1    def read_and_preprocess(example_data):
2            parsed = tf.parse_single_example(example_data, {
3                'image/encoded': tf.FixedLenFeature((), tf.string, ''),
4                'image/class/label': tf.FixedLenFeature([], tf.int64, 1),
5            })
6            image_bytes = tf.reshape(parsed['image/encoded'], shape=[])
7            label = tf.cast(
8                tf.reshape(parsed['image/class/label'], shape=[]), dtype=tf.int32) - 1
9
10            # end up with pixel values that are in the -1, 1 range
11            image = tf.image.decode_jpeg(image_bytes, channels=NUM_CHANNELS)
12            image = tf.image.convert_image_dtype(image, dtype=tf.float32) # 0-1
13            image = tf.expand_dims(image, 0) # resize_bilinear needs batches
14
15            image = tf.image.resize_bilinear(
16                image, [HEIGHT + 10, WIDTH + 10], align_corners=False)
17            image = tf.squeeze(image)  # remove batch dimension
18            image = tf.random_crop(image, [HEIGHT, WIDTH, NUM_CHANNELS])
19            image = tf.image.random_flip_left_right(image)
20            image = tf.image.random_brightness(image, max_delta=63.0 / 255.0)
21            image = tf.image.random_contrast(image, lower=0.2, upper=1.8)
22
23
24            #pixel values are in range [0,1], convert to [-1,1]
25            image = tf.subtract(image, 0.5)
26            image = tf.multiply(image, 2.0)
27            return image, label
这里有两个重要的注意事项。第一是使用 parse_single_example,因为我们是从 map() 调用此函数,所以会针对单个 TF 记录调用。我们从记录中提取相关信息(经过编码的图像和标签),然后将其用于构建必要的张量。第二个注意事项是,这些数据必须为数值。比如,我无法传回标签字符串,因为 TPU 只能处理数值型数据。我们需要在预处理管道中计算标签索引,标签此时只会是整数。
4.提供输入函数
训练模型之后,您需要部署此模型,并通过 TF Serving 提供。以下代码与您使用任何其他估算器时要用到的代码相同:
1    def serving_input_fn():
2            # Note: only handles one image at a time
3            feature_placeholders = {'image_bytes':
4                                                    tf.placeholder(tf.string, shape=())}
5            image, _ = read_and_preprocess(
6                    tf.squeeze(feature_placeholders['image_bytes']))
7            features = {
8                'image': tf.expand_dims(image, 0)
9            }
10          return tf.estimator.export.ServingInputReceiver(features, feature_placeholders)
TPU 已针对批次推理进行优化;如果您的用例需要在线预测,目前最好是通过 CPU 或 GPU 提供(根据批次大小和模型复杂程度而定)。编写输入函数时,我假定自己只传送一张图像,所以实际上是指通过 CPU/GPU 提供。
5.模型函数
模型函数需要创建并返回 TPUEstimatorSpec。实现方式如下所示:
1    def image_classifier(features, labels, mode, params):
2        image = features
3        if isinstance(features, dict):
4            image = features['image']
5
6        ylogits, nclasses = cnn_model(image, mode, params)
7
8        probabilities = tf.nn.softmax(ylogits)
9        class_int = tf.cast(tf.argmax(probabilities, 1), tf.int32)
10      class_str = tf.gather(LIST_OF_LABELS, class_int)
11
12      if mode == tf.estimator.ModeKeys.TRAIN or mode == tf.estimator.ModeKeys.EVAL:
13            loss = tf.reduce_mean(tf.nn.softmax_cross_entropy_with_logits_v2(
14                logits=ylogits, labels=tf.one_hot(labels, nclasses)))
15
16            def metric_fn(class_int, labels):
17                return {'accuracy': tf.metrics.accuracy(class_int, labels)}
18            evalmetrics = (metric_fn, [class_int, labels])
19
20            if mode == tf.estimator.ModeKeys.TRAIN:
21                # this is needed for batch normalization, but has no effect otherwise
22                update_ops = tf.get_collection(tf.GraphKeys.UPDATE_OPS)
23                optimizer = tf.train.AdamOptimizer(learning_rate=params['learning_rate'])
24                if params['use_tpu']:
25                    optimizer = tf.contrib.tpu.CrossShardOptimizer(optimizer) # TPU change 1
26                with tf.control_dependencies(update_ops):
27                    train_op = optimizer.minimize(loss, tf.train.get_global_step())
28            else:
29                train_op = None
30        else:
31            loss = None
32            train_op = None
33            evalmetrics = None
34
35        return tf.contrib.tpu.TPUEstimatorSpec(  # TPU change 2
36                    mode=mode,
37                    predictions={"probabilities": probabilities,
38                                        "classid": class_int, "class": class_str},
39                    loss=loss,
40                    train_op=train_op,
41                    eval_metrics=evalmetrics,
42                    export_outputs={'classes': tf.estimator.export.PredictOutput(
43                            {"probabilities": probabilities, "classid": class_int,
44                              "class": class_str})}
45        )
所传入的特征可能会是图像(我的训练和评估输入函数)或字典(我的提供输入函数)。我进行检查并从特征中检索图像。
然后,我在图像上调用实际模型数学函数。这应该是使用 tf.layers 的常见 TensorFlow 代码。请浏览完整的源代码以了解其形式。
由于这是分类问题,所以我使用 softmax 并根据各个类别的 logit 计算整数标签和字符串标签,之后使用了 argmax 和 gather。我还计算了交叉熵损失,这与任何其他估算器类似。
其中一个区别在于,一般的估算器需要将评估指标用作字典,而 TPUEstimator 需要能够在控制 CPU 或 TPU 上调用的函数。因此,指定 eval 指标的方式稍有不同。
如果您使用 TPU,则所用的优化器必须包装在 CrossShardOptimizer 中。这样可以在不同核心中分配优化任务。
训练操作就是将此交叉碎片优化损失最小化。请使用 optimizer.minimize(),而非 layers.optimize_loss()。
将上述所有操作整合在一起后,系统会返回 TPU 估算器规范。
6.训练和评估循环
您可能很熟悉估算器的 train_and_evaluate 循环。可惜此循环(尚)无法与 TPU 有效配合使用。幸运的是,创建您自己的循环并不太难,这让您可以更好地控制检查频率和内容(回想这样的情景,您想尽可能减少过于频繁的检查导致的环境切换和 I/O 开销)。
1    def train_and_evaluate(output_dir, hparams):
2        STEPS_PER_EVAL = 1000
3        max_steps = hparams['train_steps']
4        eval_batch_size = min(1024, hparams['num_eval_images'])
5        eval_batch_size = eval_batch_size - eval_batch_size % 8  # divisible by num_cores
6        tf.logging.info('train_batch_size=%d  eval_batch_size=%d  max_steps=%d',
7                                hparams['train_batch_size'],
8                                eval_batch_size,
9                                max_steps)
10
11        # TPU change 3
12        if hparams['use_tpu']:
13            tpu_cluster_resolver = tf.contrib.cluster_resolver.TPUClusterResolver(
14                hparams['tpu'],
15                zone=hparams['tpu_zone'],
16                project=hparams['project'])
17            config = tf.contrib.tpu.RunConfig(
18                cluster=tpu_cluster_resolver,
19                model_dir=output_dir,
20                save_checkpoints_steps=STEPS_PER_EVAL,
21                tpu_config=tf.contrib.tpu.TPUConfig(
22                    iterations_per_loop=STEPS_PER_EVAL,
23                    per_host_input_for_training=True))
24        else:
25            config = tf.contrib.tpu.RunConfig()
26
27        estimator = tf.contrib.tpu.TPUEstimator(  # TPU change 4
28            model_fn=image_classifier,
29            config=config,
30            params=hparams,
31            model_dir=output_dir,
32            train_batch_size=hparams['train_batch_size'],
33            eval_batch_size=eval_batch_size,
34            use_tpu=hparams['use_tpu']
35        )
首先,提取一些命令行参数,并用其指定最大步数以及训练和评估的批次大小。
接下来是寻找 TPU。如果您已在 Google 计算引擎上自行创建了 Cloud TPU,可能已为其命名。假设此名称(“tpu”)作为命令行参数传入。如果您使用 Cloud ML Engine,系统会自动推断 TPU 名称和区域等内容。请务必仅在已设置 use_tpu 标记的情况下执行此操作。如果用户是在 CPU 或 GPU 上运行程序,则只需创建空白 RunConfig。
接下来,使用模型函数、配置、参数和批次大小创建 TPUEstimator。创建估算器后,我们便可进入真实训练和评估循环:
1        # load last checkpoint and start from there
2        current_step = load_global_step_from_checkpoint_dir(output_dir)
3        steps_per_epoch = hparams['num_train_images'] // hparams['train_batch_size']
4        tf.logging.info('Training for %d steps (%.2f epochs in total). Current'
5                               ' step %d.',
6                               max_steps,
7                               max_steps / steps_per_epoch,
8                               current_step)
9
10        start_timestamp = time.time()  # This time will include compilation time
11
12        while current_step < hparams['train_steps']:
13            # Train for up to steps_per_eval number of steps.
14            # At the end of training, a checkpoint will be written to --model_dir.
15            next_checkpoint = min(current_step + STEPS_PER_EVAL, max_steps)
16            estimator.train(input_fn=train_input_fn, max_steps=next_checkpoint)
17            current_step = next_checkpoint
18            tf.logging.info('Finished training up to step %d. Elapsed seconds %d.',
19                                    next_checkpoint, int(time.time() - start_timestamp))
20
21            # Evaluate the model on the most recent model in --model_dir.
22            # Since evaluation happens in batches of --eval_batch_size, some images
23            # may be excluded modulo the batch size. As long as the batch size is
24            # consistent, the evaluated images are also consistent.
25            tf.logging.info('Starting to evaluate at step %d', next_checkpoint)
26            eval_results = estimator.evaluate(
27                input_fn=eval_input_fn,
28                steps=hparams['num_eval_images'] // eval_batch_size)
29            tf.logging.info('Eval results at step %d: %s', next_checkpoint, eval_results)
30
31        elapsed_time = int(time.time() - start_timestamp)
32        tf.logging.info('Finished training up to step %d. Elapsed seconds %d.',
33                                max_steps, elapsed_time)
TensorFlow 估算器的运作方式是从先前已有的检查点执行暖启动。我们可以加载输出目录中提供的检查点,以进行复制。然后,我们会一次性逐步完成训练数据 train_batch_size 步骤,直至达到所指定的最大步数。
在本文的例子中,我对完整评估数据集中的每个检查点都进行了评估,但显然,您可以减少此训练的计算量。
7.导出模型以供使用
最后,在完成训练后,我导出已保存的模型。您可以使用 TF Serving 或 Cloud ML Engine 来部署已保存的模型,以进行预测。
1        # export similar to Cloud ML Engine / TF Serving convention
2        tf.logging.info('Starting to export model.')
3        estimator.export_savedmodel(
4            export_dir_base=os.path.join(output_dir, 'export/exporter'),
5            serving_input_receiver_fn=serving_input_fn)
此时,我们便有了一个可以在 Cloud TPU 上训练的自定义估算器模型。采用这种方式编写模型(例如使用 use_tpu 标记并提供转置为可选项),同样的代码也支持各种不同的硬件,包括 CPU 和 GPU 在内。因此,我们的估算器模型实际可用于全部的三类硬件。
后续步骤:
从 GitHub 下载本文随附的代码,然后进行试用 运行代码实验室,了解如何在 TPU 上运行 ResNet 训练您自己的数据(无需编写任何代码)
注:代码链接 github.com/GoogleCloud…
在 TPU 上运行 ResNet 链接 codelabs.developers.google.com/codelabs/tp…
在 Coursera 上参加使用 TensorFlow 进行机器学习专业课程;此课程会逐步介绍 TensorFlow 概念,以及如何在 Google Cloud 上大规模地训练、调整和部署 ML 模型。
注:使用 TensorFlow 进行机器学习链接 www.coursera.org/specializat…
