前言
Gatling
Gatling是一款功能强大的负载测试工具,它为易于使用,高可维护性和高性能而设计。
开箱即用,Gatling由于对HTTP协议的出色支持,使其成为负载测试任何HTTP服务器的首选工具。由于核心引擎实际上是协议不可知的,因此完全可以实现对其他协议的支持。例如,Gatling目前还提供JMS支持。
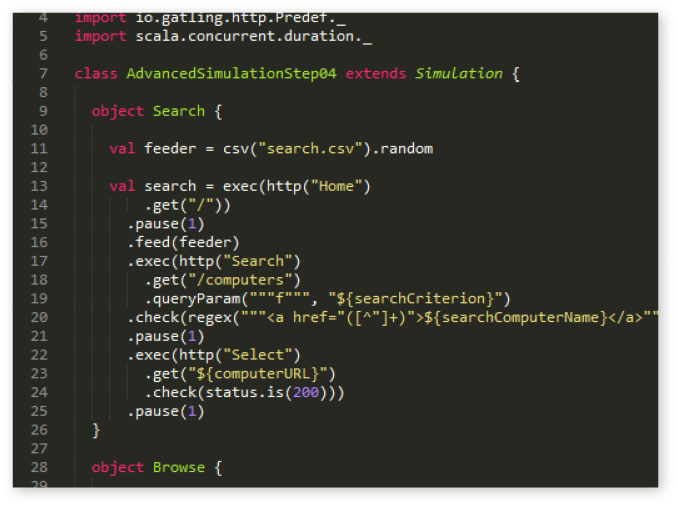
代码自定义并且场景资源有效是Gatling的两个基础。并且拥有富有表现力的DSL,自我解释的场景,易于维护,可以保存在版本控制系统中的优点。
只要底层协议(如HTTP)可以以非阻塞方式实现,Gatling的体系结构就是异步的。这种架构允许我们将虚拟用户实现为消息而不是专用线程,这使得硬件要求不需要很苛刻。因此,运行数千个并发虚拟用户不是问题。
使用理由
- 避免崩溃:Gatling可以帮助您预测缓慢的响应时间和奔溃。
- 缩短产品上市时间:Gatling 在开发周期的早期检测到性能问题和错误
- 增强用户体验:Gatling可以准确描述您最慢的用户体验
- 提升您的业务:加特林可以防止您的业务成为自身成功的牺牲品
性能测试
性能测试是什么意思?
Web应用程序的性能测试包括:
- 模拟大量具有复杂行为的用户;
- 收集和汇总所有请求的响应时间;
- 创建报告和分析数据;

编写测试场景,自动化测试
Gatling的类似代码的脚本使您可以轻松维护测试场景,并在持续交付管道中轻松实现自动化。
我们开发了自己的领域特定语言(DSL),以便让每个人都能轻松阅读您的场景。

分析并调查您的应用程序的瓶颈
Gatling是一个功能强大的工具:只需几台计算机,您就可以 在Web应用程序上模拟每秒数十万个请求,并获得高精度指标。
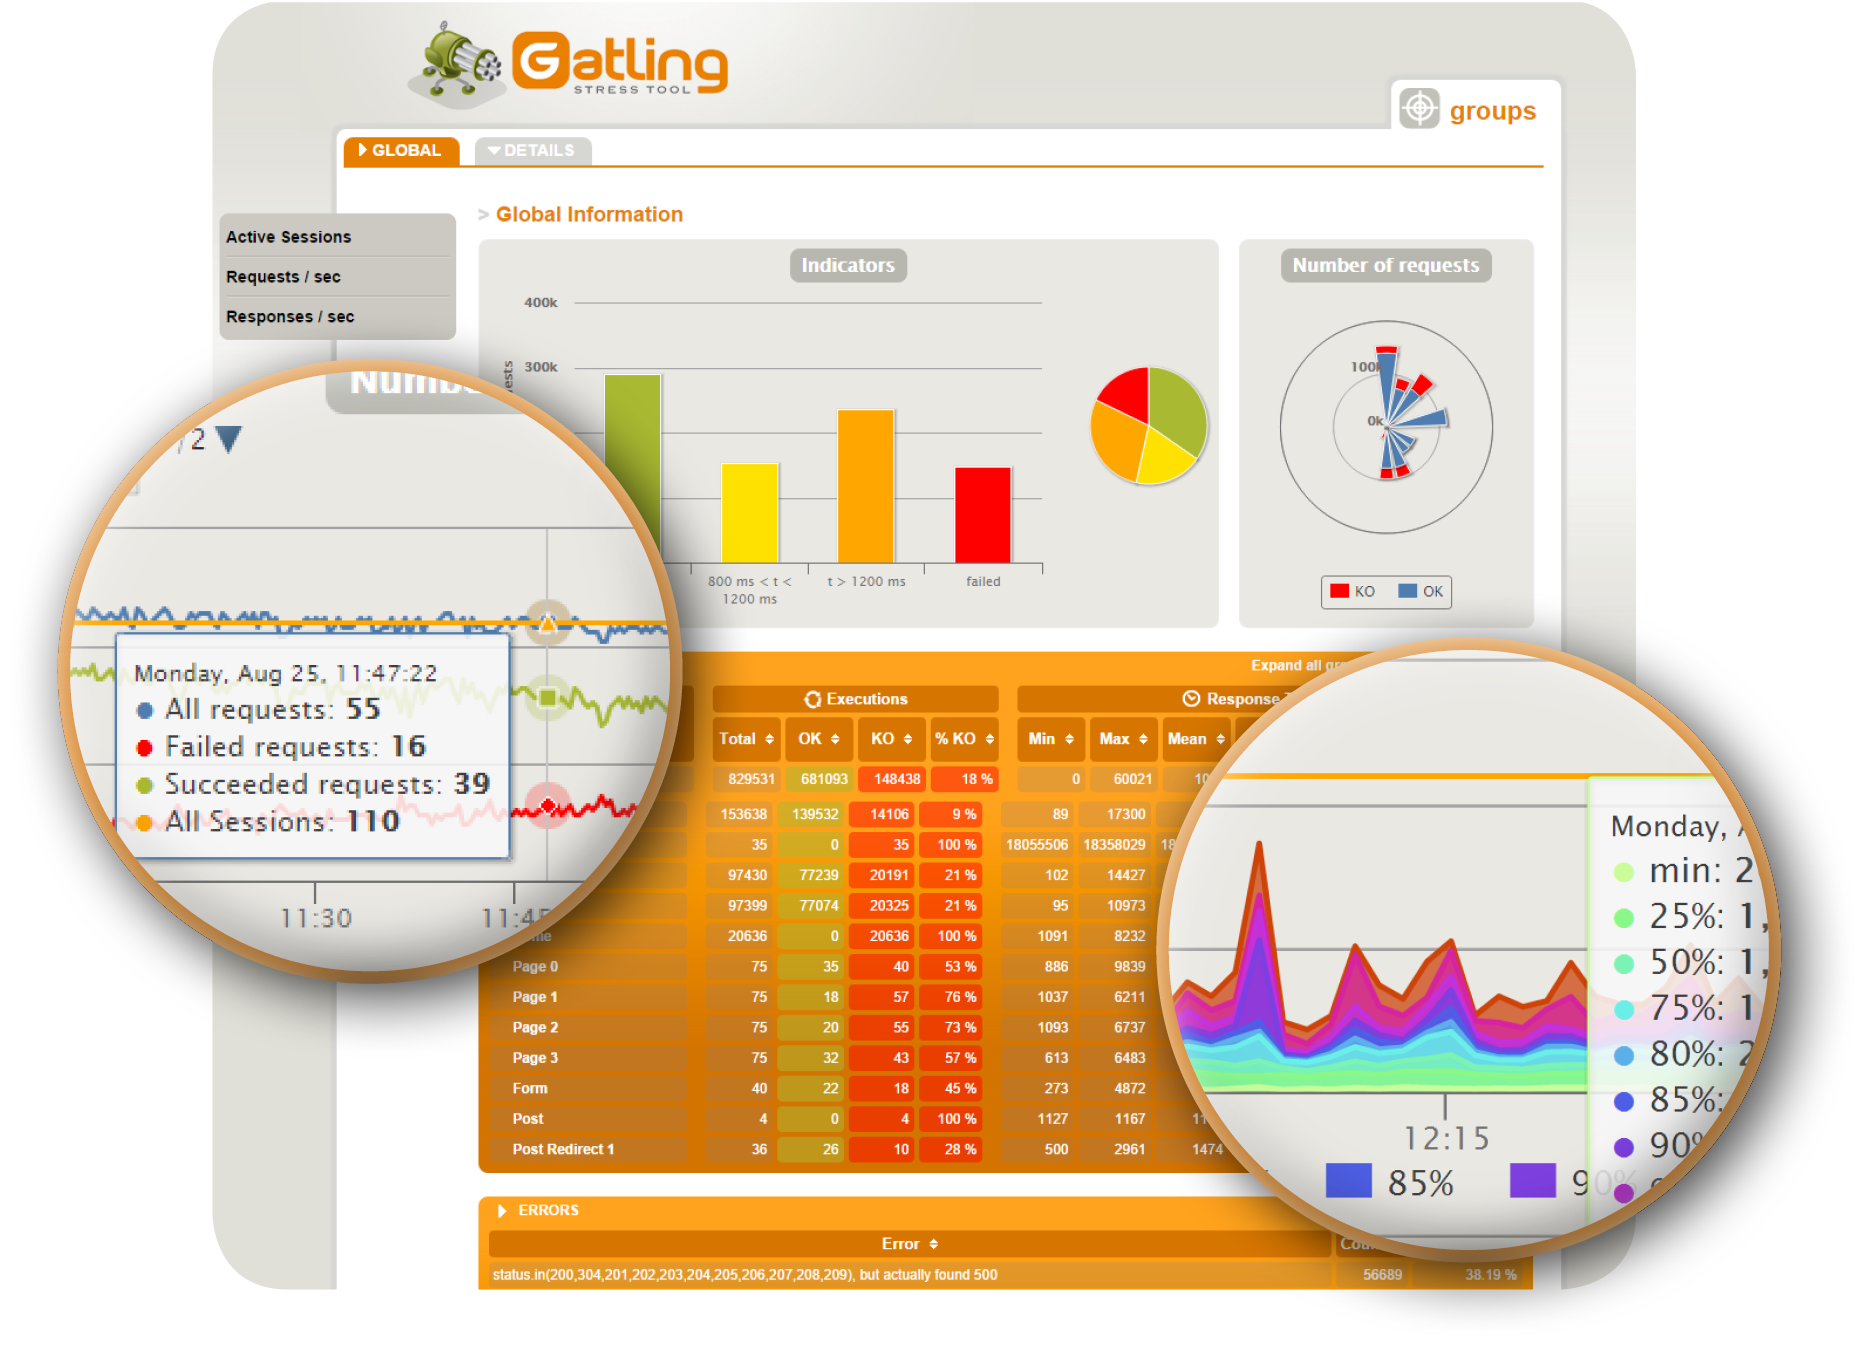
在测试结束时,Gatling会自动生成详尽,动态且丰富多彩的报告。
平均值和平均数据是不够的:使用Gatling,您可以得到适当的响应时间百分位数**。**不要让最慢的用户落后!

安装
准备工作
Java版本
Gatling主要针对Oracle提供的JDK8软件包进行测试。Gatling需要JDK8(因此不支持JDK9 atm)。Gatling应该适用于任何JDK8更新,但我们建议您使用最新版本。
IPv4 vs IPv6
发现IPv6(默认情况下在Java上启用)有时会导致一些性能问题,因此启动脚本会使用以下选项禁用它:
-Djava.net.preferIPv4Stack=true
-Djava.net.preferIPv6Addresses=false
如果您确实需要优先选择IPv6,请编辑启动脚本。
操作系统调整
以下说明摘自伟大的Riak文档。 有关更多详细信息或OS X的说明,请参阅“ 打开文件限制” 和“ 内核和网络调整”部分。
在正常操作期间,Gatling会消耗大量的打开文件句柄。通常,操作系统会限制此数量,因此您可能必须在所选操作系统中调整一些选项,以便可以打开许多新套接字并实现高负载。
打开文件限制
大多数操作系统都可以使用该命令更改打开文件限制。例:ulimit -n
$ ulimit -n 65536
但是,这只会更改当前shell会话的限制。在系统范围内,永久性地更改限制因系统而异。
要为系统的所有用户永久设置软值和硬值*,*以允许最多65536个打开文件; 编辑/etc/security/limits.conf并附加以下两行:
*       soft    nofile  65535
*       hard    nofile  65535
保存文件。启动新会话以使限制生效。您现在可以验证是否正确设置了限制。ulimit -a
对于Debian和Ubuntu,您应该启用PAM用户限制。为此,请添加:session required pam_limits.so
/etc/pam.d/common-session/etc/pam.d/common-session-noninteractive如果文件存在/etc/pam.d/sshd如果您通过SSH访问该计算机
另外,如果访问通过SSH的机器,一定要具有在UseLogin yes``/etc/ssh/sshd_config
要进行更多调整,您可能需要执行以下操作:
# more ports for testing
sudo sysctl -w net.ipv4.ip_local_port_range="1025 65535"

# increase the maximum number of possible open file descriptors:
echo 300000 | sudo tee /proc/sys/fs/nr_open
echo 300000 | sudo tee /proc/sys/fs/file-max
内核和网络调优
考虑调整内核和网络,并在/etc/sysctl.conf中添加以下这些设置:
net.ipv4.tcp_max_syn_backlog = 40000
net.core.somaxconn = 40000
net.core.wmem_default = 8388608
net.core.rmem_default = 8388608
net.ipv4.tcp_sack = 1
net.ipv4.tcp_window_scaling = 1
net.ipv4.tcp_fin_timeout = 15
net.ipv4.tcp_keepalive_intvl = 30
net.ipv4.tcp_tw_reuse = 1
net.ipv4.tcp_moderate_rcvbuf = 1
net.core.rmem_max = 134217728
net.core.wmem_max = 134217728
net.ipv4.tcp_mem  = 134217728 134217728 134217728
net.ipv4.tcp_rmem = 4096 277750 134217728
net.ipv4.tcp_wmem = 4096 277750 134217728
net.core.netdev_max_backlog = 300000
离线下载
您可以离线下载Gatling。然后,您只需要一个文本编辑器(Scala语法高亮)来编辑模拟,您就可以从命令行启动Gatling。
查看我们的下载页面以获取下载链接。
将下载的包解压缩到您选择的文件夹中。使用bin目录中的脚本启动Gatling和Recorder。
Windows用户:我们建议您不要将Gatling放在“ Programs”文件夹中,因为可能存在权限和路径问题。
要运行Gatling,您需要安装JDK。加特林至少需要JDK8。然后,我们建议您使用最新版本。
-
Gatling启动脚本和Gatling maven插件会在
JAVA_HOMEenv var中设置它。与OSX一样,操作系统有自己的棘手方法来发现要运行的Java版本,因此最终可能会运行与您告诉您的版本不同的版本。如果您遇到奇怪的错误,并且您希望运行JDK8,则可能需要明确设置
JAVA_HOME。java -version``Unsupported major.minor version 51.0
使用构建工具
Maven
Gatling提供了一个名为gatling-maven-plugin的官方maven 插件。这个插件允许您编译Scala代码并启动Gatling模拟。
有了这个插件,Gatling可以在构建项目时启动,例如使用您最喜欢的CI解决方案。
Versions
查看Maven Central上的可用版本。
请注意,OSS用户未记录里程碑(M版本),仅针对专业版客户发布。
Setup
在你的pom.xml,添加:
<dependencies>
  <dependency>
    <groupId>io.gatling.highcharts</groupId>
    <artifactId>gatling-charts-highcharts</artifactId>
    <version>MANUALLY_REPLACE_WITH_LATEST_VERSION</version>
    <scope>test</scope>
  </dependency>
</dependencies>

<plugin>
  <groupId>io.gatling</groupId>
  <artifactId>gatling-maven-plugin</artifactId>
  <version>MANUALLY_REPLACE_WITH_LATEST_VERSION</version>
</plugin>
演示样本
您可以在Gatling的Github组织中找到gatling-sbt-plugin-demo的示例项目。
您还可以使用gatling-highcharts-maven-archetype来引导项目。
Usage
您可以直接启动gatling-maven-plugin,其test目标是:
mvn gatling:test
它默认绑定到integration-test阶段。
Configuration
下面的例子显示了默认值(所以不要指定你没有覆盖的选项!!!):
<configuration>
  <simulationClass>foo.Bar</simulationClass>                               <!-- the name of the single Simulation class to run -->
  <runMultipleSimulations>false</runMultipleSimulations>                   <!-- if the plugin should run multiple simulations sequentially -->
  <includes>                                                               <!-- include filters, see dedicated section below -->
    <include></include>
  </includes>
  <excludes>                                                               <!-- exclude filters, see dedicated section below -->
    <exclude></exclude>
  </excludes>
  <noReports>false</noReports>                                             <!-- to disable generating HTML reports -->
  <reportsOnly></reportsOnly>                                              <!-- to only trigger generating HTML reports from the log file contained in folder parameter -->
  <runDescription>This-is-the-run-description</runDescription>             <!-- short text that will be displayed in the HTML reports -->
  <skip>false</skip>                                                       <!-- skip executing this plugin -->
  <failOnError>true</failOnError>                                          <!-- report failure in case of assertion failure, typically to fail CI pipeline -->
  <continueOnAssertionFailure>false</continueOnAssertionFailure>           <!-- keep on executing multiple simulations even if one fails -->
  <useOldJenkinsJUnitSupport>false</useOldJenkinsJUnitSupport>             <!-- report results to Jenkins JUnit support (workaround until we manage to get Gatling support into Jenkins) -->
  <jvmArgs>
    <jvmArg>-DmyExtraParam=foo</jvmArg>                                    <!-- pass extra parameters to the Gatling JVM -->
  </jvmArgs>
  <overrideJvmArgs>false</overrideJvmArgs>                                 <!-- if above option should override the defaults instead of replacing them -->
  <propagateSystemProperties>true</propagateSystemProperties>              <!-- if System properties from the maven JVM should be propagated to the Gatling forked one -->
  <compilerJvmArgs>
    <compilerJvmArg>-DmyExtraParam=foo</compilerJvmArg>                    <!-- pass extra parameters to the Compiler JVM -->
  </compilerJvmArgs>
  <overrideCompilerJvmArgs>false</overrideCompilerJvmArgs>                 <!-- if above option should override the defaults instead of replacing them -->
  <extraScalacOptions>                                                     <!-- extra options to be passed to scalac -->
    <extraScalacOption></extraScalacOption>
  </extraScalacOptions>
  <disableCompiler>false</disableCompiler>                                 <!-- if compiler should be disabled, typically because another plugin has already compiled sources -->
  <simulationsFolder>${project.basedir}/src/test/scala</simulationsFolder> <!-- where the simulations to be compiled are located -->
  <resourcesFolder>${project.basedir}/src/test/resources</resourcesFolder> <!-- where the test resources are located -->
  <resultsFolder>${project.basedir}/target/gatling</resultsFolder>         <!-- where the simulation log and the HTML reports will be generated -->
</configuration>
包含/排除过滤器
运行多个模拟时,您可以使用includes和excludes过滤器控制哪些模拟将被触发。那些使用ant模式语法并与类名匹配。另请注意,这些过滤器仅适用于从设置插件的项目中的源编译的类。
<configuration>
  <!--   ...  -->
  <runMultipleSimulations>true</runMultipleSimulations>
  <includes>
    <include>my.package.*</include>
  </includes>
  <excludes>
    <exclude>my.package.IgnoredSimulation</exclude>
  </excludes>
</configuration>
注意:过滤器的顺序对执行顺序没有影响,模拟将按字母顺序按类名排序。
禁用编译器
默认情况下,gatling-maven-plugin负责编译Scala代码,因此您可以直接运行。mvn gatling:execute
然后,由于某种原因,你可能想要另一个插件,如scala-maven-plugin 或scalor-maven-plugin,负责编译。然后,您可以禁用Gatling编译器,这样就不会编译两次:
<configuration>
  <disableCompiler>true</disableCompiler>
</configuration>
覆盖logback.xml文件
您可以logback-test.xml拥有优先于嵌入logback.xml文件的优先级,也可以添加JVM选项-Dlogback.configurationFile=myFilePath。
使用IDE
您可以使用任何Scala语法高亮的文本编辑器编辑Simulation类。但如果您是开发人员,您很可能希望将自己喜欢的IDE与Gatling一起使用。
Gatling正式支持IntelliJ IDEA和eclipse。
IntelliJ IDEA
您需要安装社区版中提供的Scala插件。然后,您就可以使用Scala源直接导入常规maven或sbt项目。
Eclipse
您必须安装ScalaIDE,最好是最新版本,甚至是里程碑。
遗憾的是,截至今天,ScalaIDE仅适用于Eclipse 4.7(Oxygen),并且与更现代的版本不兼容。
请注意,Eclipse 4.7不支持Java 9+,因此如果您的计算机上安装了多个Java,则可能必须强制使用JVM eclipse.ini,例如:
-vm
/Library/Java/JavaVirtualMachines/jdk1.8.0_162.jdk/Contents/Home/bin/java
SBT
如果你正在使用sbt,你可以使用sbteclipse来生成eclipse项目配置。
Maven
如果您正在使用maven,则可以将scala-maven-plugin与m2eclipse-scala结合使用。前者将编译Scala代码,后者将执行ScalaIDE和m2e(maven的eclipse插件)之间的集成。
您必须在pom.xml中添加以下部分:
<build>
        <sourceDirectory>src/main/scala</sourceDirectory>
        <testSourceDirectory>src/test/scala</testSourceDirectory>
        <plugins>
                <plugin>
                        <groupId>net.alchim31.maven</groupId>
                        <artifactId>scala-maven-plugin</artifactId>
                        <version>MANUALLY_REPLACE_WITH_LATEST_VERSION</version>
<configuration>
  <args>
    <arg>-target:jvm-1.8</arg>
    <arg>-deprecation</arg>
    <arg>-feature</arg>
    <arg>-unchecked</arg>
    <arg>-language:implicitConversions</arg>
    <arg>-language:postfixOps</arg>
  </args>
</configuration>
                        <executions>
                                <execution>
                                        <goals>
                                                <goal>compile</goal>
                                                <goal>testCompile</goal>
                                        </goals>
                                </execution>
                        </executions>
                </plugin>
        </plugins>
</build>
您也可以使用scalor-maven-plugin。
您必须在pom.xml中添加以下部分:
<build>
  <plugins>
    <plugin>
      <artifactId>maven-compiler-plugin</artifactId>
      <version>3.8.0</version>
      <configuration>
        <skip>true</skip>
        <skipMain>true</skipMain>
      </configuration>
    </plugin>
    <plugin>
      <groupId>com.carrotgarden.maven</groupId>
      <artifactId>scalor-maven-plugin_2.12</artifactId>
      <version>MANUALLY_REPLACE_WITH_LATEST_VERSION</version>
      <configuration>
                                      <zincOptionsScala>
                                              -target:jvm-1.8
                                              -deprecation
                                              -feature
                                              -unchecked
                                              -language:implicitConversions
                                              -language:postfixOps
                                      </zincOptionsScala>
                              </configuration>
      <executions>
        <execution>
          <goals>
            <goal>eclipse-config</goal>
            <goal>eclipse-format</goal>
            <goal>eclipse-restart</goal>
            <goal>eclipse-prescomp</goal>
            <!-- <goal>register-main</goal> --> <!-- uncomment if you have some Scala code to compile in src/main/scala -->
            <goal>register-test</goal>
            <!-- <goal>compile-main</goal> -->  <!-- uncomment if you have some Scala code to compile in src/main/scala -->
            <goal>compile-test</goal>
          </goals>
        </execution>
      </executions>
    </plugin>
  </plugins>
</build>
从IDE启动加特林
在gatling-highcharts-maven-archetype生成,您可以使用从您的IDE手动启动加特林和记录一些辅助类。可以完美复制这3个类(Engine,Recorder并IDEPathHelper在自己的项目)。
以上参考官网介绍:
初次接触Gatling
文件目录介绍
Gatling_Home
  ├── bin 执行程序
    ├── gatling.bat -- 启动入口(windows)
    ├── gatling.sh -- 启动入口(linux)
    ├── recorder.bat -- UI记录入口(windows)
    ├── recorder.sh -- UI记录入口(linux)
  ├── conf 配置信息
    ├── gatling.conf -- 加特林配置文件
    ├── gatling-akka.conf -- 加特林akka配置文件
    ├── logback.xml -- 日志配置文件
    ├── recorder.conf -- recorder配置文件
  ├── lib 加特林依赖jar包
  ├── results 测试报告
  ├── target 编译类
  ├── user-files 用户文件
  ├── LICENSE 许可证
How to run it
进入bin目录可以看到下面两个文件(.bat属于windows下面的可执行脚本)
gatling.sh 启动入口 依次输入以下三个参数
- 执行的脚本序号
- 本次测试Id,用作测试报告命名前缀,不能包含空格,特殊字符,中文等
- 本次测试描述(非必须),会显示在报告头部
record.sh UI操作,它主要用于将浏览器配置代理后记录用户操作然后生成测试脚本,更多的用于用户行为模拟测试。
测试运行
首先肯定是要下载它
解压并进入到bin目录下运行sh gatling.sh(linux环境下)

上面列出的就是官方自带的测试脚本样例,我们试着跑下。
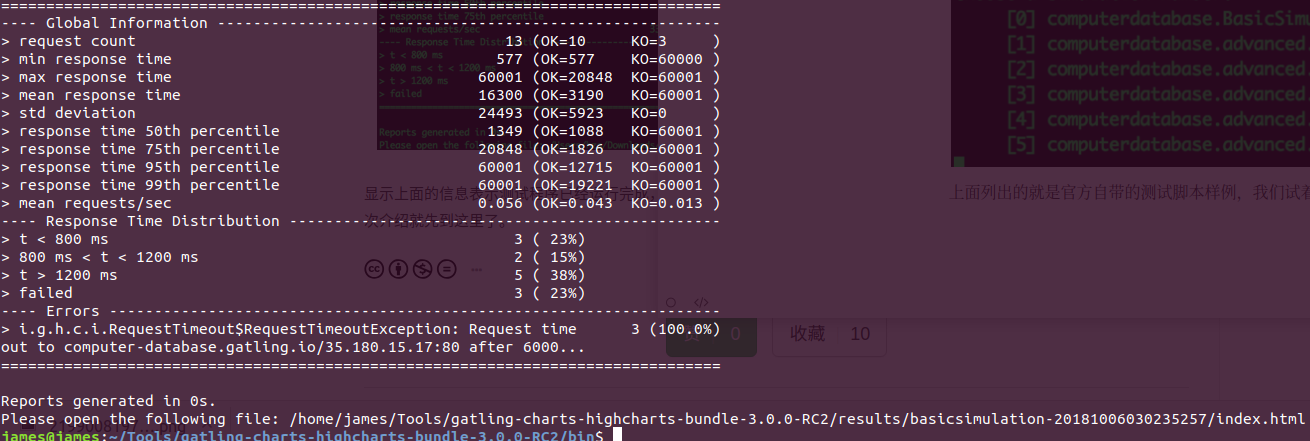
输入0.就能看到窗口开始跳动字节了!

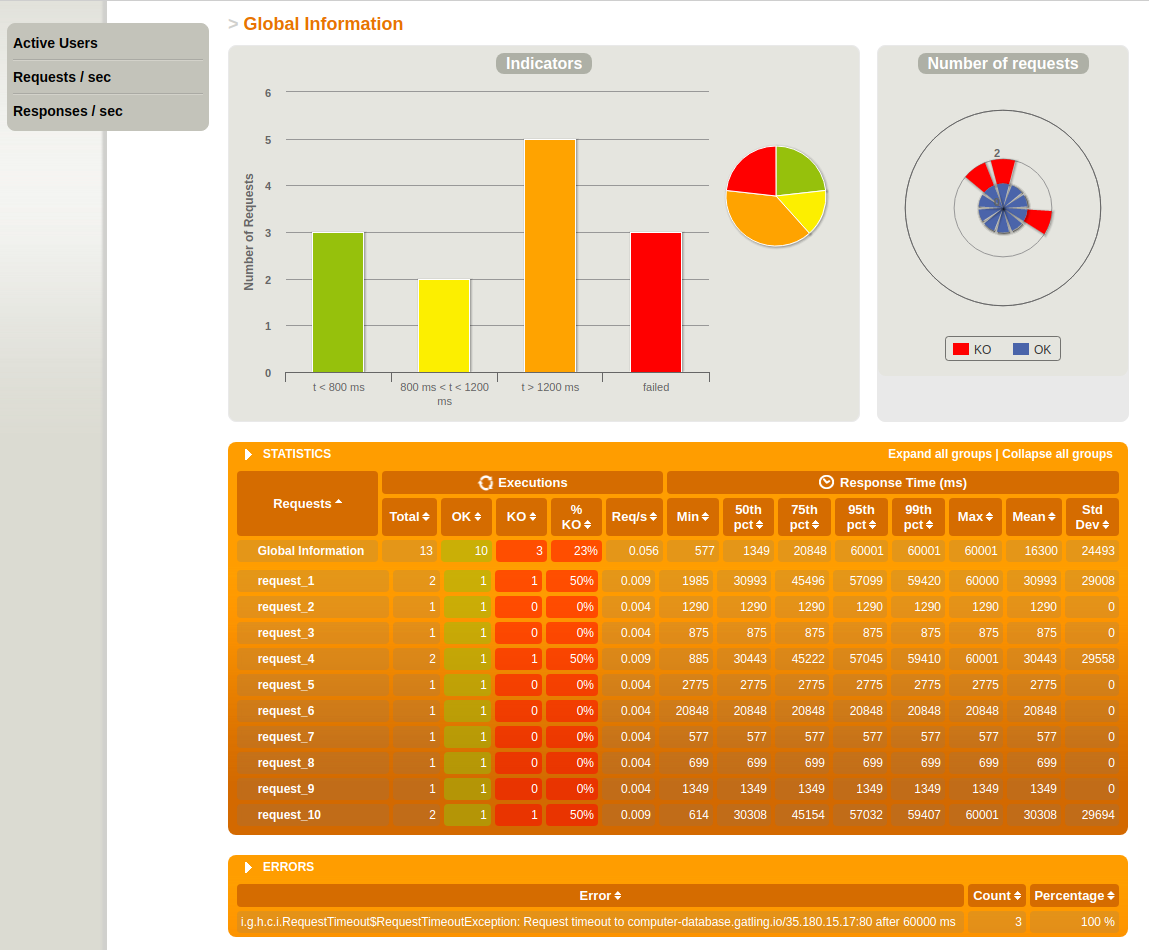
显示上面的信息表示测试程序已经运行完成,最后一行显示的是本次的测试报告,可以打开瞅瞅,风骚的报告自己体会吧,首次介绍就先到这里了。
部分报告截图如下所示:

其他
关于负载,性能测试工具-Gatling详解到这里就结束了。
原创不易,如果感觉不错,希望给个推荐!您的支持是我写作的最大动力!
版权声明:
作者:穆书伟
博客园出处:www.cnblogs.com/sanshengshu…
github出处:github.com/sanshengshu…
个人博客出处:sanshengshui.github.io/