

这一段纯属废话,可以不用看........,兑现诺言,每周写一篇博客。最近除了学习算法,还有想更全面了解Spring框架的使用。于是开始了我的学习之旅。由于本人工作中接触的是一个非常非常老的项目,所以对Spring的了解仅仅停留在一些基本的使用上。为加深了解Spring提供的功能,于是就果断买了《Spring实战》,初略看下来,收获还是有的,但总感觉也不是特别特别优秀的书。接下来,我就来谈谈我对Spring的一点浅薄理解。
一、Spring第一印象
对于Java后端开发来说,Spring基本是再熟悉不过的框架了,甚至可以说,现在不用Spring框架进行开发的JAVA后端项目应该基本是凤毛麟角(个人猜测)。相信一提到Spring,大家想到的就是DI(Dependency Injection)/IOC(Inversion of Control)、AOP这些名词了,没错,这就是Spring提供的核心功能。DI、IOC说的就是同一个功能,翻译过来分别是依赖注入、控制反转,其实就是我们把对象的创建、销毁、维护交给Spring,让它帮我们管理这些对象,但我们需要的时候,让它直接给我们一个,不需要我们自己去new。AOP就是面向切面编程。额额,看着这些名词一脸懵逼.................................
接下来就来个小例子看看这到底能干嘛,能给我们编程提供什么样的帮助。。
在给小例子之前我们得先了解两个概念:
1、既然要让Spring帮我们创建管理对象、那我们就得先告诉Spring怎么去创建这些对象,还有对象之间是什么关系。Spring提供了3个方案来实现:1、XML中显式配置。2、Java中显式配置。3、自动包扫描
2、Spring提供了俩种容器类型,分别为BeanFactory、ApplicationContext。BeanFactory只提供了基本的DI支持,ApplicationContext基于BeanFactory构建,能提供更多服务。
Spring上下文,就是一种容器,继承自ApplicationContext,提供更多功能,如常见的,
AnnotationConfigApplicationContext可从JAVA配置类中加载上下文
ClassPathXmlApplicationContext 从类路径下的XML文件中加载上下文。
FileSystemXmlApplilcationContext 从文件系统路径中加载上下文
例子
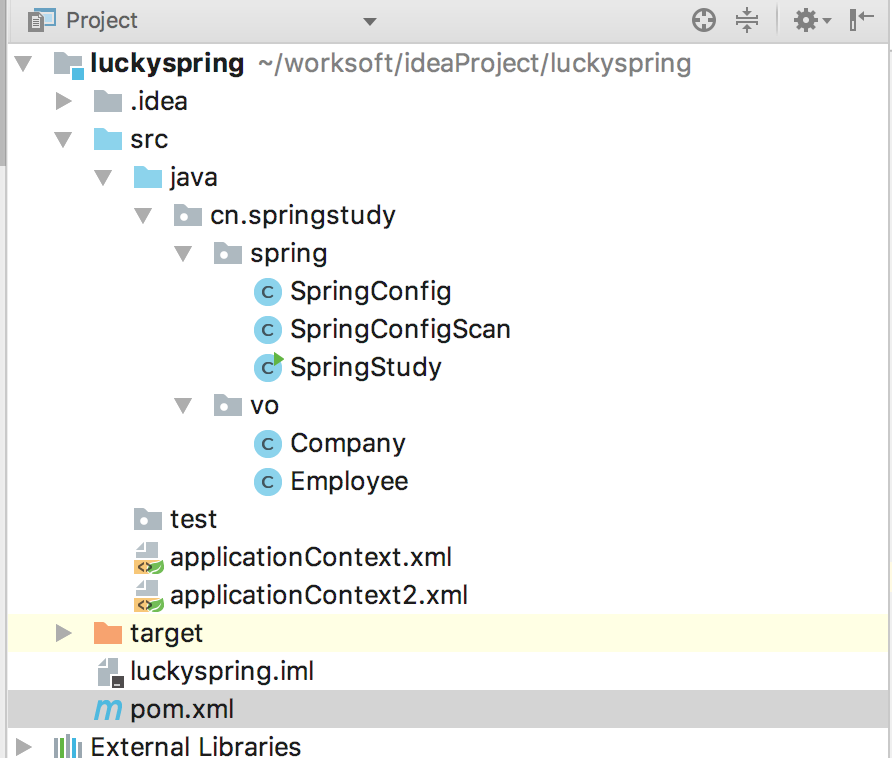
接下来我们用Idea编辑器,通过maven工具创建一个maven项目来体验下Spring。创建完之后我们首先要引入Spring jar包,通过maven,我们不需要自己去下载,只需要在配置文件中配置我们需要用到的jar包。项目结构如下图
之后我们在pom.xml文件中配置需要用到的jar文件,我们将spring的几个核心包配置进来。
<?xml version="1.0" encoding="UTF-8"?>

<project xmlns="http://maven.apache.org/POM/4.0.0" xmlns:xsi="http://www.w3.org/2001/XMLSchema-instance"
  xsi:schemaLocation="http://maven.apache.org/POM/4.0.0 http://maven.apache.org/xsd/maven-4.0.0.xsd">
  <modelVersion>4.0.0</modelVersion>

  <groupId>cn.springstudy</groupId>
  <artifactId>luckyspring</artifactId>
  <version>1.0-SNAPSHOT</version>

  <name>luckyspring</name>
  <url>http://www.example.com</url>

  <properties>
    <project.build.sourceEncoding>UTF-8</project.build.sourceEncoding>
    <maven.compiler.source>1.7</maven.compiler.source>
    <maven.compiler.target>1.7</maven.compiler.target>
    <!-- spring 版本  -->
    <org.springframework.version>4.0.0.RELEASE</org.springframework.version>
  </properties>
  <dependencies>
    <!-- 当前项目用到的3个核心spring jar包 -->
    <dependency>
      <groupId>org.springframework</groupId>
      <artifactId>spring-context</artifactId>
      <version>${org.springframework.version}</version>
    </dependency>
    <dependency>
      <groupId>org.springframework</groupId>
      <artifactId>spring-core</artifactId>
      <version>${org.springframework.version}</version>
    </dependency>
    <dependency>
      <groupId>org.springframework</groupId>
      <artifactId>spring-beans</artifactId>
      <version>${org.springframework.version}</version>
    </dependency

    <dependency>
      <groupId>junit</groupId>
      <artifactId>junit</artifactId>
      <version>4.11</version>
      <scope>test</scope>
    </dependency>
  </dependencies>

</project>
现在假设我们有一个公司,一个公司里面得有雇员来工作,才能让公司提供服务,于是我们创建雇员类
package cn.springstudy.vo;

public class Employee {

    public void work(){
        System.out.println("Employ start to Work");
    };
}
再创建公司类
package cn.springstudy.vo;

public class Company {

    //公司类有个雇员对象
    private Employee employee;

    public void  supportService(){
        employee.work();
    }

    public Employee getEmployee() {
        return employee;
    }

    public void setEmployee(Employee employee) {
        this.employee = employee;
    }
}
前面我们说过告诉Spring怎么去创建对象有三种方式
方式一XML配置来告诉spring怎么去创建我们的雇员还有公司类,在创建一个applicationContext.xml文件,内容如下
<?xml version="1.0" encoding="UTF-8"?>
<beans xmlns="http://www.springframework.org/schema/beans"
       xmlns:xsi="http://www.w3.org/2001/XMLSchema-instance"
       xsi:schemaLocation="http://www.springframework.org/schema/beans http://www.springframework.org/schema/beans/spring-beans.xsd">
    <!-- 配置一个对象 指定该对象id为emplayee-->
    <bean id="employee" class="cn.springstudy.vo.Employee"></bean>
    <!--配置对象,之后往对象中放入一个Employee对象
       ref="employee"表示注入的对象为spring容器中id为employee的对象,这样配置后创建Company
       对象后,会自动调用setEmployee()方法放入一个Employee对象
    -->
    <bean id="company" class="cn.springstudy.vo.Company">
        <property name="employee" ref="employee"></property>
    </bean>
</beans>
接下来我们创建一个main函数作为程序的入口,在main函数中去创建Spring容器
package cn.springstudy.spring;

import cn.springstudy.vo.Company;
import org.springframework.context.annotation.AnnotationConfigApplicationContext;
import org.springframework.context.support.ClassPathXmlApplicationContext;

public class SpringStudy {
    public static void main(String arg[]){
        //方式一,XML文件中加载上下文,即Spring容器
        ClassPathXmlApplicationContext classPathXmlApplicationContext = new ClassPathXmlApplicationContext("applicationContext.xml");
        //从容器中获取一个Company对象
        Company company = (Company) classPathXmlApplicationContext.getBean("company");
        company.supportService();
    }
}
执行一下,控制台打印如下

我们可以看到我们执行company.supportService()居然没报空指针,要知道我们可没在Company类中去创建Empoyee对象,说明什么???Spring容器自动帮我们创建Employee对象并set到Company对象中了。
方式二
创建一个配置Java类
package cn.springstudy.spring;

import cn.springstudy.vo.Company;
import cn.springstudy.vo.Employee;
import org.springframework.context.annotation.Bean;
import org.springframework.context.annotation.Configuration;

//注解,表明这个是一个Spring配置类
@Configuration
public class SpringConfig {

 //Spring容器管理的类,通过Bean注解,方法名即默认为bean的id,也可在Bean注解后加参数指定Bean的ID
    @Bean
    public Employee employee(){
        return  new Employee();
    }
    //Spring容器管理的类,通过Bean注解
    @Bean
    public Company company(){
        Company company =  new Company();
        company.setEmployee(employee());
        return  company;
    }
}
main函数,程序入口,执行结果同上
package cn.springstudy.spring;

import cn.springstudy.vo.Company;
import org.springframework.context.annotation.AnnotationConfigApplicationContext;
import org.springframework.context.support.ClassPathXmlApplicationContext;

public class SpringStudy {

    public static void main(String arg[]){

        //方式二,默认bean的名称即为配置方法的名称,需要用到AnnotationConfigApplicationContext容器
        AnnotationConfigApplicationContext annotationConfigApplicationContext = new AnnotationConfigApplicationContext();
        annotationConfigApplicationContext.register(SpringConfig.class);
        annotationConfigApplicationContext.refresh();
        Company company1 = (Company) annotationConfigApplicationContext.getBean("company");
        company1.supportService();
    }
}
方式三、
方式三序借助方式一或者方式二,我们首先需要在需要被Spring容器管理的类上面加上@Component注解,所以我们在Empoyee加上注解
package cn.springstudy.vo;

import org.springframework.stereotype.Component;

@Component
public class Employee {

    public void work(){
        System.out.println("Employ start to Work");
    };
}
Company类上加上注解,需自动分配的对象上加@Autowired注解
package cn.springstudy.vo;

import org.springframework.beans.factory.annotation.Autowired;
import org.springframework.stereotype.Component;

@Component
public class Company {

    //Autowired,帮我分配个Employee对象过来。
    @Autowired
    private Employee employee;

    public void  supportService(){
        employee.work();
    }

    public Employee getEmployee() {
        return employee;
    }

    public void setEmployee(Employee employee) {
        this.employee = employee;
    }
}
在配置类上加上包自动扫描路径
package cn.springstudy.spring;

import org.springframework.context.annotation.ComponentScan;
import org.springframework.context.annotation.Configuration;

//cn.springstudy.vo 为扫描的基础包路径
@Configuration
@ComponentScan("cn.springstudy.vo")
public class SpringConfigScan {
}
测试main方法
package cn.springstudy.spring;

import cn.springstudy.vo.Company;
import org.springframework.context.annotation.AnnotationConfigApplicationContext;
import org.springframework.context.support.ClassPathXmlApplicationContext;

public class SpringStudy {

    public static void main(String arg[]){
        //方式三,需借助方式2
        AnnotationConfigApplicationContext annotationConfigApplicationContext2 = new AnnotationConfigApplicationContext();
        annotationConfigApplicationContext2.register(SpringConfig.class);
        annotationConfigApplicationContext2.refresh();
        Company company2 = (Company) annotationConfigApplicationContext.getBean("company");
        company2.supportService();
    }
}
执行结果同上。
XML、Java配置文件混着使用
当然XML配置方式和Java配置文件还能混着用。
1、在XML配置中混用Java配置文件只需在配置文件中增加一个<bean></bea>即可将Java配置类导入XML配置中。2、XML中导入其他XML配置,只需用<import>指定其他XML配置文件路径
<?xml version="1.0" encoding="UTF-8"?>
<beans xmlns="http://www.springframework.org/schema/beans"
       xmlns:xsi="http://www.w3.org/2001/XMLSchema-instance"
       xsi:schemaLocation="http://www.springframework.org/schema/beans http://www.springframework.org/schema/beans/spring-beans.xsd">
    <!--导入其他XML配置文件  -->
    <import resource="applicationContext2.xml"></import>
    <!--Spring Java配置类-->
    <bean class="cn.springstudy.spring.SpringConfig"></bean>

    <bean id="employee" class="cn.springstudy.vo.Employee"></bean>
    <bean id="company" class="cn.springstudy.vo.Company">
        <property name="employee" ref="employee"></property>
    </bean>

</beans>1、Java配置文件混着XML配置文件,只需在Java类中加个注解即可,2、Java配置类导入其他配置类,只需加@Import注解,指定配置类位置。
package cn.springstudy.spring;

import cn.springstudy.vo.Company;
import cn.springstudy.vo.Employee;
import org.springframework.context.annotation.Bean;
import org.springframework.context.annotation.Configuration;
import org.springframework.context.annotation.ImportResource;

@Configuration
//导入其他XML配置文件
@ImportResource("classpath:applicationContext.xml")
//导入其他配置类
@Import({SpringConfigScan.class})
public class SpringConfig {
    @Bean
    public Employee employee(){
        return  new Employee();
    }

    @Bean
    public Company company(){
        Company company =  new Company();
        company.setEmployee(employee());
        return  company;
    }
}
Spring DI初步使用方法已经如上,接下来我们主要通过XML配置的方式来说明其他功能。
构造方法注入依赖对象
以上的小例子中Company中的Employee对象是通过setEmployee方法配置进去的。我们还可以通过构造方法的形式配置进去。
给Company类增加一个构造方法
package cn.springstudy.vo;

import org.springframework.beans.factory.annotation.Autowired;
import org.springframework.stereotype.Component;

public class Company {

    private Employee employee;
    private String name;

    public Company(Employee employee,String name){
        this.employee = employee;
        this.name = name;
    }
    public void  supportService(){
        employee.work();
    }

    public Employee getEmployee() {
        return employee;
    }

    public void setEmployee(Employee employee) {
        this.employee = employee;
    }
}
配置文件配置如下
<?xml version="1.0" encoding="UTF-8"?>
<beans xmlns="http://www.springframework.org/schema/beans"
       xmlns:xsi="http://www.w3.org/2001/XMLSchema-instance"
       xmlns:c="http://www.springframework.org/schema/c"
       xsi:schemaLocation="http://www.springframework.org/schema/beans
       http://www.springframework.org/schema/beans/spring-beans.xsd
       http://www.springframework.org/schema/c
       http://www.springframework.org/schema/c/spring-c.xsd">
    <!--在上面beans中声明spring中c命名空间-->

    <bean id="employee" class="cn.springstudy.vo.Employee"></bean>
   <!-- 构造方法中注入Employee对象,还有一个名称其中
    c:为命名空间前缀
    emplayee、name分别为构造函数中参数的名称
     -ref表示注入的是spring容器中的对象
    "emplayee"表示引入的是id为emplayee的对象,name没有带-ref则是注入字符串juejin.com
   -->
    <bean id="company" class="cn.springstudy.vo.Company"
        c:employee-ref="employee"
        c:name="juejin.com">
    </bean>

</beans>
工厂方法模式创建对象
以上说明Spring的依赖注入的基本使用。我们在编程时候可能不是通过new来创建对象,有时也会使用静态方法(静态工厂模式)来创建对象,那么Spring是否支持呢?答案是肯定的。
public class ClientService {
    private ClientService() {}

    public static ClientService createInstance() {
        return new ClientService()
    }
}
<bean id="clientService"
class="examples.ClientService"
factory-method="createInstance"/>当然工厂方法模式是通过非通过静态方法创建对象的,Spring也是支持的,如下
public class DefaultServiceLocator {

    private static ClientService clientService = new ClientServiceImpl();

    public ClientService createClientServiceInstance() {
        return clientService;
    }
}
<!-- 工厂类 -->
<bean id="serviceLocator" class="examples.DefaultServiceLocator">
</bean>
<!-- ClientService类配置 -->
<bean id="clientService"
factory-bean="serviceLocator"
factory-method="createClientServiceInstance"/>Spring中bean的作用域
默认情况下,Spring容器中的bean都是单例的,可以通过配置修改。spring定义了多种作用域:
1、Singleton(默认) 单例
2、Prototype 原型,每次通过容器获取对象都会创建一个新对象、
3、Session 会话,一个web会话中使用一个对象
4、Request ,每次web请求使用一个对象
通过XML配置可在bean中指定scrop属性指定,
Java配置类可在方法上加注解@Scope("prototype")
自动扫描的类可在类上加注解@Scope("prototype")
<!-- scope 属性指定作用域 -->
<bean id="employee" class="cn.springstudy.vo.Employee"  scope="prototype"></bean>
@Component
@Scope("prototype")
public class Company {.....}@Configuration
public class SpringConfig {
@Bean
@Scope("prototype")
public Employee employee(){
return new Employee();
}
}最后,感觉这篇写得有点乱,也很基础,还有很多东西没说到,不知道看到这里的人儿有无收获,说好的一周一篇,额,那就先发出来吧,以后可能还做修改,待续。。
