

本项目使用播放器是ijkplay, 并且进行封装和修改
主要功能:
1.重新编辑ijkplay的so库, 使其更精简和支持https协议
2.自定义MediaDataSource, 使用okhttp重写网络框架, 网络播放更流畅
3.实现视频缓存, 并且自定义LRUCache算法管理缓存文件
4.全局使用一个播放器, 实现视频在多个Activity之前无缝切换, 流畅播放
5.加入更多兼容性判断, 适配绝大数机型
①导入ijkplay:
//需要的权限
<uses-permission android:name="android.permission.INTERNET"/>
<uses-permission android:name="android.permission.WRITE_EXTERNAL_STORAGE"/>
<uses-permission android:name="android.permission.READ_EXTERNAL_STORAGE"/>
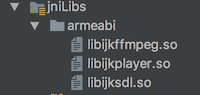
首先将lib文件夹下的so库粘贴过来, (因为官方自带的so库是不支持https的, 我重新编译的这个so库支持https协议,
并且使用的是精简版的配置, 网上关于ijkplay编译的流程和配置挺多的, 可以根据自己的需求自定义)
然后在module的build中加入 "implementation 'tv.danmaku.ijk.media:ijkplayer-java:0.8.8'"
②使用播放器的方法:
1.我封装了一个MediaPlayerTool工具类包含的初始化so库和一些回调等等
//通过单例得到媒体播放工具
mMediaPlayerTool = MediaPlayerTool.getInstance();
//这里会自动初始化so库 有些手机会找不到so, 会自动使用系统的播放器
private MediaPlayerTool(){
       try {
           IjkMediaPlayer.loadLibrariesOnce(null);
           IjkMediaPlayer.native_profileBegin("libijkplayer.so");
           loadIjkSucc = true;
       }catch (UnsatisfiedLinkError e){
           e.printStackTrace();
           loadIjkSucc = false;
       }
}

//一些生命周期回调
public static abstract class VideoListener {
       //视频开始播放
       public void onStart(){};
       //视频被停止播放
       public void onStop(){};
       //视频播放完成
       public void onCompletion(){};
       //视频旋转角度参数初始化完成
       public void onRotationInfo(int rotation){};
       //播放进度 0-1
       public void onPlayProgress(long currentPosition){};
       //缓存速度 1-100
       public void onBufferProgress(int progress){};
   }
2.因为我使用的是RecyclerView,所以先找到当前屏幕中 处于可以播放范围的item
    //首先循环RecyclerView中所有itemView, 找到在屏幕可见范围内的item
    private void checkPlayVideo(){
        currentPlayIndex = 0;
        videoPositionList.clear();

        int childCount = rv_video.getChildCount();
        for (int x = 0; x < childCount; x++) {
            View childView = rv_video.getChildAt(x);
            //isPlayRange()这个方法很重要
            boolean playRange = isPlayRange(childView.findViewById(R.id.rl_video), rv_video);
            if(playRange){
                int position = rv_video.getChildAdapterPosition(childView);
                if(position>=0 && !videoPositionList.contains(position)){
                    videoPositionList.add(position);
                }
            }
        }
    }

    //检查当前item是否在RecyclerView可见的范围内
    private boolean isPlayRange(View childView, View parentView){

        if(childView==null || parentView==null){
            return false;
        }

        int[] childLocal = new int[2];
        childView.getLocationOnScreen(childLocal);

        int[] parentLocal = new int[2];
        parentView.getLocationOnScreen(parentLocal);

        boolean playRange = childLocal[1]>=parentLocal[1] &&
                childLocal[1]<=parentLocal[1]+parentView.getHeight()-childView.getHeight();

        return playRange;
    }
3.我还封装了一个TextureView, 里面包含一些初始化SurfaceTexture和视频裁剪播放的方法
    //视频居中播放
    private void setVideoCenter(float viewWidth, float viewHeight, float videoWidth, float videoHeight){

        Matrix matrix = new Matrix();
        float sx = viewWidth/videoWidth;
        float sy = viewHeight/videoHeight;
        float maxScale = Math.max(sx, sy);

        matrix.preTranslate((viewWidth - videoWidth) / 2, (viewHeight - videoHeight) / 2);
        matrix.preScale(videoWidth/viewWidth, videoHeight/viewHeight);
        matrix.postScale(maxScale, maxScale, viewWidth/2, viewHeight/2);

        mTextureView.setTransform(matrix);
        mTextureView.postInvalidate();
    }

    //初始化SurfaceTexture
    public SurfaceTexture newSurfaceTexture(){

        int[] textures = new int[1];
        GLES20.glGenTextures(1, textures, 0);
        int texName = textures[0];
        SurfaceTexture surfaceTexture = new SurfaceTexture(texName);
        surfaceTexture.detachFromGLContext();
        return surfaceTexture;
    }
4.接下来就是播放代码了
private void playVideoByPosition(int position){
       //根据传进来的position找到对应的ViewHolder
       final MainAdapter.MyViewHolder vh = (MainAdapter.MyViewHolder)
       rv_video.findViewHolderForAdapterPosition(position);
       if(vh == null){
           return ;
       }

       currentPlayView = vh.rl_video;

       //初始化一些播放状态, 如进度条,播放按钮,加载框等
       //显示正在加载的界面
       vh.iv_play_icon.setVisibility(View.GONE);
       vh.pb_video.setVisibility(View.VISIBLE);
       vh.iv_cover.setVisibility(View.VISIBLE);
       vh.tv_play_time.setText("");

       //初始化播放器
       mMediaPlayerTool.initMediaPLayer();
       mMediaPlayerTool.setVolume(0);

       //设置视频url
       String videoUrl = dataList.get(position).getVideoUrl();
       mMediaPlayerTool.setDataSource(videoUrl);

       myVideoListener = new MediaPlayerTool.VideoListener() {
           @Override
           public void onStart() {
               //将播放图标和封面隐藏
               vh.iv_play_icon.setVisibility(View.GONE);
               vh.pb_video.setVisibility(View.GONE);
               //防止闪屏
               vh.iv_cover.postDelayed(new Runnable() {
                   @Override
                   public void run() {
                       vh.iv_cover.setVisibility(View.GONE);
                   }
               }, 300);
           }
           @Override
           public void onStop() {
               //播放停止
               vh.pb_video.setVisibility(View.GONE);
               vh.iv_cover.setVisibility(View.VISIBLE);
               vh.iv_play_icon.setVisibility(View.VISIBLE);
               vh.tv_play_time.setText("");
               currentPlayView = null;
           }
           @Override
           public void onCompletion() {
               //播放下一个
               currentPlayIndex++;
               playVideoByPosition(-1);
           }
           @Override
           public void onRotationInfo(int rotation) {
               //设置旋转播放
               vh.playTextureView.setRotation(rotation);
           }
           @Override
           public void onPlayProgress(long currentPosition) {
               //显示播放时长
               String date = MyUtil.fromMMss(mMediaPlayerTool.getDuration() - currentPosition);
               vh.tv_play_time.setText(date);
           }
       };
       mMediaPlayerTool.setVideoListener(myVideoListener);

       //这里重置一下TextureView
       vh.playTextureView.resetTextureView();
       mMediaPlayerTool.setPlayTextureView(vh.playTextureView);
       mMediaPlayerTool.setSurfaceTexture(vh.playTextureView.getSurfaceTexture());
       //准备播放
       mMediaPlayerTool.prepare();
   }
③重写MediaDataSource, 使用okhttp实现边下边播和视频缓存
1.一共需要重写3个方法getSize(),close()和readAt(); 先说getSize()
    public long getSize() throws IOException {
        //开始播放时, 播放器会调用一下getSize()来初始化视频大小, 这时我们就要初始化一条视频播放流
        if(networkInPutStream == null) {
            initInputStream();
        }
        return contentLength;
    }

    //初始化一个视频流出来, 可能是本地或网络
    private void initInputStream() throws IOException{

        File file = checkCache(mMd5);
        if(file != null){
            //更新一下缓存文件
            VideoLRUCacheUtil.updateVideoCacheBean(mMd5, file.getAbsolutePath(), file.length());
            //读取的本地缓存文件
            isCacheVideo = true;
            localVideoFile = file;
            //开启一个本地视频流
            localStream = new RandomAccessFile(localVideoFile, "rw");
            contentLength = file.length();
        }else {
            //没有缓存 开启一个网络流, 并且开启一个缓存流, 实现视频缓存
            isCacheVideo = false;
            //开启一个网络视频流
            networkInPutStream = openHttpClient(0);
            //要写入的本地缓存文件
            localVideoFile = VideoLRUCacheUtil.createCacheFile(MyApplication.mContext, mMd5, contentLength);
            //要写入的本地缓存视频流
            localStream = new RandomAccessFile(localVideoFile, "rw");
        }
    }
2.然后是readAt()方法, 也是最重要的一个方法
    /**
     * @param position 视频流读取进度
     * @param buffer 要把读取到的数据存到这个数组
     * @param offset 数据开始写入的坐标
     * @param size 本次一共读取数据的大小
     * @throws IOException
     */
    //记录当前读取流的索引
    long mPosition = 0;
    @Override
    public int readAt(long position, byte[] buffer, int offset, int size) throws IOException {

        if(position>=contentLength || localStream==null){
            return -1;
        }

        //是否将此字节缓存到本地
        boolean isWriteVideo = syncInputStream(position);

        //读取的流的长度不能大于contentLength
        if (position+size > contentLength) {
            size -= position+size-contentLength;
        }

        //读取指定大小的视频数据
        byte[] bytes;
        if(isCacheVideo){
            //从本地读取
            bytes = readByteBySize(localStream, size);
        }else{
            //从网络读取
            bytes = readByteBySize(networkInPutStream, size);
        }
        if(bytes != null) {
            //写入到播放器的数组中
            System.arraycopy(bytes, 0, buffer, offset, size);
            if (isWriteVideo && !isCacheVideo) {
                //将视频缓存到本地
                localStream.write(bytes);
            }
            //记录数据流读取到哪步了
            mPosition += size;
        }

        return size;
    }

     /**
     * 从inputStream里读取size大小的数据
     */
    private byte[] readByteBySize(InputStream inputStream, int size) throws IOException{

        ByteArrayOutputStream out = new ByteArrayOutputStream();

        byte[] buf = new byte[size];
        int len;
        while ((len = inputStream.read(buf)) != -1) {
            out.write(buf, 0, len);
            if (out.size() == size) {
                return out.toByteArray();
            } else {
                buf = new byte[size - out.size()];
            }
        }
        return null;
    }

     /**
     * 删除file一部分字节, 从position到file.size
     */
    private void deleteFileByPosition(long position) throws IOException{

        FileInputStream in = new FileInputStream(localVideoFile);

        File tempFile = VideoLRUCacheUtil.createTempFile(MyApplication.mContext);
        FileOutputStream out = new FileOutputStream(tempFile);

        byte[] buf = new byte[8192];
        int len;
        while ((len = in.read(buf)) != -1) {
            if(position <= len){
                out.write(buf, 0, (int) position);
                out.close();

                in.close();
                localVideoFile.delete();
                tempFile.renameTo(localVideoFile);
                localStream = new RandomAccessFile(localVideoFile, "rw");
                return ;
            }else{
                position -= len;
                out.write(buf, 0, len);
            }
        }
        tempFile.delete();
    }
3.主要说一下syncInputStream(), 因为有可能出现一种情况, 比如一个视频长度100, 播放器首先读取视频的1到10之间的数据, 然后在读取90到100之间的数据, 然后在从1播放到100; 所以这时我们需要同步视频流, 和播放进度保持一致这时就需要重新开启一个IO流(如果在读取本地缓存时可以直接使用RandomAccessFile.seek()方法跳转)
 //同步数据流
    private boolean syncInputStream(long position) throws IOException{
        boolean isWriteVideo = true;
        //判断两次读取数据是否连续
        if(mPosition != position){
            if(isCacheVideo){
                //如果是本地缓存, 直接跳转到该索引
                localStream.seek(position);
            }else{
                if(mPosition > position){
                    //同步本地缓存流
                    localStream.close();
                    deleteFileByPosition(position);
                    localStream.seek(position);
                }else{
                    isWriteVideo = false;
                }
                networkInPutStream.close();
                //重新开启一个网络流
                networkInPutStream = openHttpClient((int) position);
            }
            mPosition = position;
        }
        return isWriteVideo;
    }
4.最后一个是close()方法, 主要播放停止后释放一些资源
public void close() throws IOException {
        if(networkInPutStream != null){
            networkInPutStream.close();
            networkInPutStream = null;
        }
        if(localStream != null){
            localStream.close();
            localStream = null;
        }
        if(localVideoFile.length()!=contentLength){
            localVideoFile.delete();
        }
    }
④视频缓存和LRUCache管理
1.首先创建缓存文件, 在刚才的MediaDataSource.getSize()方法里有一句代码
localVideoFile = VideoLRUCacheUtil.createCacheFile(MyApplication.mContext, mMd5, contentLength);

public static File createCacheFile(Context context, String md5, long fileSize){
        //创建一个视频缓存文件, 在data/data目录下
        File filesDir = context.getExternalFilesDir(Environment.DIRECTORY_DOWNLOADS);

        File cacheFile = new File(filesDir, md5);
        if(!cacheFile.exists()) {
            cacheFile.createNewFile();
        }
        //将缓存信息存到数据库
        VideoLRUCacheUtil.updateVideoCacheBean(md5, cacheFile.getAbsolutePath(), fileSize);
        return cacheFile;
    }
2.然后是读取缓存文件, 在刚才的MediaDataSource.getSize()方法里还有一句代码
 //检查本地是否有缓存, 2步确认, 数据库中是否存在, 本地文件是否存在
    private File checkCache(String md5){
        //查询数据库
        VideoCacheBean bean = VideoCacheDBUtil.query(md5);
        if(bean != null){
            File file = new File(bean.getVideoPath());
            if(file.exists()){
                return file;
            }
        }
        return null;
    }
3.LRUCache的实现
//清理超过大小和存储时间的视频缓存文件
VideoLRUCacheUtil.checkCacheSize(mContext);

public static void checkCacheSize(Context context){

        ArrayList<VideoCacheBean> videoCacheList = VideoCacheDBUtil.query();

        //检查一下数据库里面的缓存文件是否存在
        for (VideoCacheBean bean : videoCacheList){
            if(bean.getFileSize() == 0){
                File videoFile = new File(bean.getVideoPath());
                //如果文件不存在或者文件大小不匹配, 那么删除
                if(!videoFile.exists() && videoFile.length()!=bean.getFileSize()){
                    VideoCacheDBUtil.delete(bean);
                }
            }
        }

        long currentSize = 0;
        long currentTime = System.currentTimeMillis();
        for (VideoCacheBean bean : videoCacheList){
            //太久远的文件删除
            if(currentTime-bean.getPlayTime() > maxCacheTime){
                VideoCacheDBUtil.delete(bean);
            }else {
                //大于存储空间的删除
                if (currentSize + bean.getFileSize() > maxDirSize) {
                    VideoCacheDBUtil.delete(bean);
                } else {
                    currentSize += bean.getFileSize();
                }
            }
        }

        //删除不符合规则的缓存
        deleteDirRoom(context.getExternalFilesDir(Environment.DIRECTORY_DOWNLOADS), VideoCacheDBUtil.query());
    }

    //更新缓存文件的播放次数和最后播放时间
    public static void updateVideoCacheBean(String md5, String videoPath, long fileSize){

        VideoCacheBean videoCacheBean = VideoCacheDBUtil.query(md5);
        if(videoCacheBean == null){
            videoCacheBean = new VideoCacheBean();
            videoCacheBean.setKey(md5);
            videoCacheBean.setVideoPath(videoPath);
            videoCacheBean.setFileSize(fileSize);
        }
        videoCacheBean.setPlayCount(videoCacheBean.getPlayCount()+1);
        videoCacheBean.setPlayTime(System.currentTimeMillis());

        VideoCacheDBUtil.save(videoCacheBean);
    }
⑤关于多个Activity同步播放状态, 无缝切换
1.首先在跳转时, 通知被覆盖的activity不关闭播放器
//首先跳转时通知一下activity
 mainActivity.jumpNotCloseMediaPlay(position);

//然后在onPause里
protected void onPause() {
        super.onPause();
        //如果要跳转播放, 那么不关闭播放器
        if (videoPositionList.size()>currentPlayIndex && jumpVideoPosition==videoPositionList.get(currentPlayIndex)) {
              ...这里就不关闭播放器
        }else{
            //如果不要求跳转播放, 那么就重置播放器
            mMediaPlayerTool.reset();
      }
}
2.然后在新页面初始化播放器
private void playVideoByPosition(int position){
    ......一切初始化代码照旧(注意不要重置播放器), 这里省略不提

     //把播放器当前绑定的SurfaceTexture取出起来, 设置给当前界面的TextureView
     vh.playTextureView.resetTextureView(mMediaPlayerTool.getAvailableSurfaceTexture());
     mMediaPlayerTool.setPlayTextureView(vh.playTextureView);
     //最后刷新一下view
     vh.playTextureView.postInvalidate();
}
