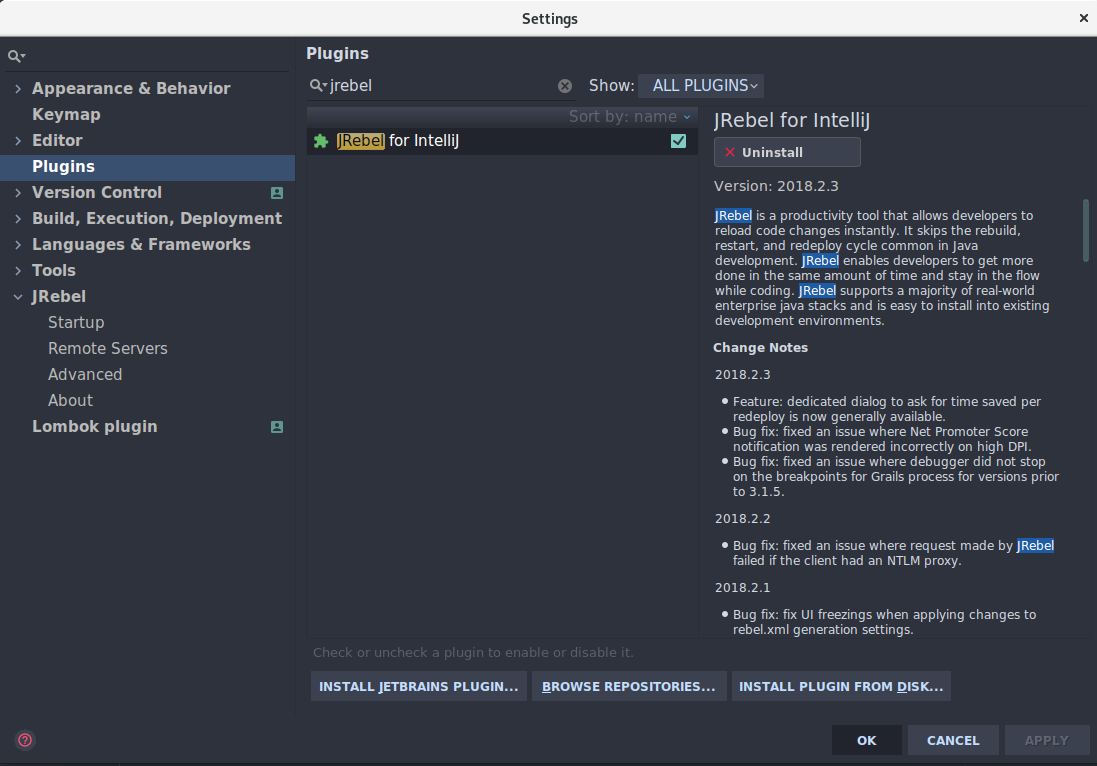
1.3. Press Browse plugin repositories... and locate the JRebel plugin.
1.4. restart IntelliJ IDEA
2. Activation
An excellent plugin is offen not free, and this is no exception.But i cant to teach you to buy it, of course that is the best way to get it, i will tall you how to crack this plugin.
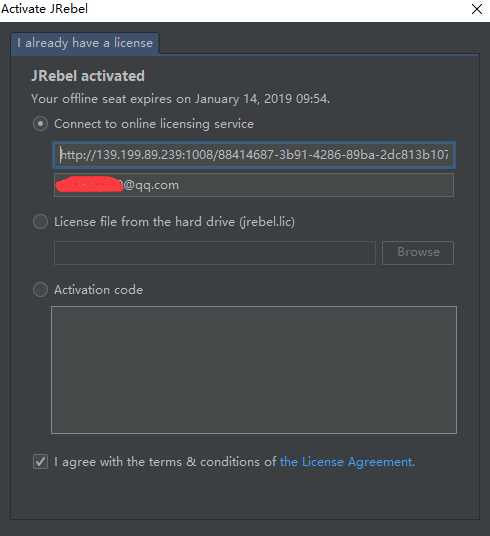
2.1 open the JRebel control panel
you just need to fill in the infomation in these two boxes.
Filled in the first box is http://139.199.89.239:1008/d6bbb34d-84c4-4214-907e-26fc52f8e1b8
Filled in the second box is your email
Node: If the first box prompt expire, you can change to a uuid after the url.
OK, it is done when you click OK.
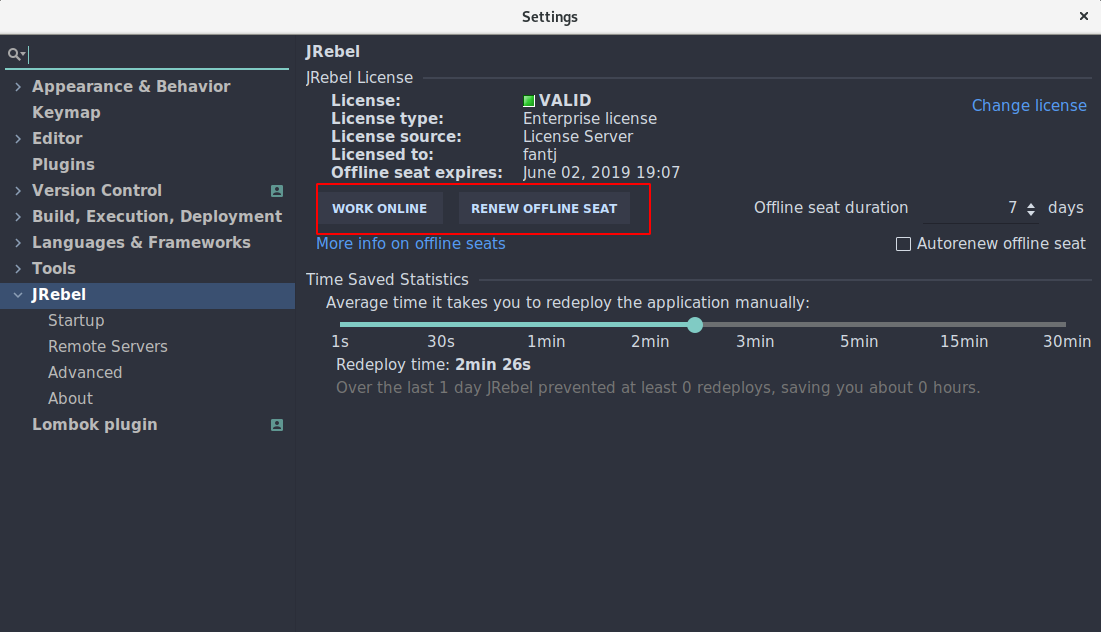
2.2 Change working model
if you just complete the first step, you also need to set this setting. Because in the case of working online, Exception will be detected at any time,(Will be detected as pirated).So follow me down:
After that, you will see it becomes like this:
OK, this is a success.
3. How to use on local
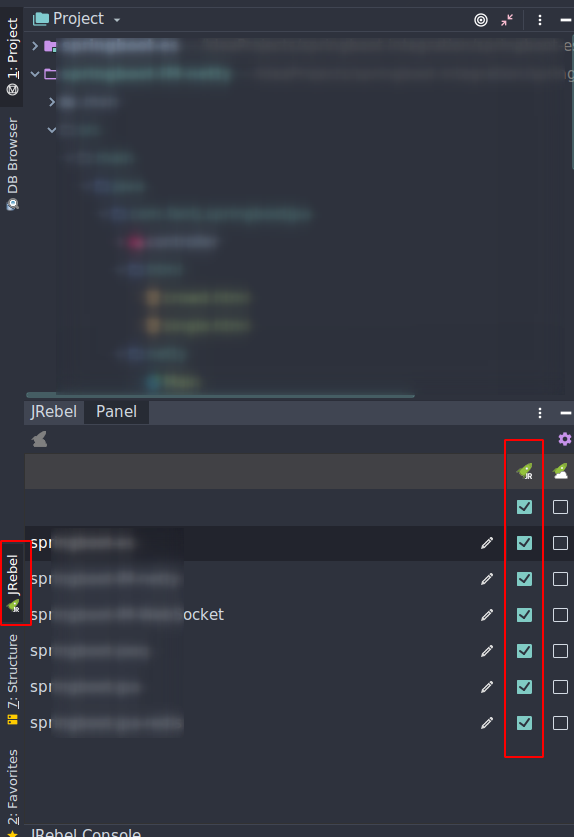
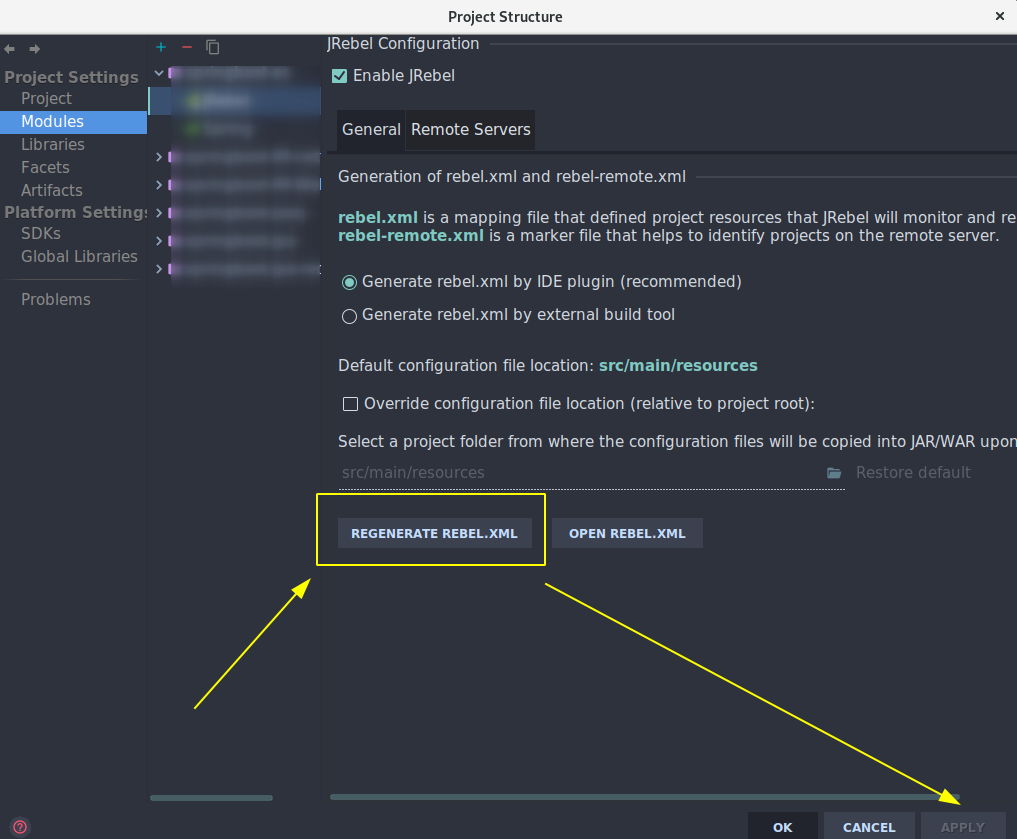
The only required configuration file is rebel.xml. This is used by JRebel to map the running application to the workspace. The good news is that IDE plugin can automate this configuration for you.
The meaning of the check mark is: Enable JRebel and generator therebel.xml
What`s in this file?
This file is automatically generated, Generally not need to manually modify .
<?xml version="1.0" encoding="UTF-8"?>

<!--
  This is the JRebel configuration file. It maps the running application to your IDE workspace, enabling JRebel reloading for this project.
  Refer to https://manuals.zeroturnaround.com/jrebel/standalone/config.html for more information.
-->
<application generated-by="intellij" xmlns:xsi="http://www.w3.org/2001/XMLSchema-instance"
			 xmlns="http://www.zeroturnaround.com" xsi:schemaLocation="http://www.zeroturnaround.com http://update.zeroturnaround.com/jrebel/rebel-2_1.xsd
http://www.zeroturnaround.com
http://www.zeroturnaround.com ">

	<classpath>
		<dir name="/home/fantj/xxx/xxxx-xxx/xxx-xxxx/target/classes">
		</dir>
	</classpath>

</application>
Server startup
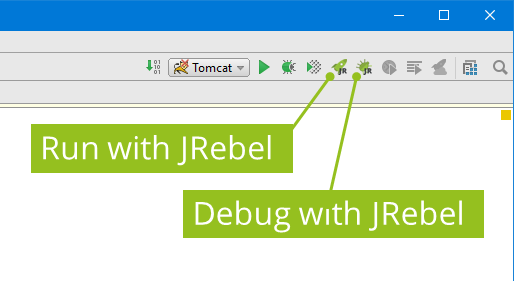
The JRebel plugin for IntelliJ IDEA includes dedicated launch buttons. These buttons are located on the main toolbar and on the navigation toolbar by default. You can also find these commands via the Run menu.
The first button launches the container with JRebel. The second button launches the container with JRebel in debug mode.
By launching the process from one of these buttons, the JRebel plugin will automatically add the appropriate command line parameters.
Node: You must have to use Run with JRebel or Debug with JRebel to start server, Because only then will it work, If you use Run mainor Debug main, sorry, you won`t be able to experience it !
4. How to use in remote servers
This chapter lists the steps required to set up JRebel remote server support for IntelliJ IDEA. You need a working, activated JRebel installation in your IDE. Please follow the instructions on how to install and configure JRebel for IntelliJ IDEA. If you have already set up JRebel, move on to step 1.
1. Enable JRebel remote server support on the server
Running JRebel on a remote server requires the JRebel agent and a special launch parameter. Follow these steps to do this.
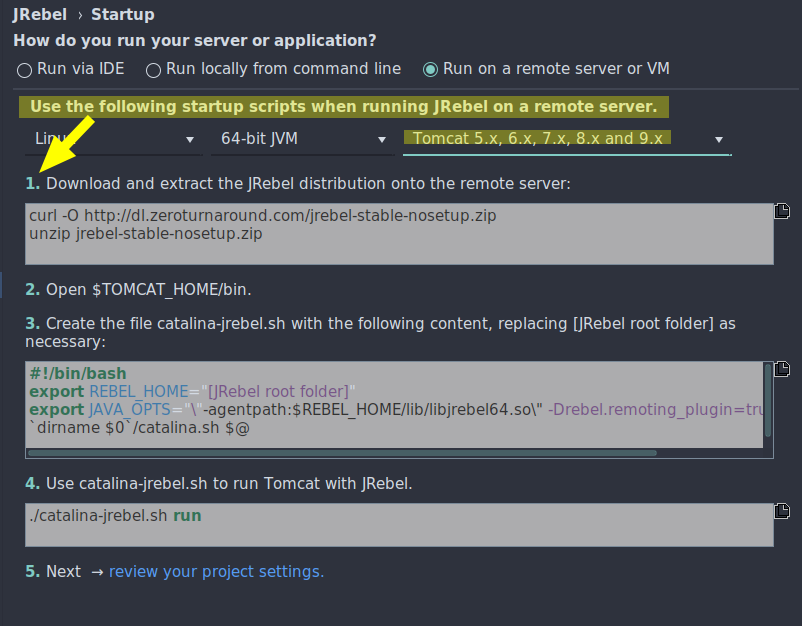
Open Settings > JRebel > Startup.
Select Run on a remote server.
Use the drop-down menus to specify your remote server configuration.
Follow the instructions displayed.
1.1 if remote server is tomcat
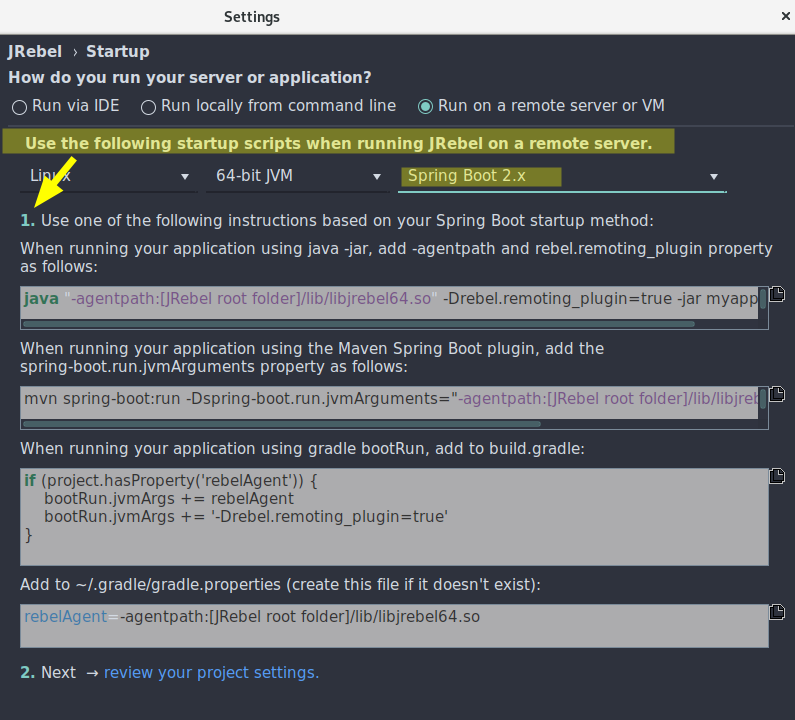
1.2 If remote server is springboot 2.x
2. Server Config
2.1 download and install jrebel server
[root@FantJ jrebel]# curl -O http://dl.zeroturnaround.com/jrebel-stable-nosetup.zip
  % Total    % Received % Xferd  Average Speed   Time    Time     Time  Current
                                 Dload  Upload   Total   Spent    Left  Speed
100 21.2M  100 21.2M    0     0  2584k      0  0:00:08  0:00:08 --:--:-- 4778k
[root@FantJ jrebel]# unzip jrebel-stable-nosetup.zip
2.2 start up
because I am using the remote service of springboot 2.x, so I execute this statement :java "-agentpath:[JRebel root folder]/lib/libjrebel64.so" -Drebel.remoting_plugin=true -jar myapp-boot.jar
Node: You may also notice that is not safe, because there is not need any certification. Official provides a method: java -jar jrebel.jar -set-remote-password <NewPassword>, You should set it up , I will not make a demo here.
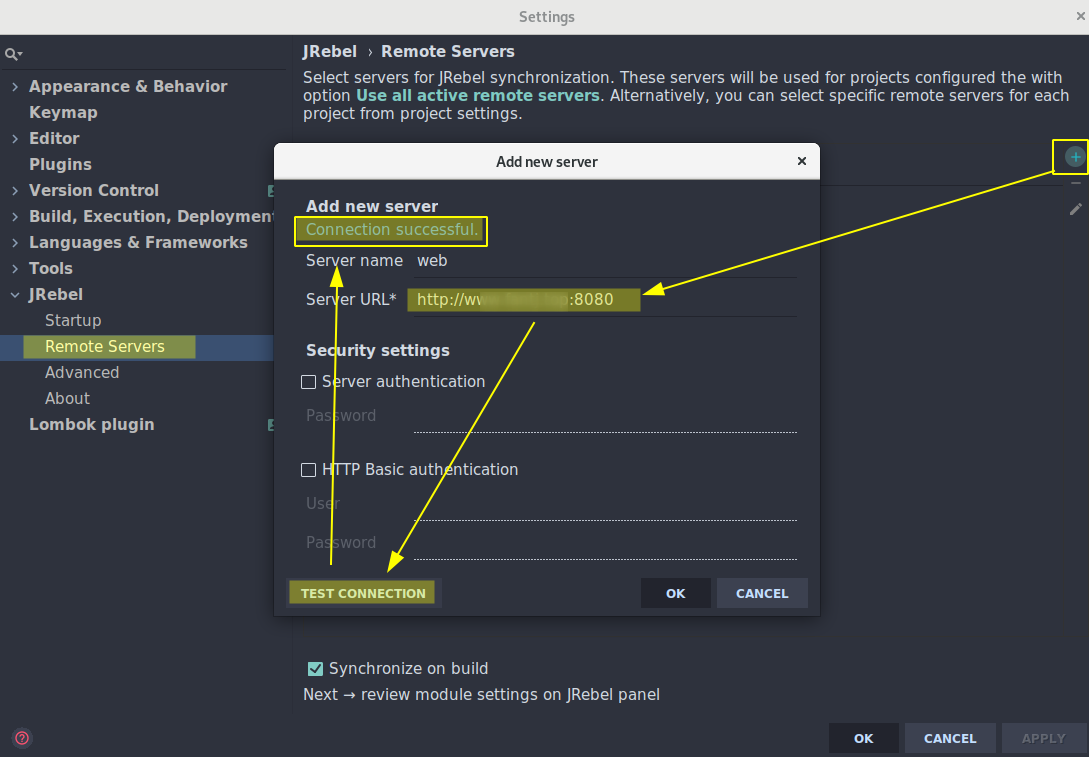
Press OK to store the new remote server.
4. Configure modules for remote server support
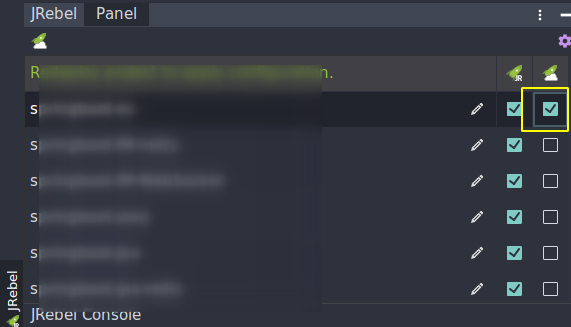
Open View > Tool Windows > JRebel. The JRebel Modules view is opened in IntelliJ IDEA:
Select the checkbox for your desired modules.
Build and redeploy your application containing the rebel-remote.xml configuration file to the remote server.