

前言
本项目jslib-base是一个能让开发者轻松开发属于自己的JavaScript库的基础框架。
灵感来源于颜海镜的8102年如何写一个现代的JavaScript库,项目链接在此。
需求简介
最近在项目中需要对内部一款历史悠久的js库进行改造升级,此库使用iife+ES5的方式编写,日后维护及开发存在诸多不便,随即萌生了搭建一个编写js库的基础框架的想法,正好又看到了颜大的文章,说干就干,最终达到的效果如下:
- 编写源码支持ES6+和TypeScript
- 打包后代码支持多环境(支持浏览器原生,支持AMD,CMD,支持Webpack,Rollup,fis等,支持Node)
- 收敛项目相关配置,目录清晰,上手简单
- Tree Shaking: 自动剔除第三方依赖无用代码
- 一键初始化框架
- 自动生成API文档
- 集成代码风格校验
- 集成commit信息校验及增量代码风格校验
- 集成单元测试及测试覆盖率
- 集成可持续构建工具与测试结果上报
使用说明
首先克隆仓库至本地并安装依赖:
$ git clone https://github.com/logan70/jslib-base.git
$ cd jslib-base
$ npm install
初始化框架,按照提示填写项目名、变量名及项目地址
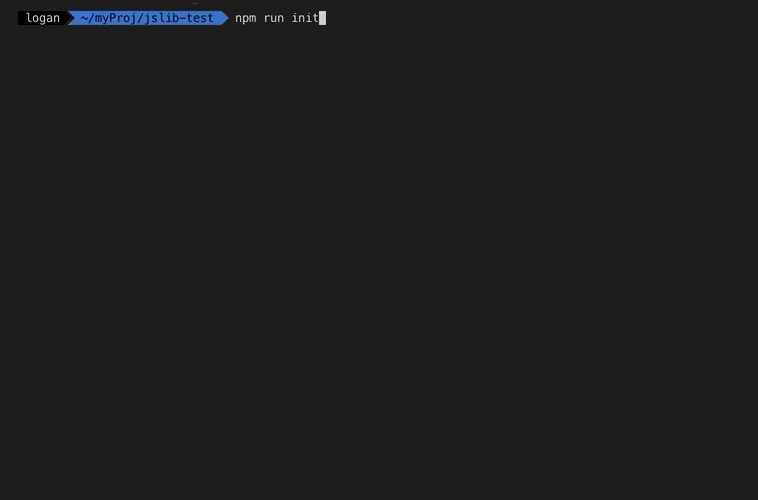
$ npm run init
然后就可以在src/文件夹愉快地开发了(可监听变化构建,实时查看效果),开发完成后打包
# 监听构建
$ npm run dev
# 打包构建
$ npm run build
最后就是打包发布:
# 自动修改CHANGLOG及版本信息
$ npm run release
# 登录npm
$ npm login
# 发布npm包
$ npm publish
发布后就可以在各种环境内使用你自己的JavaScript库了:
// 首先npm安装你的js库
$ npm install yourLibName --save-dev

// 浏览器内使用
// 引入文件:<script src="path/to/index.aio.min.js"><script>
yourLibName.xxx(xxx)

// es6模块规范内使用
import yourLibName from 'yourLibName'
yourLibName.xxx(xxx)

// Node内使用
const yourLibName = require('yourLibName')
yourLibName.xxx(xxx)
是不是很简单,更多信息可往下阅读技术实现,也可前往Github项目查看(主要是欢迎Star,哈哈)。
技术实现
首先要明确的一点是,要做到源码支持ES6+和TypeScript,我们一开始就要做好规划,理想情况是使用者切换只需要修改一处即可,故为项目建立配置文件jslib.config.js:
// jslib.config.js
module.exports = {
    srcType: 'js' // 源码类型,js或ts
}
编译打包工具
使用工具:Rollup + Babel + TypeScript
相关文档:
- Rollup: 下一代打包工具 - Rollup中文文档
- TypeScript: JavaScript的超集 - TypeScript中文网
- Babel: JavaScript编译工具 - Babel中文网
打包工具我选择Rollup,主要因为其强大的Tree Shaking能力以及构建体积优势。
- Tree Shaking: Rollup仅支持ES6模块,在构建代码时,在使用ES6模块化的代码中,会对你的代码进行静态分析,只打包使用到的代码。
- 构建体积: Webpack构建后除了业务逻辑代码,还包括代码执行引导及模块关系记录的代码,Rollup构建后则只有业务逻辑代码,构建体积占优,总结就是开发库或框架使用Rollup,应用开发时选择Webpack。
下面我们看看Rollup的使用:
首先安装Rollup及相关插件
$ npm install rollup -D
然后新建一个配置文件build/rollupConfig/rollup.config.aio.js:
// build/rollupConfig/rollup.config.aio.js
const  { srcType } = require('../../jslib.config')
export default {
  input: `src/index.${srcType}`, // 入口文件,区分js|ts
  output: {
    file: 'dist/index.aio.js', // 构建文件
    format: 'umd', // 输出格式,umd格式支持浏览器直接引入、AMD、CMD、Node
    name: 'myLib', // umd模块名,在浏览器环境用作全局变量名
    banner: '/* https://github.com/logan70/jslib-base */' // 插入打包后文件的头部内容
  }
}
然后在src/index.js下编写源码:
// src/index.js
export function foo() {
    console.log('Hello world!')
}
然后运行命令进行打包构建:
$ npx rollup --config build/rollupConfig/rollup.config.aio.js
我们来看看打包后的文件dist/index.aio.js:
/* https://github.com/logan70/jslib-base */
(function (global, factory) {
  typeof exports === 'object' && typeof module !== 'undefined' ? factory(exports) :
  typeof define === 'function' && define.amd ? define(['exports'], factory) :
  (global = global || self, factory(global.myLib = {}));
}(this, function (exports) { 'use strict';

  function foo() {
    console.log('Hello world!');
  }

  exports.foo = foo;

  Object.defineProperty(exports, '__esModule', { value: true });

}));
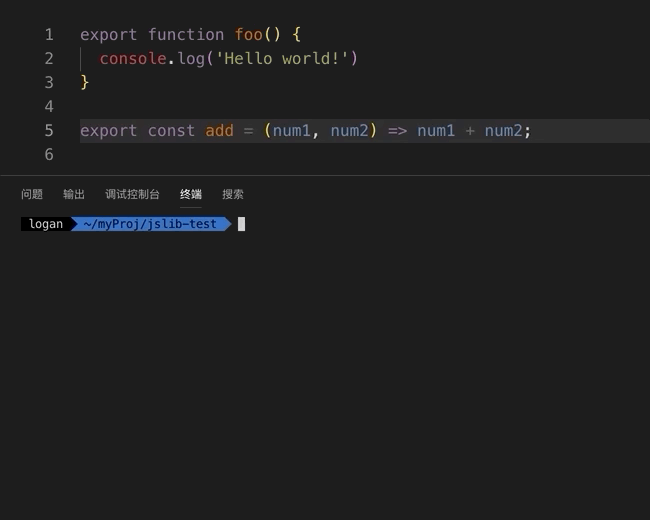
非常完美有木有,我们继续编写:
// src/index.js
// ...
export const add = (num1, num2) => num1 + num2
打包后查看:
// dist/index.aio.js
// ...
function foo() {
  console.log('Hello world!');
}

const add = (num1, num2) => num1 + num2;

exports.foo = foo;
exports.add = add;
// ...
???几个意思小老弟,const和箭头函数什么鬼?
原来是忘记了编译,说到编译我就想到了今年下半年...
直接开花,说到编译当然是大名鼎鼎的Babel,Rollup有Babel的插件,直接安装Babel相关及插件使用:
$ npm install @babel/core @babel/preset-env @babel/plugin-transform-runtime   -D
$ npm install @babel/polyfill @babel/runtime -S
$ npm install rollup-plugin-babel rollup-plugin-node-resolve rollup-plugin-commonjs -D
| 名称 | 作用 |
|---|---|
| @babel/core | Babel核心 |
| @babel/preset-env | JS新语法转换 |
| @babel/polyfill | 为所有 API 增加兼容方法 |
| @babel/plugin-transform-runtime & @babel/runtime | 把帮助类方法从每次使用前定义改为统一 require,精简代码 |
| rollup-plugin-babel | Rollup的Babel插件 |
| rollup-plugin-node-resolve | Rollup解析外部依赖模块插件 |
| rollup-plugin-commonjs | Rollup仅支持ES6模块,此插件是将外部依赖CommonJS模块转换为ES6模块的插件 |
然后修改Rollup配置:
// build/rollupConfig/rollup.config.aio.js
const babel = require('rollup-plugin-babel')
const nodeResolve = require('rollup-plugin-node-resolve')
const commonjs = require('rollup-plugin-commonjs')
const { srcType } =  require('../../jslib.config')

export default {
  input: `src/index.${srcType}`, // 入口文件
  output: {
    // ...
  },
  plugins: [
    // Rollup解析外部依赖模块插件
    nodeResolve(),
    // Rollup仅支持ES6模块,此插件是将外部依赖CommonJS模块转换为ES6模块的插件
    commonjs({
      include: 'node_modules/**',
    }),
    babel({
      presets: [
        [
          '@babel/preset-env',
          {
            targets: {
              browsers: 'last 2 versions, > 1%, ie >= 6, Android >= 4, iOS >= 6, and_uc > 9',
              node: '0.10'
            },
            // 是否将ES6模块转为CommonJS模块,必须为false
            // 否则 Babel 会在 Rollup 有机会做处理之前,将我们的模块转成 CommonJS,导致 Rollup 的一些处理失败
            // 例如rollup-plugin-commonjs插件,将 CommonJS 转换成 ES6 模块
            modules: false,
            // 松散模式,源码不同时使用export和export default时可开启,更好兼容ie8以下
            loose: false,
            // 按需进行polyfill
            useBuiltIns: 'usage'
          }
        ]
      ],
      plugins: ['@babel/plugin-transform-runtime'],
      runtimeHelpers: true,
      exclude: 'node_modules/**'
    })
  ]
}
再次打包后查看:
// dist/index.aio.js
// ...
function foo() {
  console.log('Hello world!');
}
var add = function add(num1, num2) {
  return num1 + num2;
};

exports.foo = foo;
exports.add = add;
// ...
完事儿收工!接下来就是解决TypeScript的支持了,首先安装依赖:
$ npm install typescript rollup-plugin-typescript2 -D
| 名称 | 作用 |
|---|---|
| typescript | typescript核心 |
| rollup-plugin-typescript2 | rollup编译typeScript的插件 |
然后创建TypeScript编译配置文件tsconfig.json:
// tsconfig.json
{
    "compilerOptions": {
        "target": "ES5",
        "module": "ES6",
        "lib": ["esnext", "dom"],
        "esModuleInterop": true
    },
    "include": [
        "src/**/*.ts"
    ],
    "exclude": [
        "node_modules",
        "**.d.ts"
    ]
}
由于Rollup编译插件会根据源码类型动态切换,所以我们创建文件build/rollupConfig/getCompiler.js用来动态导出Rollup编译插件:
// build/rollupConfig/getCompiler.js
const babel = require('rollup-plugin-babel')
const typeScript = require('rollup-plugin-typescript2')
const { srcType } = require('../../jslib.config')

const jsCompiler = babel({
  // ...
})

const tsCompiler = typeScript({
  // 覆盖tsconfig.json的配置,rollup仅支持ES6模块
  tsconfigOverride: {
    compilerOptions : { module: 'ES6', target: 'ES5' }
  }
})

module.exports = () => srcType === 'js' ? jsCompiler : tsCompiler
然后修改Rollup配置文件:
const nodeResolve = require('rollup-plugin-node-resolve')
const commonjs = require('rollup-plugin-commonjs')
const getCompiler = require('./getCompiler')
const { srcType } =  require('./jslib.config')

export default {
  input: `src/index.${srcType}`, // 入口文件
  output: {
    // ...
  },
  plugins: [
    nodeResolve(),
    commonjs({
      include: 'node_modules/**',
    }),
    getCompiler()
  ]
}
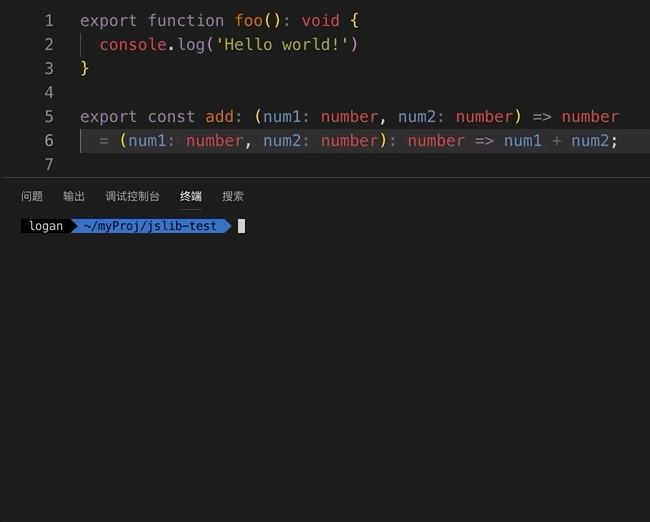
然后创建src/index.ts编写源码:
export function foo(): void {
  console.log('Hello world!')
}

export const add: (num1: number, num2: number) => number
  = (num1: number, num2: number): number => num1 + num2
记得修改jslib.config.js中的源码类型为ts:
module.exports = {
  srcType: 'ts' // 源码类型,js|ts
}
然后运行打包命令查看输出文件dist/index.aio.js,发现打包结果完全一样,大功告成!
多环境支持
使用工具:
考虑到要支持多环境,所以要打包多种格式文件,但是如果使用npx rollup --config 1.js && npx rollup --config 2.js这种构建方式,其实是串行构建,效率低,所以使用Rollup提供的Node API结合Promise.all来充分利用js的异步特性,提升构建效率。
工欲善其事,必先利其器。考虑到之后别的命令可能也会使用Node来完成,所以我们先实现一个自己的CLI。
由于我们接下来编写时会用到JS新特性,所以要求版本大于8,我们使用semver工具:
$ npm install semver -D
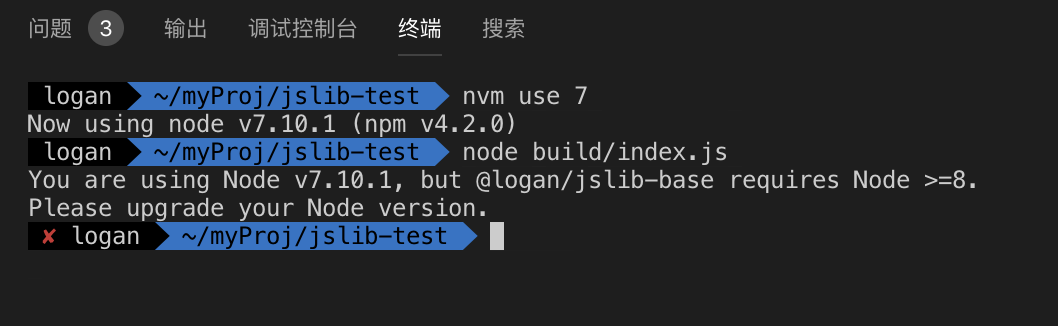
然后新建build/index.js文件作为我们的Node运行入口:
// build/index.js
const semver = require('semver')
const requiredVersion = '>=8'
// check node version
if (!semver.satisfies(process.version, requiredVersion)) {
  console.error(
    `You are using Node ${process.version}, but @logan/jslib-base ` +
    `requires Node ${requiredVersion}.\nPlease upgrade your Node version.`
  )
  process.exit(1)
}
然后我们将Node版本切换到7进行测试:
测试OK,接下来需要实现根据命令行参数不同执行不同任务的功能,我们解析命令行用到minimist:
$ npm install minimist -D
minimist的使用很简单:
const args = require('minimist')(process.argv.slice(2))
console.log(args)
我们来看看效果:

我想大家已经明白怎么使用了,下面继续编写Node入口:
// build/index.js
// ...
// 解析命令行参数
const args = require('minimist')(process.argv.slice(2))
// 取出第一个作为命令
const command = args._[0]
// 从args._中删除命令
args._.shift()

function run(command, args) {
  // 动态加载命令执行文件
  const runner = require(`./command-${command}/index`)
  // 将args作为参数传入并执行对应任务函数
  runner(args)
}

run(command, args)
之后如果我们想添加任务,只需要创建command-${任务名称}文件夹,在文件夹下的index.js中编写代码,然后在package.json添加对应的script命令即可。
我们先在package.json中添加构建命令:
// package.json
{
  "scripts": {
    ...
    "build": "node build/index.js build",
    ...
  }
}
然后创建build/command-build/index.js编写执行构建任务的代码:
其他输出格式的Rollup配置文件以及Rollup提供的Node API的使用不做详解,感兴趣的朋友自行了解
const path = require('path')
const rollup = require('rollup')

// 不同环境配置文件映射
const rollupConfigMap = {
  // UMD格式
  aio: 'rollup.config.aio.js',
  // UMD格式压缩版
  aioMin: 'rollup.config.aio.min.js',
  // ES6模块格式
  esm: 'rollup.config.esm.js',
  // CommonJS格式
  cjs: 'rollup.config.js'
}

// 单个rollup构建任务
function runRollup(configFile) {
  return new Promise(async (resolve) => {
    // 根据配置文件名引入rollup配置
    const options = require(path.resolve(__dirname, '../rollupConfig', configFile))
    // 创建rollup任务
    const bundle = await rollup.rollup(options.inputOption)
    // 构建文件
    await bundle.write(options.outputOption)
    console.log(`${options.outputOption.file} 构建成功`)
    resolve()
  })
}

module.exports = async (args = {}) => {
  // 要构建的格式数组
  const moduleTypes = args._

  // 目的在于支持选择要构建的类型
  // 例如 node build/index.js build esm cjs 则只构建es6模块格式和commonjs格式文件
  // 不传则全部构建
  const configFiles = moduleTypes && moduleTypes.length
    ? moduleTypes.map(moduleKey => rollupConfigMap[moduleKey])
    : Object.values(rollupConfigMap)

  try {
    // 并行构建(伪,JS单线程)
    await Promise.all(configFiles.map(file => runRollup(file)))
  } catch (e) {
    throw new Error(e)
  }
}
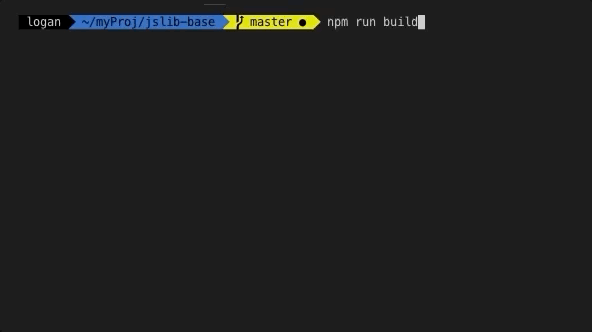
然后我们运行构建命令npm run build查看效果:
代码风格检查
使用工具:
- ESLint: JavaScript代码风格校验工具 - ESLint中文文档
- TSLint: TypeScript代码风格校验工具- TSLint官网
首先安装依赖:
$ npm install eslint eslint-config-airbnb eslint-plugin-import -D
配置ESLint校验规则文件.eslintrc.js,详细过程略,详情请前往上方官网了解。
JavaScript代码使用Airbnb JavaScript 风格作为基础,配合无分号规则(可视个人/团队偏好修改)来校验代码风格。
配置TSLint校验规则文件tslint.json,详细过程略,详情请前往上方官网了解。
TypeScript代码使用默认规则,配合单引号、无分号规则(可视个人/团队偏好修改)来校验代码风格。
然后在package.json中添加校验命令:
// package.json
{
  "scripts": {
    ...
    "lint": "node build/index.js lint",
    "lint:fix": "node build/index.js lint --fix",
    ...
  }
}
然后创建build/command-jslint/index.js编写执行构建任务的代码:
// build/command-jslint/index.js
// Node自带子进程方法
const { spawn } = require('child_process')
const { srcType } = require('../../jslib.config')

module.exports = async (args = {}) => {
  const options = [
    // 要校验的文件,glob匹配
    `src/**/*.${srcType}`,
    // 错误输出格式,个人喜欢codeframe风格,信息比较详细
    '--format', 'codeframe'
  ]
  // 是否需要自动修复,npm run lint:fix 启用
  if (args.fix) {
    options.push('--fix')
  }
  // 要使用的lint工具
  const linter = srcType === 'js' ? 'eslint' : 'tslint'
  // 开启子进程
  spawn(
    linter,
    options,
    // 信息输出至主进程
    { stdio: 'inherit' }
  )
}
然后我们来测试一下:
JavaScript代码风格检查及修复:
TypeScript代码风格检查及修复:
自动生成API文档
使用工具
- JSDoc: 根据JS注释自动生成API文档工具 - JSDoc官网
- docdash: JSDoc主题,支持搜索等功能 - docdash
- TypeDoc: 根据TS注释自动生成API文档工具 - TypeDoc官网
- typedoc-plugin-external-module-name: 优化TypeScript文档模块分类插件 - typedoc-plugin-external-module-name
首先安装依赖:
$ npm install jsdoc typedoc typedoc-plugin-external-module-name -D
配置JSDoc文件build/command-doc/jsdocConf.js,详细过程略,详情请前往上方官网了解。
配置TypeDoc文件build/command-doc/tsdocConf.js,详细过程略,详情请前往上方官网了解。
然后在package.json中添加生成API文档的命令:
// package.json
{
  "scripts": {
    ...
    "doc": "node build/index.js doc",
    ...
  }
}
然后创建build/command-doc/index.js编写执行生成API文档任务的代码:
// build/command-jslint/index.js
// Node自带子进程方法
const { spawn } = require('child_process')
const path = require('path')
const TypeDoc = require('typedoc')
const { srcType } = require('../../jslib.config')

module.exports = async (args = {}) => {
  if (srcType === 'js') {
    spawn('jsdoc', ['-c', path.resolve(__dirname, './jsdocConf.js')], { stdio: 'inherit' })
    resolve()
  } else {
    // 引入tsdoc配置
    const tsdocConf = require(path.resolve(__dirname, './tsdocConf'))
    // 初始化任务,详见typedoc官网
    const app = new TypeDoc.Application(tsdocConf)
    const project = app.convert(app.expandInputFiles(['src']))
    if (project) {
      const outputDir = tsdocConf.outputDir
      // 输出文档
      app.generateDocs(project, outputDir)
    }
  }
}
然后我们在源码内添加JavaScript规范化注释,相关注释标准也可前往JSDoc官网查看:
// src/index.js
/**
 * @module umdName
 * @description JavaScript库 - umdName
 * @see https://github.com/logan70/jslib-base
 * @example
 * // 浏览器内使用
 * // 引入文件:<script src="path/to/index.aio.min.js"><script>
 * window.umdName.add(1, 2)
 *
 * // es6模块规范内使用
 * import umdName from '@logan/jslib-base'
 * umdName.add(1, 2)
 *
 * // Node内使用
 * const umdName = require('@logan/jslib-base')
 * umdName.add(1, 2)
 */
/**
 * @description 加法函数
 * @method add
 * @memberof module:umdName
 * @param {Number} num1 - 加数
 * @param {Number} num2 - 被加数
 * @return {Number} - 两数相加结果
 * @example
 * umdName.add('Hello World!')
 */
export const add = (num1, num2) => num1 + num2
然后将jslib.config.js中的源码类型修改为js,运行命令npm run doc,打开docs/index.html查看效果:
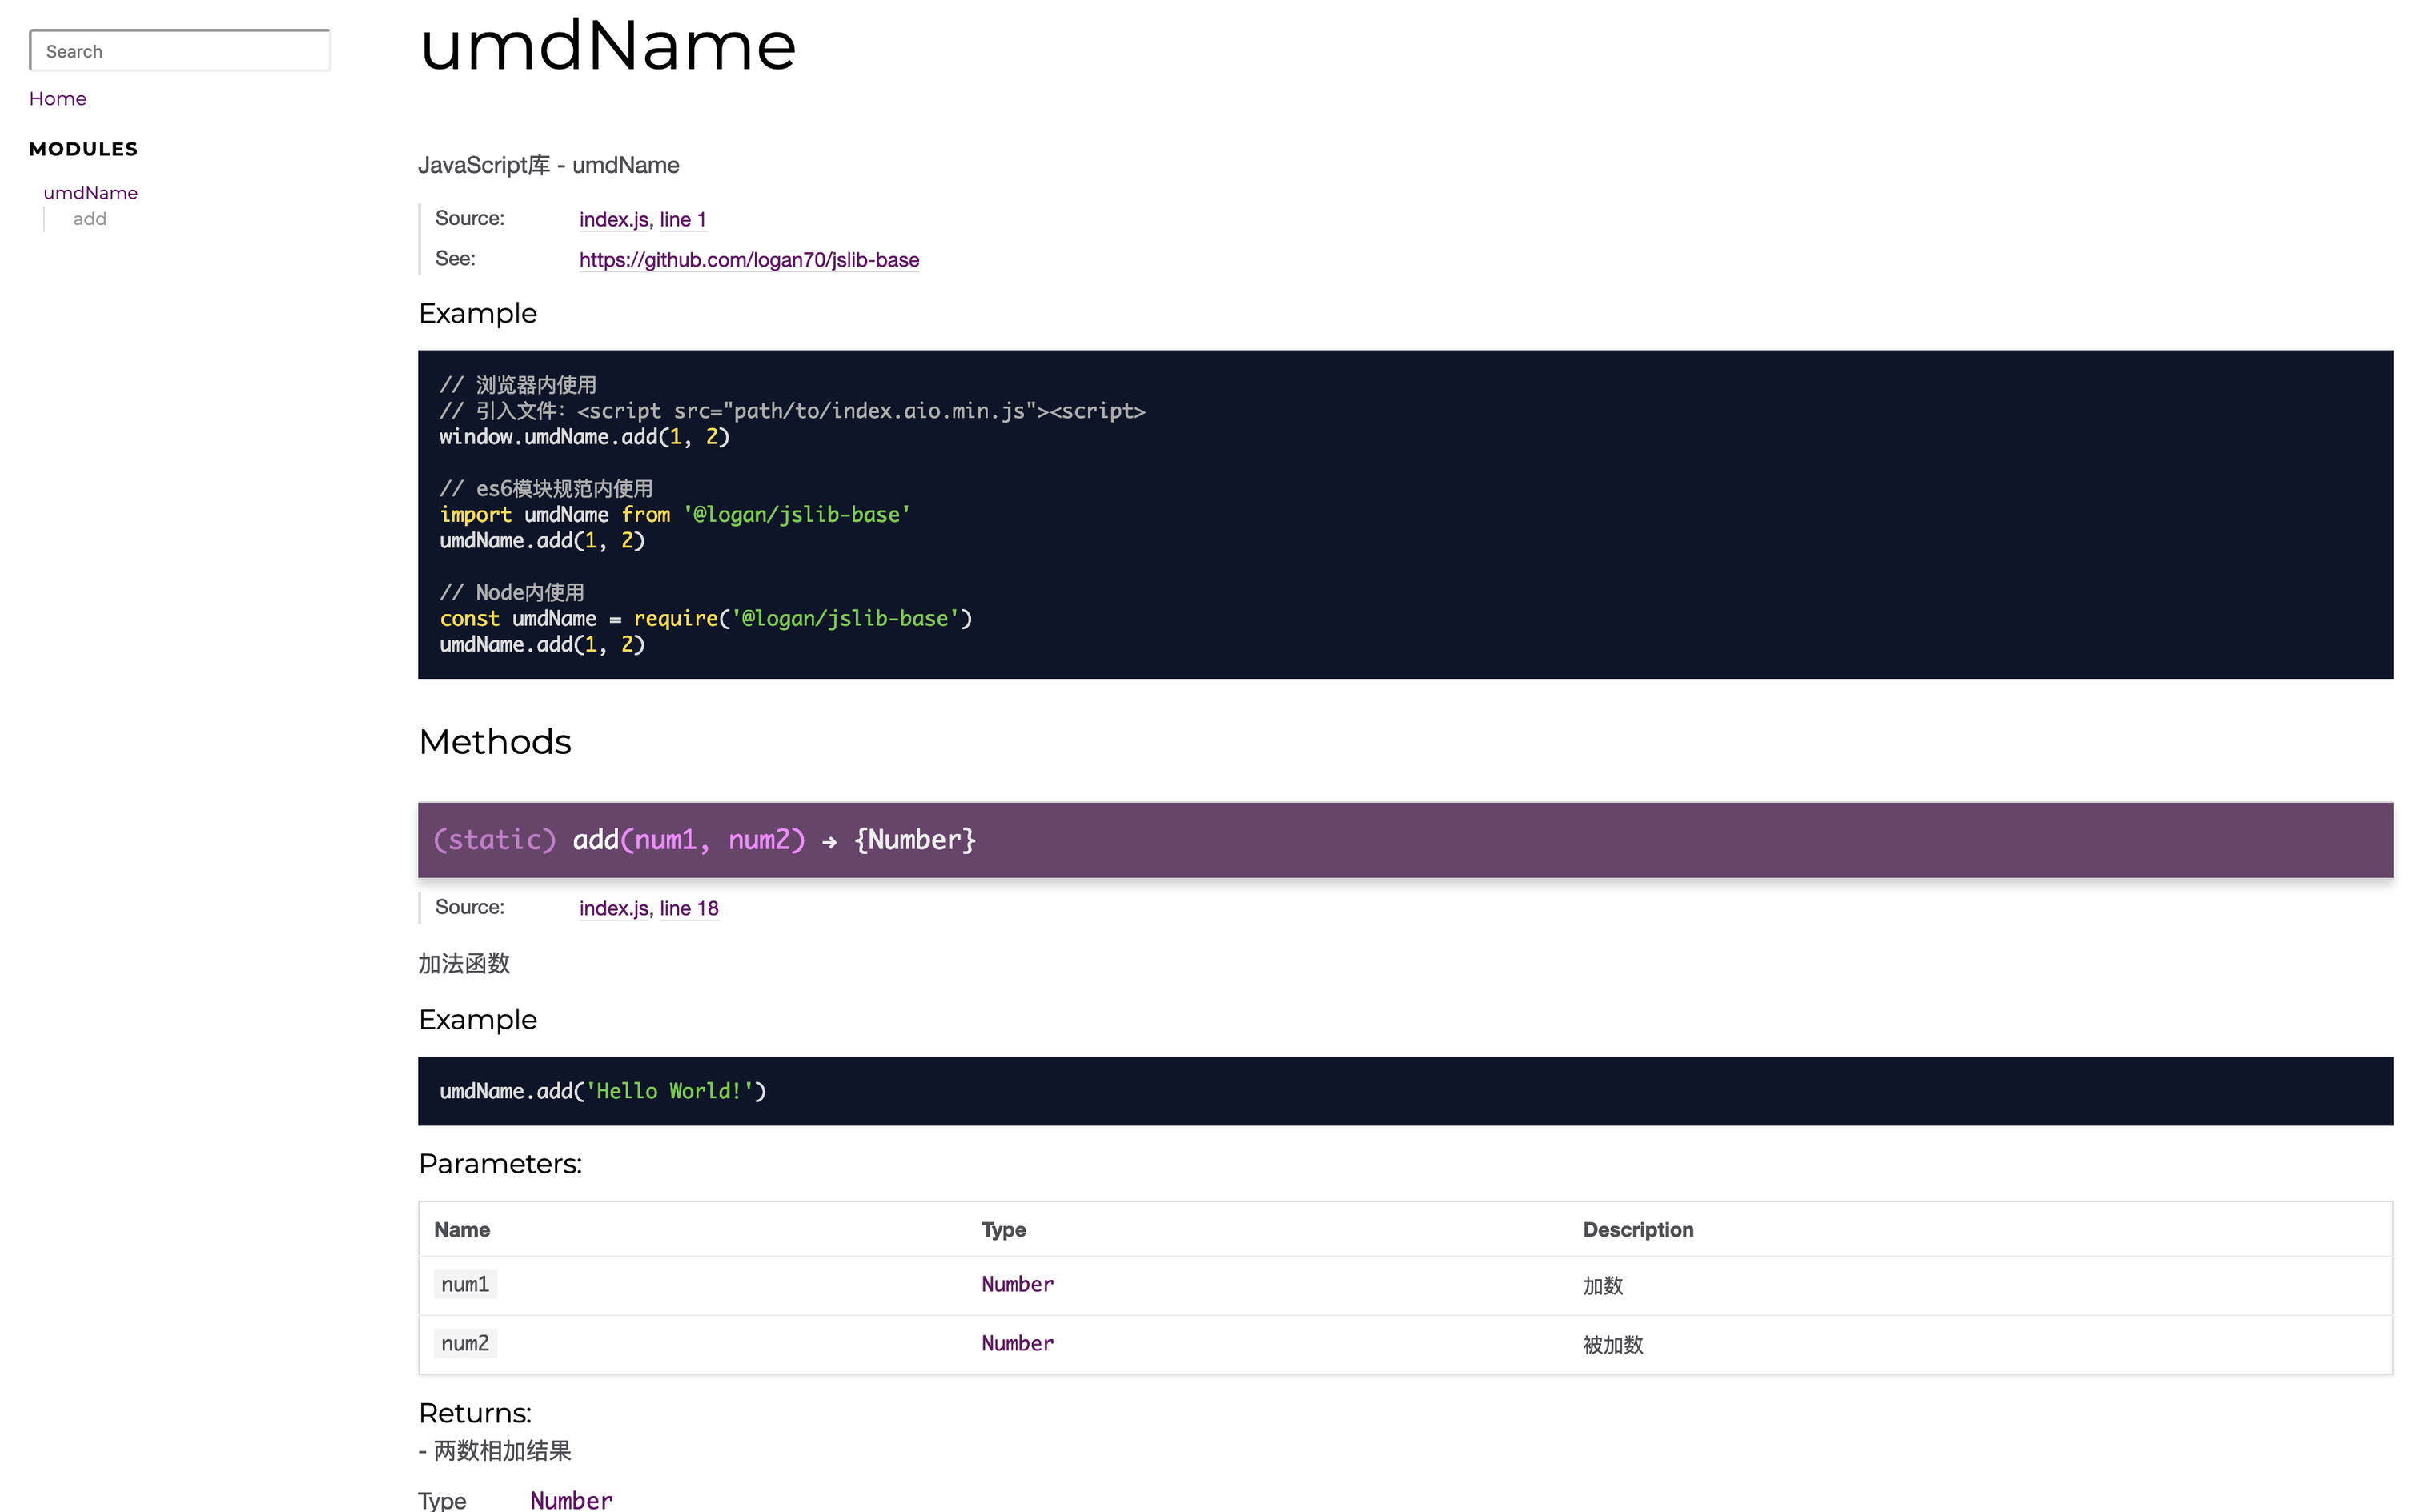
效果如上图所示,然后我们在源码内添加TypeScript规范化注释,相关注释标准也可前往TypeDoc官网查看:
注意:TypeDoc不支持@example标签,但是支持MarkDown语法,所以我们可以将代码实例写在md标签内
/**
 * @module umdName
 * @description JavaScript库 - umdName
 * @see https://github.com/logan70/jslib-base
 * @example
 * ```js
 *
 * // 浏览器内使用
 * // 引入文件:<script src="path/to/index.aio.min.js"><script>
 * window.umdName.add(1, 2)
 *
 * // es6模块规范内使用
 * import umdName from '@logan/jslib-base'
 * umdName.add(1, 2)
 *
 * // Node内使用
 * const umdName = require('@logan/jslib-base')
 * umdName.add(1, 2)
 * ```
 */

/**
 * @description 加法函数
 * @param num1 - 加数
 * @param num2 - 被加数
 * @returns 两数相加结果
 * @example
 * ```js
 *
 * umdName.add(1, 2)
 * ```
 */
export const add: (num1: number, num2: number) => number
  = (num1: number, num2: number): number => num1 + num2
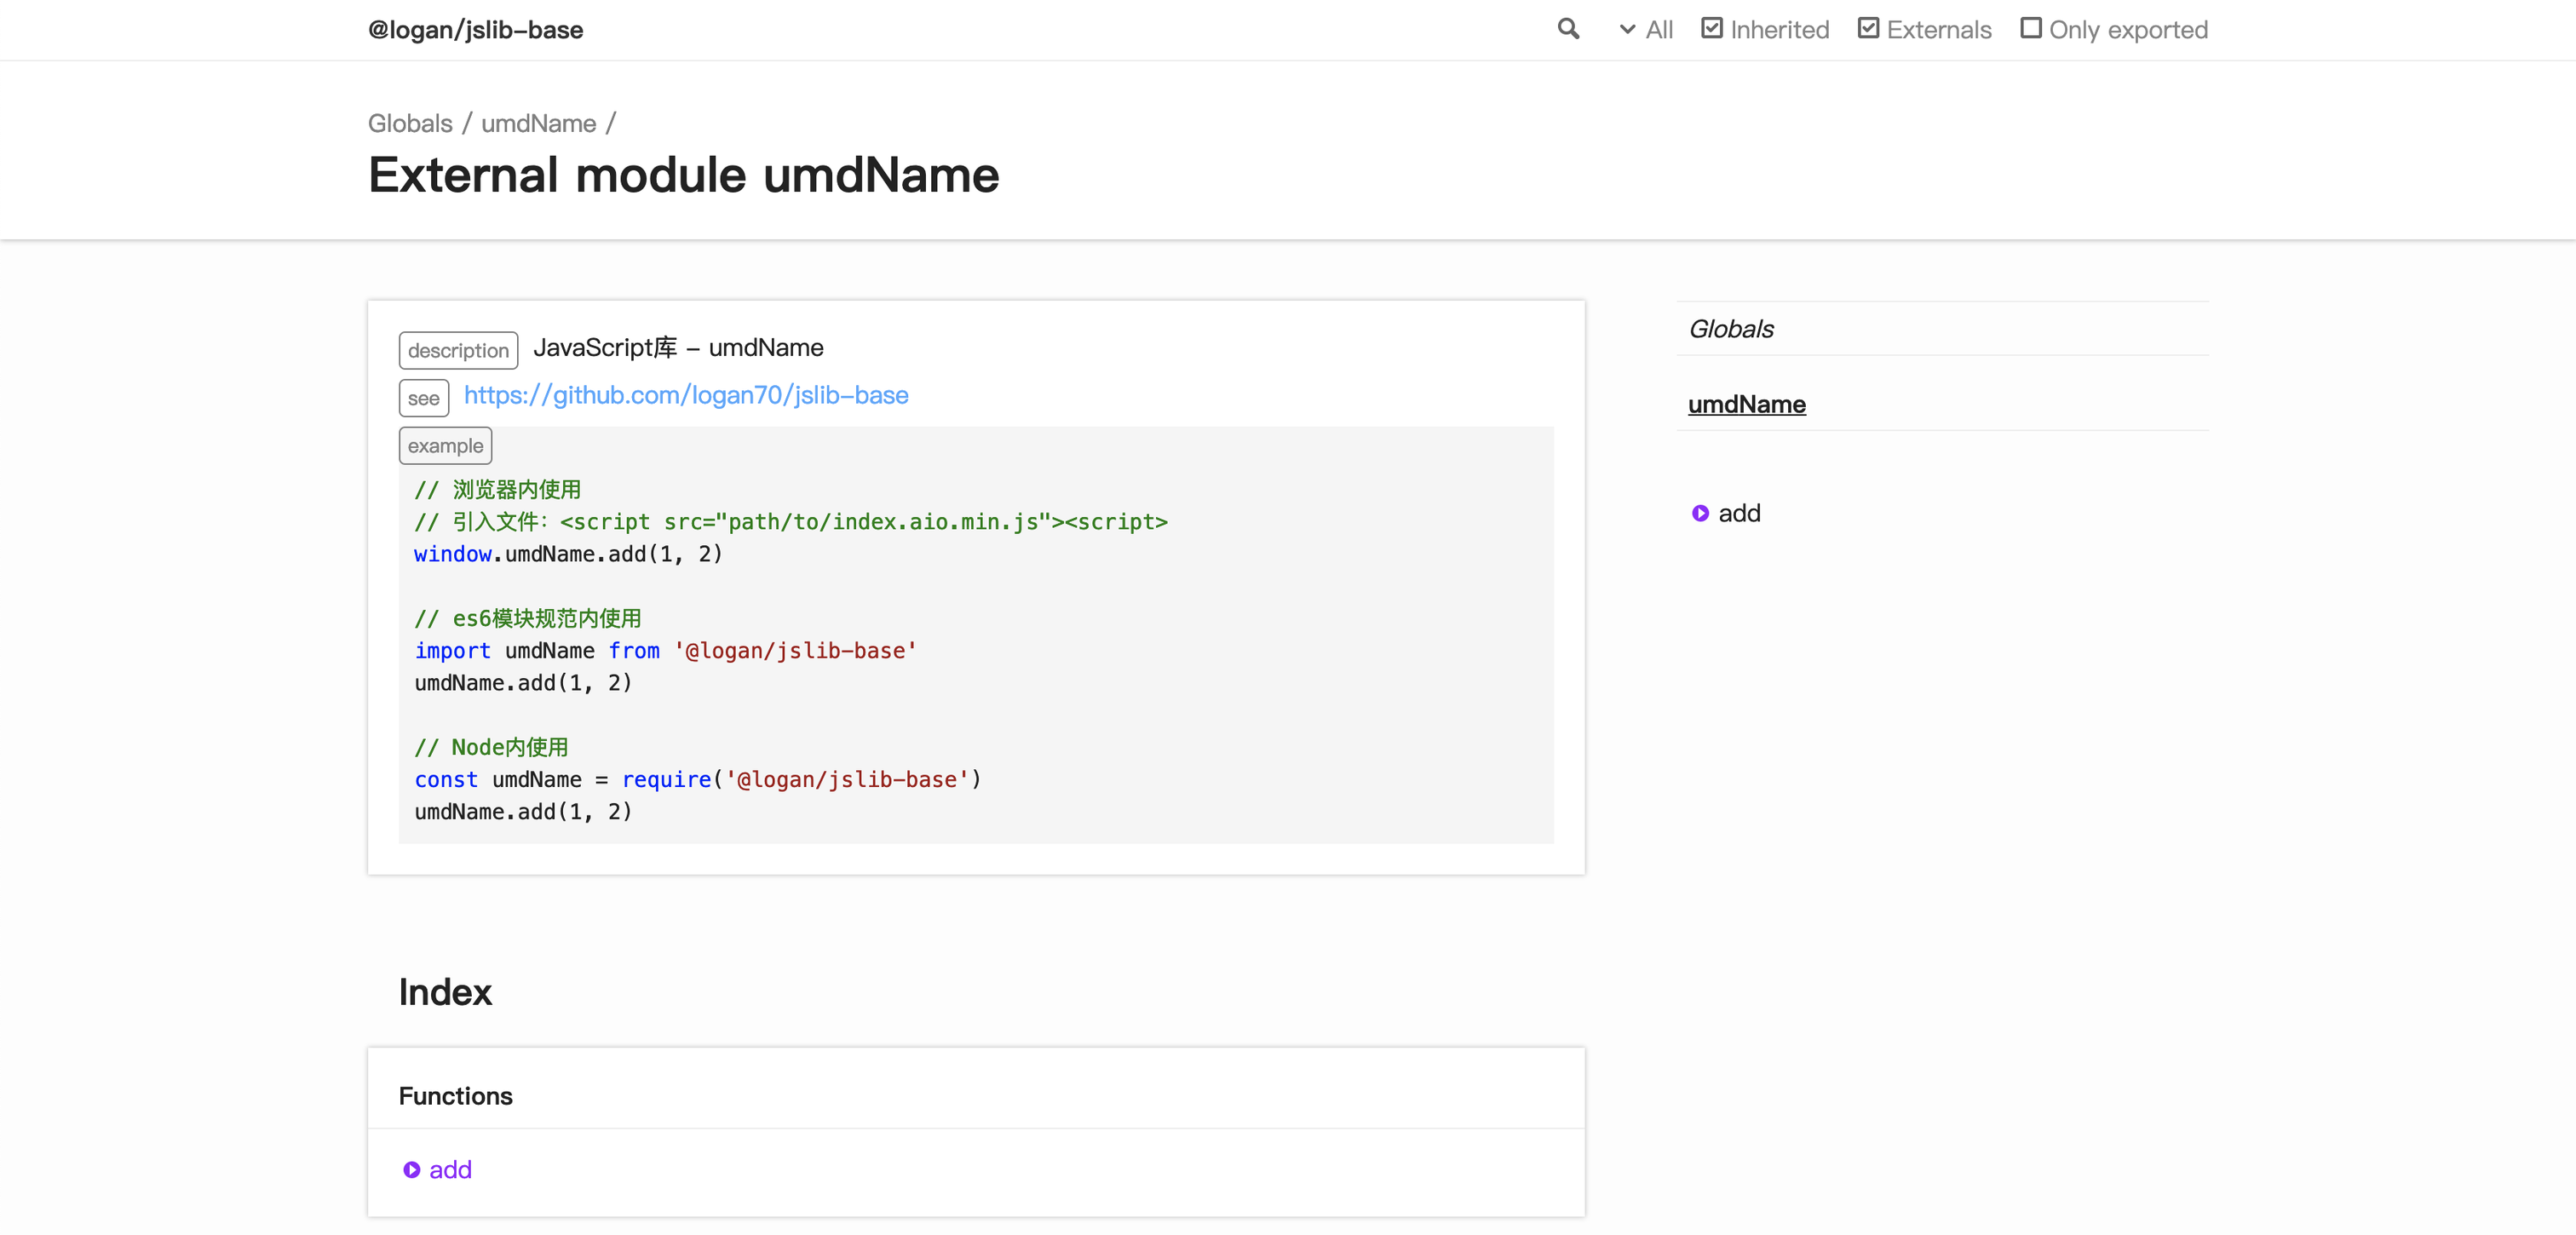
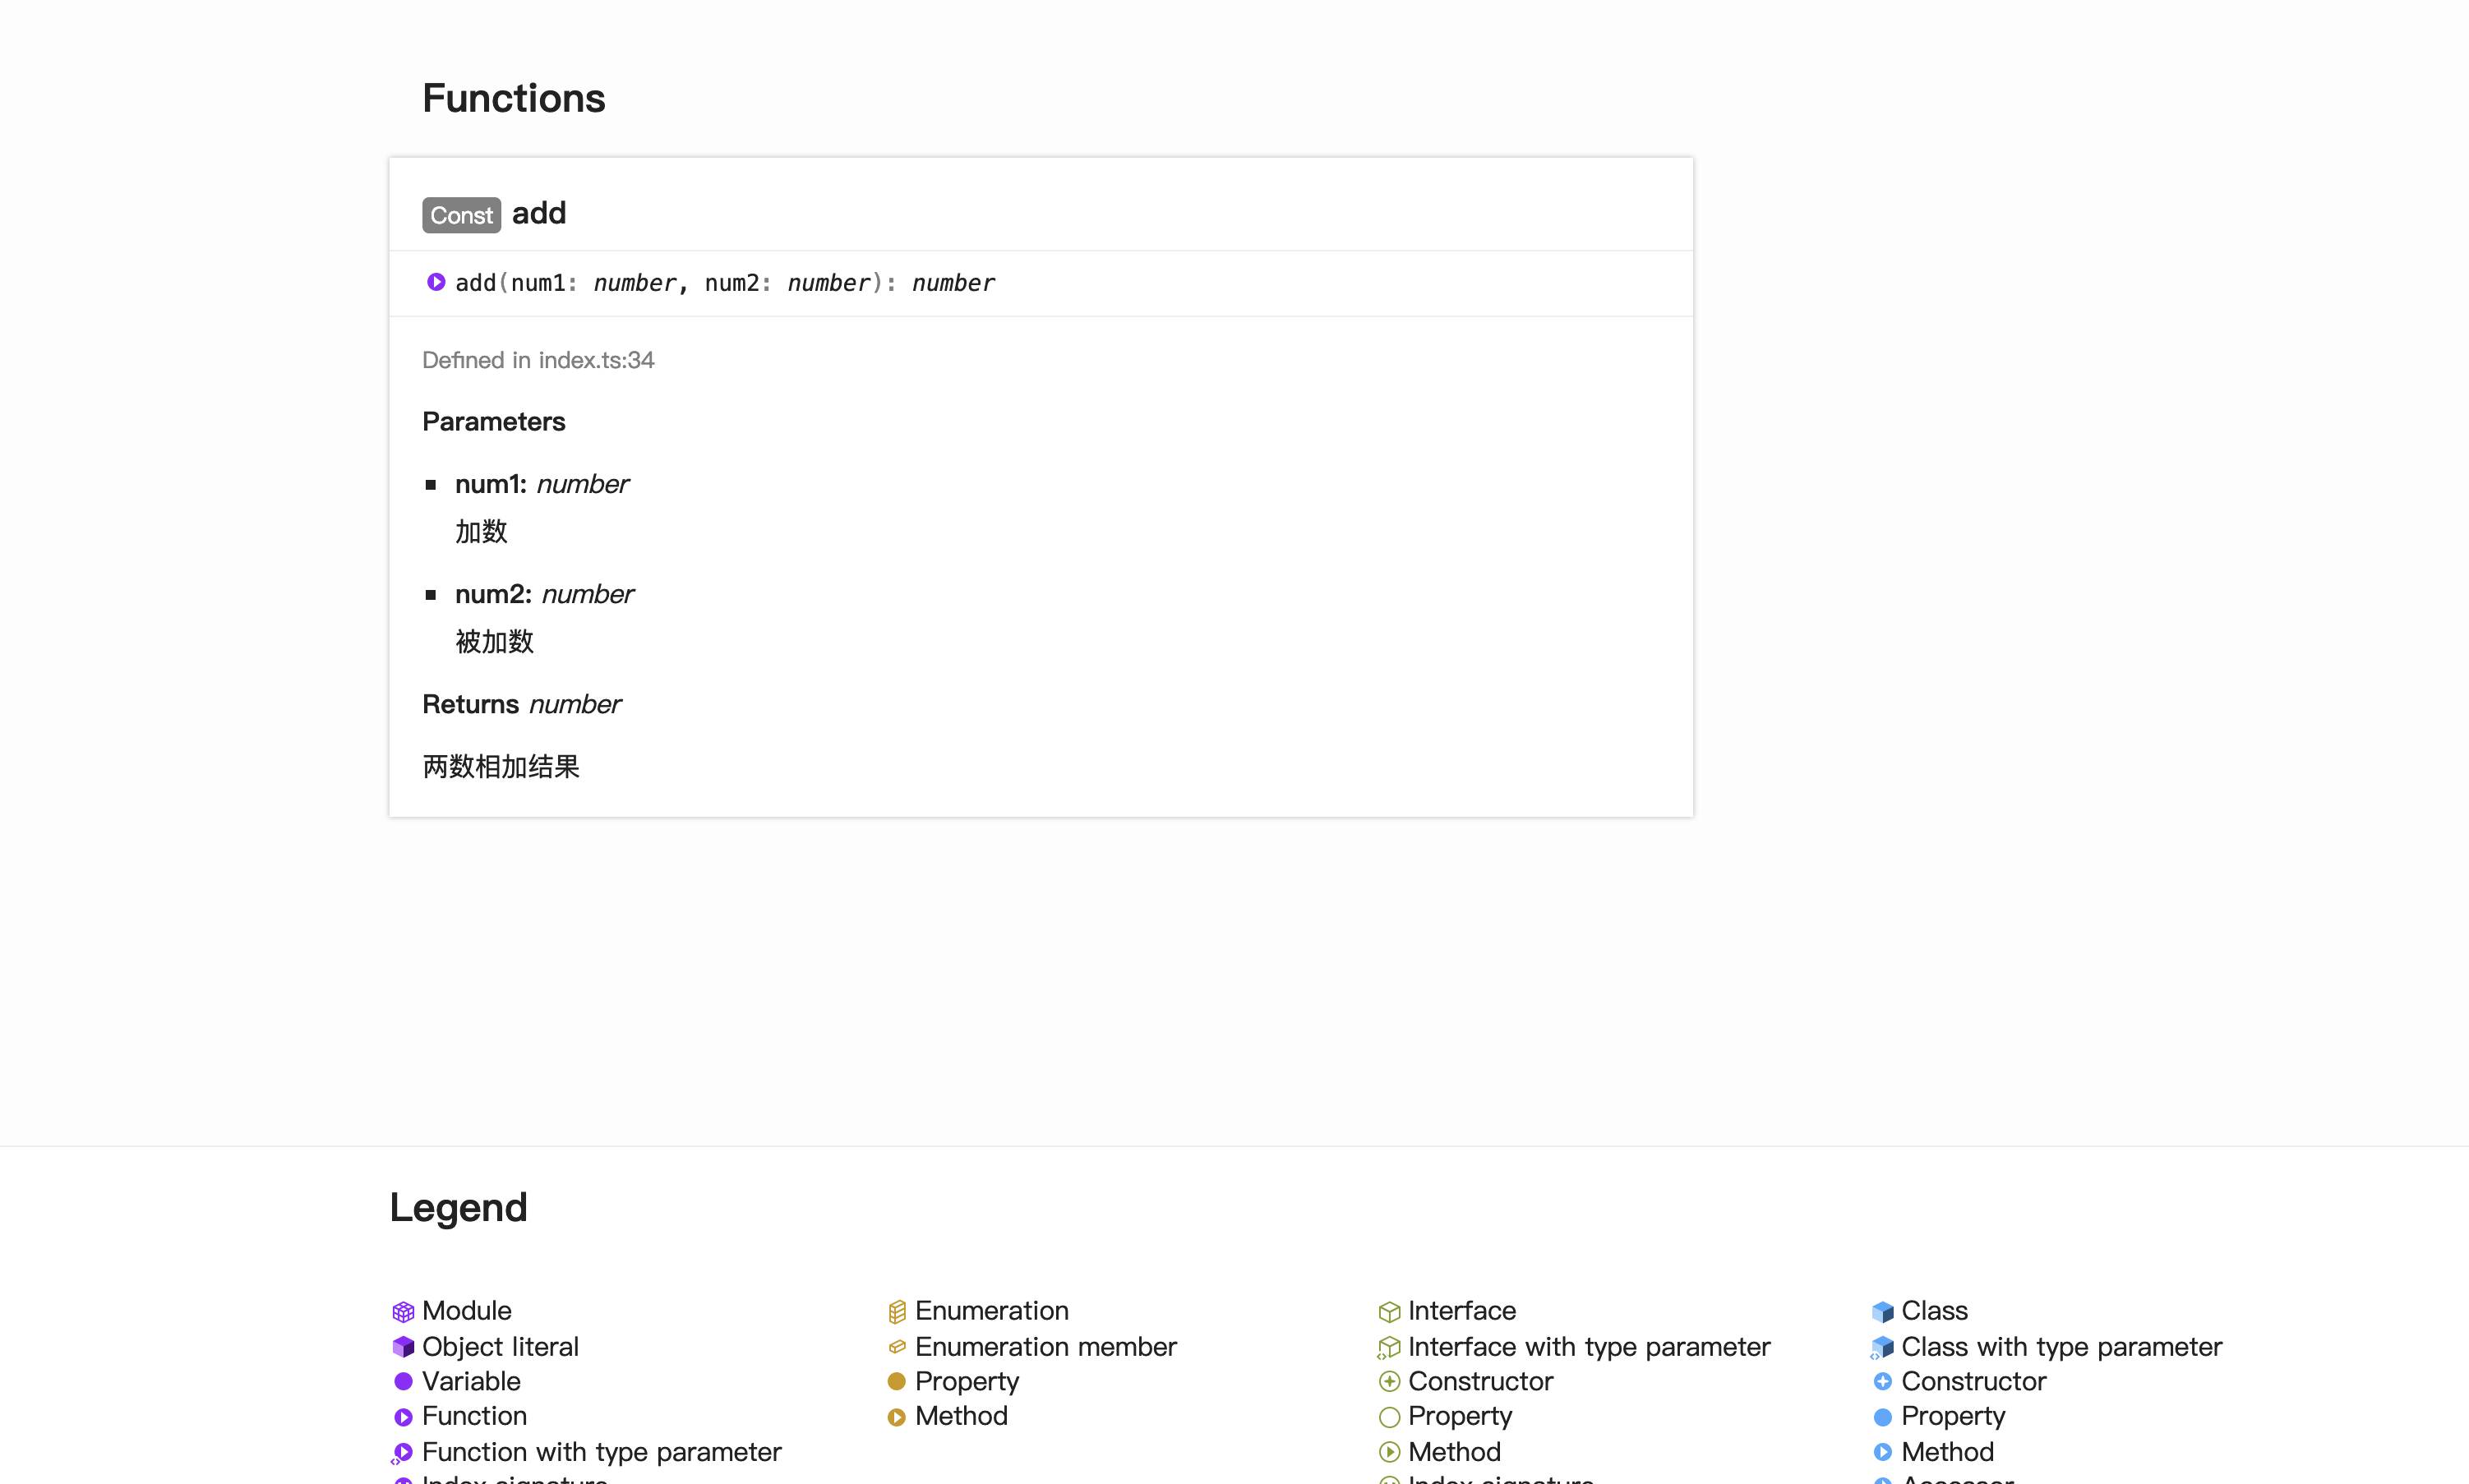
然后将jslib.config.js中的源码类型修改为ts,运行命令npm run doc,打开docs/index.html查看效果:
单元测试及测试覆盖率
使用工具
- Jest: 单元测试框架 - Jest中文文档
- babel-jest: JS新语法特性支持插件 - babel-jest
- ts-jest: TypeScript支持插件 - ts-jest
- @type/jest: TypeScript的Jest声明插件 - @type/jest
首先安装依赖:
$ npm install jest babel-jest ts-jest @type/jest -D
编写jest文件build/command-test/jest.config.js。
// build/command-test/jest.config.js
const path = require('path')

module.exports = {
  // 根路径,指向项目根路径
  rootDir: path.resolve(__dirname, '../../'),
  // jest寻找的路径数组,添加项目根路径
  "roots": [
    path.resolve(__dirname, '../../')
  ],
  // ts-jest用于支持typescript, babel-jest用于支持ES6模块化语法
  "transform": {
    "^.+\\.tsx?$": "ts-jest",
    "^.+\\.jsx?$": "babel-jest"
  },
  // 测试文件匹配正则
  "testRegex": "(/__tests__/.*|(\\.|/)(test|spec))\\.[jt]sx?$",
  // 测试文件内可省略的文件后缀
  "moduleFileExtensions": ["ts", "js"],
  // 显示测试内容
  "verbose": true
}
然后在package.json中添加生成API文档的命令,npm run test:coverage命令为单元测试并收集测试覆盖信息的命令,测试覆盖信息后面会讲到:
// package.json
{
  "scripts": {
    ...
    "test": "node build/index.js test",
    "test:coverage": "node build/index.js test --coverage",
    ...
  }
}
由于JS新语法特性支持需要Babel编译,我们创建并编写Babel配置文件.babelrc:
// .babelrc
{
  "presets": ["@babel/preset-env"]
}
然后创建build/command-test/index.js编写执行单元测试任务的代码:
// build/command-test/index.js
const { spawnSync } = require('child_process')

module.exports = (args = {}) => {
  return new Promise(resolve => {
    // 指定jest配置文件
    const cliOptions = ['--config', 'build/command-test/jest.config.js']
    // 是否收集测试覆盖率信息
    if (args.coverage) {
      cliOptions.push('--collectCoverage')
    }
    spawnSync('jest', cliOptions, {
      stdio: 'inherit'
    })
    resolve()
  })
}
然后我们在项目根目录下新建__tests__文件夹编写单元测试用例,更多单元测试知识请前往Jest中文文档学习:
// __tests__/index.test.js
import { add } from '../src/index.js'

describe('单元测试(js)', () => {
  it('1加2等于3', () => {
    expect(add(1, 2)).toEqual(3)
  })
})

// __tests__/index.test.ts
import { add } from '../src/index'

describe('单元测试(ts)', () => {
  it('1加2等于3', () => {
    expect(add(1, 2)).toEqual(3)
  })
})
然后运行命令npm run test查看效果:
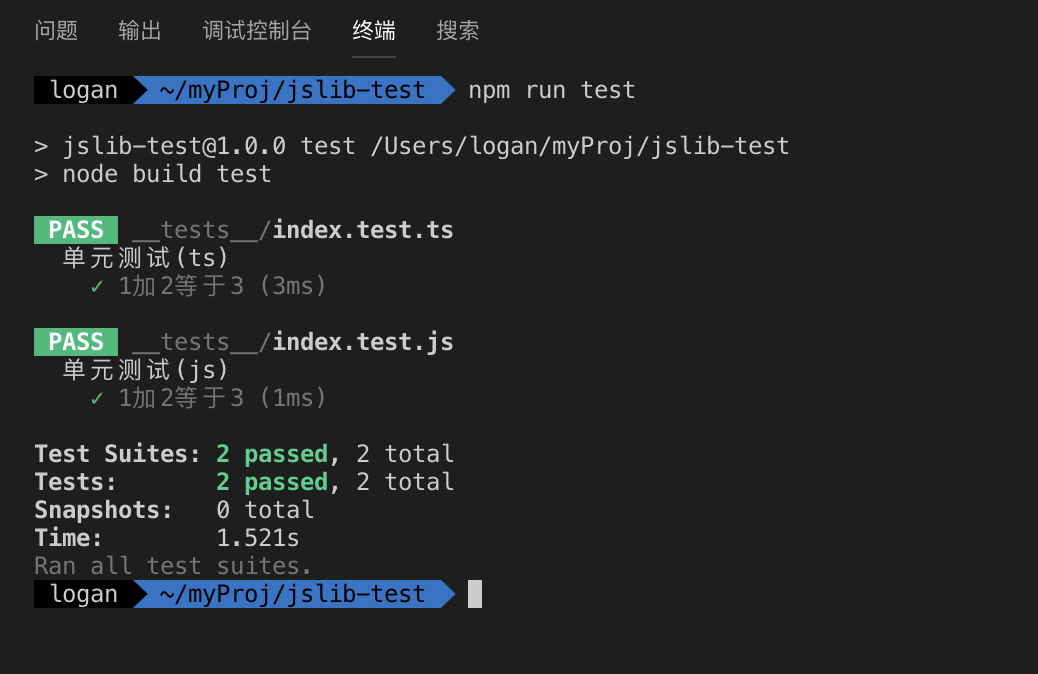
然后我们来运行命令npm run test:coverage查看测试覆盖率信息:
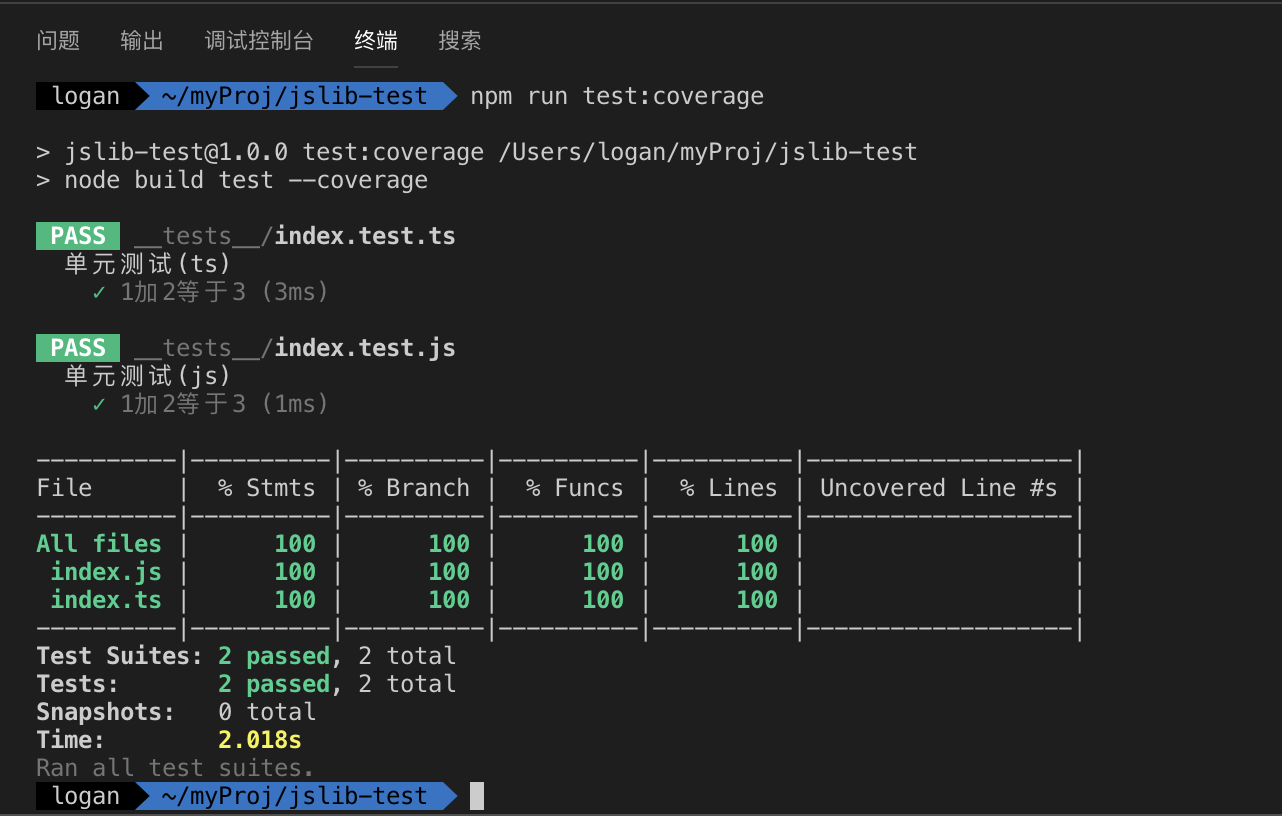
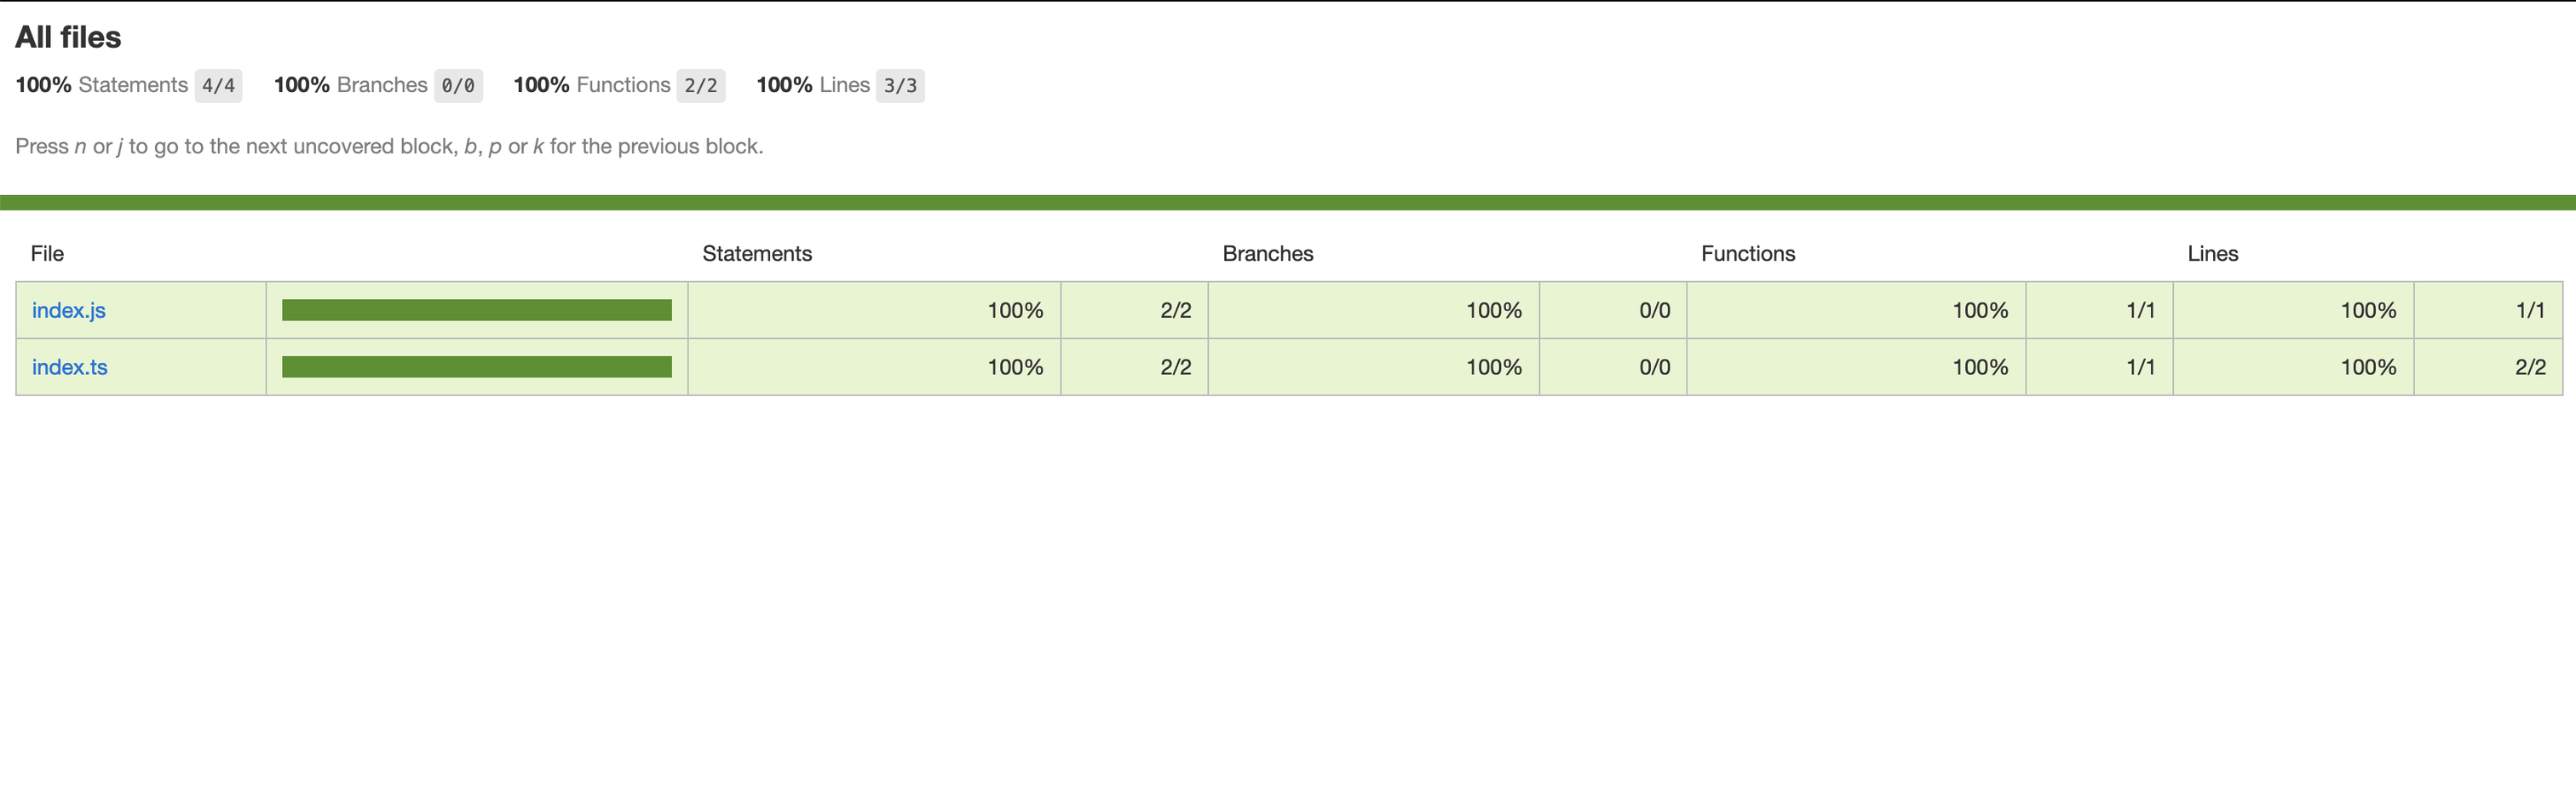
在浏览器中打开coverage/lcov-report/index.html也可查看测试覆盖率信息:
帮助信息
使用工具
首先安装依赖:
$ npm install chalk ascii-art -D
然后在package.json中添加显示帮助信息的命令:
// package.json
{
  "scripts": {
    ...
    "help": "node build/index.js help",
    ...
  }
}
然后创建build/command-help/index.js编写执行输出帮助信息任务的代码:
const art = require('ascii-art')
const chalk = require('chalk')

module.exports = () => {
  return new Promise(resolve => {
    // 生成字符画
    art.font('@logan\/jslib\-base', 'Doom', data => {
      console.log(chalk.cyan(('-').repeat(104)))
      console.log(chalk.cyan(data))
      console.log(chalk.cyan(('-').repeat(104)))
      console.log()
      console.log('Usage: npm run <command>')
      console.log()
      console.log('A good JavaScript library scaffold.')
      console.log()
      console.log('Commands:')
      console.log('  npm run init, initialize this scaffold.')
      console.log('  npm run build, output bundle files of three different types(UMD, ES6, CommonJs).')
      console.log('  npm run dev, select a type of output to watch and rebuild on change.')
      console.log('  npm run lint, lint your code with ESLint/TSLint.')
      console.log('  npm run lint:fix, lint your code and fix errors and warnings that can be auto-fixed.')
      console.log('  npm run doc, generate API documents based on good documentation comments in source code.')
      console.log('  npm run test, test your code with Jest.')
      console.log('  npm run test:coverage, test your code and collect coverage information with Jest.')
      console.log('  npm run help, output usage information.')
      console.log()
      console.log(`See more details at ${chalk.cyan('https://github.com/logan70/jslib-base')}`)
      resolve()
    })
  })
}
然后我们运行命令npm run help查看效果:

一键重命名
实现一键重命名的思路是:获取用户输入的信息,然后把相关文件内占位符替换为用户输入信息即可。
使用工具
- inquirer: 交互式命令行工具 - inquirer
首先安装依赖:
$ npm install inquirer -D
然后在package.json中添加初始化脚手架的命令:
// package.json
{
  "scripts": {
    ...
    "init": "node build/index.js init",
    ...
  }
}
inquirer使用方法前往inquirer文档学习,这里不做赘述,直接上代码。
然后创建build/command-init/index.js编写执行初始化脚手架任务的代码:
// build/command-init/index.js
const fs = require('fs')
const path = require('path')
const inquirer = require('inquirer')
// 显示帮助信息
const runHelp = require('../command-help/index')

// inquirer要执行的任务队列
const promptArr = []
// 获取UMD格式输出名
promptArr.push({
  type: 'input',
  name: 'umdName',
  // 提示信息
  message: 'Enter the name for umd export (used as global varible name in browsers):',
  // 校验用户输入
  validate(name) {
    if (/^[a-zA-Z][\w\.]*$/.test(name)) {
      return true
    } else {
      // 校验失败提示信息
      return `Invalid varible name: ${name}!`
    }
  }
})
// 获取项目名
promptArr.push({
  type: 'input',
  name: 'libName',
  message: 'Enter the name of your project (used as npm package name):',
  validate(name) {
    if (/^[a-zA-Z@][\w-]*\/?[\w-]*$/.test(name)) {
      return true
    } else {
      return `Invalid project name: ${name}!`
    }
  }
})
// 获取项目地址
promptArr.push({
  type: 'input',
  name: 'repoUrl',
  default: 'https://github.com/logan70/jslib-base',
  message: 'Enter the url of your repository:',
  validate(url) {
    if (/^https?\:\/\/[0-9a-zA-Z]([-.\w]*[0-9a-zA-Z])*(:(0-9)*)*(\/?)([a-zA-Z0-9\-\.\?\,\'\/\\\+&%\$#_]*)?$/.test(url)) {
      return true
    } else {
      return `Invalid repository url: ${url}!`
    }
  }
})

module.exports = (args = {}) => {
  return new Promise(async (resolve, reject) => {
    // 获取用户输入
    const { umdName, libName, repoUrl } = await inquirer.prompt(promptArr)

    // 需要修改的文件
    let files = [
      'jslib.config.js',
      'package.json',
      'package-lock.json',
      'README.md'
    ]

    try {
      await Promise.all(files.map((file) => new Promise((resolve, reject) => {
        const filePath = path.resolve(__dirname, '../../', file)
        // 读取文件
        fs.readFile(filePath, 'utf8', function (err, data) {
          if (err) {
            reject(err)
            return
          }
          // 替换占位符
          const result = data
            .replace(/umdName/g, umdName)
            .replace(/@logan\/jslib\-base/g, libName)
            .replace(/https:\/\/github\.com\/logan70\/jslib/g, repoUrl)

          // 重写文件
          fs.writeFile(filePath, result, 'utf8', (err) => {
             if (err) {
               reject(err)
               return
             }
             resolve()
          })
        })
      })))
      // 显示帮助信息
      await runHelp()
    } catch (e) {
      throw new Error(e)
    }
  })
}
然后我们运行命令npm run init查看效果:
watch监听构建模式
实现监听构建的思路是:用户选择一种输出格式,使用Rollup提供的Node API开启watch模式。
首先在package.json中添加初始化脚手架的命令:
// package.json
{
  "scripts": {
    ...
    "dev": "node build/index.js watch",
    ...
  }
}
然后创建build/command-watch/index.js编写执行监听构建任务的代码:
const path = require('path')
const rollup = require('rollup')
const inquirer = require('inquirer')

const { srcType } = require('../../jslib.config')

// rollup 监听配置
const watchOption = {
  // 使用chokidar替换原生文件变化监听的工具
  chokidar: true,
  include: 'src/**',
  exclude: 'node_modules/**'
}

// 用户选择一种输出格式
const promptArr = [{
  type: 'list',
  name: 'configFile',
  message: 'Select an output type to watch and rebuild on change:',
  default: 'rollup.config.aio.js',
  choices: [{
    value: 'rollup.config.aio.js',
    name: 'UMD - dist/index.aio.js (Used in browsers, AMD, CMD.)'
  }, {
    value: 'rollup.config.esm.js',
    name: 'ES6 - dist/index.esm.js (Used in ES6 Modules)'
  }, {
    value: 'rollup.config.js',
    name: 'CommonJS - dist/index.js (Used in Node)'
  }]
}]

module.exports = (args = {}) => {
  return new Promise((resolve, reject) => {
    // 获取用户选择的输出格式
    inquirer.prompt(promptArr).then(({ configFile }) => {
      // 对应输出格式的rollup配置
      const customOptions = require(path.resolve(__dirname, '../rollConfig/', configFile))
      const options = {
        ...customOptions.inputOption,
        output: customOptions.outputOption,
        watch: watchOption
      }

      // 开始监听
      const watcher = rollup.watch(options)

      // 监听阶段时间处理
      watcher.on('event', async (event) => {
        if (event.code === 'START') {
          console.log('正在构建...')
        } else if (event.code === 'END') {
          console.log('构建完成。')
        }
      })
    })
  })
}
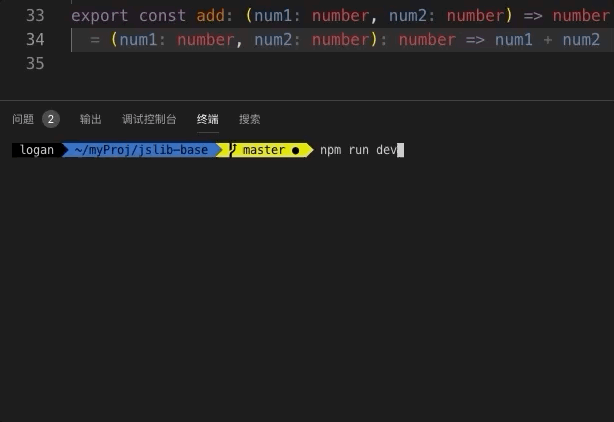
然后我们运行命令npm run dev查看效果:
规范Git提交信息
使用工具
- husky: Git钩子工具 - husky
- @commitlint/config-conventional 和 @commitlint/cli: Git commit信息校验工具 - commitlint
- commitizen: 撰写合格 Commit message 的工具。 - commitizen
- lint-staged: 增量校验代码风格工具 - lint-staged
具体使用方法前往上方文档自行学习。
首先安装依赖:
$ npm install husky @commitlint/config-conventional @commitlint/cli commitizen lint-staged -D
然后在package.json中添加以下信息:
// package.json
{
  "scripts": {
    ...
    "husky": {
        "hooks": {
          "pre-commit": "lint-staged",
          "commit-msg": "commitlint -E HUSKY_GIT_PARAMS"
        }
      },
      "lint-staged": {
        "src/**/*.js": [
          "eslint --fix",
          "git add"
        ],
        "src/**/*.ts": [
          "tslint --fix",
          "git add"
        ]
      },
      "commitlint": {
        "extends": [
          "@commitlint/config-conventional"
      ]
    },
    ...
  }
}
配置完成后我们来看看效果:
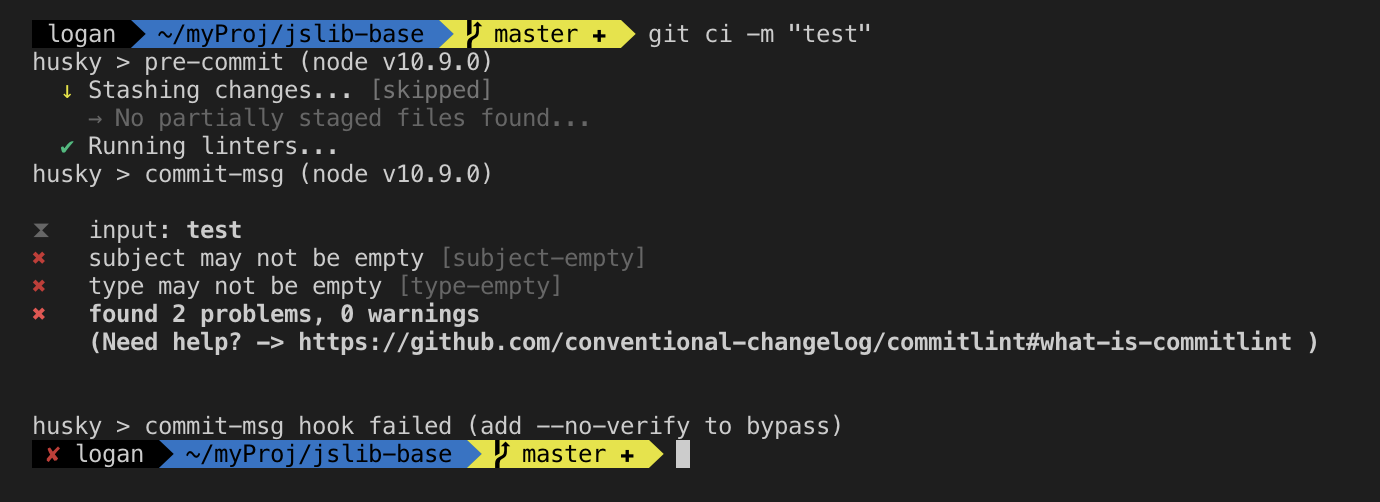
与预期相符,关于Git commit信息规范推荐阅读阮一峰老师的文章
这么多信息规范,记不住或者不想记怎么办,没关系,commitizen是一个撰写合格 Commit message 的工具。
之前我们已经安装过依赖,我们运行下面的命令使其支持 Angular 的 Commit message 格式。
$ commitizen init cz-conventional-changelog --save --save-exact
然后在package.json中添加Git提交的命令:
// package.json
{
  "scripts": {
    ...
    "commit": "npx git-cz",
    ...
  }
}
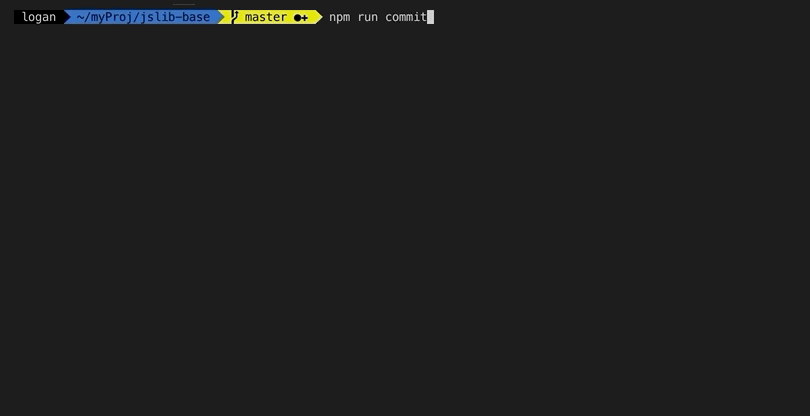
之后本项目凡是用到git commit命令,一律替换为npm run commit命令即可,我们看下效果:
这边还要介绍一个根据commit信息自动生成CHANGELOG并更新版本信息的工具 - standard-version
我们先安装依赖:
$ npm install standard-version
然后在package.json中添加release命令:
// package.json
{
  "scripts": {
    ...
    "release": "standard-version",
    ...
  }
}
之后要发布新版本时,可以运行命令npm run release来根据Git Commit历史自动更新CHANGELOG.md和版本信息。
持续集成
使用工具
使用方法非常简单,首先使用Github账号分别登录Travis-CI和Codecov,添加你的Github项目。
然后安装依赖:
$ npm install codecov -D
然后在package.json中添加codecov命令:
// package.json
{
  "scripts": {
    ...
    "codecov": "codecov",
    ...
  }
}
然后在项目跟目下下创建travis-ci配置文件.travis.yml:
language: node_js            # 指定运行环境为node

node_js:                     # 指定nodejs版本为8
  - "8"

cache:				               # 缓存 node_js 依赖,提升第二次构建的效率
  directories:
  - node_modules


script:                      # 运行的脚本命令
  - npm run test:coverage    # 单元测试并收集测试覆盖信息
  - npm run codecov          # 将单元测试结果上传到codecov
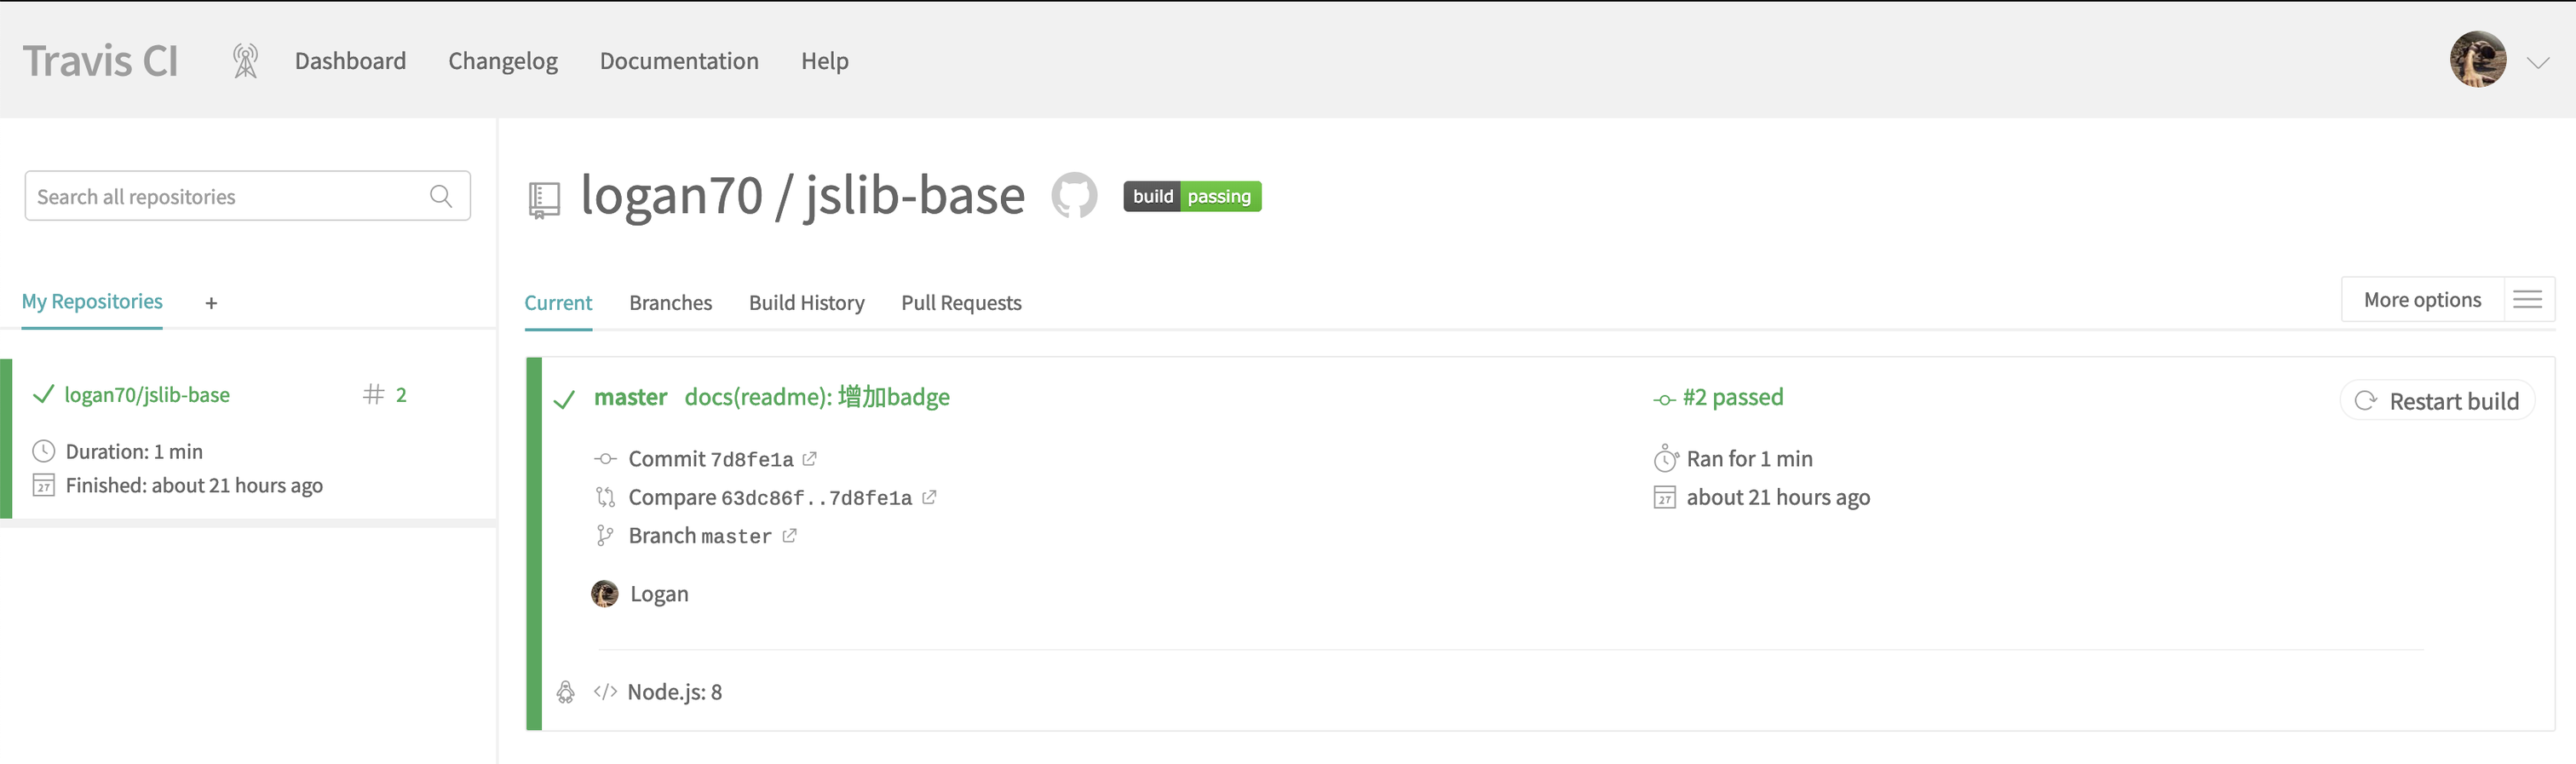
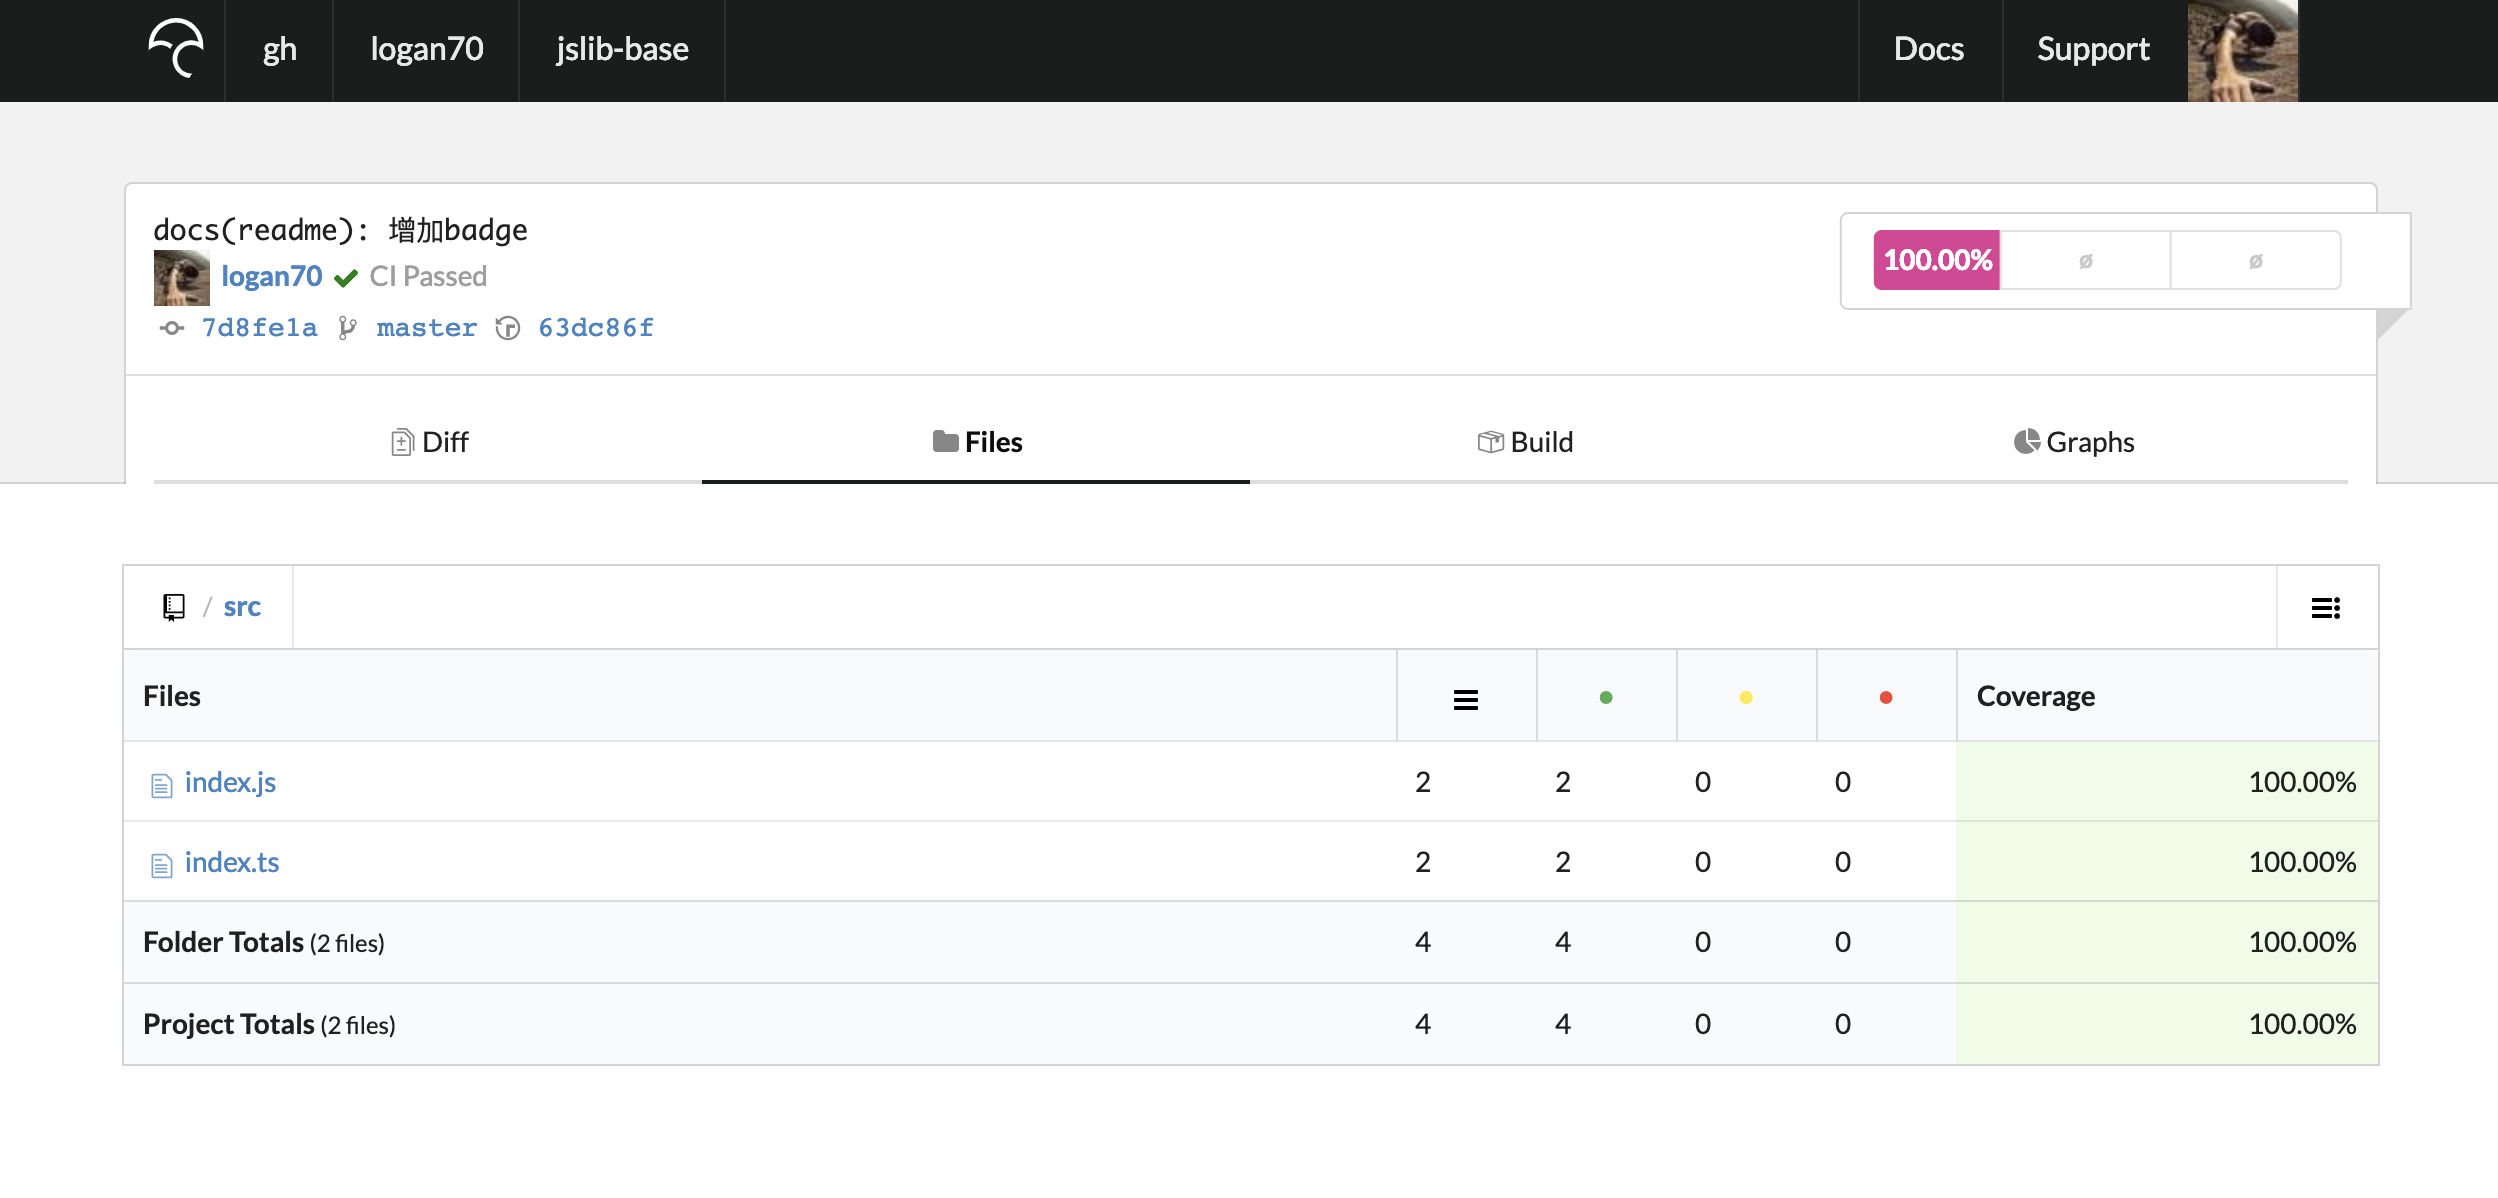
我们编写好源码及单元测试,推送到远程仓库,然后去查看结果:
Travis-CI:
Codecov:
README徽章
终于来到最后环节,README的编写没什么好说的,各有各的风格。
主要来说说README徽章,毕竟费了好大劲儿,不装个X怎么能行。
Tarvis-CI的徽章点击项目名称右侧徽章即可获得:

Codecov的徽章在项目Settings选项的Badge栏内:
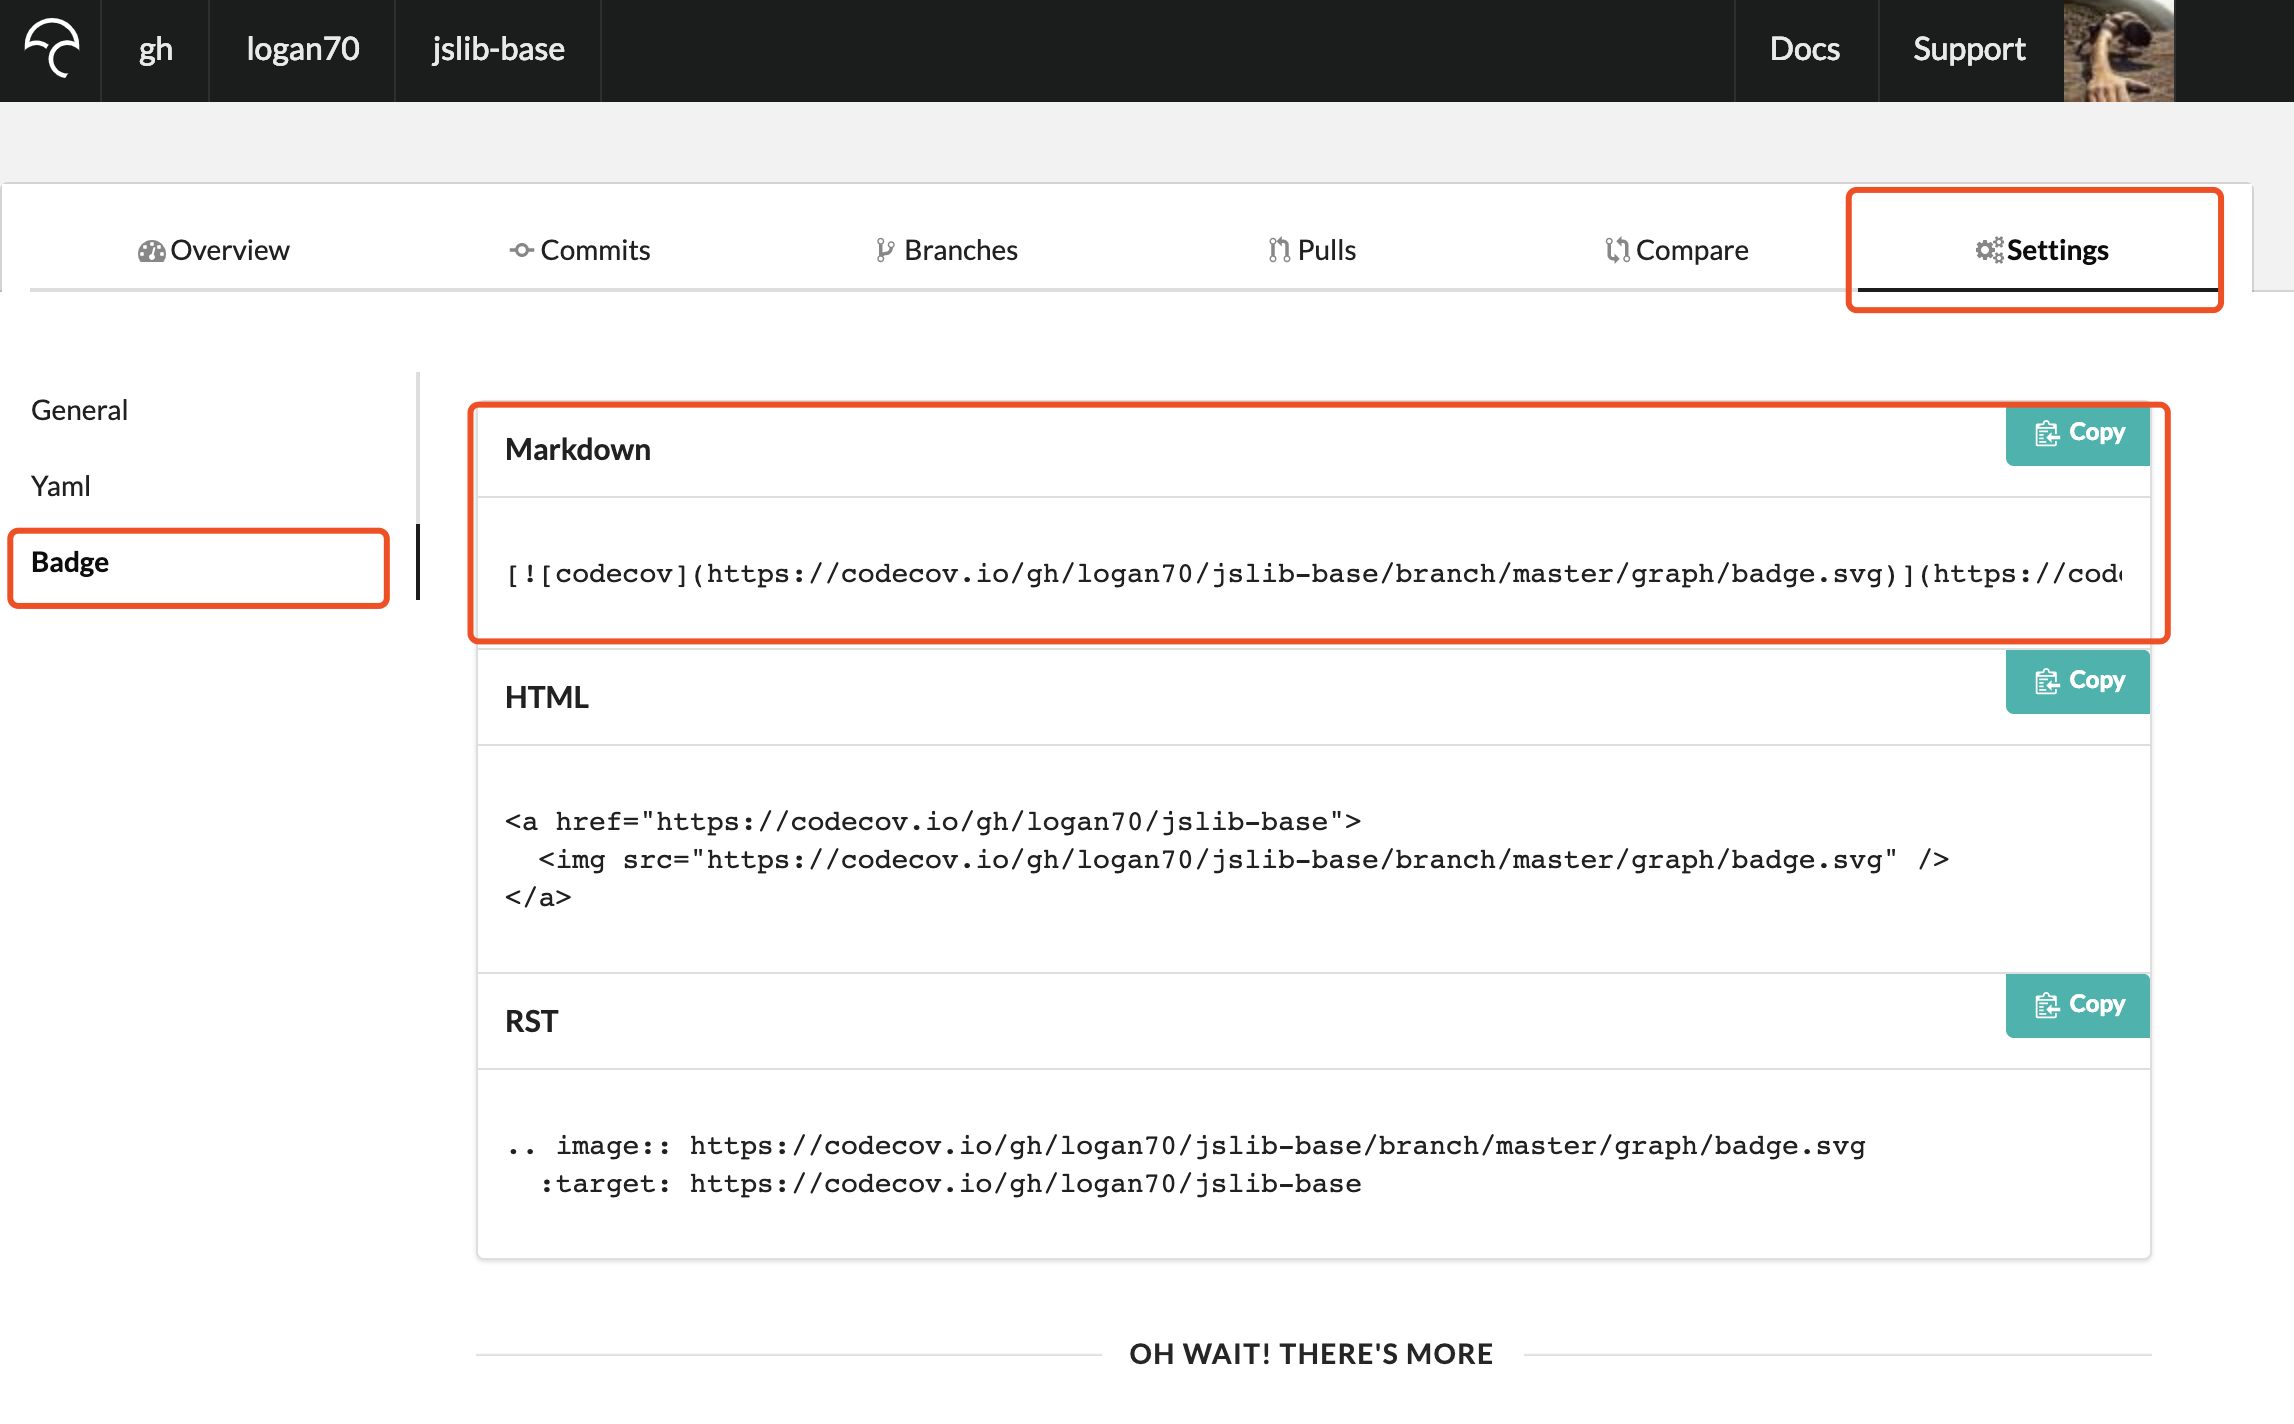
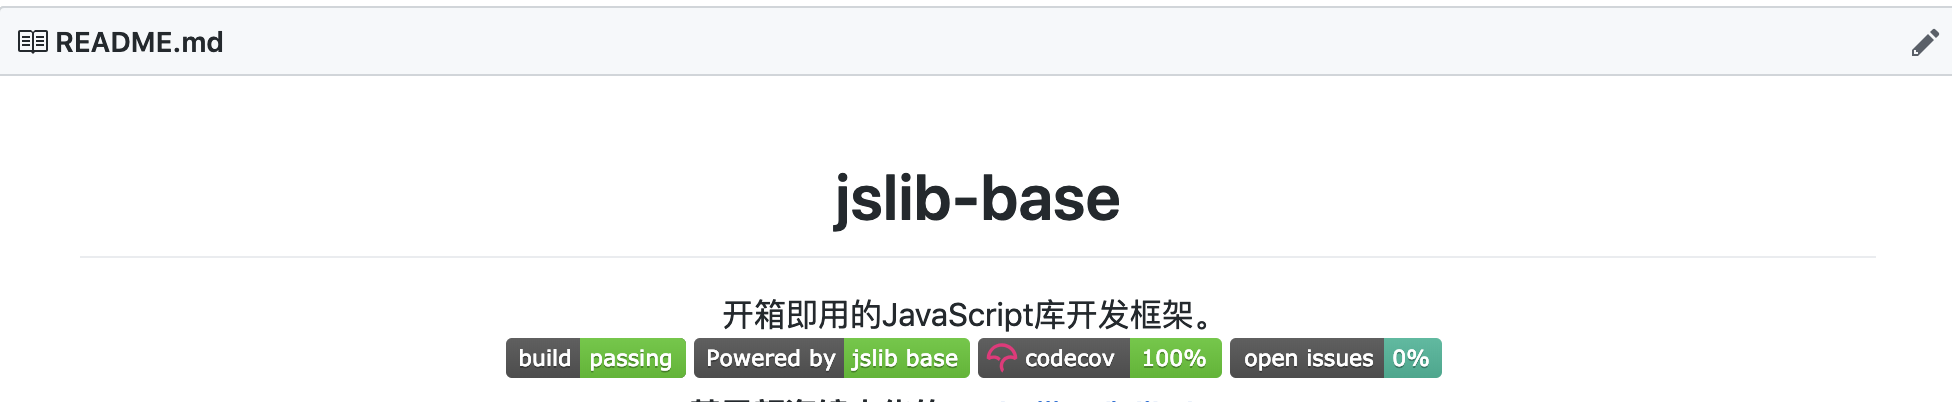
拷贝Markdown格式的徽章内容,粘贴进README.md即可,效果如下:
总结
这段时间的辛苦总算是没有白费,过程中学到了很多东西,看到这里的帅哥美女们,就别吝啬了,给个Star呗!
