微信公众号:wanpython
关注即可获取python网络爬虫、数据分析、机器学习、大数据等学习资料,期待你的加入!
如有建议意见,欢迎留言
今日突发奇想,想查看一下服务器各硬件的负载情况,但是使用free、top等这些linux命令,智能看到一堆数据,不能可视化展现网络、内存、内存使用情况
于是,经过查资料,发现了一个比较好用的工具:pydash
pydash是一个基于python和django的性能监测工具。可以运行在centos、ubuntu等主流的linux发行版本上,能够统计服务器资源,监控服务器性能
效果展示
话不多说,先来几张图片看看效果:
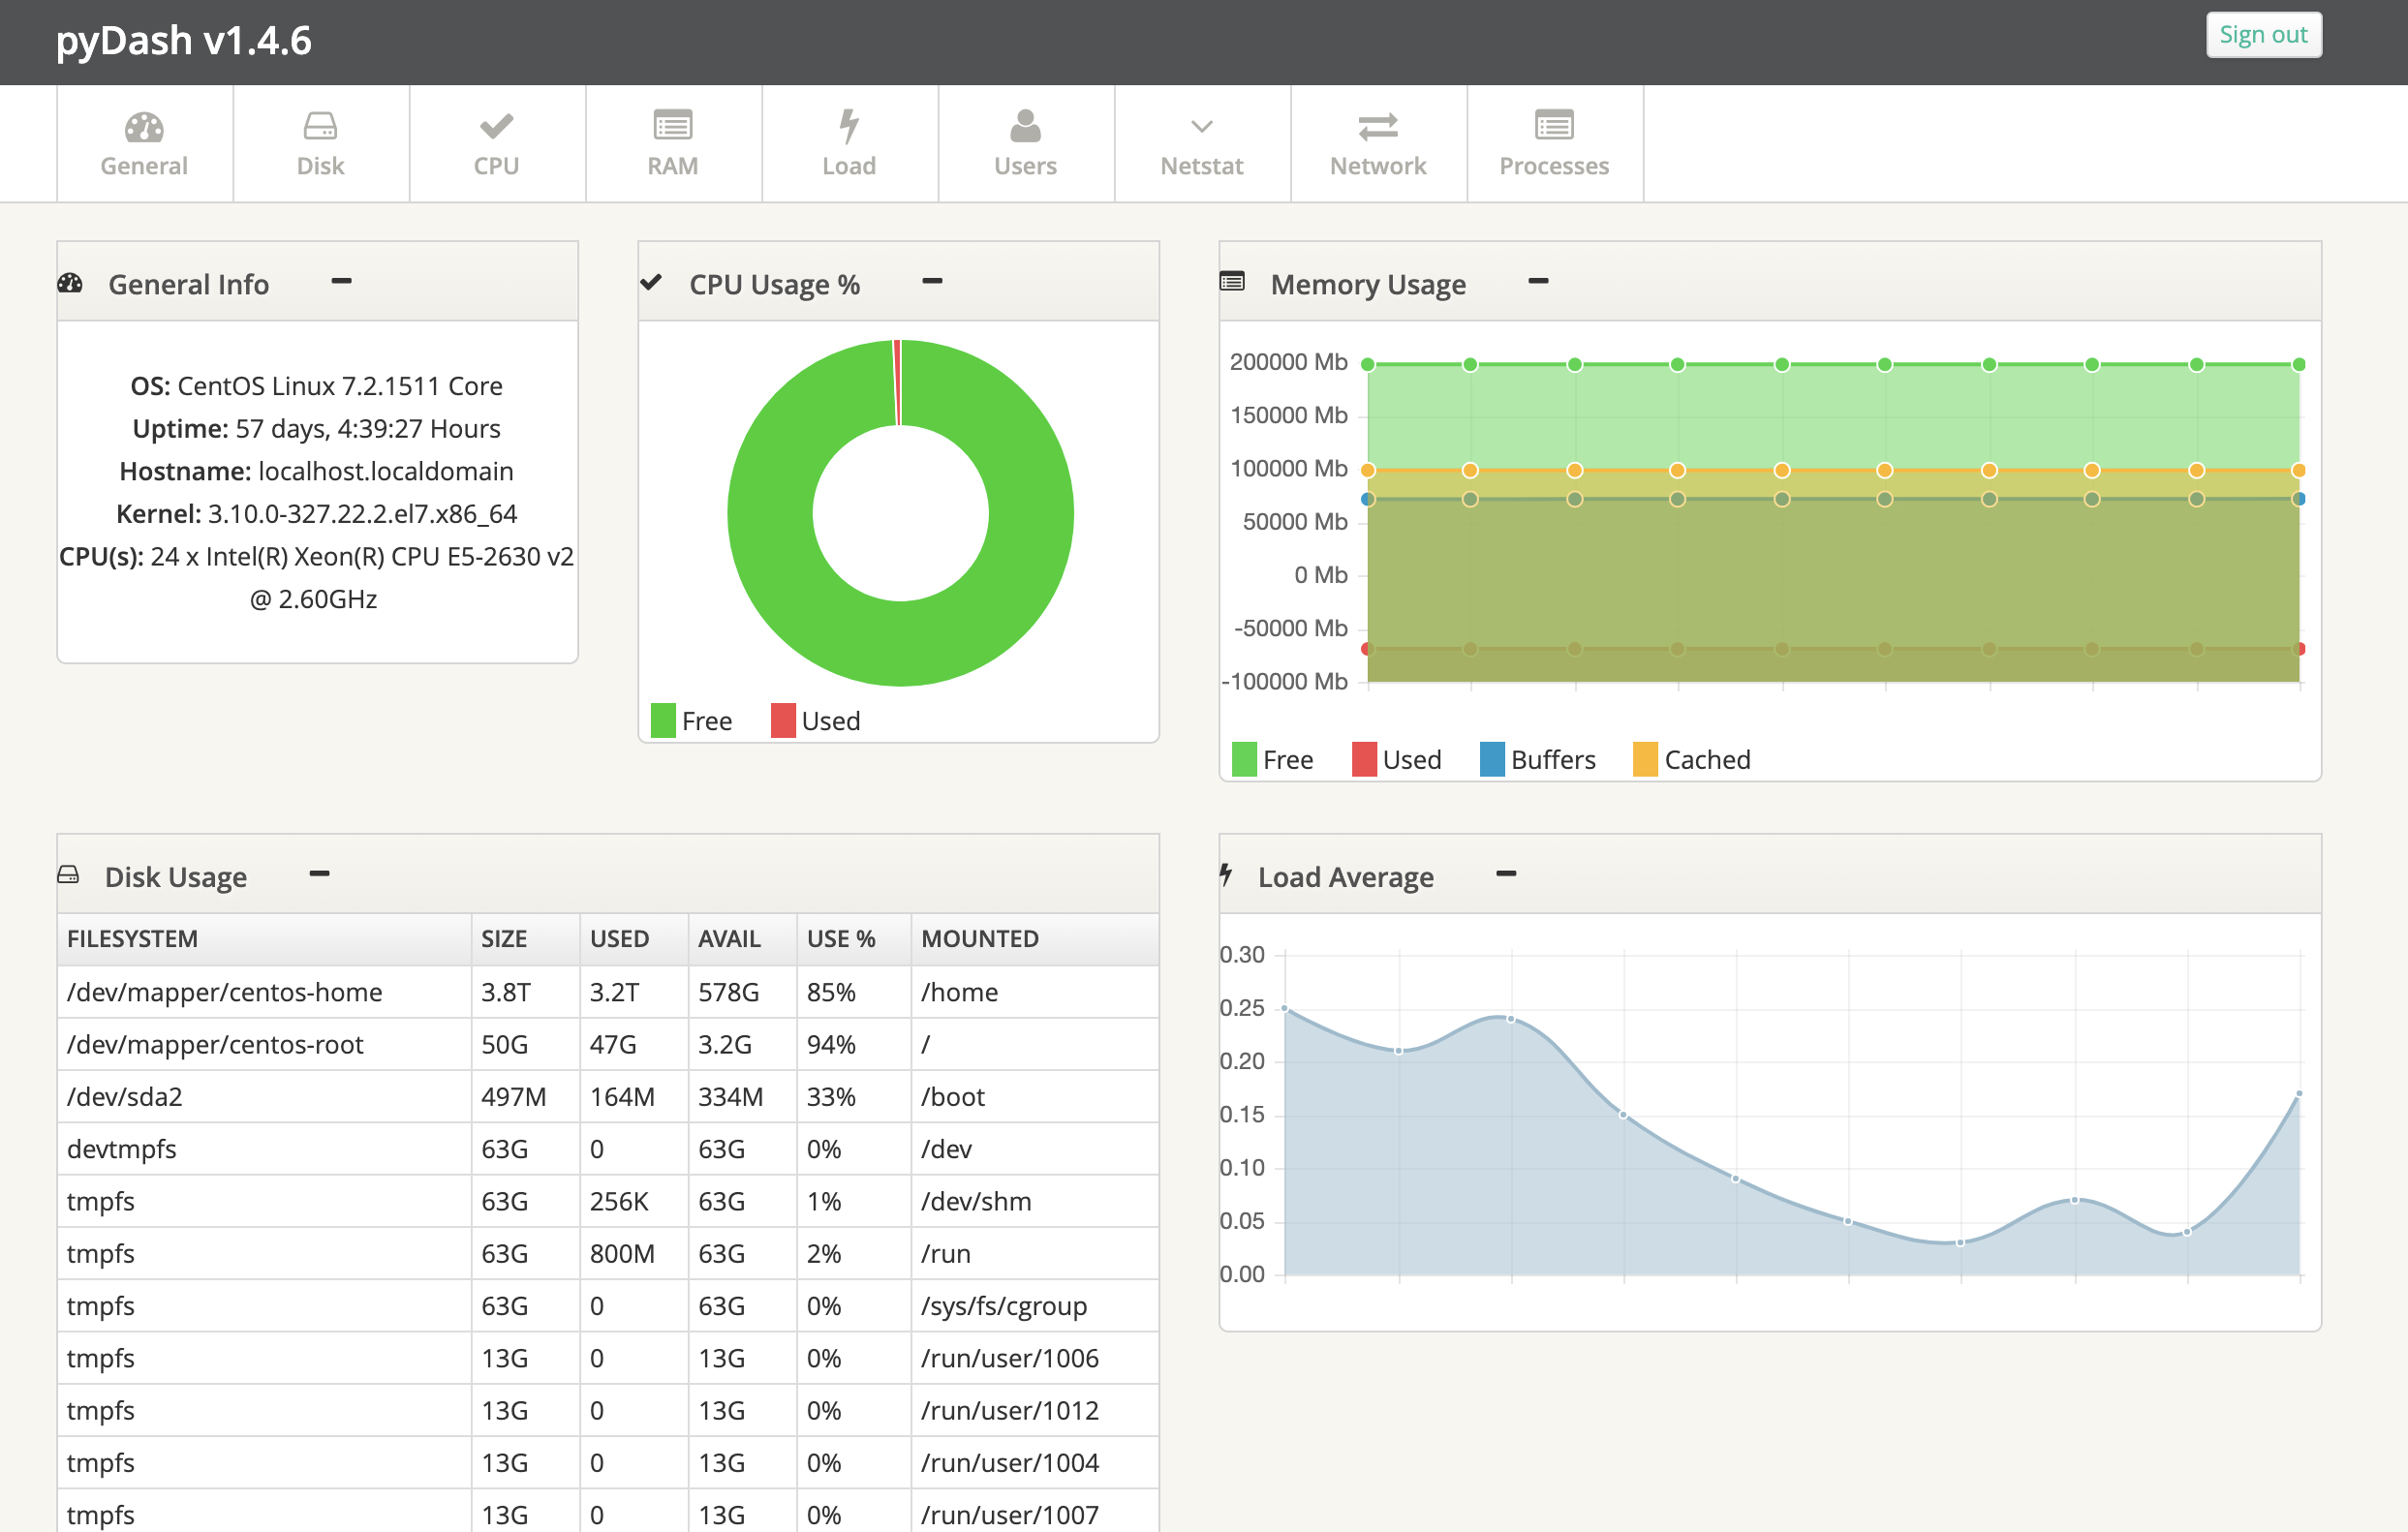
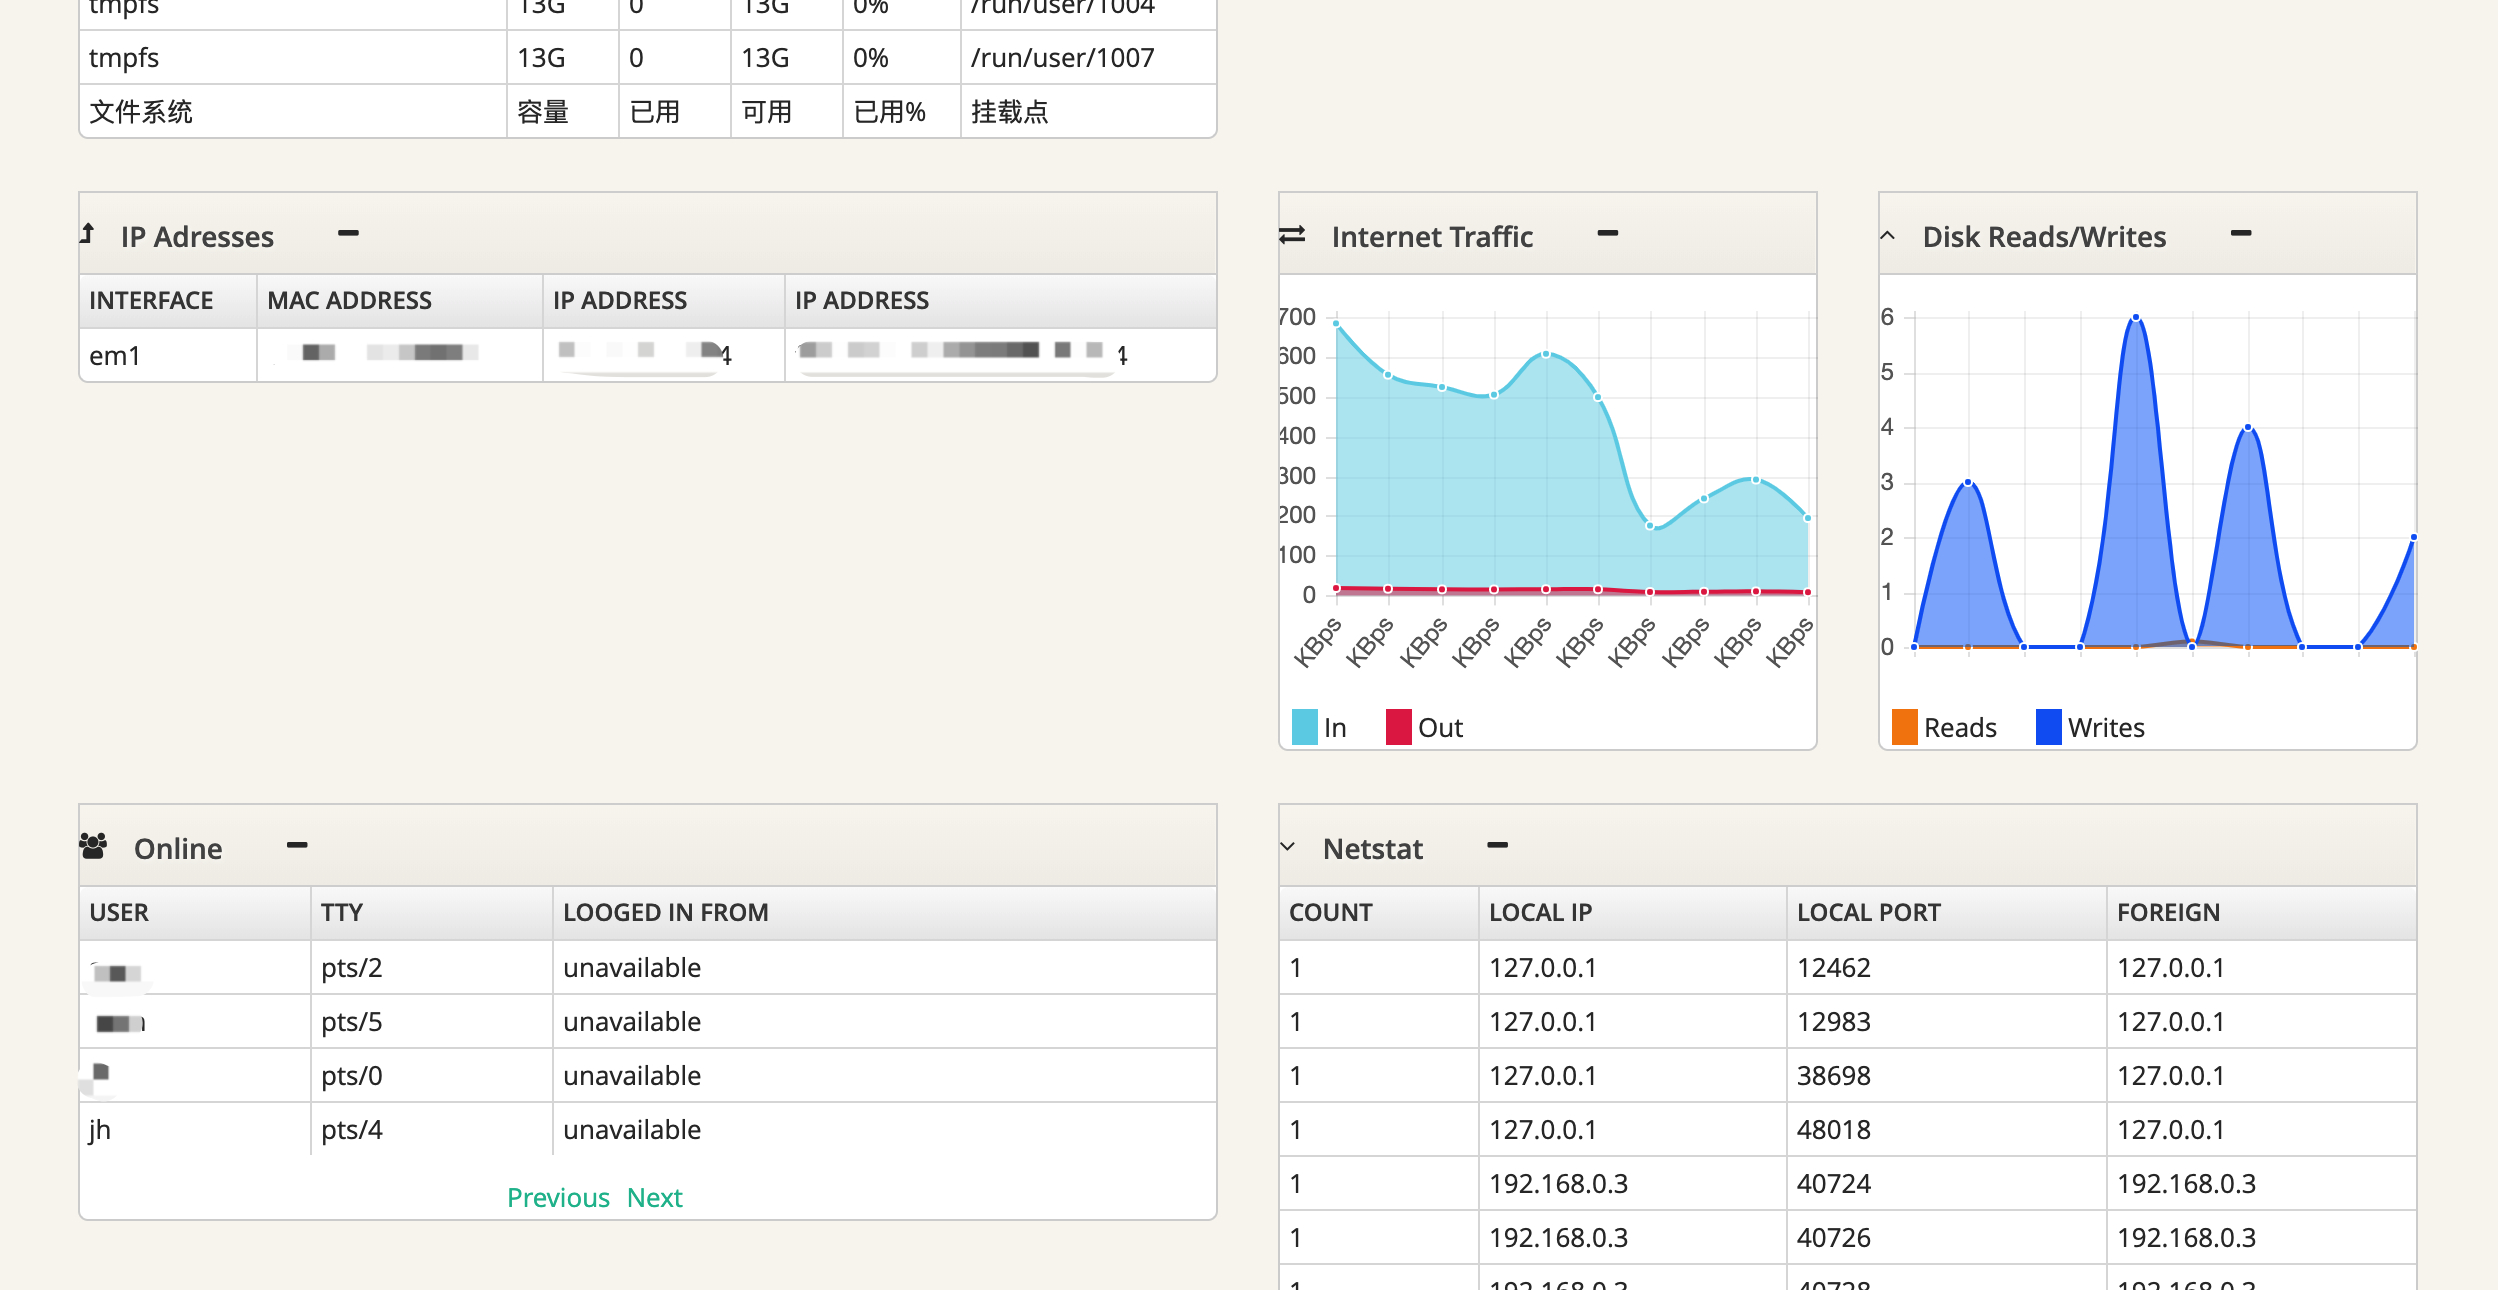

讲真,效果还是可以的
安装过程
建议初次安装,请尽量在测试机上实现
1. 使用git克隆pydash到本地
此处认为你已经安装好了git和python(无论是python2.x,还是python3.x)
克隆pydash到本地
git clone https://gitlab.com/k3oni/pydash.git
cd pydash
显示结果:
正克隆到 'pydash'...
remote: Enumerating objects: 1230, done.
remote: Counting objects: 100% (1230/1230), done.
remote: Compressing objects: 100% (588/588), done.
remote: Total 1230 (delta 625), reused 1230 (delta 625)
接收对象中: 100% (1230/1230), 1.25 MiB | 683.00 KiB/s, done.
处理 delta 中: 100% (625/625), done.
2. 创建虚拟环境
为了不与服务器上现有环境冲突,此处创建虚拟环境,所有操作在虚拟环境中进行
pip install virtualenv
virtualenv pydashtest
如果创建python2.7版本的虚拟环境,创建命令如下:
virtualenv pydashtest --python=python2.7
此时就创建好了虚拟环境pydashtest
Using base prefix '/usr/local'
New python executable in /home/jh/pydash/pydashtest/bin/python3.6
Also creating executable in /home/jh/pydash/pydashtest/bin/python
Installing setuptools, pip, wheel...
done.
3. 激活虚拟环境
source pydashtest/bin/activate
此时会发现shell界面发生了变化:
(pydashtest) [jh@localhost pydash]$
说明已经进入虚拟环境,如果需要退出当前虚拟环境,使用命令
deactivate
即可退出
4. 安装django
由于pydash是基于python和django的,所以需要安装django
有两种方式,一种直接使用pydash下的requirements.txt文件进行安装
pip install -r requirements.txt
此时,实际上安装了django的1.6.8版本,如果python的版本高于3.5的话,在后续使用django命令创建项目的时候,会报如下错误:
Traceback (most recent call last):
  File "manage.py", line 10, in <module>
    execute_from_command_line(sys.argv)
  File "/home/jh/pydash/pydashtest/lib/python3.6/site-packages/django/core/management/__init__.py", line 399, in execute_from_command_line
    utility.execute()
  File "/home/jh/pydash/pydashtest/lib/python3.6/site-packages/django/core/management/__init__.py", line 392, in execute
    self.fetch_command(subcommand).run_from_argv(self.argv)
  File "/home/jh/pydash/pydashtest/lib/python3.6/site-packages/django/core/management/__init__.py", line 261, in fetch_command
    commands = get_commands()
  File "/home/jh/pydash/pydashtest/lib/python3.6/site-packages/django/core/management/__init__.py", line 107, in get_commands
    apps = settings.INSTALLED_APPS
  File "/home/jh/pydash/pydashtest/lib/python3.6/site-packages/django/conf/__init__.py", line 54, in __getattr__
    self._setup(name)
  File "/home/jh/pydash/pydashtest/lib/python3.6/site-packages/django/conf/__init__.py", line 50, in _setup
    self._configure_logging()
  File "/home/jh/pydash/pydashtest/lib/python3.6/site-packages/django/conf/__init__.py", line 72, in _configure_logging
    from django.utils.log import DEFAULT_LOGGING
  File "/home/jh/pydash/pydashtest/lib/python3.6/site-packages/django/utils/log.py", line 7, in <module>
    from django.views.debug import ExceptionReporter, get_exception_reporter_filter
  File "/home/jh/pydash/pydashtest/lib/python3.6/site-packages/django/views/debug.py", line 12, in <module>
    from django.template import Template, Context, TemplateDoesNotExist
  File "/home/jh/pydash/pydashtest/lib/python3.6/site-packages/django/template/__init__.py", line 53, in <module>
    from django.template.base import (ALLOWED_VARIABLE_CHARS, BLOCK_TAG_END,
  File "/home/jh/pydash/pydashtest/lib/python3.6/site-packages/django/template/base.py", line 19, in <module>
    from django.utils.html import escape
  File "/home/jh/pydash/pydashtest/lib/python3.6/site-packages/django/utils/html.py", line 14, in <module>
    from .html_parser import HTMLParser, HTMLParseError
  File "/home/jh/pydash/pydashtest/lib/python3.6/site-packages/django/utils/html_parser.py", line 12, in <module>
    HTMLParseError = _html_parser.HTMLParseError
AttributeError: module 'html.parser' has no attribute 'HTMLParseError'
原因:
HTMLParseError is deprecated from Python 3.3 onwards and removed in Python 3.5.
解决办法:
- 降低python的版本
- 升级django的版本
此处采用第二种方法,直接安装django较高版本为最方便最快捷的办法
pip install django==1.8
5. 创建项目数据库,安装Django身份验证系统
python manage.py syncdb
输入用户信息:
Operations to perform:
  Synchronize unmigrated apps: staticfiles, messages
  Apply all migrations: contenttypes, sessions, auth
Synchronizing apps without migrations:
  Creating tables...
    Running deferred SQL...
  Installing custom SQL...
Running migrations:
  Rendering model states... DONE
  Applying contenttypes.0001_initial... OK
  Applying contenttypes.0002_remove_content_type_name... OK
  Applying auth.0001_initial... OK
  Applying auth.0002_alter_permission_name_max_length... OK
  Applying auth.0003_alter_user_email_max_length... OK
  Applying auth.0004_alter_user_username_opts... OK
  Applying auth.0005_alter_user_last_login_null... OK
  Applying auth.0006_require_contenttypes_0002... OK
  Applying sessions.0001_initial... OK

You have installed Django's auth system, and don't have any superusers defined.
Would you like to create one now? (yes/no): yes
Username (leave blank to use 'jh'):
Email address: linupy@163.com
Password:
Password (again):
Superuser created successfully.
此处的Username和Password,就是监控系统登录的用户名和密码,邮箱可写可不写
6. 启动服务(后台)
以上步骤无误后,就可以启动服务了,此处采用后台运行的方式
nohup python ./manage.py runserver 192.168.0.3:8000 &
结果:
Performing system checks...

System check identified no issues (0 silenced).
April 03, 2019 - 00:58:37
Django version 1.8, using settings 'pydash.settings'
Starting development server at http://192.168.0.3:8000/
Quit the server with CONTROL-C.
浏览器输入192.168.0.3:8000,即可进入用户登录界面
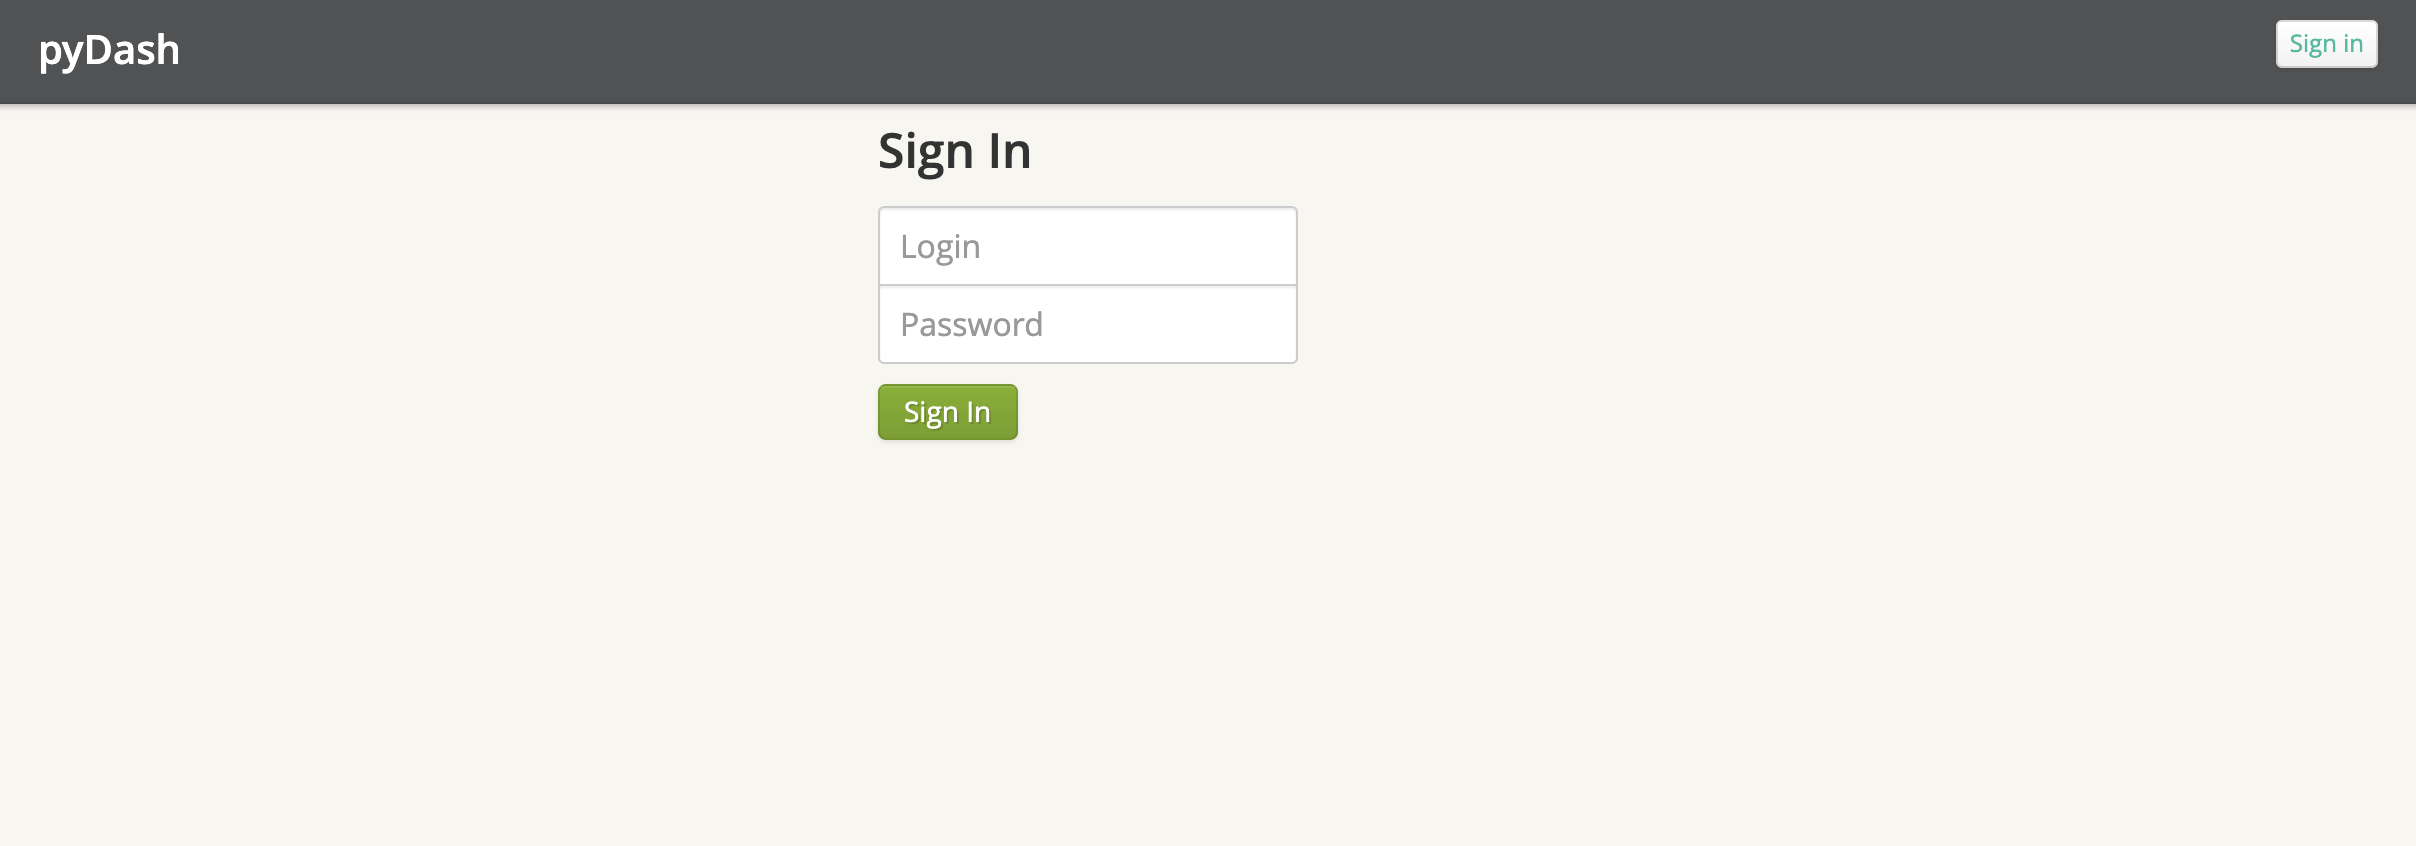
输入第5步设置的用户名和密码就能登录系统了
关注我,不迷路
下面的是我的公众号二维码图片,欢迎关注。