

本文会练习使用IDE建立一个 mongodb 的简单 web 服务,尽量会很详细,做到初次看的也能建立成功。
1. 使用 IDE
Java 开发推荐使用 IDE,可以免去你很多麻烦。
第一步,建立你的项目: File->New->Project...,选择 Spring Initializr。
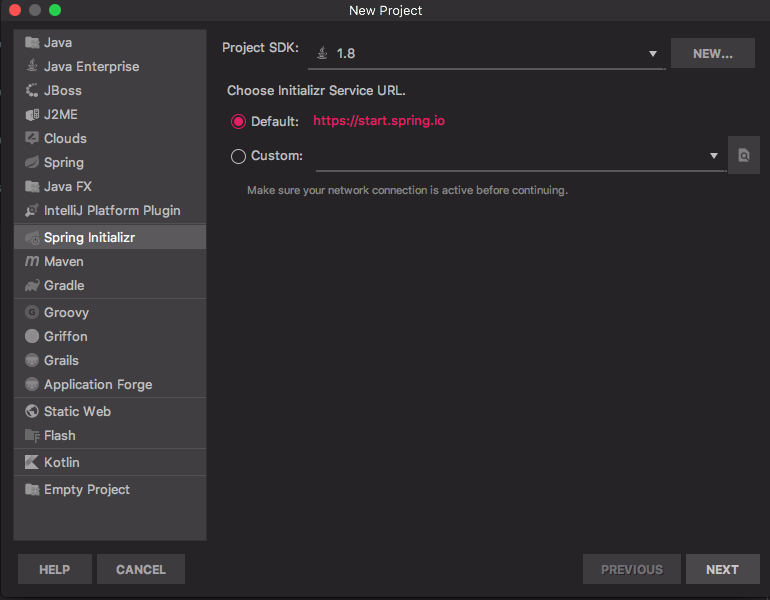
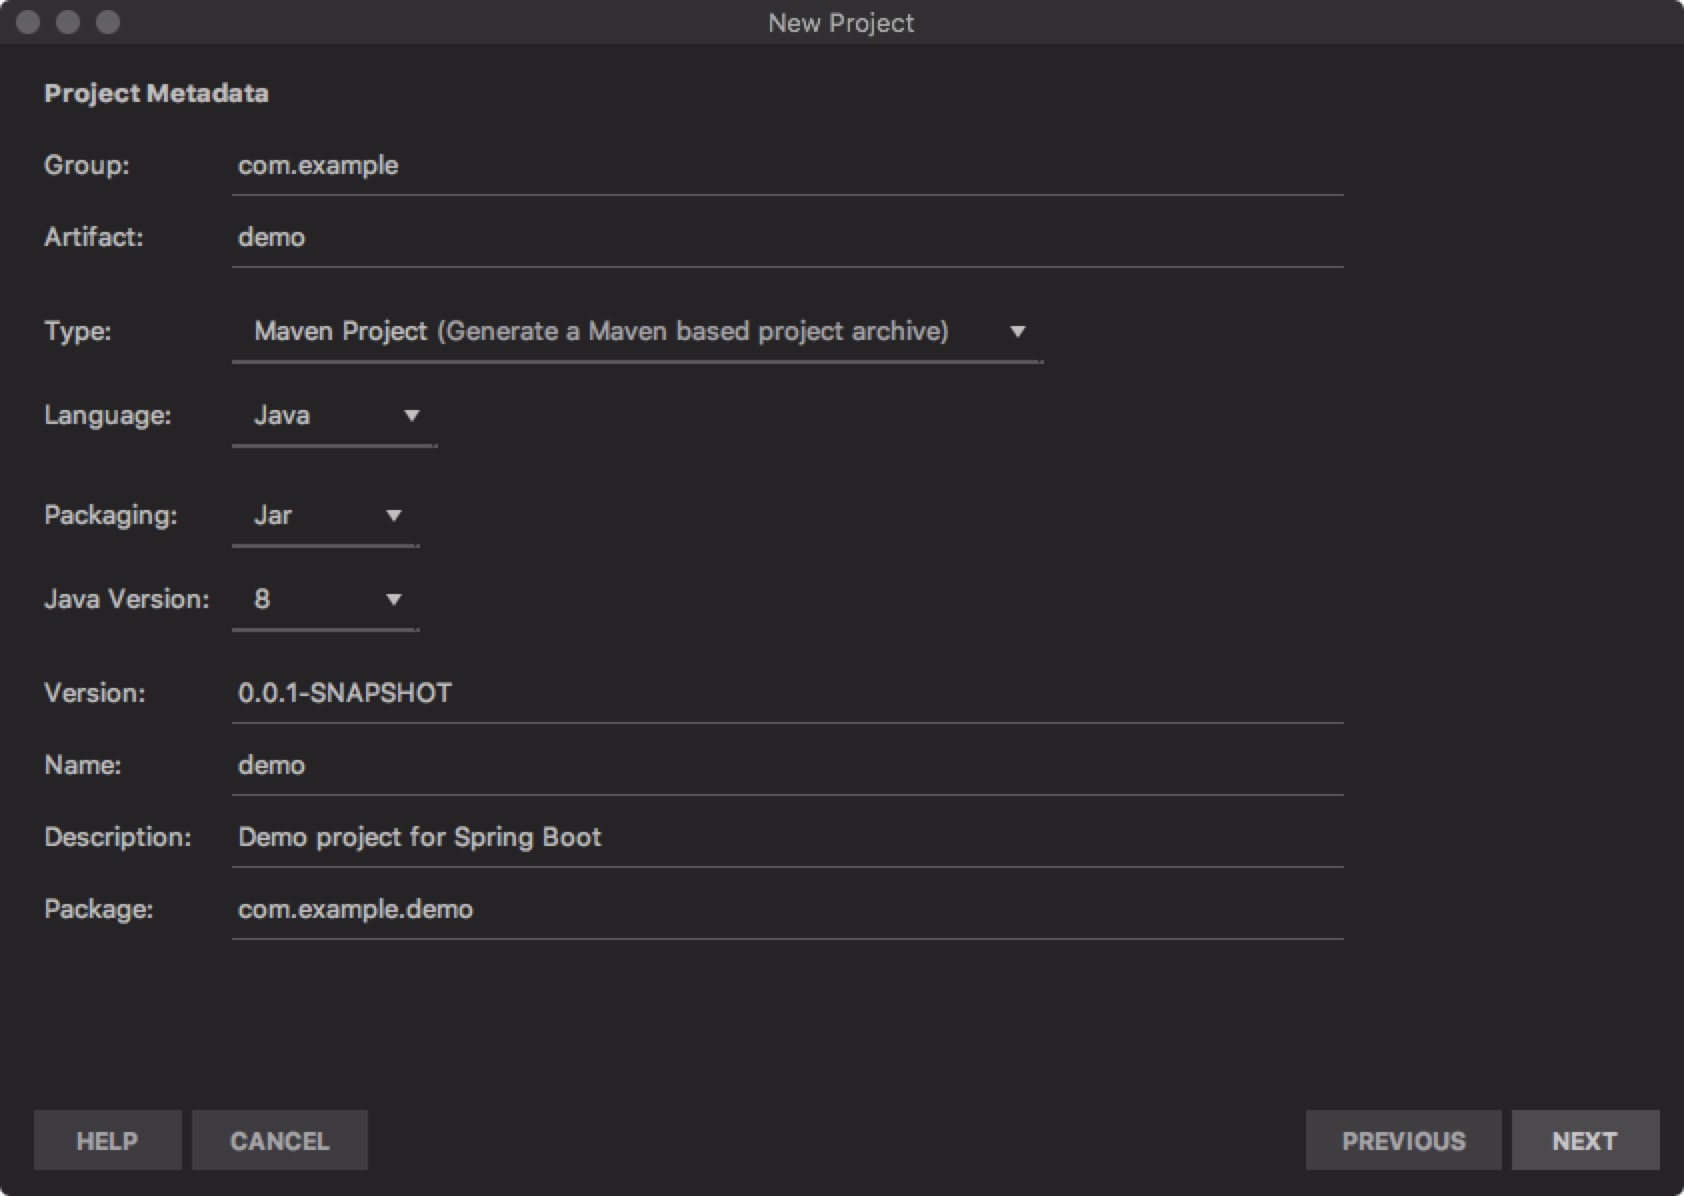
默认点击 Next-> 就好了。
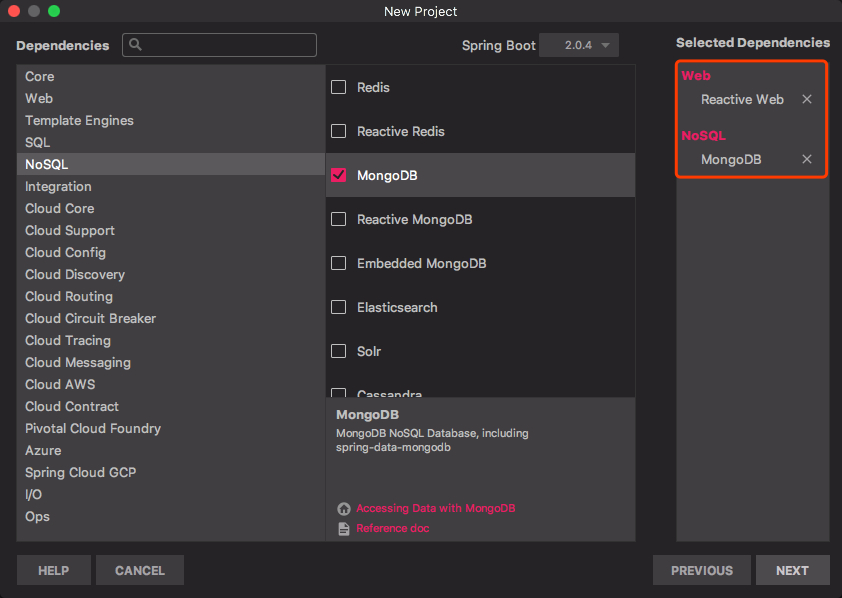
选择依赖,本项目先起一个简单的 mongodb web服务,所以选择了web和mongodb的dependencies,然后点击next:
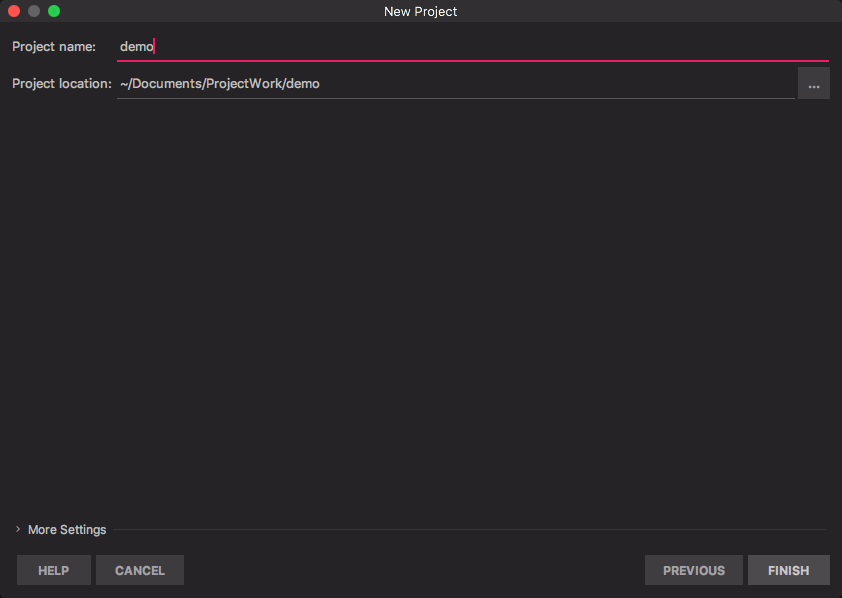
最后一步也点击 next就好。
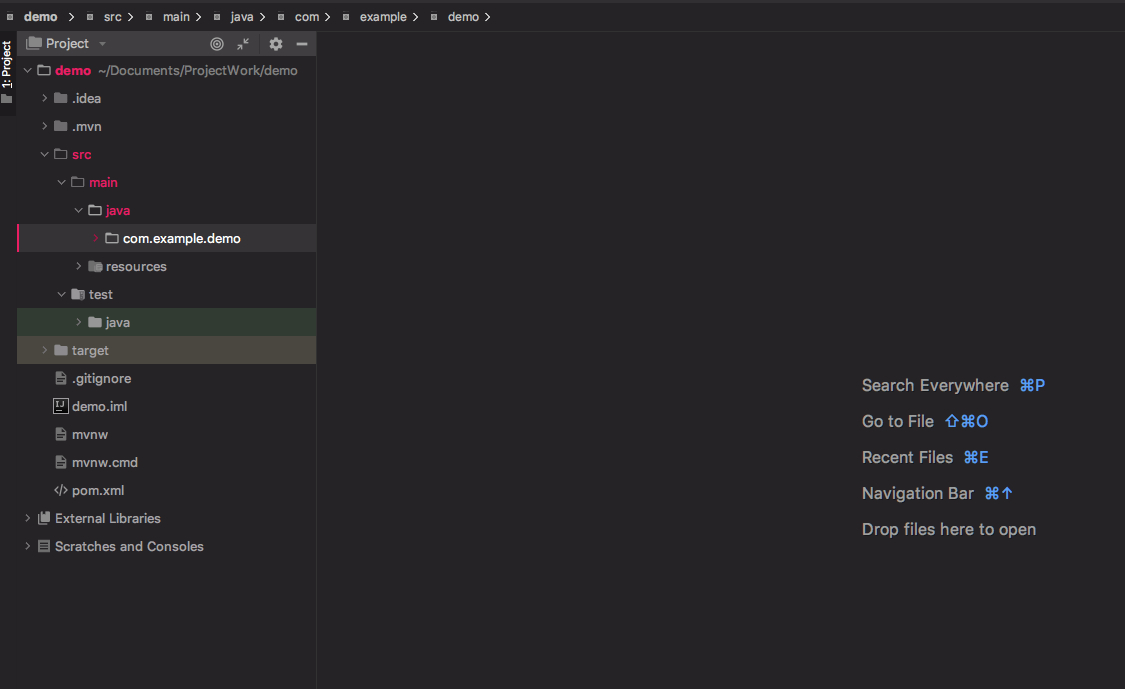
完成后可以看到此目录结构:
2. 编写项目
可以看到com.example.demo目录下会有一个DemoApplication.java 的文件, 这个就是整个服务的入口文件。这个文件我们基本不用去碰它做任何改动。
建立一个web 服务,通常的步骤:第一步是建立路由,第二步是写个controller,第三步是建立service,第四步是service 调用Dao层控制db。
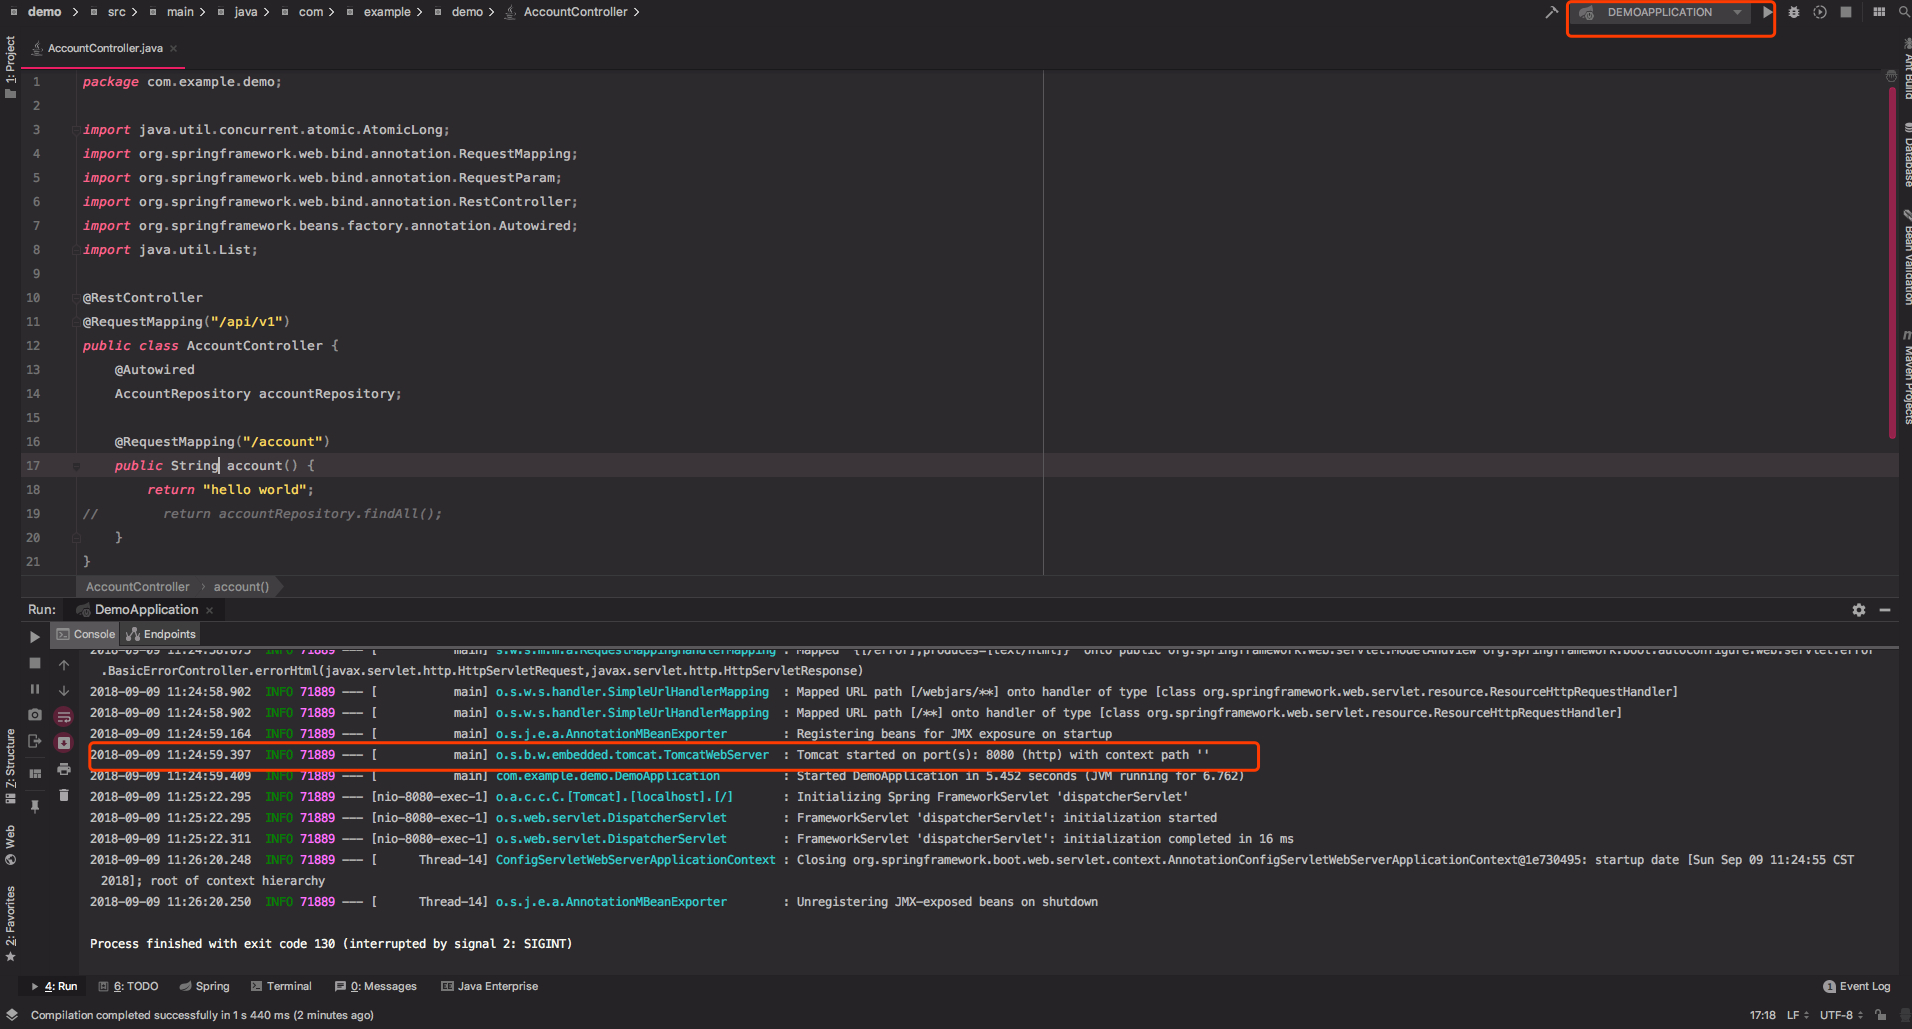
2.1 建立路由,写个 controller
首先直接在 com.example.demo 目录下创建个controller文件,java里面router直接可以用注解完成,不用建立一个文件专门存router地址。
// AccountController
package com.example.demo;

import java.util.concurrent.atomic.AtomicLong;
import org.springframework.web.bind.annotation.RequestMapping;
import org.springframework.web.bind.annotation.RequestParam;
import org.springframework.web.bind.annotation.RestController;
import org.springframework.beans.factory.annotation.Autowired;
import java.util.List;

@RestController
@RequestMapping("/api/v1")
public class AccountController {

    @RequestMapping("/account")
    public String account() {
        return "hello world";
    }
}
这就是一个简单的web服务接口。点击IDE的启动就可以跑起来。
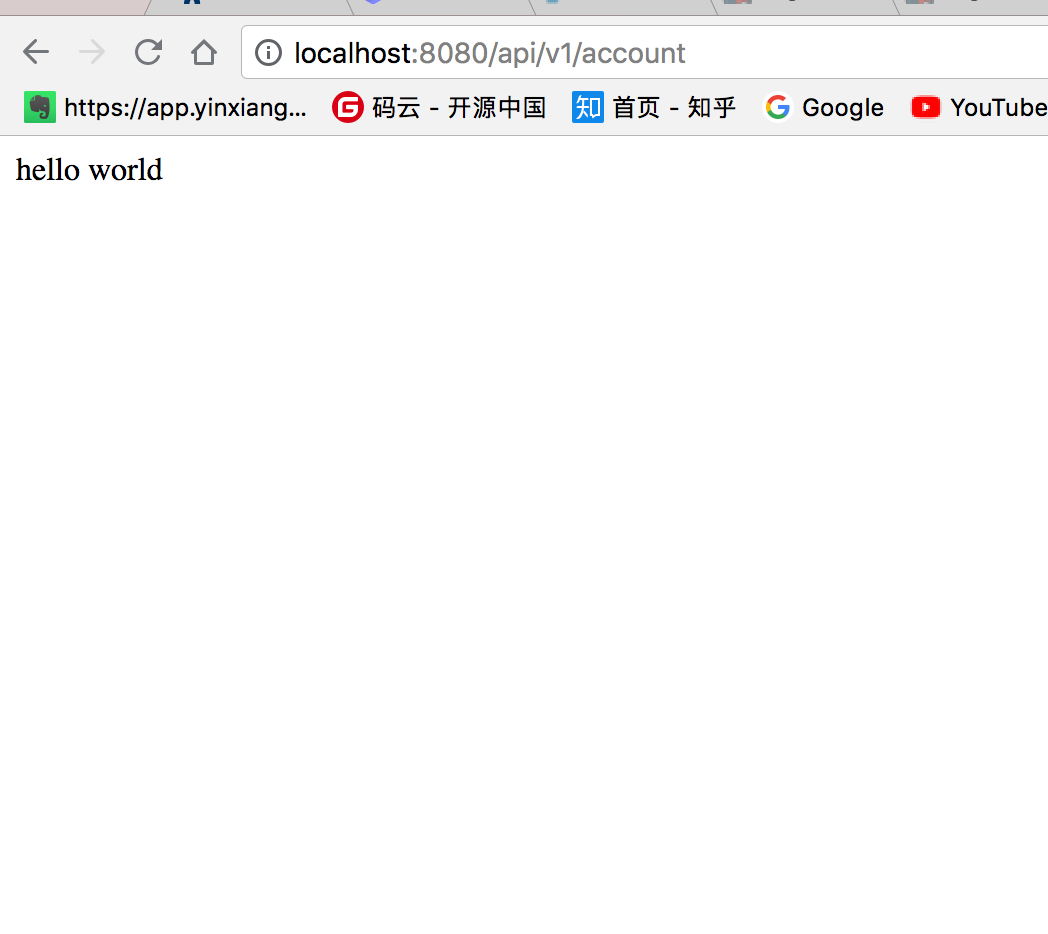
然后访问以下所写的地址就可以得到返回结果;
2.2 建立Dao层
在com.example.demo目录下创建AccountRepository.java,引入Account类,直接继承MongoRepository。
// AccountRepository
package com.example.demo;

import java.util.List;

import com.example.demo.Account;
import org.springframework.data.mongodb.repository.MongoRepository;
import org.springframework.data.rest.core.annotation.RepositoryRestResource;

@RepositoryRestResource
public interface AccountRepository extends MongoRepository<Account, String> {
}
在com.example.demo目录下创建 Account.java
// Acount
package com.example.demo;
import org.springframework.data.annotation.Id;
// import org.springframework.data.mongodb.core.index.CompoundIndex;
import org.springframework.data.mongodb.core.mapping.Document;
import org.bson.types.ObjectId;
import java.io.Serializable;

@Document(collection = "account")
public class Account implements Serializable {
  @Id
  private ObjectId _id;

  private String realName;

  public ObjectId getId() {
    return _id;
  }

  public String getName() {
    return realName;
  }

  public String setName(String realName) {
    return this.realName = realName;
  }
}
以上就是简单的引用一个 Account Collection 的实现,
最后还要在application.properties指定数据库的连接,这个文件放在 resources,一般项目的配置类参数都写在这里。
如果从来没起过一个 mongodb的话, 先去查查。
spring.data.mongodb.uri=mongodb://localhost:27017/test_invest
在引入了db的collection之后,controller可以做更多的东西了。
以下,简单写了个获取account这个collection内所有document的方法, 还有插入一个account的方法:
// AccountController
package com.example.demo;
import java.util.concurrent.atomic.AtomicLong;
import org.springframework.web.bind.annotation.RequestMapping;
import org.springframework.web.bind.annotation.RequestParam;
import org.springframework.web.bind.annotation.RestController;
import org.springframework.beans.factory.annotation.Autowired;
import java.util.List;
@RestController
@RequestMapping("/api/v1")
public class AccountController {
@Autowired
AccountRepository accountRepository;
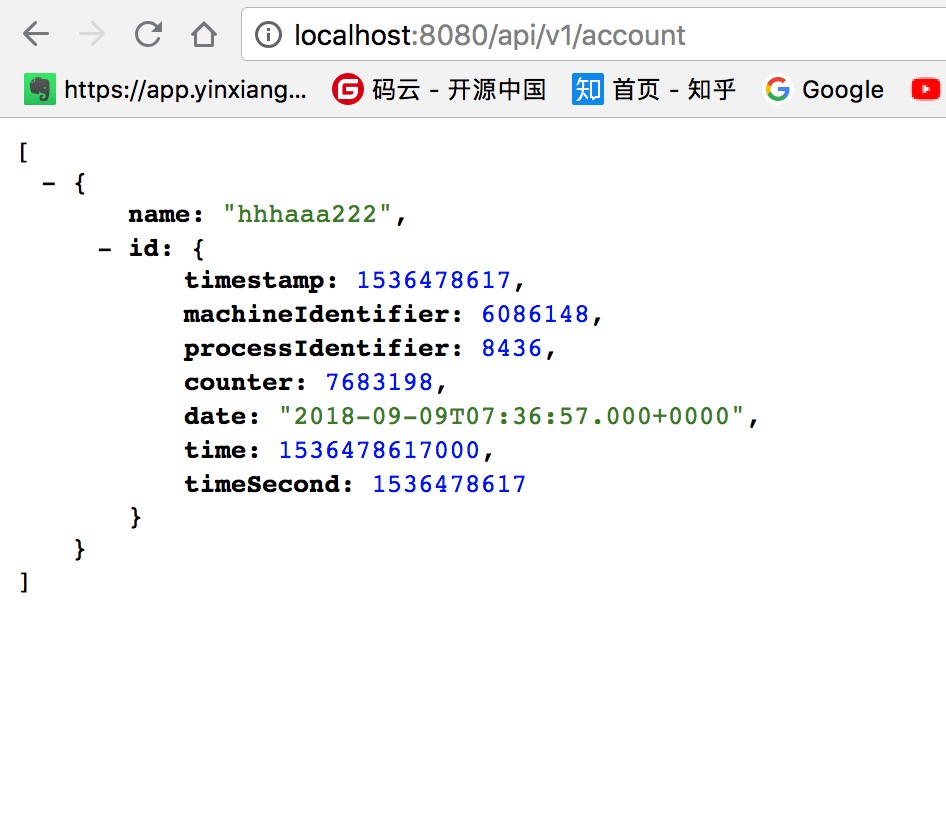
@RequestMapping("/account")
public List<Account> account() {
return accountRepository.findAll();
}
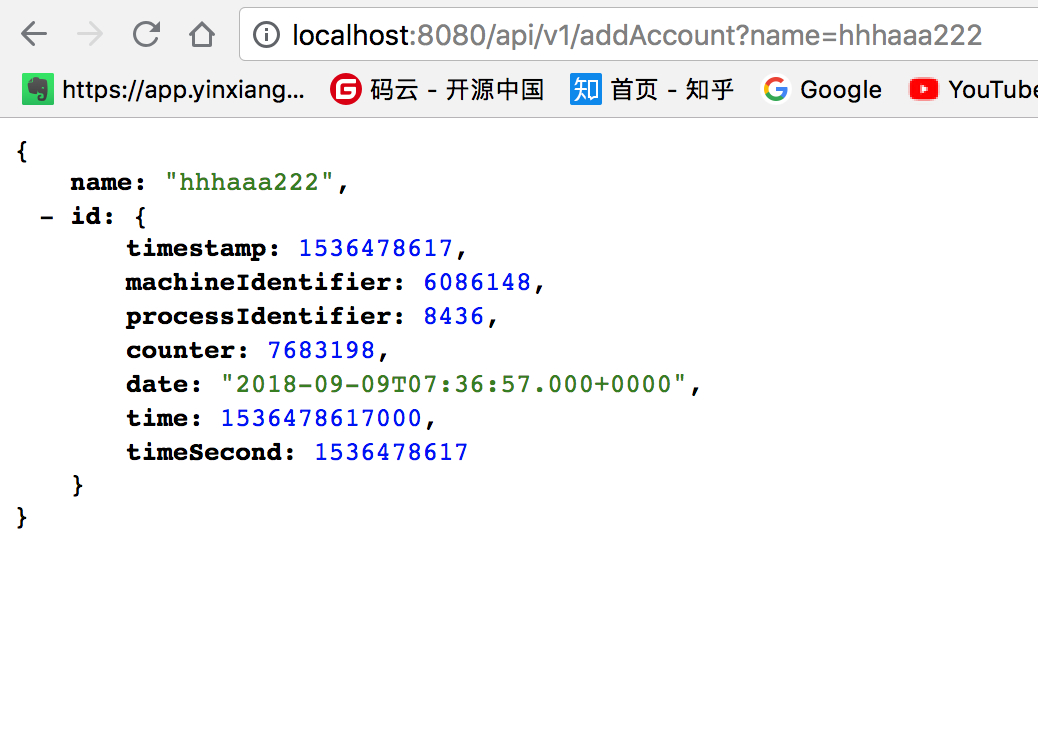
@RequestMapping("/addAccount")
public Account addAccount(@RequestParam String name) {
System.out.println(name);
Account account = new Account();
account.setName(name);
Account result = accountRepository.insert(account);
System.out.println(result);
return result;
}
}
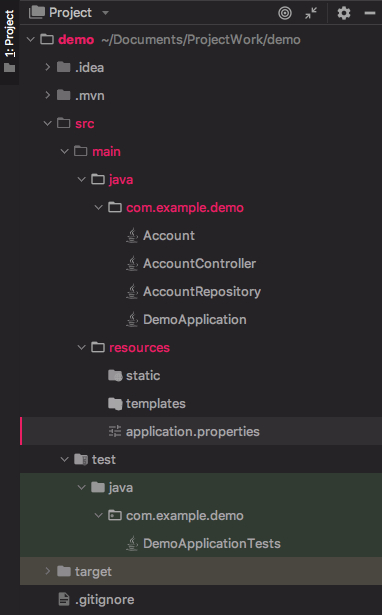
整个项目的目录结构是这样的:
再次运行项目:
- 插入一个 document
- 查看表中所有的 document
以上就已经完整的实现了一个接口服务。
项目 demo 地址:[[github.com/yuchenzhen/…]]
