

Spring Boot(十八)— Admin Client
在上一章节中,我们学习了如何构建Spring Boot Admin Server应用程序。在本章节中,将学习如何让我们的应用程序被Admin Server所管理。相对于Admin Server来说,需要被管理的应用程序称为Admin Client。
添加依赖
admin client需要在Maven build文件中添加如下的两个依赖:
<dependency>
    <groupId>org.springframework.boot</groupId>
    <artifactId>spring-boot-starter-actuator</artifactId>
</dependency>
<dependency>
    <groupId>de.codecentric</groupId>
    <artifactId>spring-boot-admin-starter-client</artifactId>
</dependency>
配置Admin Client
在application.properties文件中配置应用程序的启动端口、应用名称和Admin Server的URL地址:
server.port=8081
spring.application.name=Admin-Client-1
spring.boot.admin.client.url=http://localhost:9091
management.endpoints.web.exposure.include=*
打包运行
使用下面的maven命令对应用程序进行打包:
mvn clean install
打包成功后,使用入下的命令运行JAR文件:
java -jar JARFILE
最后,我们还需要将Admin Server启动。
接下来,在web浏览器中输入URL:http://localhost:9091 访问Spring Boot Admin Server:
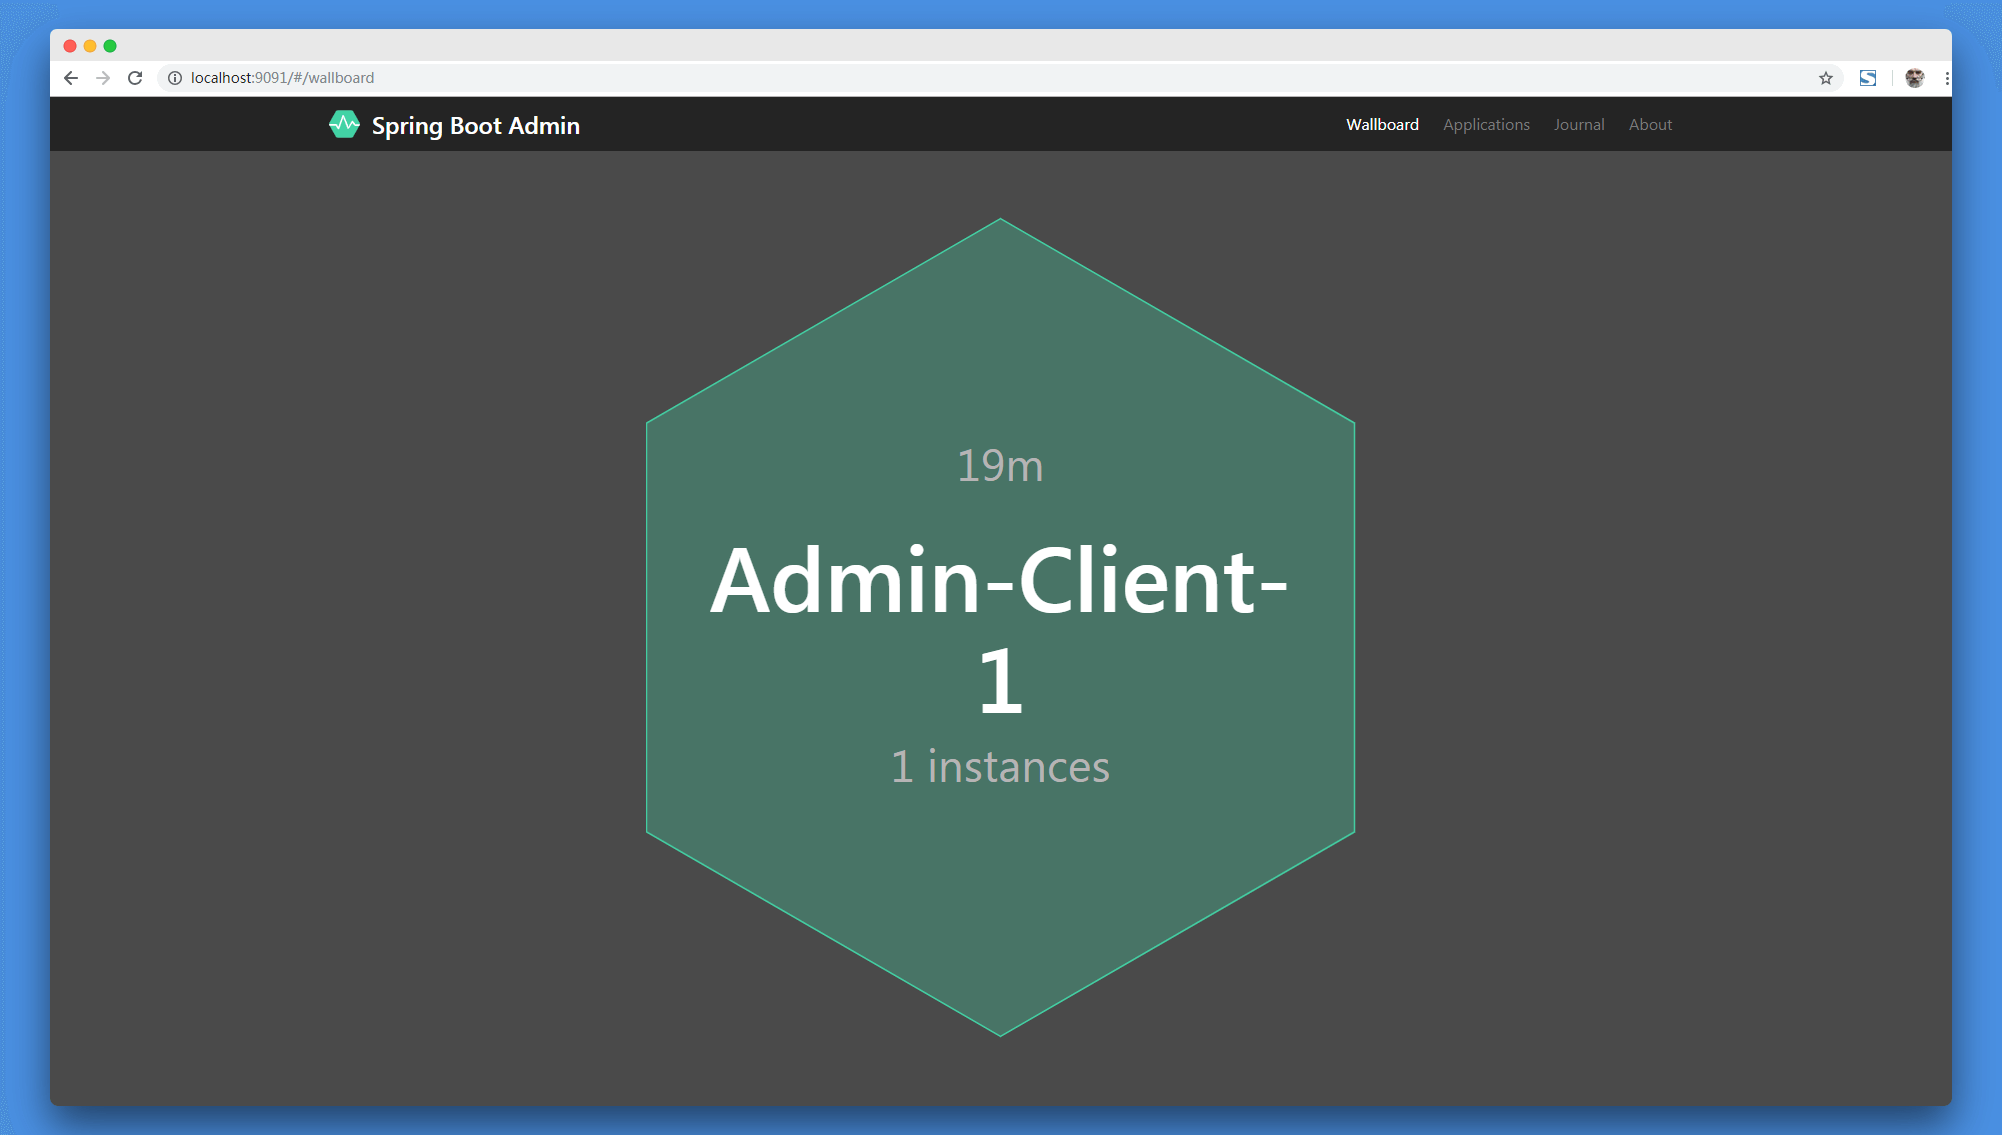
应用监控详情页:
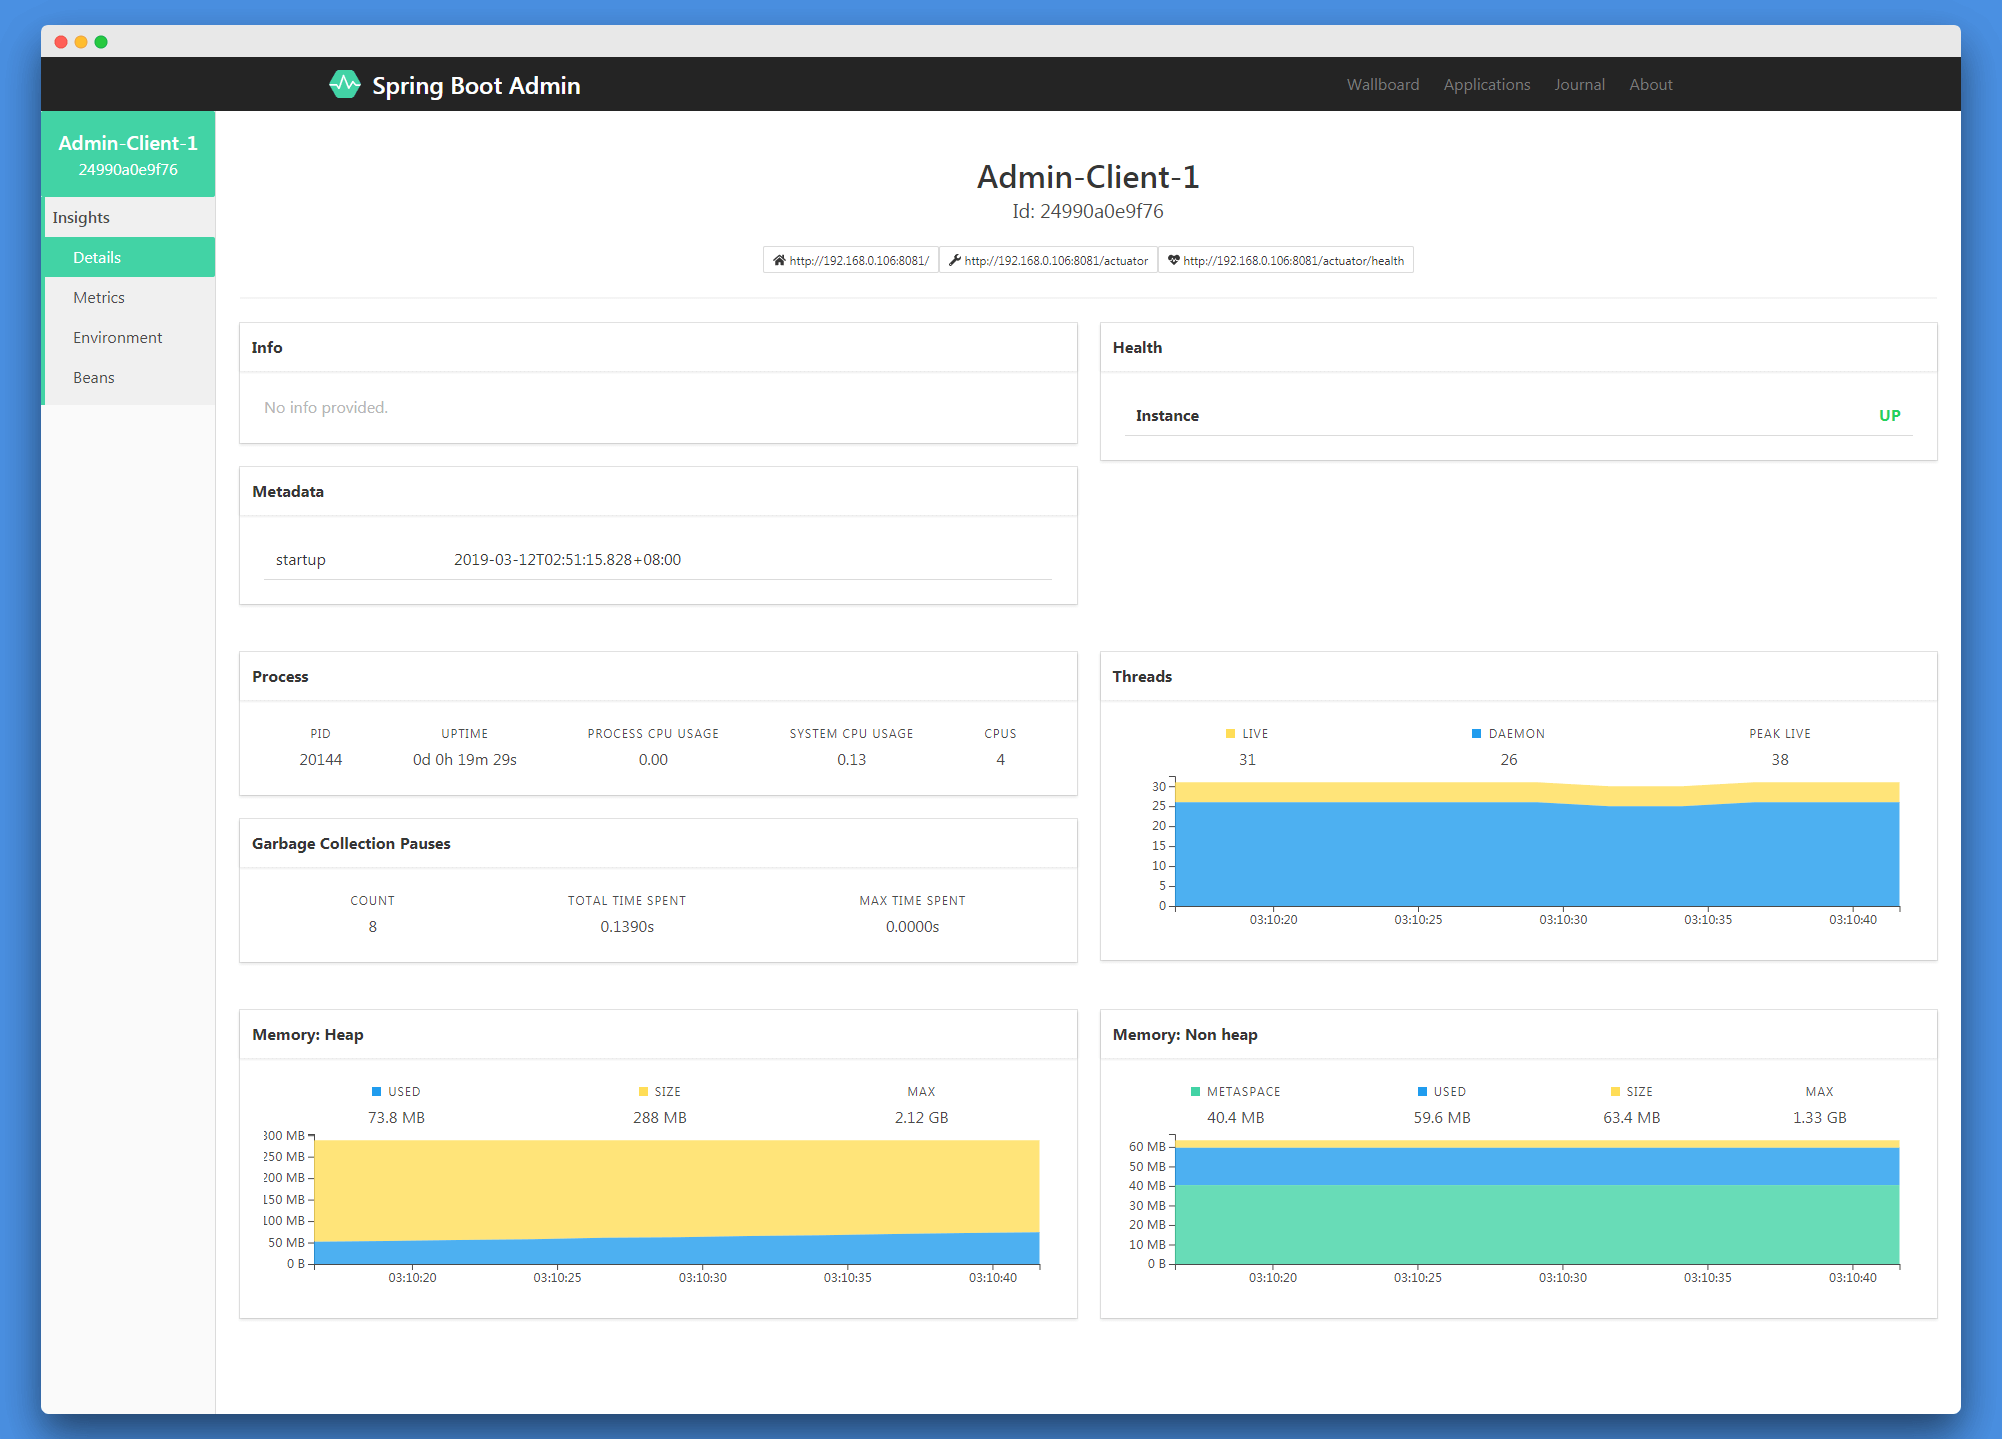
JVM监控页面:

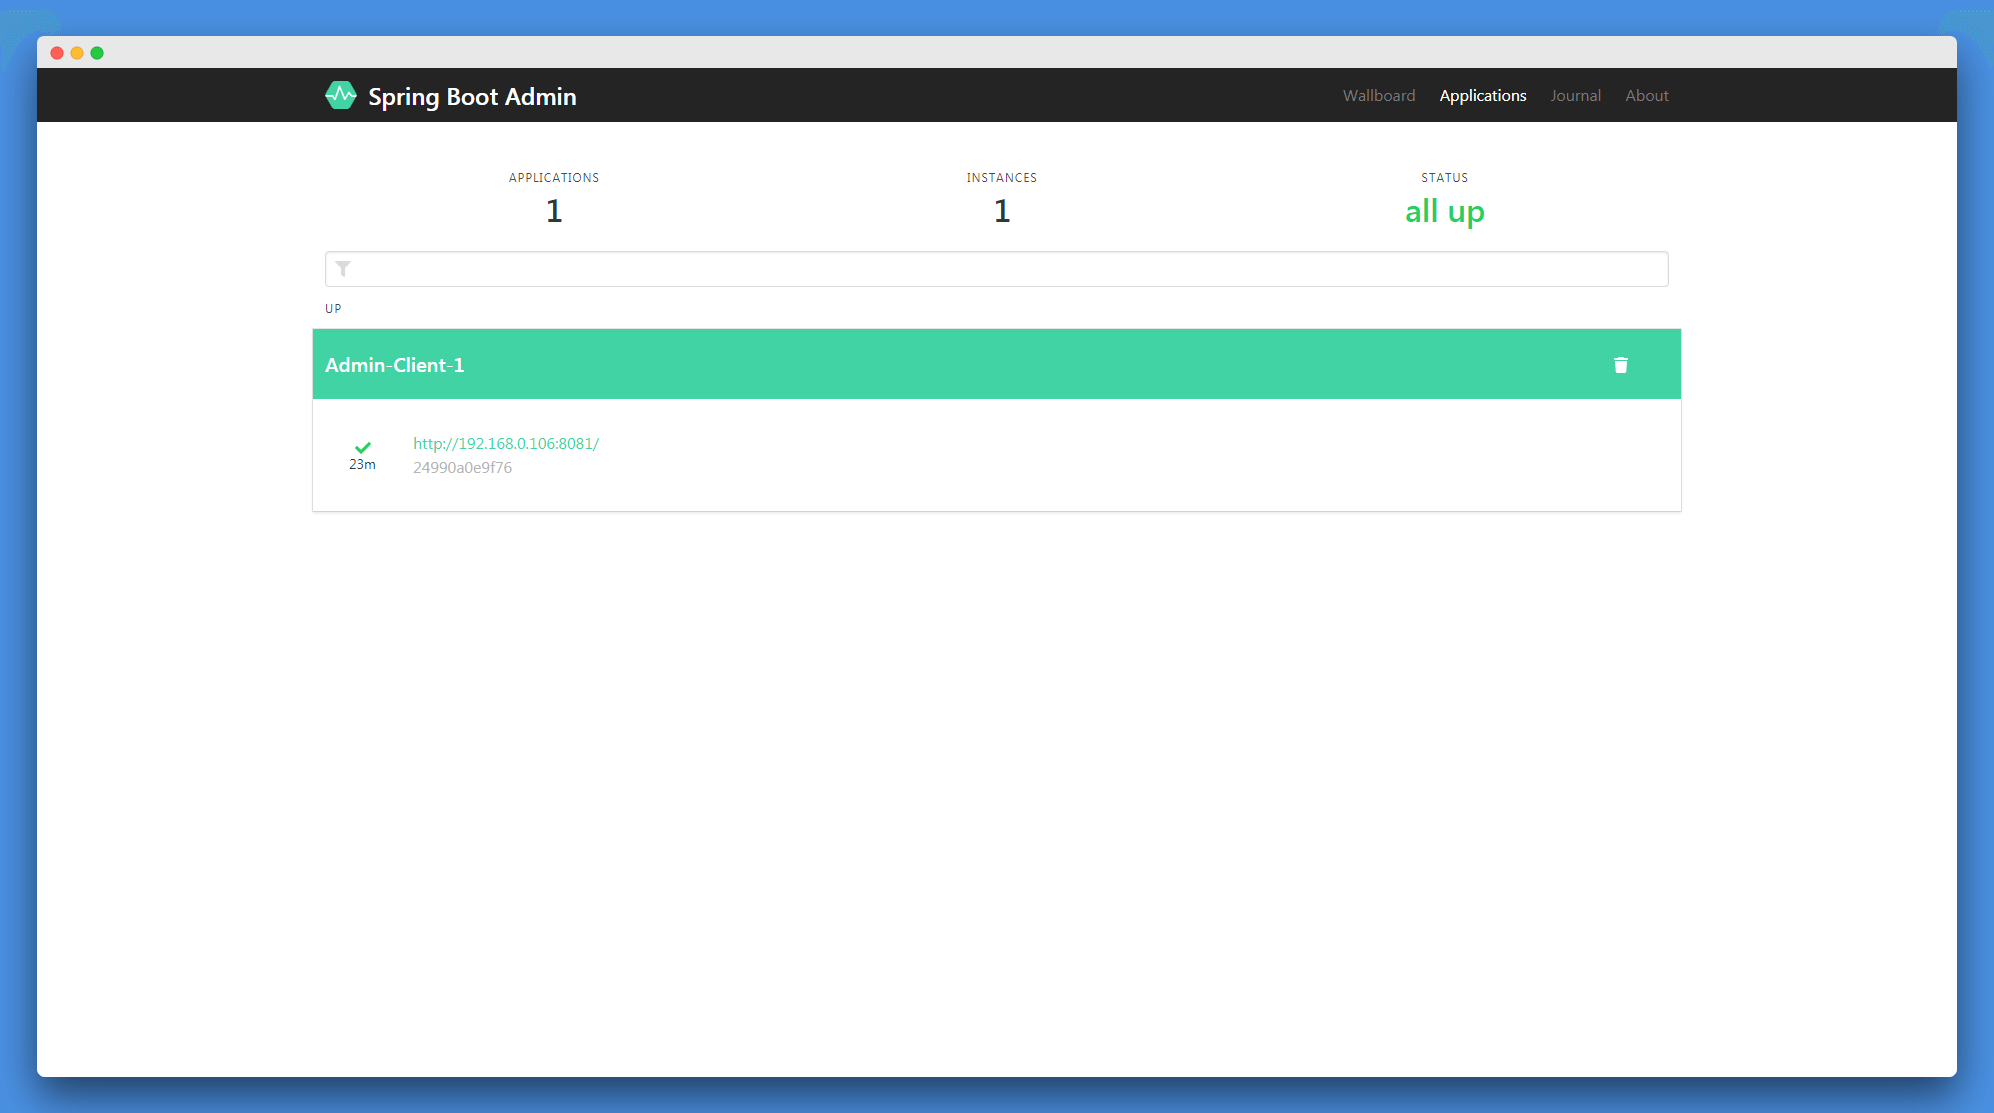
应用实例信息页面:
日志信息页面:

