

- 原文地址:Patterns — Generic Repository with Typescript and Node.js
- 原文作者:Erick Wendel
- 译文出自:掘金翻译计划
- 本文永久链接:github.com/xitu/gold-m…
- 译者:Raoul1996
- 校对者:Fengziyin1234

如果你使用 Node.js/Javascript,并且有很多应付不同数据模型的重复代码或者不厌其烦地创建 CRUD(Create, Read, Update and Delete),那么这篇文章适合你!
通用仓储模式
在写 Javascript 应用的时候,我们存在在不同应用中共享相似代码的问题,并且有些时候,我们为不同的应用写相同的代码。当我们有一个(或更多)抽象类,并重用与数据模型解耦的实现时,这种模式赋予你编写数据抽象的能力,只需为某些类传入类型。
谈到 仓储模式,它指当你需要对数据库进行操作时,你可以将所有的数据库操作(Create, Read, Update 和 Delete 操作)对保存在每个本地唯一的业务实体中,而不是直接调用数据库驱动。如果你有多于一个数据库,或者一个事务涉及到多个数据库,你的应用应当只调用仓储中的方法,那么谁调用了方法也显而易见。
因此,通用仓储 与之类似,不同的是,现在你只有一个抽象,一个具有所有常见操作的基类。而你的 实体仓储仅拓展基类以及基类中所有的数据库操作实现。遵循 SOLID 原则,该模式遵循 开放/封闭 原则,你的基类对拓展开放,而对于修改是关闭的。
何时使用通用仓储?
取决于你的业务类型和应用程序的关键级别。我认为这种模式的具有可拓展性。当你用用程序的所有实体都要有 CURD 或者类似操作的时候,它可以让你只需要创建一个类来编写所有常见操作,诸如 CURD。
什么时候不要使用通用仓储?
与拥有的能力相同,你也会有危险的隐含代码(不要使用通用仓储),一个简单的例子就是:
-
你有两个实体类:People 和 Account。
-
用户可以删除 People。
-
用户无法更新 Account 的相关信息(例如向账户增加更多的钱)
-
如果两个类都拓展自具有 update() 和 remove() 方法的基类,那么程序员必须谨记那一点,并且不要把 remove 或者 update 方法暴露给服务,负责你的业务案例将会是危险并错误的。
Typescript 的泛型
能够处理当前乃至未来数据的组件将为你提供构建大型软件系统的最灵活的功能 —— typescriptlang.org/docs/handbo…
遵循 Typescript 的文档,泛型提供了构建灵活和通用组件(或类型)的能力,从他们的文档中,我们有一个更好的例子来说明它如何工作:
function identity(arg: number): number {
    return arg;
}
所以,我们有一个成熟的方法,他接收一个数字并返回相同类型。如果要将一个字符串传递给此方法,则需要使用相同的实现创建另一个方法并重复代码。
通过泛型实现,我们用一个明确的词来说明什么是泛型实现(约定,使用 T 来表示它是泛型类型)
function identity<T>(arg: T): T {
  return arg;
}

// call
const result = identity<string>('Erick Wendel');
console.log('string is', result);

const resultNumber = identity<number>(200);
console.log('number is ', resultNumber);

/**
 * string is Erick Wendel
   number is  200
 */
使用通用仓储和 Node.js 来创建一个真实的项目
Lets go! 如果你还没有理解(译者注:这里原本的词是 understated,应该是 understand?),通过下一部分的学习你应该就会理解了。
要求:
测试你的环境
安装完所有的环境要求之后,如果一切正常,请在 terminal 中运行测试。
npm --v && node --version

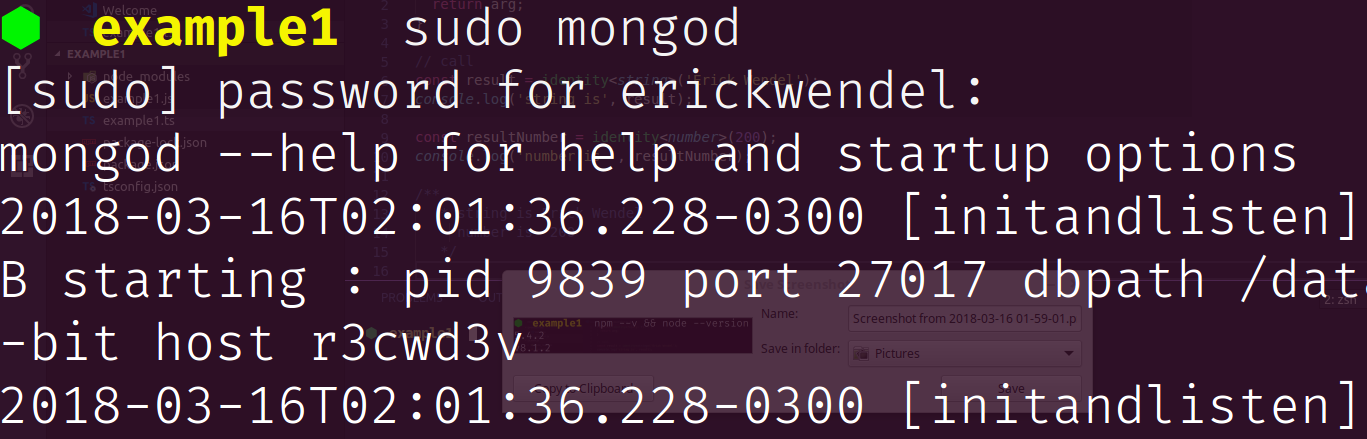
要验证 MongoDB 是否正常,请在另一个 terminal tab 上运行,sudo mongod
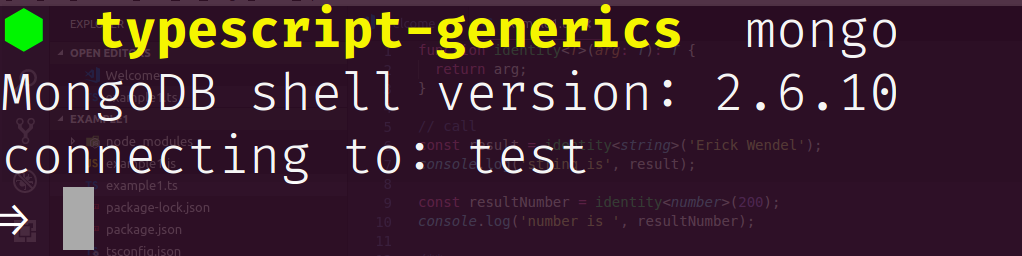
然后,另一个 tab 上运行 mongo 以进入你的数据库。
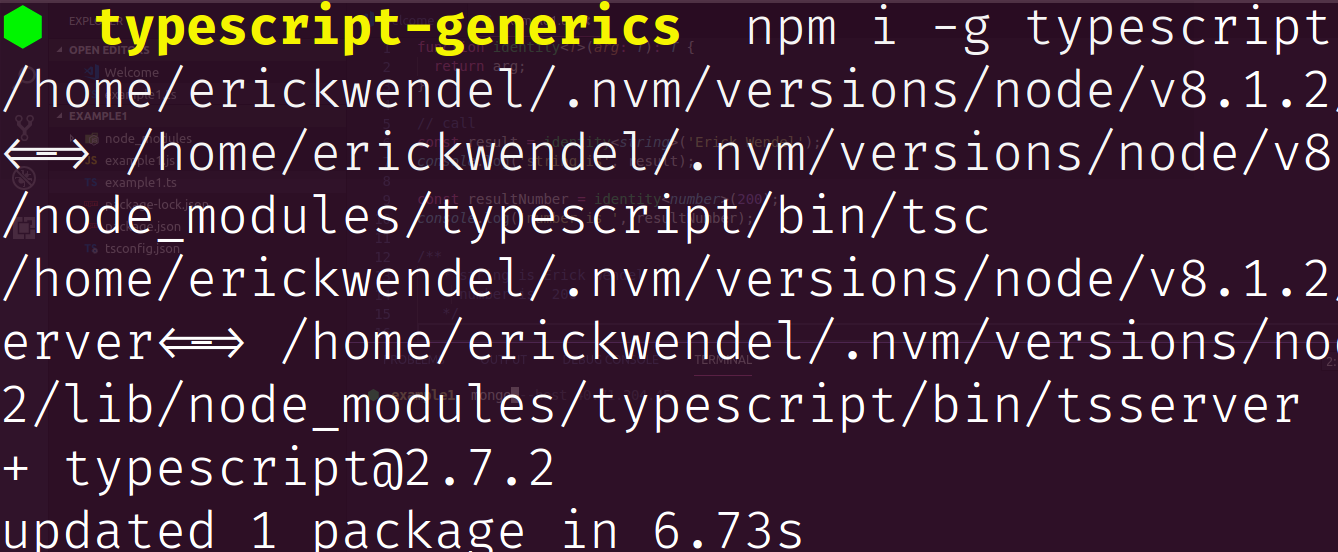
然后,全局安装 typescript,以编译你的 typescript 项目。运行 npm install -g typescript
一旦你已经完成,我们就可以继续前进 :D
现在,我们需要创建一个文件夹并且初始化一个 Node.js 项目。
mkdir warriors-project
cd warriors-pŕoject
npm init -y #to init nodejs app without wizard
tsc --init  #to init config file to typescript
之后,应该在 vscode 中打开你的项目文件夹。要创建我们的项目,你得创建一些文件夹以便更好地构建我们的应用程序。我们将使用以下的文件夹结构:
.
├── entities
├── package.json
├── repositories
│ ├── base
│ └── interfaces
└── tsconfig.json
进入 tsconfig.json 文件,将属性 "lib": [] 部分值修改为 "lib": [ "es2015"],我们改变 json 文件的属性,以使用 es2015 模块,例如 Typescript 中的 Promises。将 outDir属性修改为 "outDir": "lib" 以便在另一个文件夹中生成 .js 文件。
关于我们的文件夹,entities 文件夹是存放你的数据模型,repositories 文件夹关于数据库操作,interfaces 是我们操作的合同(contracts)。现在,我们应该在 entities 文件夹中创建我们的实体,使用以下代码创建 Spartan.ts 文件
export class Spartan {
  private name: string;
  private kills: number;

  constructor(name: string, kills: number) {
    this.name = name;
    this.kills = kills;
  }
}
现在,在 repositories/interfaces 文件夹,我们将创建两个文件, 遵循 单一功能(Single responsibility) 这些文件将具有抽象类必须有的合同。我们的合同应该遵循通用模式,可以在没有固定类型的情况下编写,但是,当任何人实现此接口时,应该为它们传递类型。
export interface IWrite<T> {
  create(item: T): Promise<boolean>;
  update(id: string, item: T): Promise<boolean>;
  delete(id: string): Promise<boolean>;
}
export interface IRead<T> {
  find(item: T): Promise<T[]>;
  findOne(id: string): Promise<T>;
}
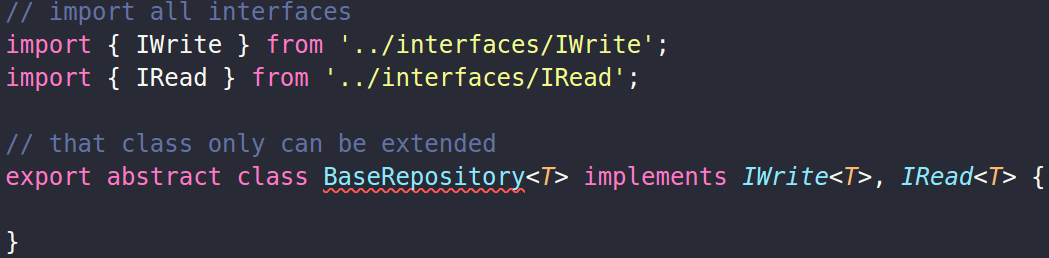
在创建接口之后,我们应该创建基类,这是一个实现所有通用接口的抽象类,并且具有我们对所有实体的通用实现。在 base 文件夹中,我们使用下面的代码创建 BaseRepository.ts
导入接口(interface)之后,需要实现接口的签名。为此可以按 ctrl . 显示 vscode 的选项来修复有问题的地方。然后单击 “Implements Interface IWrite<T> (Fix all in file)” 来添加所有实现.

现在我们有一个类似下面代码的类
// import all interfaces
import { IWrite } from '../interfaces/IWrite';
import { IRead } from '../interfaces/IRead';

// that class only can be extended
export abstract class BaseRepository<T> implements IWrite<T>, IRead<T> {
    create(item: T): Promise<boolean> {
        throw new Error("Method not implemented.");
    }
    update(id: string, item: T): Promise<boolean> {
        throw new Error("Method not implemented.");
    }
    delete(id: string): Promise<boolean> {
        throw new Error("Method not implemented.");
    }
    find(item: T): Promise<T[]> {
        throw new Error("Method not implemented.");
    }
    findOne(id: string): Promise<T> {
        throw new Error("Method not implemented.");
    }
}
我们现在应该为所有的方法创建实现。BaseRepository 类应该知道如何访问你可使用的数据库和集合。此时,你需要安装 Mongodb 驱动包。所以你需要返回到 terminal 中的项目文件夹,运行 npm i -S mongodb @types/mongodb 添加 mongodb 驱动和 typescript 的定义包。
在 constructor 中,我们添加两个参数,db 和 collectionName。类的实现应该和下面的代码差不多
// import all interfaces
import { IWrite } from '../interfaces/IWrite';
import { IRead } from '../interfaces/IRead';

// we imported all types from mongodb driver, to use in code
import { MongoClient, Db, Collection, InsertOneWriteOpResult } from 'mongodb';

// that class only can be extended
export abstract class BaseRepository<T> implements IWrite<T>, IRead<T> {
  //creating a property to use your code in all instances
  // that extends your base repository and reuse on methods of class
  public readonly _collection: Collection;

  //we created constructor with arguments to manipulate mongodb operations
  constructor(db: Db, collectionName: string) {
    this._collection = db.collection(collectionName);
  }

  // we add to method, the async keyword to manipulate the insert result
  // of method.
  async create(item: T): Promise<boolean> {
    const result: InsertOneWriteOpResult = await this._collection.insert(item);
    // after the insert operations, we returns only ok property (that haves a 1 or 0 results)
    // and we convert to boolean result (0 false, 1 true)
    return !!result.result.ok;
  }


  update(id: string, item: T): Promise<boolean> {
    throw new Error('Method not implemented.');
  }
  delete(id: string): Promise<boolean> {
    throw new Error('Method not implemented.');
  }
  find(item: T): Promise<T[]> {
    throw new Error('Method not implemented.');
  }
  findOne(id: string): Promise<T> {
    throw new Error('Method not implemented.');
  }
}
现在,我们在 repositories 文件夹中为特定实体创建了 Repository 文件。
import { BaseRepository } from "./base/BaseRepository";
import { Spartan } from "../entities/Spartan"

// now, we have all code implementation from BaseRepository
export class SpartanRepository extends BaseRepository<Spartan>{

    // here, we can create all especific stuffs of Spartan Repository
    countOfSpartans(): Promise<number> {
        return this._collection.count({})
    }
}
现在,去测试仓储和所有的逻辑事件。我们需要在项目根路径下创建一个 Index.ts 文件,来调用所有的仓储。
// importing mongoClient to connect at mongodb
import { MongoClient } from 'mongodb';

import { SpartanRepository } from './repositories/SpartanRepository'
import { Spartan } from './entities/Spartan';


// creating a function that execute self runs
(async () => {
    // connecting at mongoClient
    const connection = await MongoClient.connect('mongodb://localhost');
    const db = connection.db('warriors');

    // our operations
    // creating a spartan
    const spartan = new Spartan('Leonidas', 1020);

    // initializing the repository
    const repository = new SpartanRepository(db, 'spartans');

    // call create method from generic repository
    const result = await repository.create(spartan);
    console.log(`spartan inserted with ${result ? 'success' : 'fail'}`)

    //call specific method from spartan class
    const count = await repository.countOfSpartans();
    console.log(`the count of spartans is ${count}`)

    /**
     * spartan inserted with success
      the count of spartans is 1
     */
})();
你需要将你的 Typescript 转换成 Javascript 文件, 在 terminal 中运行 tsc 命令。现在 lib 文件夹中你拥有了全部的 javascript 文件,如此这般,你可以通过 node lib/Index.js. 运行你的程序。
为了让你领略到通用仓储的强大之处,我们将为名为 HeroesRepository.ts 的 Heroes,以及一个实体类创建更多的仓储,这代表一位 Hero。
// entities/Hero.ts

export class Hero {
    private name: string;
    private savedLifes: number;

    constructor(name: string, savedLifes: number) {
        this.name = name;
        this.savedLifes = savedLifes;
    }
}
// repositories/HeroRepository.ts

import { BaseRepository } from "./base/BaseRepository";
import { Hero } from "../entities/Hero"

export class HeroRepository extends BaseRepository<Hero>{

}
现在,我们只需要在 Index.ts 中调用仓储,下面是完整代码。
// importing mongoClient to connect at mongodb
import { MongoClient } from 'mongodb';

import { SpartanRepository } from './repositories/SpartanRepository'
import { Spartan } from './entities/Spartan';

//importing Hero classes
import { HeroRepository } from './repositories/HeroRepository'
import { Hero } from './entities/Hero';

// creating a function that execute self runs
(async () => {
    // connecting at mongoClient
    const connection = await MongoClient.connect('mongodb://localhost');
    const db = connection.db('warriors');

    // our operations
    // creating a spartan
    const spartan = new Spartan('Leonidas', 1020);

    // initializing the repository
    const repository = new SpartanRepository(db, 'spartans');

    // call create method from generic repository
    const result = await repository.create(spartan);
    console.log(`spartan inserted with ${result ? 'success' : 'fail'}`)

    //call specific method from spartan class
    const count = await repository.countOfSpartans();
    console.log(`the count of spartans is ${count}`)

    /**
     * spartan inserted with success
      the count of spartans is 1
     */

    const hero = new Hero('Spider Man', 200);
    const repositoryHero = new HeroRepository(db, 'heroes');
    const resultHero = await repositoryHero.create(hero);
    console.log(`hero inserted with ${result ? 'success' : 'fail'}`)

})();
总结
对于一个类,我们有很多实现可以采用并且让工作更容易。对于我来说,TypeScript 中的泛型功能是最强大的功能之一。你在此处看到的所有代码都可以在 GitHub 的 repo 中找到。你可以在下面的链接中找出它们,不要忘记查看 :D
如果你到了这儿,不要吝啬你的评论,分享给你的朋友并留下反馈。当然这是我的第一篇英文帖子,如果你碰巧发现任何错误,请通过私信纠正我 :D
不要忘了点赞哦!

Links
- github.com/ErickWendel…
- erickwendel.com.br
- fb.com/page.erickw…
- deviq.com/repository-…
- hannesdorfmann.com/android/evo…
- www.pluralsight.com/courses/dom…
- en.wikipedia.org/wiki/Open/c…
- en.wikipedia.org/wiki/SOLID_…
- medium.com/@cramirez92…
- www.typescriptlang.org/docs/handbo…
See ya 🤘
如果发现译文存在错误或其他需要改进的地方,欢迎到 掘金翻译计划 对译文进行修改并 PR,也可获得相应奖励积分。文章开头的 本文永久链接 即为本文在 GitHub 上的 MarkDown 链接。
掘金翻译计划 是一个翻译优质互联网技术文章的社区,文章来源为 掘金 上的英文分享文章。内容覆盖 Android、iOS、前端、后端、区块链、产品、设计、人工智能等领域,想要查看更多优质译文请持续关注 掘金翻译计划、官方微博、知乎专栏。
