

Flutter + Dio + Fish_Redux
目前网上只有单个的介绍,没有整合使用的demo,那就由我来吧。要给我点星星啊!!!
代码地址: github.com/liangwei010…
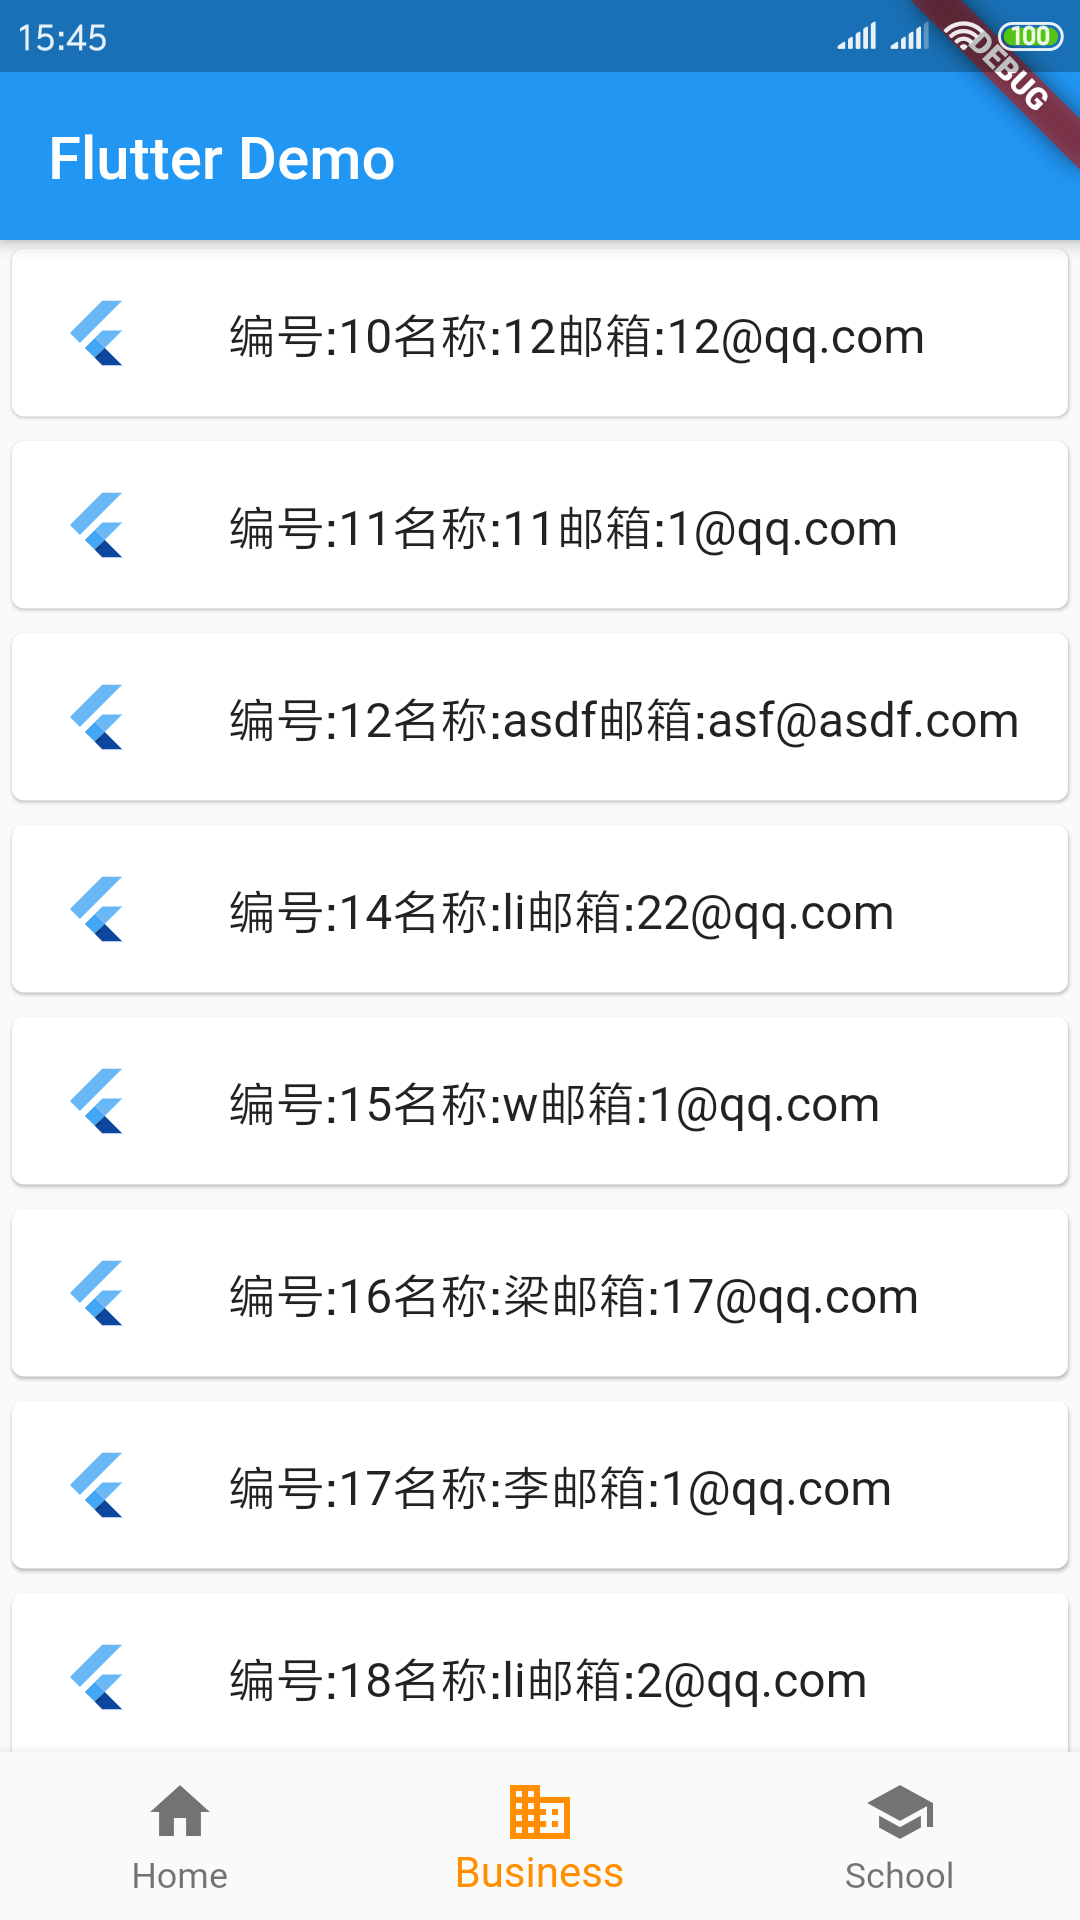
本次将实现的界面如下:
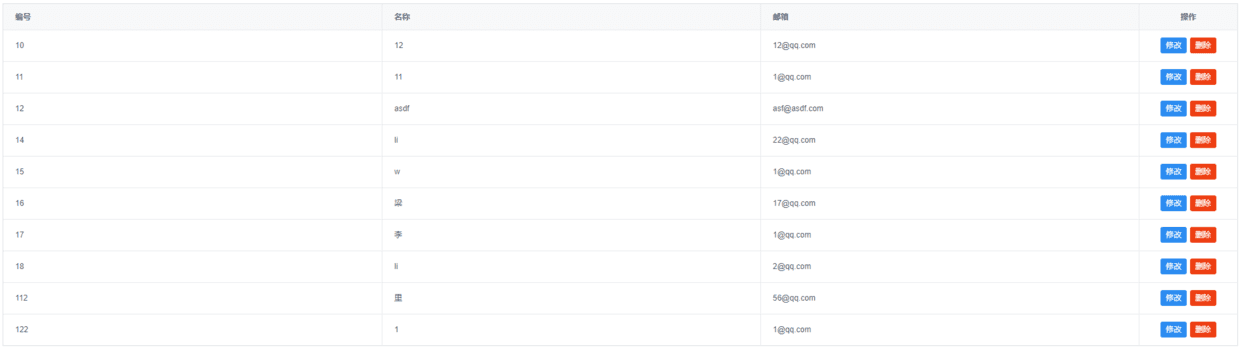
之前做的一个管理端界面(spring boot + vue )数据,下图网址为:http://101.132.124.171:8000/about
看完能懂啥?
看完能大概知道目录结构,Dio基础请求的封装, Fish_Redux状态的使用,和一些乱七八糟的坑。笔者也是差不多摸石头过河,这些天也是踩了一些坑。
选型
因为组人员有限,所以没有过多的精力去维护一套IOS和Android代码。经过和组里的人员套论以后,决定放弃选用React Native,选用Flutter。因为组人人员都是React Native和Flutter都没有接触过,差不多都是从0开始,然后觉得Flutter可能是以后的趋势,性能还行,就开始搞了。
搭环境
此处省略一万字,按Flutter官网来即可:Flutter中文网。
项目结构
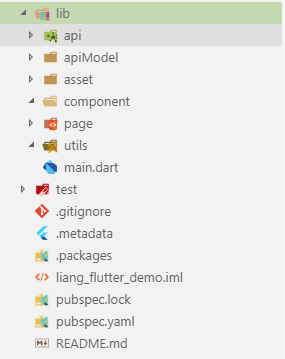
- api 用来存放和后端接口请求
- apiModel 用来存放后端返回的json对应的model对象集合
- asset 用来存放一些例如图片啥的资源
- component 为能抽出来的单个的组件的集合
- page 为单个的页面的集合
- utils 为功能的方法和类的集合
- pubspec.yaml是管理包的地方
demo需要用的依赖包
dependencies:
  json_annotation: ^2.4.0 # json序列化和反序列化用的
  dio: ^2.1.7 # http请求用的
  fish_redux: ^0.2.2 # 状态管理用的
  flutter:
    sdk: flutter

# 开发环境的依赖
dev_dependencies:
  flutter_test:
    sdk: flutter
  build_runner: ^1.5.2 # 开发时生成model用的
  json_serializable: ^3.0.0 # json序列化和反序列化用的
为啥要使用状态管理
- 为了View(界面)和VM(逻辑)解耦。
- 为了代码的可维护性。
- 为了以后的可扩展性。
使用 fish_redux前戏
- 在状态管理的选型中,有bloc和redux,后面选了阿里的 fish_redux。一是因为相信阿里的团队,二是看了他们的状态管理和其他的对比(状态管理对比),三是它的星星是最多的。
- 官方推出了一个插件:FishReduxTemplate,分别有vscode 和Android studio,不过Android studio创建了文件以后,过许久以后才会刷新,有点小慢。
- 开始有点不是很理解他的意思,接触和看文档以后发现他的这个和Vuex状态有点类似。
- 看的知乎上的一个解释(不知道为啥,翻墙才搜到了知乎的,讲的挺好的,为啥某度的搜索引擎就没有出来),觉得下面几个还是很重要的:View、Effect、Reducer组件三要素。 (掘金解释)、(知乎解释)
使用Flutter的坑
- fish_redux去github上找官方的example,我是没有跑起来。是因为我的flutter的版本是1.74的。报错如下,原因也挺简单,是因为咸鱼团队的Action和官方的Action的类名重复了。解决办法:降级,将flutter版本降至:v1.5.4-hotfix.2及以下。
Error: 'Action' is imported from both 'package:flutter/src/widgets/actions.dart' and 'package:fish_redux/src/redux/basic.dart'.
- fish_redux 创建以后effect文件报错,错误如下。
The function '_onAction' has type 'void Function(Action, Context<DemoState>)' that isn't of expected type 'dynamic Function(dynamic, Context<DemoState>)'. This means its parameter or return type does not match what is expected.
-
在开始模式调用API的时候,遇上一个大坑,因为之前做JAVA 、C#、Vue居多,移动端偏少,然后在使用Dio封装后,开始连接后台API,报错。原因也是找了一会,是因为,我自己开的后台去调试的,开的node的后台和java的后台都不行,BaseUrl写的是:localhost,后面看见有大兄弟说,linux系统下,本机被映射的端口是啥10.20啥的,我猜这个dart的底层虚拟机是linux的,我果断换了远程的IP的API,立马来事。
// 错误是这个, DioError [DioErrorType.DEFAULT] // 官网的解释如下 enum DioErrorType { /// Default error type, usually occurs before connecting the server. DEFAULT, } -
没啥文档,很多靠猜和网上的例子。有些不是很理解,也没有人讲解啥的,还是有点痛苦的。
fish_redux几个重要的概念
-
Action定义一种行为,可以携带信息,发往Store。换言之Store发生改变须由Action触发,Fish redux 有以下约定:Action 包含两个字段type和payload;推荐写法是在action.dart里定义一个type枚举类和一个ActionCreator类,这样有利于约束payload的类型。
-
Reducer/Effect这两个函数都是用来处理数据的函数,Reducer是纯函数响应Action对Store数据进行改变。Effect用来处理来自视图的意图,如点击事件,发起异步请求,这些有副作用的操作。
-
Page可以看成是一个容器,它用来配置聚合State,Effect,Reduce,View,Dependencies等。
-
Adapter(可选),这个不咋懂。
-
view 解耦出来的纯页面。
首先创建一个简单的页面
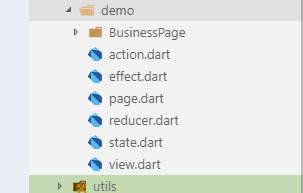
使用咸鱼提供插件新建后,将出现上图的文件。
- action,里面是定义一些动作,给view或者effect用的。
import 'package:fish_redux/fish_redux.dart';
import '../../../apiModel/user.dart';

//TODO replace with your own action
enum BusinessAction { query }

class BusinessActionCreator {

  static Action updateAction(List<User> userList){
    print('由effect请求后dispatch的值来了');
    return Action(BusinessAction.query, payload: userList);
  }
}
- effect 里头是一些事件,发起异步请求等
import 'package:fish_redux/fish_redux.dart';
import 'action.dart';
import 'state.dart';
import '../../../api/user.dart';

Effect<BusinessState> buildEffect() {
  return combineEffects(<Object, Effect<BusinessState>>{
    Lifecycle.initState: _init,
  });
}

void _init(Action action, Context<BusinessState> ctx) {
  // Http请求
  UserApi.getUser().then((value){
    ctx.dispatch(BusinessActionCreator.updateAction(value));
  });
}
- page 是配置聚合State,Effect,Reduce,View
import 'package:fish_redux/fish_redux.dart';

import 'effect.dart';
import 'reducer.dart';
import 'state.dart';
import 'view.dart';

class BusinessPage extends Page<BusinessState, Map<String, dynamic>> {
  BusinessPage()
      : super(
            initState: initState,
            effect: buildEffect(),
            reducer: buildReducer(),
            view: buildView,
            dependencies: Dependencies<BusinessState>(
                adapter: null,
                slots: <String, Dependent<BusinessState>>{
                }),
            middleware: <Middleware<BusinessState>>[
            ],);
}
- reducer 修改值的地方
import 'package:fish_redux/fish_redux.dart';

import 'action.dart';
import 'state.dart';

Reducer<BusinessState> buildReducer() {
  return asReducer(
    <Object, Reducer<BusinessState>>{
      BusinessAction.query: _onQuery,
    },
  );
}

BusinessState _onQuery(BusinessState state, Action action) {
  print('我是值真正更新的地方');
  final BusinessState newState = state.clone();
  newState.userList = action.payload;
  return newState;
}
- state 初始化,存属性的地方
import 'package:fish_redux/fish_redux.dart';
import '../../../apiModel/user.dart';

class BusinessState implements Cloneable<BusinessState> {

  BusinessState({this.userList});

  List<User> userList = new List<User>();

  @override
  BusinessState clone() {
    return BusinessState();
  }
}

// 初始化
BusinessState initState(Map<String, dynamic> args) {
  List<User> tempList = new List<User>();
  User user = new User();
  user.no = 0;
  user.name = '梁二狗';
  user.email = '1@qq.com';
  tempList.add(user);
  return BusinessState(userList: tempList);
}
- view 解耦出来的界面
import 'package:fish_redux/fish_redux.dart';
import 'package:flutter/material.dart';

import 'action.dart';
import 'state.dart';

Widget buildView(BusinessState state, Dispatch dispatch, ViewService viewService) {

  var buildListView = ListView.builder(
    itemCount: state.userList.length,
    itemBuilder: (BuildContext context, int index) {
      return Card(
        child: ListTile(
          leading: FlutterLogo(),
          title: Text('编号:' +
              state.userList[index].no.toString() +
              '名称:' +
              state.userList[index].name.toString() +
              '邮箱:' +
              state.userList[index].email.toString()),
        ),
      );
    },
  );
  // 中间页面的视图
  return Scaffold(appBar: null, body: Center(child: buildListView));
}
Http的封装
在上面,我们使用的Http请求,是用Dio封装过一次的,代码如下:
import 'package:dio/dio.dart';
import 'dart:io';
import 'dart:async';

/*
 * 封装 restful 请求
 *
 * GET、POST、DELETE、PATCH
 * 主要作用为统一处理相关事务:
 *  - 统一处理请求前缀;
 *  - 统一打印请求信息;
 *  - 统一打印响应信息;
 *  - 统一打印报错信息;
 */

class HttpUtils {

  /// global dio object
  static Dio dio;

  /// default options
  static const String API_PREFIX = 'http://101.132.124.171:8080/demo-1.0/api';
  static const int CONNECT_TIMEOUT = 10000;
  static const int RECEIVE_TIMEOUT = 3000;

  /// http request methods
  static const String GET = 'get';
  static const String POST = 'post';
  static const String PUT = 'put';
  static const String PATCH = 'patch';
  static const String DELETE = 'delete';

  static Future<dynamic> request (
      String url,
      { data, method }) async {

    data = data ?? {};
    method = method ?? 'GET';

    /// restful 请求处理
    data.forEach((key, value) {
      if (url.indexOf(key) != -1) {
        url = url.replaceAll(':$key', value.toString());
      }
    });

    Dio dio = createInstance();
    /// 打印请求相关信息:请求地址、请求方式、请求参数
    print('请求地址:【' + dio.options.baseUrl + url + '】');
    print('请求参数:' + data.toString());

    var result;

    try {
      Response response = await dio.request(url, data: data, options: new Options(method: method));
      result = response.data;

      /// 打印响应相关信息
      print('响应数据成功!');
    } on DioError catch (e) {
      /// 打印请求失败相关信息
      print('请求出错:' + e.toString());
    }

    return result;
  }

  /// 创建 dio 实例对象
  static Dio createInstance () {
    if (dio == null) {
      /// 全局属性:请求前缀、连接超时时间、响应超时时间
      BaseOptions option = new BaseOptions(
          baseUrl: API_PREFIX,
          connectTimeout: CONNECT_TIMEOUT,
          receiveTimeout: RECEIVE_TIMEOUT,

          headers: {
            "user-agent": "dio",
            "api": "1.0.0"
          },

          contentType: ContentType.JSON,
          // Transform the response data to a String encoded with UTF8.
          // The default value is [ResponseType.JSON].
          responseType: ResponseType.plain
      );
      dio = new Dio(option);
    }

    return dio;
  }

  /// 清空 dio 对象
  static clear () {
    dio = null;
  }
}
json 字符串解析
在上面http中,我们的数据为json数组,数据如下,我们使用 json_serializable 将json串转化成List数组。
[{"no":10,"name":"12","email":"12@qq.com"},{"no":11,"name":"11","email":"1@qq.com"},{"no":12,"name":"asdf","email":"asf@asdf.com"},{"no":14,"name":"li","email":"22@qq.com"},{"no":15,"name":"w","email":"1@qq.com"},{"no":16,"name":"梁","email":"17@qq.com"},{"no":17,"name":"李","email":"1@qq.com"},{"no":18,"name":"li","email":"2@qq.com"},{"no":112,"name":"里","email":"56@qq.com"},{"no":122,"name":"1","email":"1@qq.com"}]
他这个东西还是有点复杂的,没有java或者C#转json方便。我们建立对应的Model的文件user.dart,示例代码如下:
import 'package:json_annotation/json_annotation.dart';

part 'user.g.dart';

@JsonSerializable()
class User {
  User({this.no, this.name, this.email});

  int no;
  String name;
  String email;

  factory User.fromJson(Map<String, dynamic> json) => _$UserFromJson(json);

  Map<String, dynamic> toJson() => _$UserToJson(this);
}
开始建立文件的时候,最后两行会报错。然后我们使用如下命令行,将会生成一个"user.g.dart",然后就能使用了。
flutter packages pub run build_runner watch
在json串转List的时候,找了很久,终于找到啦,这样写:
 // json 为后台返回的json数组串
 var usersJson = json.decode(result);
 List<User> userList = (usersJson as List).map((i)=>User.fromJson(i)).toList();
就写到这里吧。希望能帮到大家哦,还有,记得给我点星星,写文不容易啊。
