

三种常用的timer
1.第一种Timer(NSTimer) 第一步:初始化timer
let timer = Timer.init(timeInterval: 1, target: self, selector: #selector(timerAction), userInfo: nil, repeats: true)
第二步:实现回调函数
@objc func timerAction() {

    print("timer action!")
}
第三步:启动定时器
let timer = Timer.init(timeInterval: 1, target: self, selector: #selector(timerAction), userInfo: nil, repeats: true)

timer.fire()
执行之后会发现,timerAction() 函数只执行了一次。这是因为Timer定时器,需要和RunLoop支持。所以,需要把第三步的代码修改成如下。
let timer = Timer.init(timeInterval: 1, target: self, selector: #selector(timerAction), userInfo: nil, repeats: true)

RunLoop.current.add(timer, forMode: .default)
在iOS10.0以后,Timer增加了block回调,但是用法都是一样的,就不再举例说明了。
2.第二种GCD方式(DispatchSourceTimer)
let timer = DispatchSource.makeTimerSource()

timer.setEventHandler {
    print(timer)
}

timer.schedule(deadline: DispatchTime.now(), repeating: 1)

timer.resume()
DispatchSourceTimer 需要设置deadline。同时,需要执行 resume() 函数,因为 DispatchSourceTimer 默认是挂起的,需要resume才会开启定时器。
2.第三种CADisplayLink
let timer = CADisplayLink(target: self, selector: #selector(timerAction))

timer.preferredFramesPerSecond = 1

timer.add(to: .current, forMode: .common)
CADisplayLink 需要设置preferredFramesPerSecond屏幕在一分钟内刷新的帧数,默认为60,如果不设置,则一秒执行60次。
同时需要将创建的 CADisplayLink 对象加入到 RunLoop 中,才能在屏幕刷新的时候,执行定时器的 selector 方法。
RxSwift中的定时器(timer)
let timer = Observable<Int>.interval(1, scheduler: MainScheduler.instance)

timer.subscribe(onNext: { (time) in
    print(time)
})
    .disposed(by: disposeBag)
从上面的示例中可以看出,RxSwift中的timer是一个可观察序列,而且也没有RunLoop的支持。那么,RxSwift的定时器timer内部是如何实现的呢?我们一起来看看源码。
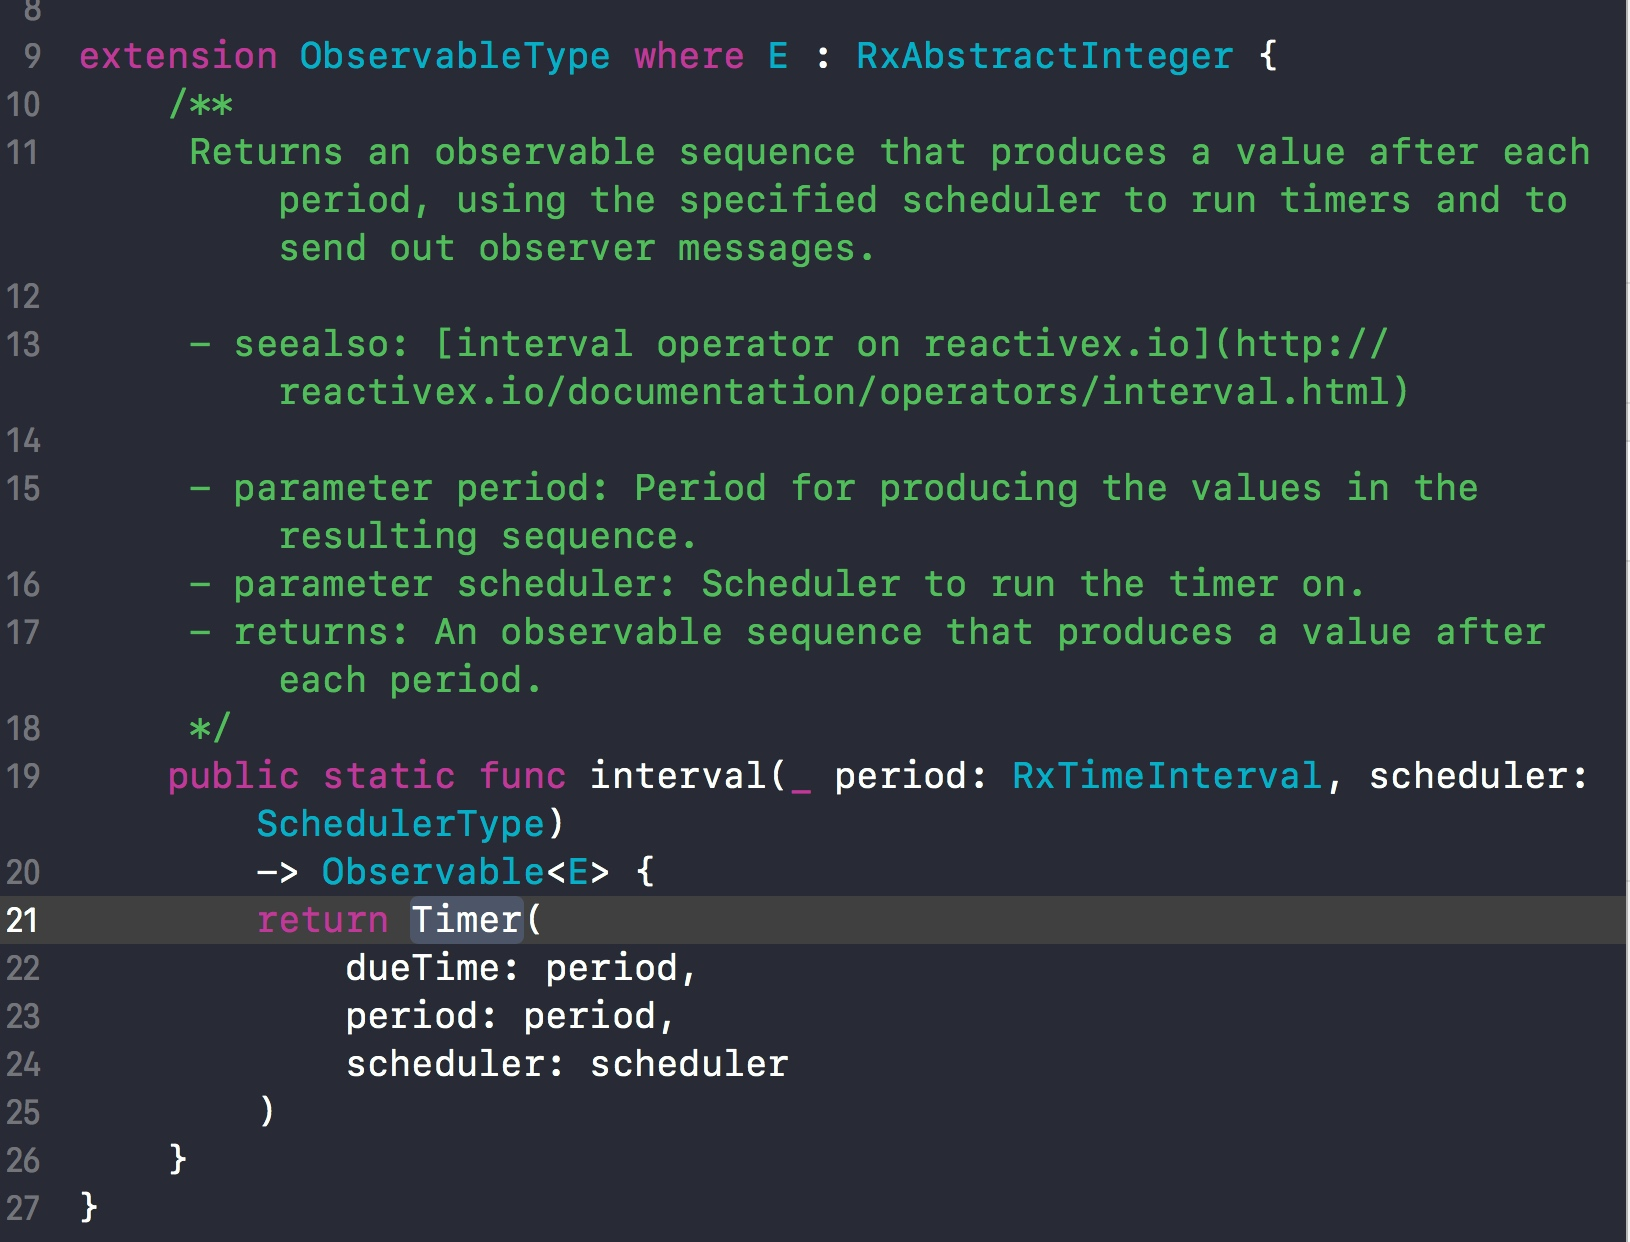
interval 内部是初始化了一个 Timer 类的实例对象。
我们再查看 Timer 的源码。
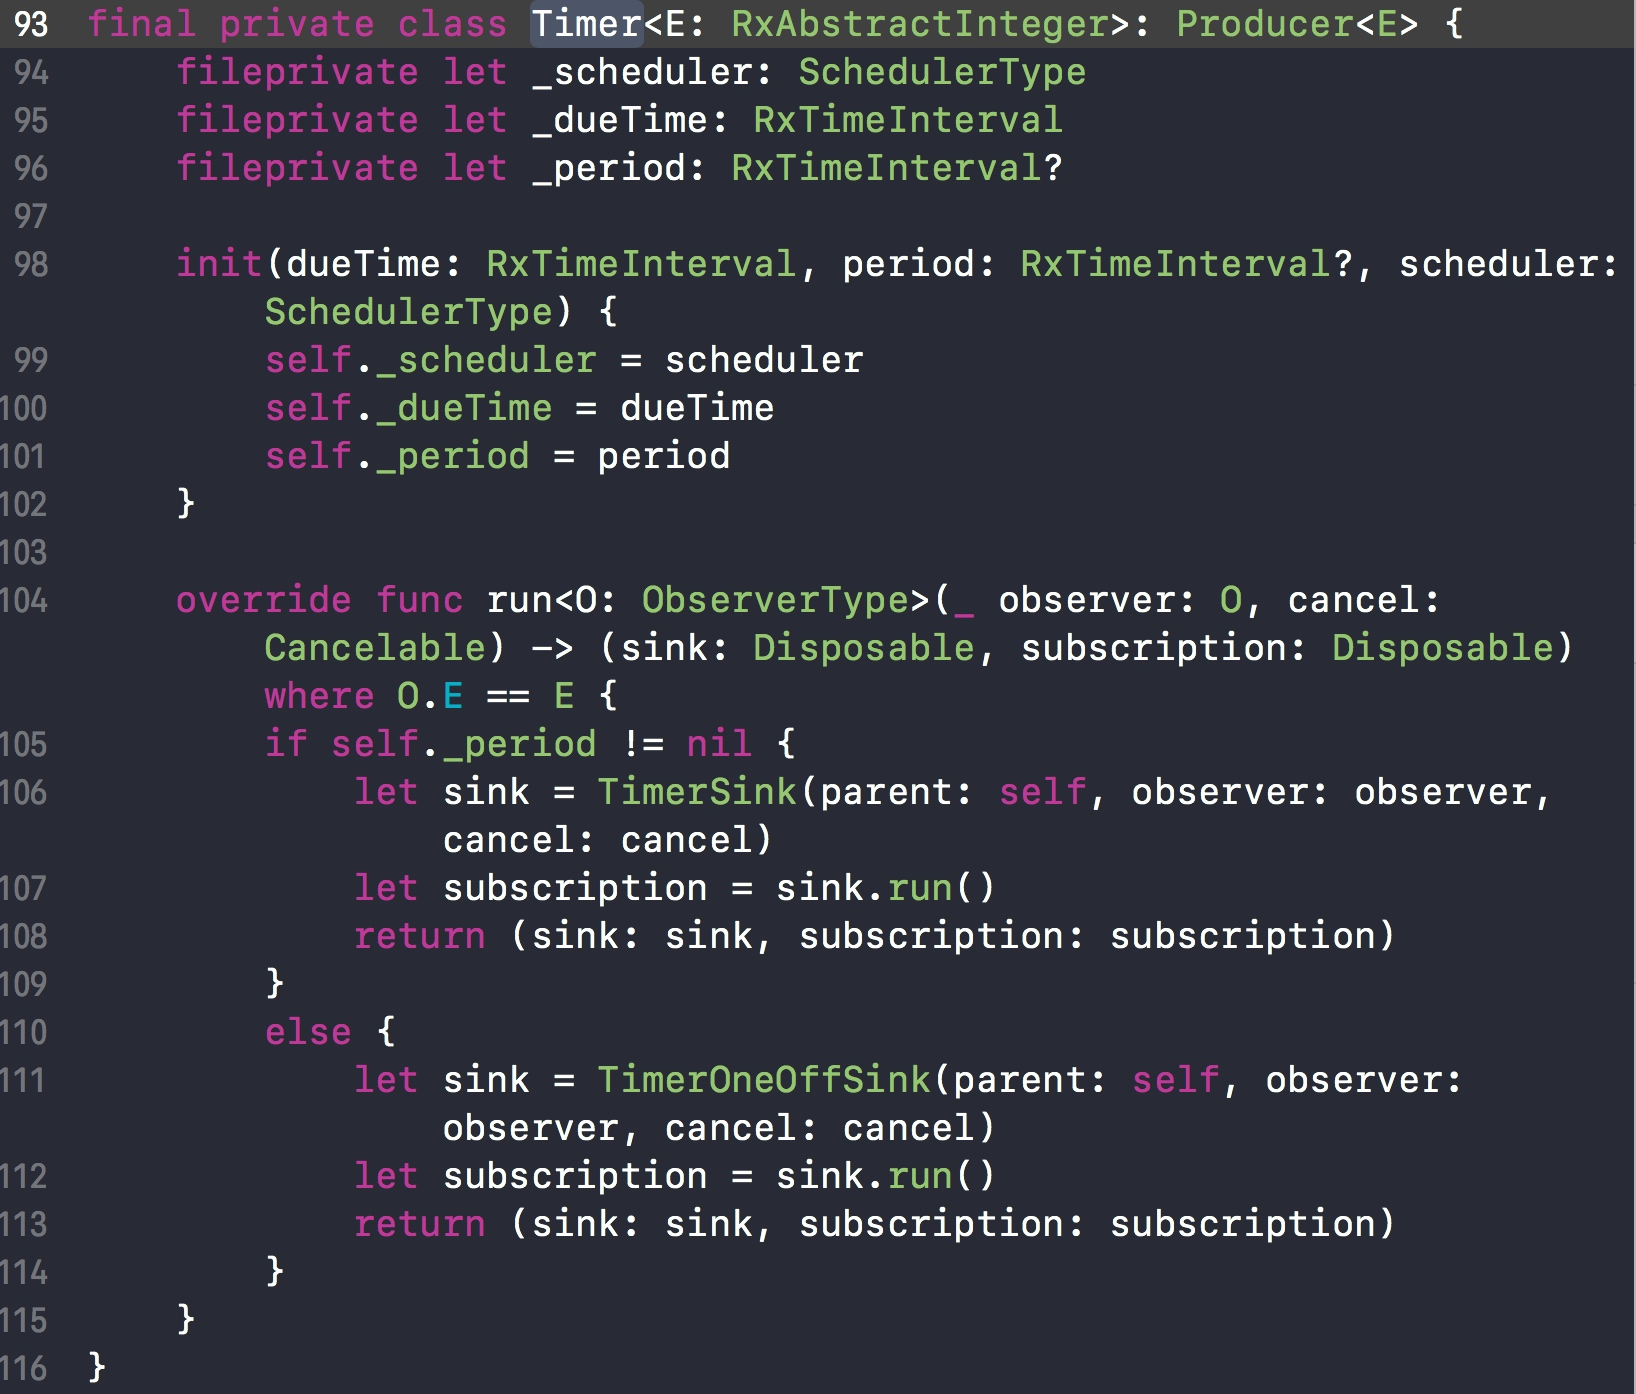
Timer 类是 Producer 的子类。我在RxSwift核心逻辑简介 中已经分析过了,在订阅信号调用 subscribe() 函数之后,会调用 run() 函数。
最后会初始化 TimerSink 实例对象,并调用其 run() 函数。
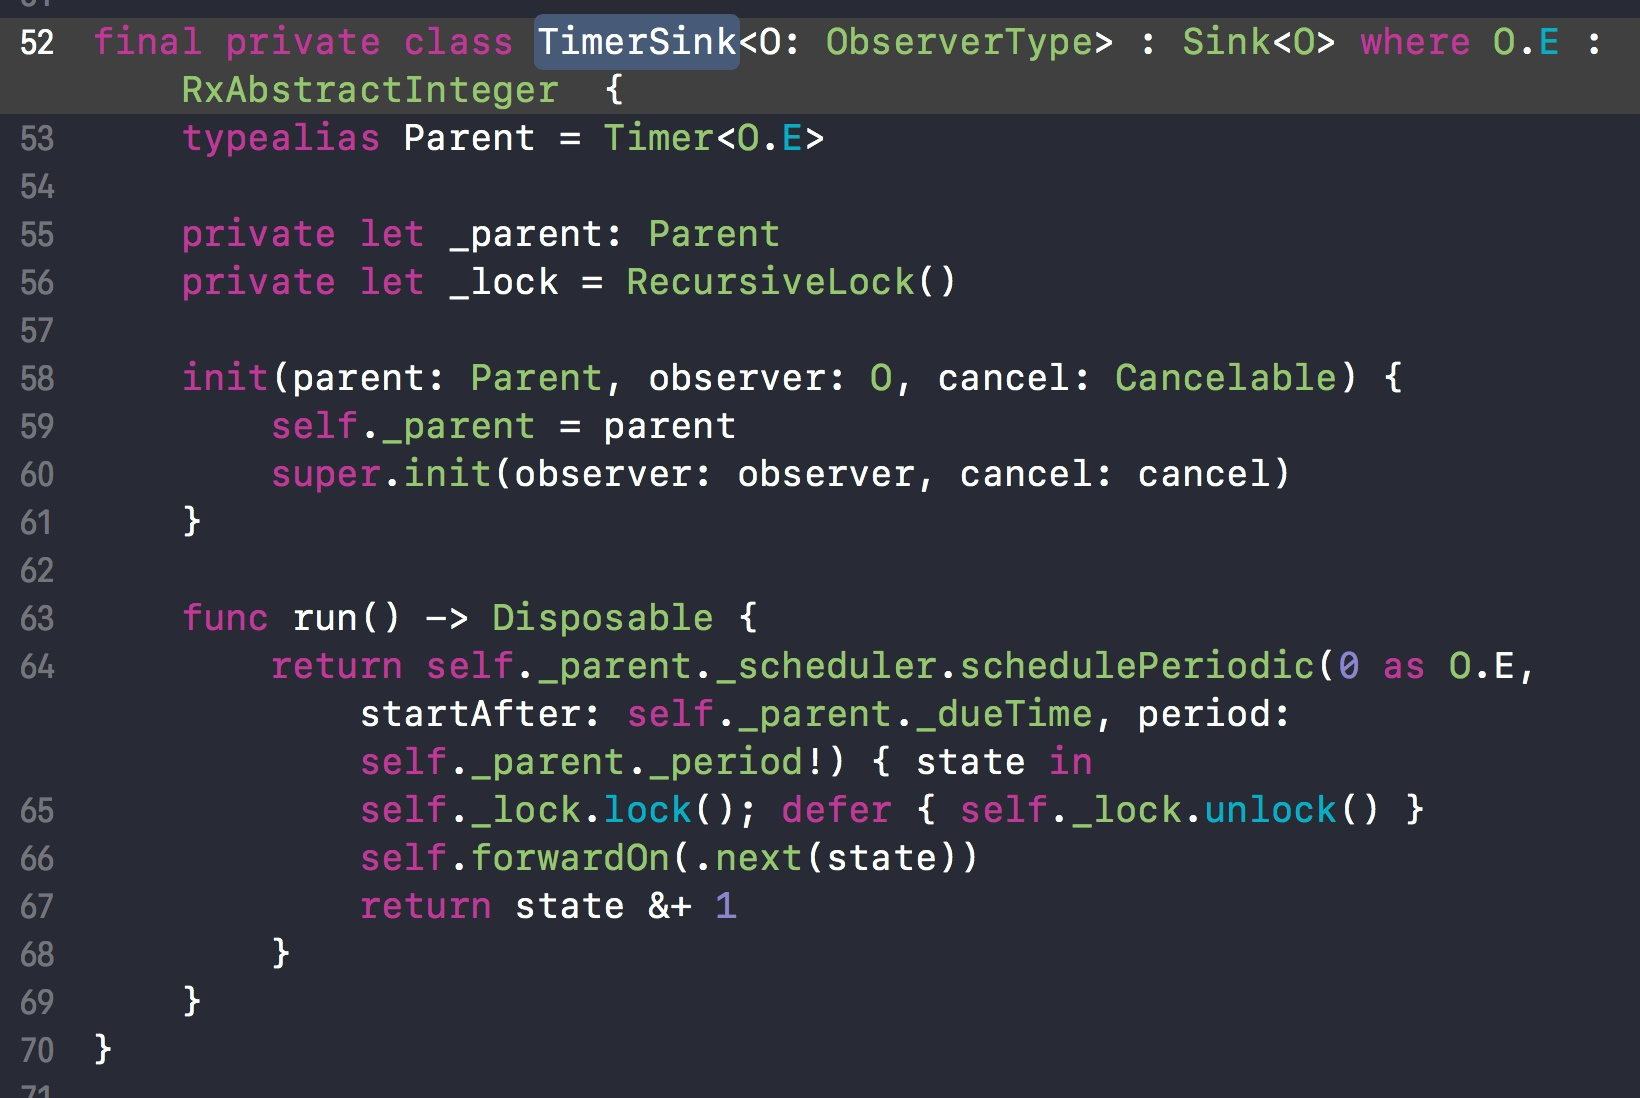
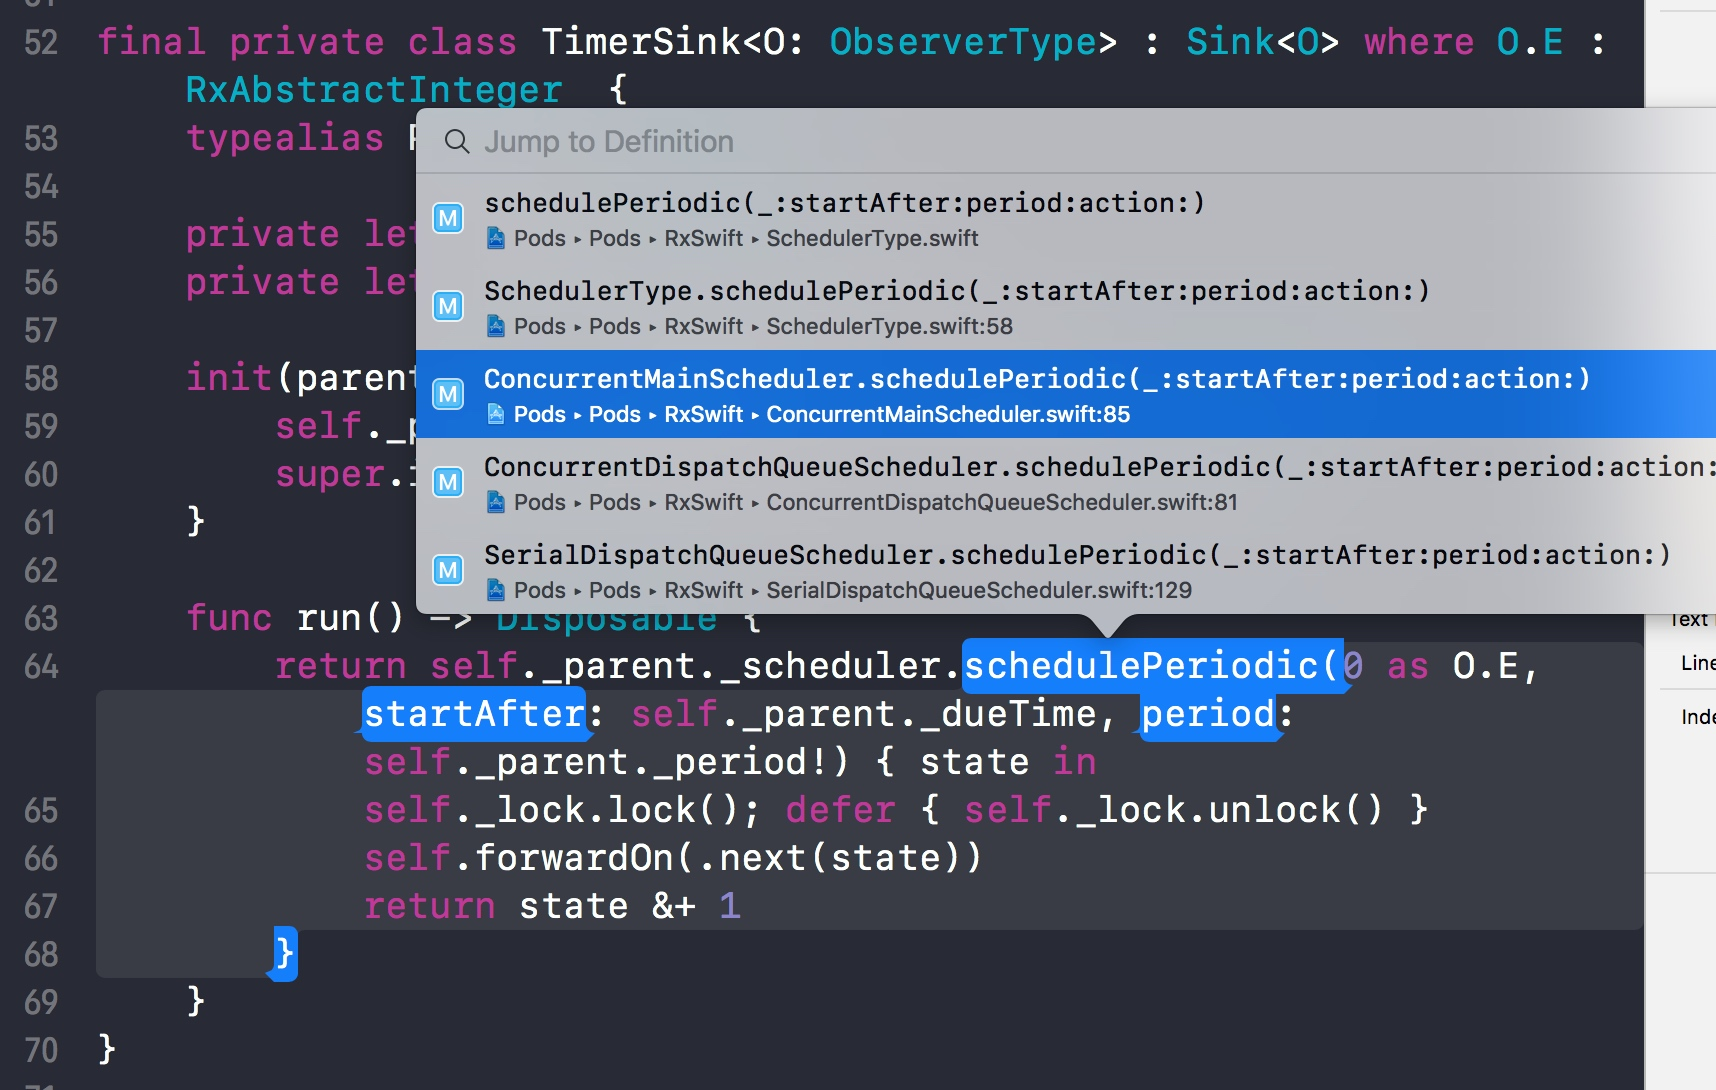
schedulePeriodic()函数,但是我们应该进入哪个文件查看呢?因为我们初始化timer时传入的参数是MainScheduler的实例,所以我们应该找和MainScheduler相关的类的实现
schedulePeriodic 函数
    func schedulePeriodic<StateType>(_ state: StateType, startAfter: TimeInterval, period: TimeInterval, action: @escaping (StateType) -> StateType) -> Disposable {
        let initial = DispatchTime.now() + dispatchInterval(startAfter)

        var timerState = state

        let timer = DispatchSource.makeTimerSource(queue: self.queue)
        timer.schedule(deadline: initial, repeating: dispatchInterval(period), leeway: self.leeway)

        // TODO:
        // This looks horrible, and yes, it is.
        // It looks like Apple has made a conceputal change here, and I'm unsure why.
        // Need more info on this.
        // It looks like just setting timer to fire and not holding a reference to it
        // until deadline causes timer cancellation.
        var timerReference: DispatchSourceTimer? = timer
        let cancelTimer = Disposables.create {
            timerReference?.cancel()
            timerReference = nil
        }

        timer.setEventHandler(handler: {
            if cancelTimer.isDisposed {
                return
            }
            timerState = action(timerState)
        })
        timer.resume()

        return cancelTimer
    }
在 schedulePeriodic 函数中就会发现,RxSwift中timer的底层实现,其实是一个 DispatchSourceTimer。
并且在每次调用 timer 的 EventHandler 时会执行 action(timerState) 闭包。通过分析可以知道,闭包 action 是
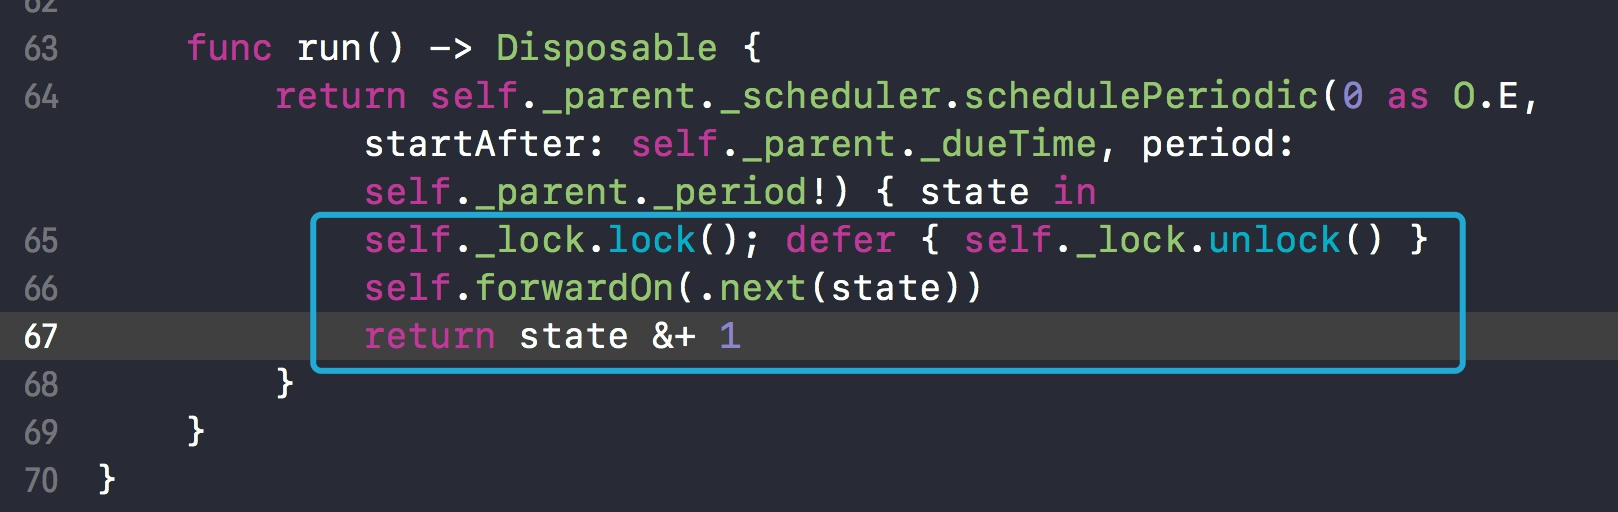
self.forwardOn(.next(state)) 。
这之后的代码执行逻辑,就和RxSwift之管道——AnonymousObservableSink中4、observer.onNext()分析的逻辑一致,就不再过多赘述了。
以上,就是RxSwift的定时器底层逻辑分析。如有不足之处,还请大家在评论中指出,不胜感激。
