

1.前言
前一篇文章中了解了AsyncTask的使用和原理,这一篇轮到HandlerThread这种异步任务的方式,HandlerThread源码中会涉及一些关于Handler和Looper的内容,不太了解的可以先看一下这篇文章Android进阶知识:Handler相关。
2.HandlerThread使用
HandlerThread的使用有以下几个步骤:
1. 创建HandlerThread对象
HandlerThread handlerThread = new HandlerThread("myHandlerThread");
2.开启HandlerThread
handlerThread.start();
3.创建HandlerThread的Handler,并复写其handleMessage方法
Handler handler = new Handler(handlerThread.getLooper()) {
        @Override
        public void handleMessage(Message msg) {
            switch (msg.what) {
                case type1: {
                    try {
                        Thread.sleep(1000);
                    } catch (InterruptedException e) {
                        e.printStackTrace();
                    }
                    Log.d(TAG, Thread.currentThread().getName() + " type1  receive");
                }
                break;
                case type2: {
                    for (percent = 0; percent <= 100; percent += 10) {
                        try {
                            Thread.sleep(300);
                        } catch (InterruptedException e) {
                            e.printStackTrace();
                        }
                        Log.d(TAG, Thread.currentThread().getName() + " type2  " + percent + "% progress");

                    }
                    Log.d(TAG, Thread.currentThread().getName() + ":finish");
                }
                break;
            }
        }
    };
4.通过Handler发送消息
Message message1 = Message.obtain();
message1.what = type1;
handler.sendMessage(message1);

Message message2 = Message.obtain();
message2.what = type2;
handler.sendMessage(message2);
5.使用完退出HandlerThread
handlerThread.quit();
运行结果日志:

3.HandlerThread运行原理
无论从HandlerThread的名字还是它的使用方法来看HandlerThread都是一个线程Thread加上一个Handler的组合,其实也确实如此。先从它的构造方法开始看。
/**
* Handy class for starting a new thread that has a looper. The looper can then be
* used to create handler classes. Note that start() must still be called.
*/
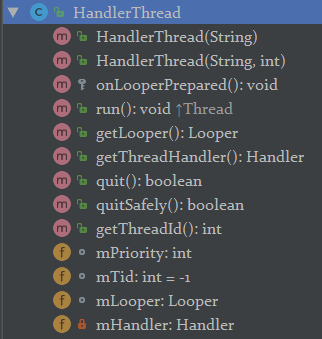
public class HandlerThread extends Thread {
int mPriority;
int mTid = -1;
Looper mLooper;
private @Nullable Handler mHandler;
public HandlerThread(String name) {
super(name);
mPriority = Process.THREAD_PRIORITY_DEFAULT;
}
/**
* Constructs a HandlerThread.
* @param name
* @param priority The priority to run the thread at. The value supplied must be from
* {@link android.os.Process} and not from java.lang.Thread.
*/
public HandlerThread(String name, int priority) {
super(name);
mPriority = priority;
}
......
}
首先看到它确实是继承了Thread类,从HandlerThread类上的注释可以看出HandlerThread就是一个提供带有Looper的线程便利类,可以通过这个Looper创建Handler。我们知道子线程中使用Handler需要自己手动创建Lopper,而使用HandlerThread就不需要了,它里面已经帮我们创建好了Looper。HandlerThread它有两个重载的构造方法,构造方法中只做了两件事,就是这个线程设置名字和优先级。作为一个Thread类想要使用它就必须调用start方法开启线程,开启线程后就会执行它的run方法,继续来看它的run方法实现。
 @Override
    public void run() {
        // 获取线程id
        mTid = Process.myTid();
        // 创建Looper
        Looper.prepare();
        synchronized (this) {
            // 获取当前线程的Looper
            mLooper = Looper.myLooper();
            // 通知等待唤醒
            notifyAll();
        }
        // 设置线程优先级
        Process.setThreadPriority(mPriority);
        // 开启Looper循环前的准备方法
        onLooperPrepared();
        // 开启轮询
        Looper.loop();
        // 将线程id修改为-1
        mTid = -1;
    }
run方法中首先获取线程id,然后就调用了Looper.prepare方法创建一个Looper,接着调用了Looper.myLooper方法获取到了当前线程的Looper。接着通过notifyAll通知等带唤醒,这里的等待是在HandlerThread的getLooper方法里调用的wait方法,getLooper方法是为了获取该HandlerThread中的Looper。如果在没调用HandlerThread的start方法开启线程前就调用getLooper方法就通过wait方法暂时先进入等待,等到run方法运行后再进行唤醒。唤醒之后run方法中继续设置了构造函数中传入的优先级,接着调用了onLooperPrepared方法,该方法是个空实现,该方法是为了在Looper开启轮询之前如果要进行某些设置,可以复写该方法。最后调用Looper.loop开启轮询。
 public Looper getLooper() {
        // 如果该线程isAlive为false直接返回null
        if (!isAlive()) {
            return null;
        }
        // 如果isAlive为true但mLooper为null,就进行等待直到mLooper被创建
        synchronized (this) {
            while (isAlive() && mLooper == null) {
                try {
                    wait();
                } catch (InterruptedException e) {
                }
            }
        }
        return mLooper;
    }
onLooperPrepared空实现。
 protected void onLooperPrepared() {
 }
HandlerThread中还提供了两个退出的方法分别对应Looper中的两个退出方法。
    public boolean quit() {
        Looper looper = getLooper();
        if (looper != null) {
            looper.quit();
            return true;
        }
        return false;
    }

    public boolean quitSafely() {
        Looper looper = getLooper();
        if (looper != null) {
            looper.quitSafely();
            return true;
        }
        return false;
    }
可以看到不管哪个方法其中都先获取Looper判断不为空后调用了Looper中的对应的退出方法。使用完HandlerThread后一定要记得调用退出方法停止Looper,否则Looper会一直轮询。
除了以上方法,HandlerThread里还有一个getThreadHandler获取持有当前线程Looper的Hanlder,不过这个方法是hide隐藏的。
   /**
     * @return a shared {@link Handler} associated with this thread
     * @hide
     */
    @NonNull
    public Handler getThreadHandler() {
        if (mHandler == null) {
            mHandler = new Handler(getLooper());
        }
        return mHandler;
    }
4.总结
以上就是HandlerThread所有源码方法,可以发现HandlerThread源码不多一共160多行,其实现的功能也不复杂,就是封装了一个带有Looper的线程类,方便了我们做异步耗时任务和通信。不过使用还是有几个要注意的点:
- 因为
HandlerThread只有一个线程,所以在连续不停的使用Handler的发送消息时,任务只能一个一个进行。 - 为
HandlerThread用完记得调用退出方法。 - 因为要使用
Handler所以会容易发生内存泄漏。
