

导读:通过前面的一系列文章你已经知道如何基于 kubectl 来操作 Knative 的各种资源。但是如果想要在项目中集成 Knative 仅仅使用 kubectl 这种命令的方式是不够的,还需要在代码中基于 Knative Serving SDK 进行集成开发。本篇文章中,阿里云智能事业群技术专家冬岛将从 Knative Serving SDK 入手,介绍如何基于 Knative SDK 进行 serverless 开发。
Golang Context
在正式开始介绍 Knative Serving SDK 之前,我们先简单介绍一下 Golang Context 的机理。因为在 Knative Serving 中 client、Informer 的初始化和信息传递完全是基于 Golang Context 实现的。
Golang 是从 1.7 版本开始引入的 Context ,Golang 的 Context 可以很好的简化多个 goroutine 之间以及请求域间的数据传递、取消信号和截至时间等相关操作。Context 主要有两个作用:
- 传输必要的数据;
- 进行协调控制,比如终止 goroutein、设置超时时间等。
Context 定义
Context 本身是一个接口。
type Context interface {
    Deadline() (deadline time.Time, ok bool)
    Done() <-chan struct{}
    Err() error
    Value(key interface{}) interface{}
}
这个接口中定义了四个方法,下面分别介绍:
- Deadline 方法是获取设置的截止时间的意思,到了这个时间点,Context 会自动发起取消请求;
- Done 方法返回一个只读的 chan,如果该方法返回的 chan 可以读取,则意味着 parent Context 已经发起了取消请求, 此时应该做清理操作,然后退出 goroutine 并释放资源;
- Err 方法返回取消的错误原因;
- Value 方法获取该 Context 上绑定的值,是一个键值对。所以要通过一个 Key 才可以获取对应的值,这个值是线程安全的。
关于 Context 主要记住一点:可以通过 Value 传递数据,Value 是一个键值对结构。更多详细的介绍可以参见下面这些文章:
- Concurrency Patterns in Go
- How to correctly use context.Context in Go 1.7
- Using context cancellation in Go
- Go Context
Knative Serving client 源码浅析
在 Context 的这些特性中,Knative Serving 中重度依赖的是 Value 功能。以 Service 的 Informer 初始化为例进行说明,这里可以看到源码。
Informer “构造函数”是在 init 函数中自动注册到 injection.Default 中的。当 Informer “构造函数”被调用之后会自动把生成的 Informer 注入到 Context 中 context.WithValue(ctx, Key{}, inf), inf.Informer()。
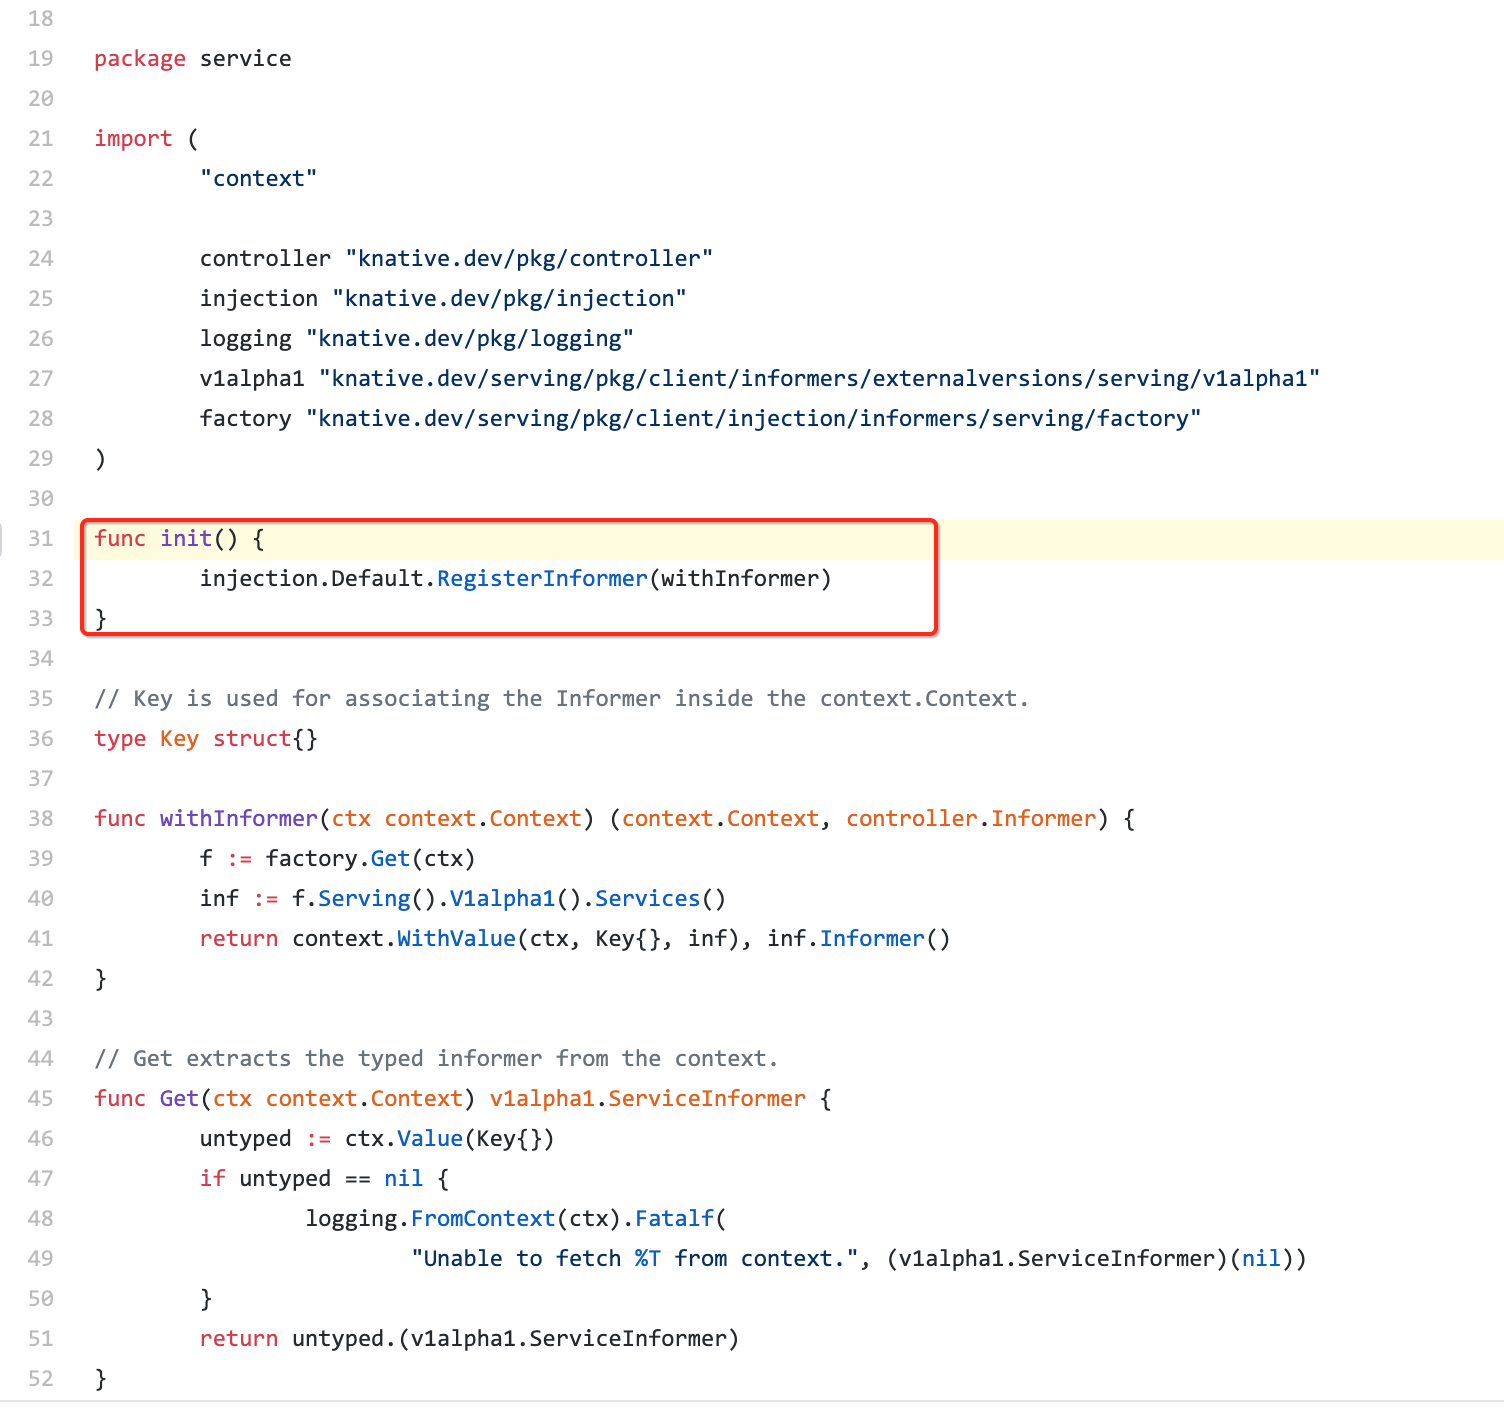
从上图中可以看到:Informer 初始化的时候需要调用 factory,而 factory 本身是从 Context 中获取的。下面我们再看看 factory 是怎么初始化的。factory 的初始化。
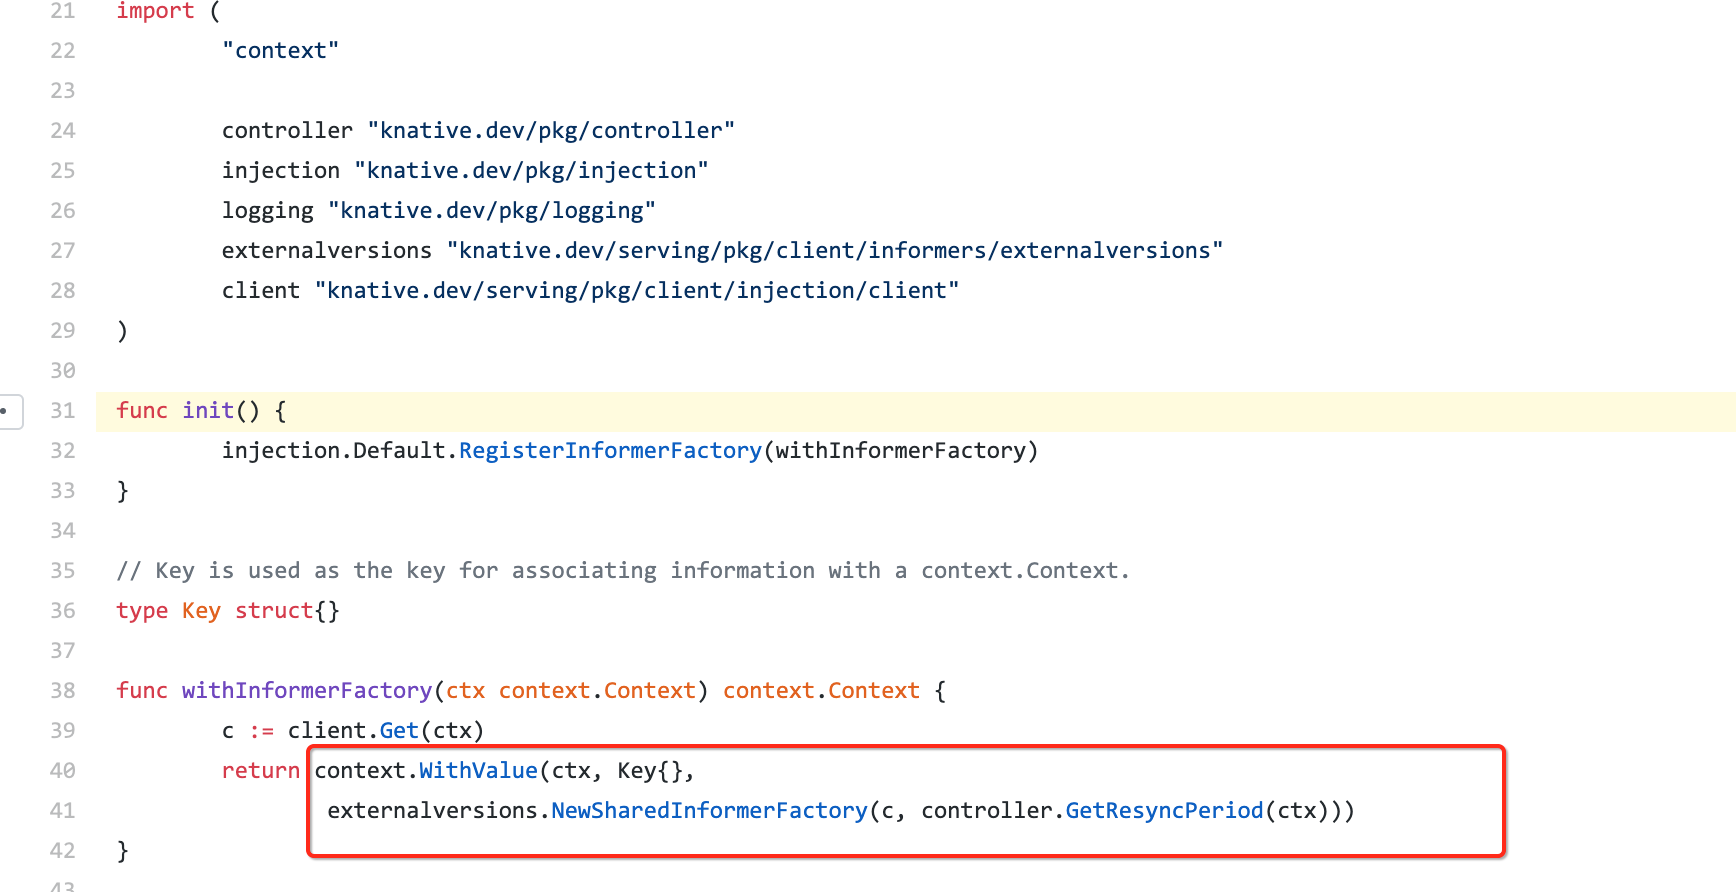
上图可以发现,factory 也是把“构造函数”注册到 injection.Default 中,并会将生成的 SharedInformerFactory 注入到 Context 中。而且 factory 中使用的 client (链接 kube-apiserver 使用的对象)也是从 Context 获取到的。
可以说 Knative Serving SDK 初始化的过程是面向 Context 编程的。关键对象是自动注入到 Context,在使用的时候从 Context 中取出。
顺带提一点,Knative Serving 的日志对象也是在 Context 保存的,当需要打印日志的时候先通过 logger := logging.FromContext(ctx) 从 Context 中拿到 logger,然后就可以使用了。这样做的好处是可以通过管理 logger 对象,比如做 trace 功能。
如下所示是基于 logger 打印出来的日志,可以看到对于同一个请求的处理是可以通过 traceID 进行追踪的。下面这段日志都是对 577f8de5-cec9-4c17-84f7-f08d39f40127 这个 trace 的处理。
{"level":"info","ts":"2019-08-28T20:24:39.871+0800","caller":"controller/service.go:67","msg":"Reconcile: default/helloworld-go","knative.dev/traceid":"be5ec711-6ca3-493c-80ed-dddfa21fd576","knative.dev/key":"default/helloworld-go"}
{"level":"info","ts":"2019-08-28T20:24:39.871+0800","caller":"controller/controller.go:339","msg":"Reconcile succeeded. Time taken: 487.347µs.","knative.dev/traceid":"90653eda-644b-4b1e-8bdb-4a1a7a7ff0d8","knative.dev/key":"eci-test/helloworld-go"}
{"level":"info","ts":"2019-08-28T20:24:39.871+0800","caller":"controller/service.go:106","msg":"service: default/helloworld-go route: default/helloworld-go ","knative.dev/traceid":"be5ec711-6ca3-493c-80ed-dddfa21fd576","knative.dev/key":"default/helloworld-go"}
{"level":"info","ts":"2019-08-28T20:24:39.872+0800","caller":"controller/service.go:67","msg":"Reconcile: eci-test/helloworld-go","knative.dev/traceid":"22f6c77d-8365-4773-bd78-e011ccb2fa3d","knative.dev/key":"eci-test/helloworld-go"}
{"level":"info","ts":"2019-08-28T20:24:39.872+0800","caller":"controller/service.go:116","msg":"service: default/helloworld-go revisions: 1 ","knative.dev/traceid":"be5ec711-6ca3-493c-80ed-dddfa21fd576","knative.dev/key":"default/helloworld-go"}
{"level":"info","ts":"2019-08-28T20:24:39.872+0800","caller":"controller/service.go:118","msg":"service: default/helloworld-go revision: default/helloworld-go-cgt65 ","knative.dev/traceid":"be5ec711-6ca3-493c-80ed-dddfa21fd576","knative.dev/key":"default/helloworld-go"}
{"level":"info","ts":"2019-08-28T20:24:39.872+0800","caller":"controller/controller.go:339","msg":"Reconcile succeeded. Time taken: 416.527µs.","knative.dev/traceid":"be5ec711-6ca3-493c-80ed-dddfa21fd576","knative.dev/key":"default/helloworld-go"}
{"level":"info","ts":"2019-08-28T20:24:39.872+0800","caller":"controller/service.go:106","msg
使用 Knative Serving SDK
介绍完 Knative Serving client 的初始化过程,下面我们看一下应该如何在代码中用 Knative Serving SDK 进行编码。
示例参见:github.com/knative-sam…
这个示例中首先使用配置初始化 *zap.SugaredLogger 对象,然后基于 ctx := signals.NewContext()生成一个 Context。signals.NewContext() 作用是监听 SIGINT 信号,也就是处理 CTRL+c 指令。这里用到了 Context 接口的 Done 函数机制。
构造 Informer
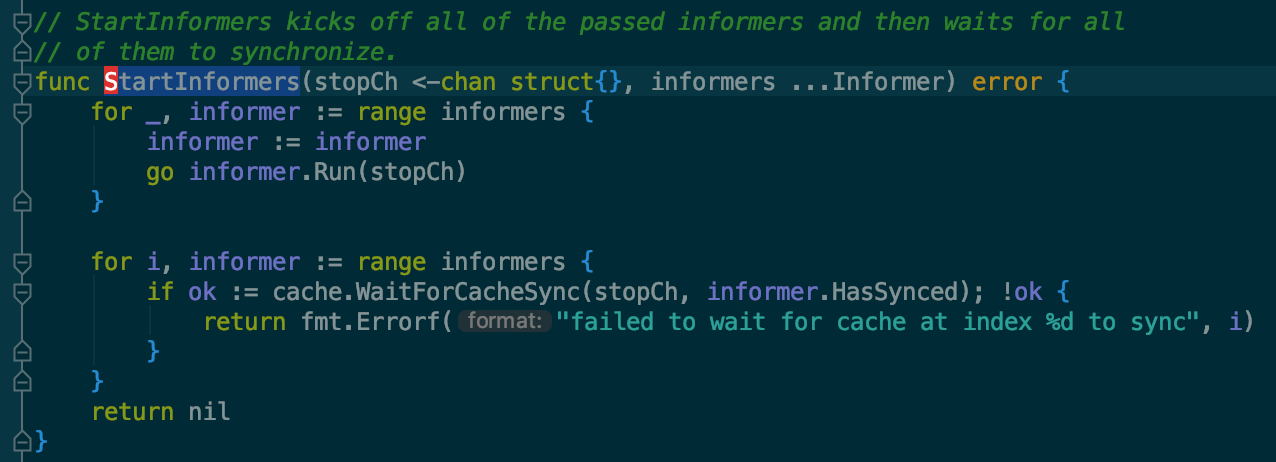
接着使用 ctx, informers := injection.Default.SetupInformers(ctx, cfg) 构造出所有的 informer,然后调用下面这段代码执行注入,把 informer 注入到 Context 中。
// Start all of the informers and wait for them to sync.
    logger.Info("Starting informers.")
    if err := controller.StartInformers(ctx.Done(), informers...); err != nil {
        logger.Fatalw("Failed to start informers", err)
    }
从 Context 中获取 Informer
实例代码: github.com/knative-sam…
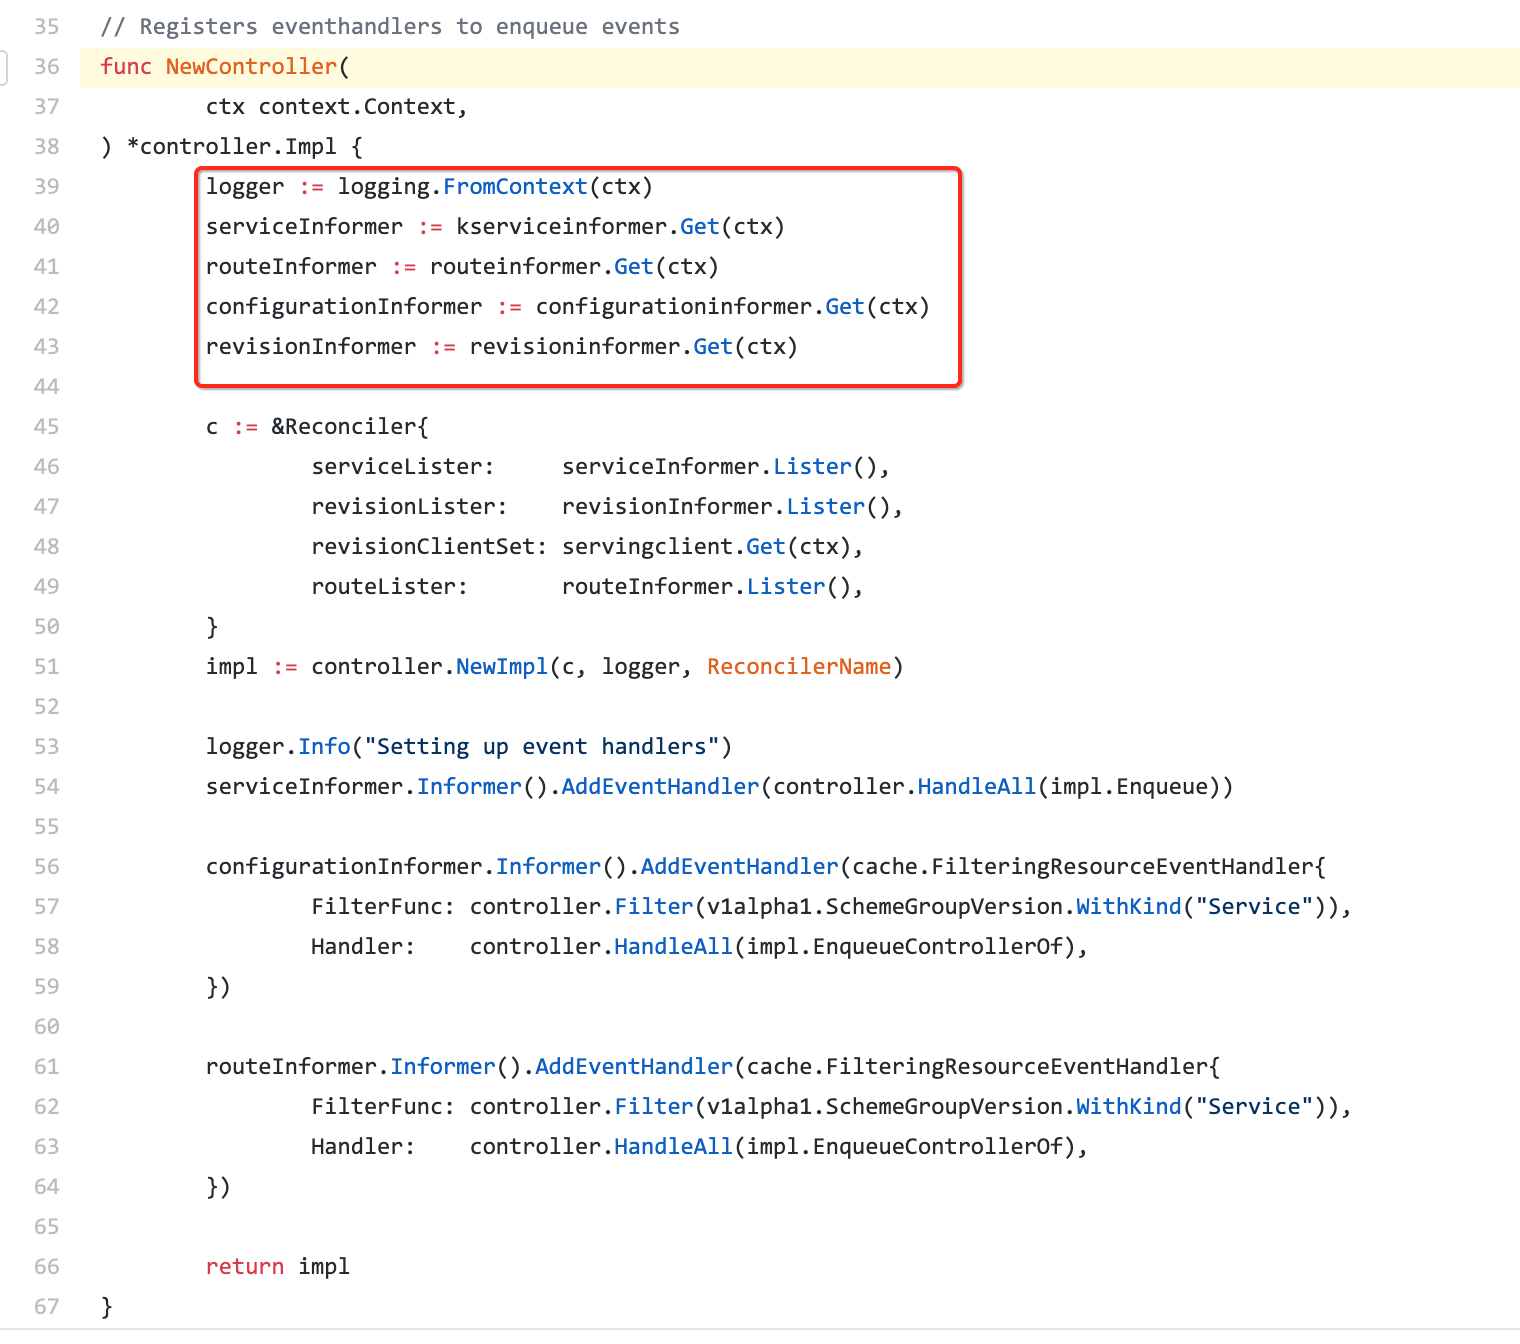
如上所示,所有的 informer 都是从 Context 中获取的。
最后 Controller 初始化一个 Reconciler 接口,接口的定义如下, 里面只有一个 Reconcile 函数。这个使用方式和 sigs.k8s.io/controller-runtime 使用的逻辑是一样的。如果你之前写过 Operator 之类的功能,对这个操作应该不会陌生。
// Reconciler is the interface that controller implementations are expected
// to implement, so that the shared controller.Impl can drive work through it.
type Reconciler interface {
    Reconcile(ctx context.Context, key string) error
}
在 Reconcile 中调用 Knative API
代码示例: github.com/knative-sam…
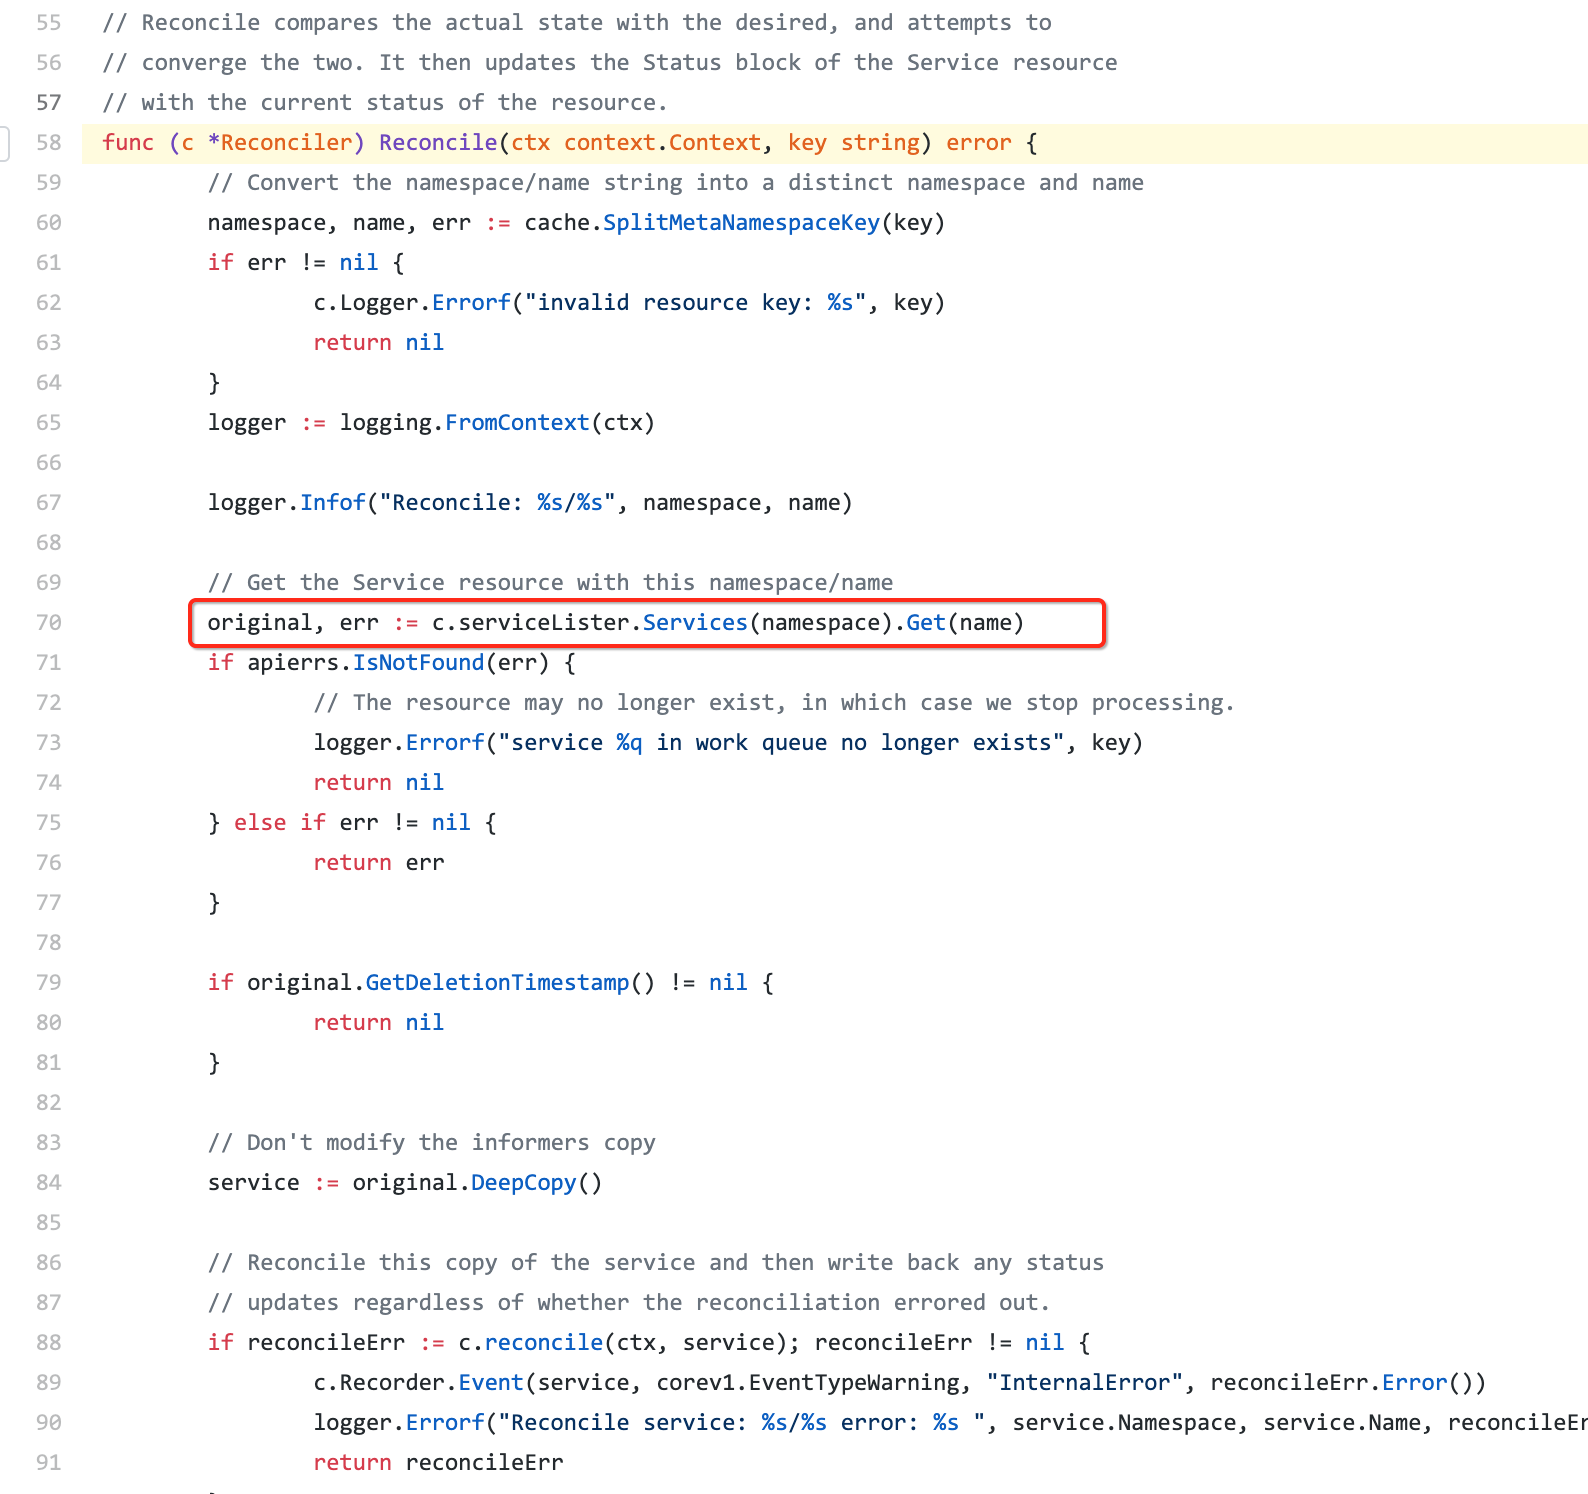
现在就可以在 Reconcile 中通过 c.serviceLister.Services(namespace).Get(name) 这种方式直接操作 Seving 资源了。
至此,我们已经把基于 Knative Seving 开发 Serverless 应用的关键脉梳理了一遍。更详细的代码示例请参见:github.com/knative-sam… ,这里面有完整可以运行的代码。
小结
本文从 Knative Serving client 的初始化过程开始展开,介绍了 Knative informer 的设计以及使用方法。通过本文你可以了解到:
- Knative Serving client 的设计思路
- 如何基于 Knative Serving SDK 进行二次开发
- 通过 Knative Serving 学习到如何面向 Context 编程
- Knative Serving 集成开发示例: github.com/knative-sam…
本文作者:牛秋霖(冬岛)
本文为云栖社区原创内容,未经允许不得转载。
