

前言:
身为一名iOS开发人员,面临必不可少的一个阶段就是打包测试。虽然xcode可有实现打包,但在测试阶段面临测试人员不断的向你催促需要新的包进行测试就会很让人头疼,打包又是一个重复性极高又很费时间的事情。所以研究了一下jenkins和fastlane的自动打包流程,希望对大家有所帮助,途中也遇到了众多的问题和坑。
如需帮助可直接 联系我
前期准备
-
Ruby:
fastlane的安装需要Ruby2.0版本以上,虽然mac自带ruby,但是版本可能较低,并且权限较少,所以推荐使用RVM管理ruby版本。
按照这篇文章安装既可以了 Mac安装Ruby版本管理器RVM
-
xcode命令行工具
xcode-select --install如果已经安装会提示
如果没有安装会出现
直接点击安装就可以了,安装完成后再次执行
xcode-select --install之后出现已经安装的提示了。 -
Java JDK (这个是Jenkins安装用的,如果不需要jenkins可直接忽略)
可先查看 当前安装的java版本
java -version如果未安装请先前往 JDK下载链接 下载
因为jenkins是用java语言编写的,所以需要java的支持,建议使用1.8版本的JDK
需要先接受协议之后才可以下载
下载完成之后直接安装就可以了,这里就不再赘述。
前期准备工作到这里就完成了
Fastlane
fastlane是为iOS和Android应用程序自动化beta部署和发布最简单的方法。🚀可以处理各种繁琐任务,例如生成屏幕截图,处理代码签名和发布应用该程序等.fastlane整合了一系列移动端开发中签名,编译,发布等工具,堪称打包神器。
fastlane初始化
安装fastlane的三种方式
-
Homebrew
brew cask install fastlane -
安装程序脚本
下载zip文件。后双击shell脚本即可
-
RubyGems
gem install fastlane -NV
蒲公英插件
这里我们在最后使用了 Jenkins上传蒲公英,为了获取下载二维码。
本文也提到了使用Fastlane上传蒲公英的介绍
Fastlane 安装成功之后 执行安装蒲公英的插件
fastlane add_plugin pgyer
如果没什么意外就直接成功了
刚开始我使用的本机自带的ruby, 失败了。然后使用了rvm管理的ruby之后就成功了。
如果遇到了其他问题请大家google一下吧,或者联系我我们一起探讨。
初始化
cd /到自己的项目目录中
初始化fastlane
fastlane init
如果之前的都没有问题 会出现以下选项
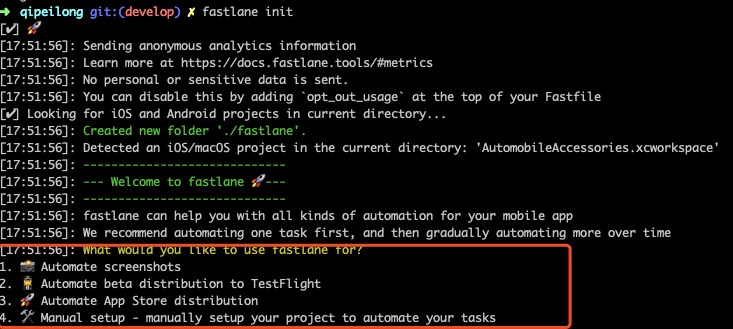
- Automate screenshots: 自动截屏
- Automate beta distribution to TestFlight: 自动发布beta版本到testFlight
- Automate App Store distribution: 自动发布到App Store
- Manual setup: 手动设置
这里我们选的是第3个,然后会出现一些选项
1. 📸 Automate screenshots
2. 👩✈️ Automate beta distribution to TestFlight
3. 🚀 Automate App Store distribution
4. 🛠 Manual setup - manually setup your project to automate your tasks
? 3
[10:37:53]: ----------------------------------------------------------
[10:37:53]: --- Setting up fastlane for iOS App Store distribution ---
[10:37:53]: ----------------------------------------------------------
[10:37:53]: Parsing your local Xcode project to find the available schemes and the app identifier
[10:37:53]: $ xcodebuild -showBuildSettings -workspace FastlaneDev.xcworkspace -scheme FastlaneDev
[10:37:55]: $ cd `你项目的路径` && agvtool what-version -terse
[10:37:55]: --------------------------------
[10:37:55]: --- Login with your Apple ID ---
[10:37:55]: --------------------------------
[10:37:55]: To use App Store Connect and Apple Developer Portal features as part of fastlane,
[10:37:55]: we will ask you for your Apple ID username and password
[10:37:55]: This is necessary for certain fastlane features, for example:
[10:37:55]:
[10:37:55]: - Create and manage your provisioning profiles on the Developer Portal
[10:37:55]: - Upload and manage TestFlight and App Store builds on App Store Connect
[10:37:55]: - Manage your App Store Connect app metadata and screenshots
[10:37:55]:
[10:37:55]: Your Apple ID credentials will only be stored in your Keychain, on your local machine
[10:37:55]: For more information, check out
[10:37:55]: https://github.com/fastlane/fastlane/tree/master/credentials_manager
[10:37:55]:
[10:37:55]: Please enter your Apple ID developer credentials
[10:37:55]: Apple ID Username:
`你的Apple ID`
[10:38:16]: Logging in...

如果你账号下有多个team会让你选择一下
然后等待安装
在这期间我遇到了bundle update这句话一直不动,我重新init了一遍就好了
成功之后 打开我们的项目目录发现多了这个文件
恭喜你 初始化成功了 !!!
配置Fastlane
| 文件名 | 描述 |
|---|---|
| Appfile | 从 Apple Developer Portal 获取和项目相关的信息 详情 |
| Fastfile | 核心文件,存放lane任务 |
| Deliverfile | deliver的配置文件,从 iTunes Connect 获取和项目相关的信息详细 |
| metadata | 同步iTC中的元数据 |
| screenshots | 同步iTC中的截图 |
这里给打家推荐一篇配置的文章Fastfile参考配置
下面是我的配置仅供参考,没有用fastlane上传蒲公英,因为想要在jenkins里面获取二维码暂时的解决办法使用jenkins上传蒲公英 如果需要fastlane上传直接打开的注释进行了
# 导出路径
$ipa_output_directory = "/Users/xx/xx/fastlaneBuild"
# 上传蒲公英的包 路径
$ipa_output_upload_directory = "/Users/xx/.jenkins/workspace/xx/ipa"
# jenkins匹配的包名
$jenkins_name = "项目名"

default_platform(:ios)
    # 应用名词
    scheme_name = "项目名字"
     # 获取version
    version = get_info_plist_value(path: "./#{scheme_name}/Info.plist", key: "CFBundleShortVersionString")
    # 获取build版本号
    build = get_info_plist_value(path: "./#{scheme_name}/Info.plist", key: "CFBundleVersion")
    # 指定xcode打包 这里可选择不要,我们的项目需要用10.1版本xcode
    xcode_select("/Applications/Xcode_10.1.app")
    # 默认内测打包方式,目前支持app-store, package, ad-hoc, enterprise, development
    ipa_exportMethod = "ad-hoc"
    ipa_exportMethod_appStore = "app-store"

# 计算buildNumber
def updateProjectBuildNumber
    currentTime = Time.new.strftime("%Y%m%d")
    scheme_name = "项目名字"
	 	build = get_info_plist_value(path: "./#{scheme_name}/Info.plist", key: "CFBundleVersion").to_s
    if build.include?"#{currentTime}."
    # 为当天版本 计算迭代版本号
		lastStr = build[build.length-2..build.length-1]
		lastNum = lastStr.to_i
		lastNum = lastNum + 1
		lastStr = lastNum.to_s
		if lastNum < 10
			lastStr = lastStr.insert(0,"0")
		end
		build = "#{currentTime}.#{lastStr}"
    else
        # 非当天版本 build 号重置
        build = "#{currentTime}.01"
    end
    puts("*************| 更新build #{build} |*************")
    # 更改项目 build 号
    increment_build_number(
        build_number: "#{build}"
    )
end

# 打包成功 jenkins 开始提示上传log
# 使用fastlane上传蒲公英拿不到二维码展示, 所以使用jenkins上传蒲公英
def archiveSuccessLog(outputName,buildConfig)
	# 打好的包 移动到 jenkins的 workspace的目录下,用于jenkins上传蒲公英匹配包内容。永远只保留一份
# 	FileUtils.cp_r("#{$ipa_output_directory}" + "/#{outputName}", "#{$ipa_output_upload_directory}" +  "/#{$jenkins_name}.ipa")
 	puts" --------------------------------------------------------------------------"
 	puts"|                                                                          |"
 	puts"|                                                                          |"
	puts"|   🎉🎉🎉 --------->>>>>      #{buildConfig}版本_打包成功     <<<<<-----------🎉🎉🎉  |"
	puts"|                                                                          |"
	puts"|   🎉🎉🎉 --------->>>>>  Jenkins 可以开始上传蒲公英了  <<<<<-----------🎉🎉🎉  |"
	puts"|                                                                          |"
	puts"|                                                                          |"
	puts" --------------------------------------------------------------------------"
end


#
# 所有任务脚本
#
platform :ios do

  #
  # *************| 上传到测试版本到蒲公英_测试包 |*************
  #
  desc "上传到测试版本到蒲公英_测试包"
  lane :topgyer_debug do|option|
    puts "*************| 开始打包.ipa文件... |*************"
    # 自动增加build
    updateProjectBuildNumber
    # 自动生成证书
    cert
    # 导出名称
    output_name = "#{scheme_name}_#{version}_#{build}_#{option[:desc]}_#{Time.now.strftime('%Y%m%d%H%M%S')}.ipa"
    gym(
      # 指定输出的ipa名称
        output_name: "#{output_name}",
        # 指定项目的scheme
        scheme: "xxx",
        # 是否清空以前的编译信息 true:是
        clean: true,
        export_method: "#{ipa_exportMethod}",
        export_options: {iCloudContainerEnvironment: 'Development'},
        # 指定打包方式,Release 或者 Debug 按需修改
        configuration:"Debug",
        # 包导出的位置
        output_directory: "#{$ipa_output_directory}",
     )

	# 使用fastlane上传蒲公英拿不到二维码展示, 所以使用jenkins上传蒲公英
	archiveSuccessLog(output_name," Debug ")

		# 这里是 fastlane 直接上传蒲公英
    # 如果需要请打开一下注释,并注释掉archiveSuccessLog(output_name," Debug ")
    # puts "*************| 开始上传__测试版__本到蒲公英... |*************"
    # 配置蒲公英 api_key 和 user_key
    # pgyer(api_key: "你的api_key", user_key: "你的user_key", update_description: "#{option[:desc]}")
    # puts "*************| 上传__测试版__到蒲公英🎉🎉🎉成功🎉🎉🎉 |*************"
  end


   #
   # *************| 上传App Store |*************
   #
   lane :toappstore do
    project_identifier = ""
    puts "*************| 开始上传AppStore... |*************"
    # 自动增加build
    updateProjectBuildNumber
    # 自动生成证书
    # cert
    # 导出名称
    codesigning_identity = "证书名字"
    output_name = "#{scheme_name}_#{version}_#{build}_#{ipa_exportMethod_appStore}_#{Time.now.strftime('%Y%m%d%H%M%S')}.ipa"
    gym(
        # 指定输出的ipa名称
        output_name:output_name,
        # 指定项目的scheme
        scheme:"xxx",
        # 是否清空以前的编译信息 true:是
        clean:true,
        # 指定打包方式,Release 或者 Debug
        configuration:"Release",
        # 指定打包方式,目前支持app-store, package, ad-hoc, enterprise, development
        export_method:"app-store",
        # 上传的环境
        export_options: {iCloudContainerEnvironment: 'Production'},
        # 指定输出文件夹
        output_directory:"#{$ipa_output_directory}",
     )

     deliver(
             # 选择跳过图片和元数据上传,自己去配置
             skip_screenshots:true,
             skip_metadata:true,
             # 上传完成后提交新版本进行审查
             submit_for_review: false,
             force:true,
            )
    puts "*************| 上传AppStore成功🎉 |*************"


    puts "*************| 开始上传__测试版__本到蒲公英... |*************"
    # 配置蒲公英 api_key 和 user_key
    pgyer(api_key: "你的api_key", user_key: "你的user_key", update_description: "#{option[:desc]}")
    puts "*************| 上传__测试版__到蒲公英🎉🎉🎉成功🎉🎉🎉 |*************"
    # 发布testflight测试
    # pilot
    end

end
在自己的项目目录中执行
fastlane topgyer_debug desc:测试
这句话根据自己的lane :topgyer_debug do|option| 修改
成功之后可以看见 , 如果有上传蒲公英给的操作 则会告知蒲公英上传成功,前往蒲公英查看就有新版本了。
17:58:59:  --------------------------------------------------------------------------
17:58:59: |                                                                          |
17:58:59: |                                                                          |
17:58:59: |   🎉🎉🎉 --------->>>>>       Debug 版本_打包成功     <<<<<-----------🎉🎉🎉  |
17:58:59: |                                                                          |
17:58:59: |   🎉🎉🎉 --------->>>>>  Jenkins 可以开始上传蒲公英了  <<<<<-----------🎉🎉🎉  |
17:58:59: |                                                                          |
17:58:59: |                                                                          |
17:58:59:  --------------------------------------------------------------------------
接下来思考的问题是: 不能还是由我们开发人员执行 脚本任务来打包上传蒲公英。
有没有办法能够让测试人员自己去打包呢? 所以接下来我们要做的就是 让jenkins执行我们的fastlane脚本
并且自动生成二维码展示。测试人员需要测试包的时候开发人员只需要把代码上传到对应的分支就好了。
我选择了一台专门的机器作为服务器 来做这件事情, 毕竟在自己电脑上多少会有点影响的。
Jenkins
Jenkins是一个独立的开源软件项目,是基于Java开发的一种持续集成工具,用于监控持续重复的工作,旨在提供一个开放易用的软件平台,使软件的持续集成变成可能。前身是Hudson是一个可扩展的持续集成引擎。可用于自动化各种任务,如构建,测试和部署软件。Jenkins可以通过本机系统包Docker安装,甚至可以通过安装Java Runtime Environment的任何机器独立运行。
- 主要用于:
- 持续、自动地构建/测试软件项目,如CruiseControl与DamageControl。
- 监控一些定时执行的任务。
JAVA JDK
前面我们已经安装了 java JDK 若未安装请前往上方查看安装步骤
Jenkins安装
-
安装方式
-
Jenkins官网地址:jenkins-ci.org/ 下载最新的war包双击安装
-
使用brew安装
// 使用brew安装
brew install jenkins
// 安装完成后启动,直接运行jenkins即可启动服务
jenkins
-
初始化jenkins
默认访问http://localhost:8080/, 可进入jenkins配置页面。 不要关闭终端否则jenkins会停掉
第一次运行的时候会出现以下界面
根据提示的路径去 将密码输入进去 然后点击 Continue
会进入:
选择第一个就可以了
等待安装完成
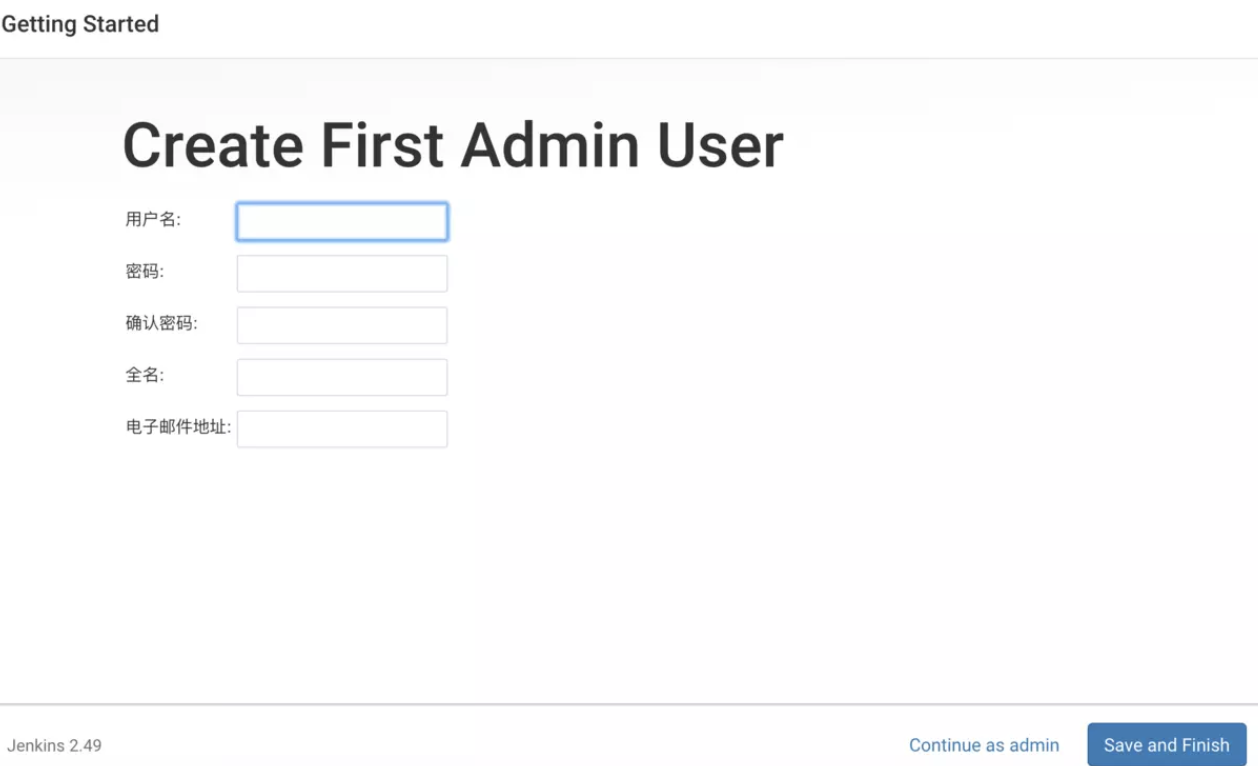
自己设置账户密码
jenkins配置
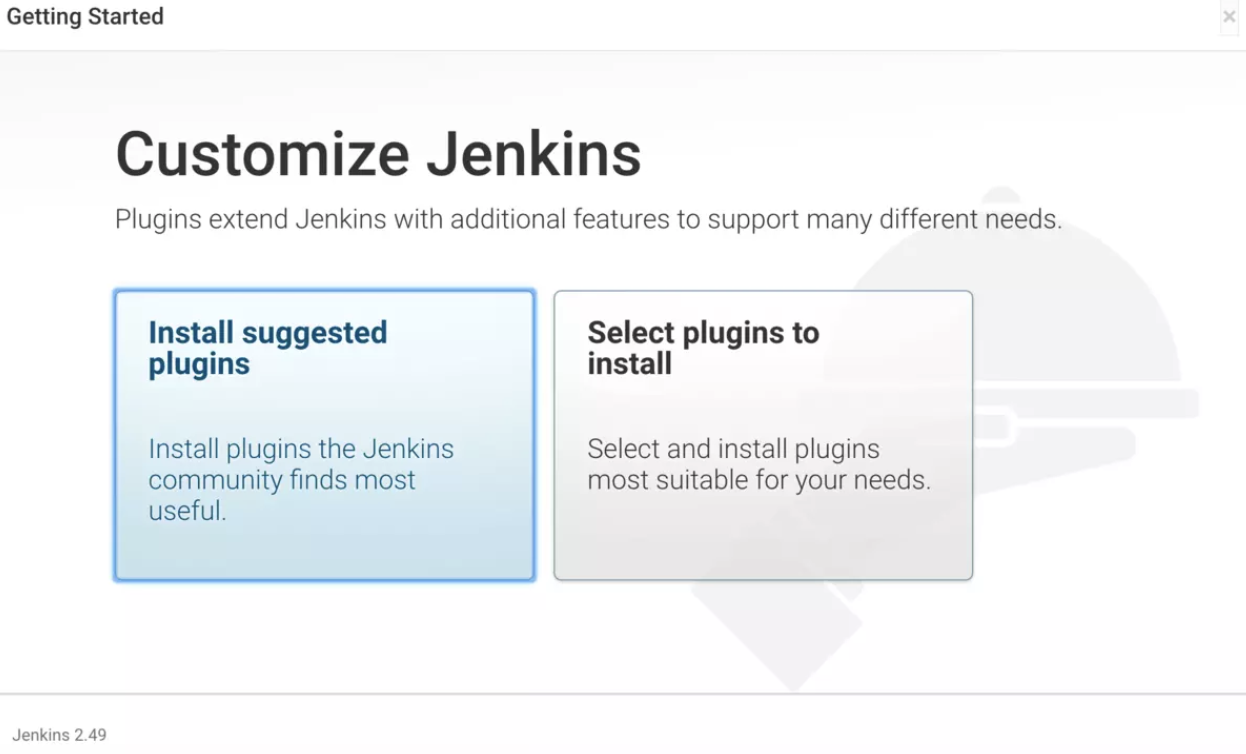
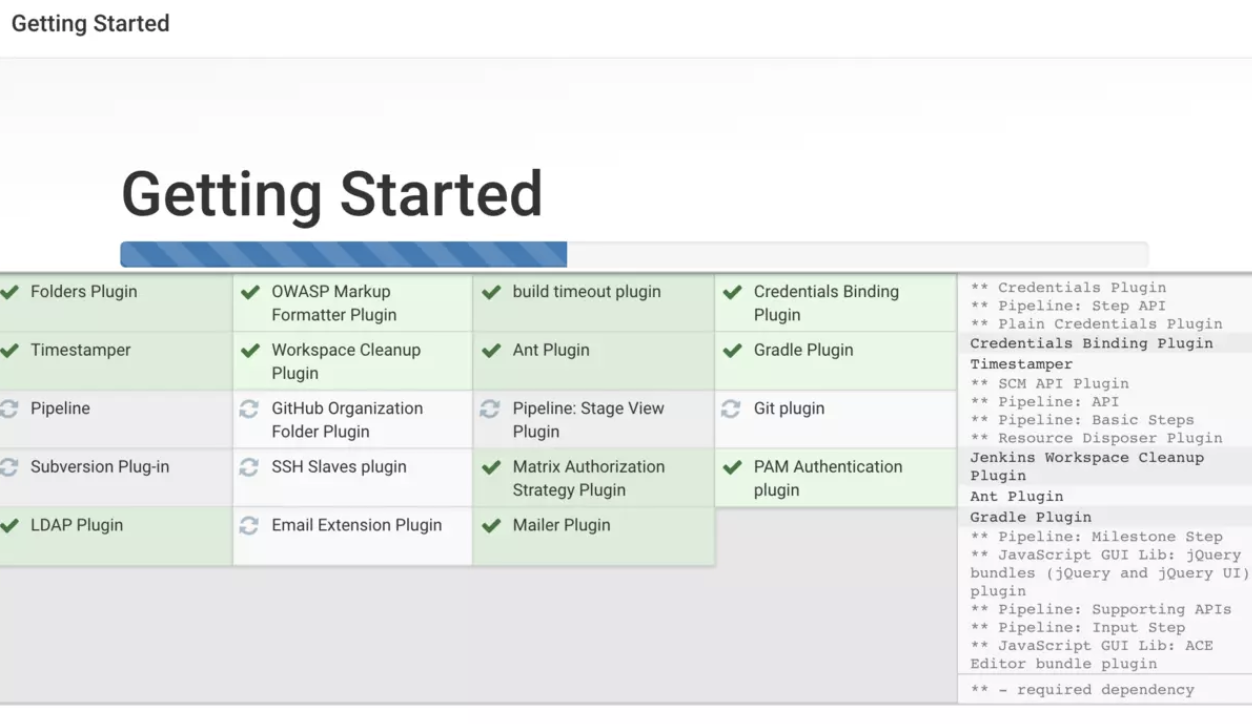
在主页选择 manage Jenkins --> Manage Plugins 去下载插件
在这个选项中下载需要的插件,一些基本插件在安装jenkins的时候都已经下好了,现在只需要下载需要的就可以了
 ```ruby
 GitLab
 Xcode integration    // 这个其实可以不用
 Keychains and Provisioning Profiles Management // 配置文件管理
 /// 上面这三个 如果需要在jenkins中打包 证书添加需要导入

 Upload to pgyer // 上传蒲公英
 Build Name and Description Setter  // 设置打好包的名字
 description setter   // 设置图片
 ```
插件安装好了之后,开始创建项目
创建项目
回到主页点击新建Item
选择: 自由风格的项目
General --> Discard old builds 构建的天数的保持最大的个数。
General --> This project is parameterized --> 添加参数 --> Choice Parameter
这个就是 你在构建的时候可以先择 构建环境和分支,(按需添加!)
名称: BUILD_TYPE
选项: debug
      release
描述: 打包环境
----------------------------------------------
名称: GIT_BRANCH
选项: develop
      master
      3.1.0
      3.0.0
      2.9.1
      2.9.0
描述: 拉取代码的 git分支
源码管理 --> Git
使用Git管理源码 我这里用的是gitlab 的SSH方式管理
ruby */${GIT_BRANCH}
git管理就是为了让jenkins知道我们的源码在哪里
在第一次构建的时候他回去拉取代码放到.jenkins的workspace中进行管理
填写完项目地址,我们点击添加按钮。(branch Specifier 不要忘记修改 这里上面设置的选择参数,拉取代码的分支)
点击添加按钮
密钥获取: 首先我们要保证 在git中配置了自己的秘钥。配置方法 --> Mac 配置ssh秘钥
-
类型SSH
-
userName 就是git中的名字 能知道是谁上传下载的就可以
-
PrivateKey ssh中的私钥,/Users/用户名/.ssh/id_rsa
-
Passphrase git密码。
-
点击添加 既可以了。
如果你的项目很大,需要的clone时间较长的话,需要设置一下超时时间. jenkins默认的超时时间是10分钟,根据自己项目设置时间,
这里有一个[git clone 太慢解决方案](git clone 太慢)。
构建环境 --> Set build Name 设置打出来的包的展示名字 ,如果没有添加插件 是没有这个选项的
ruby iOS_XXX_${GIT_BRANCH}_${BUILD_TYPE}_build(${BUILD_NUMBER})
构建 --> 增加构建步骤 --> Execute shell
cd /Users/你的项目目录

fastlane topgyer_debug desc:测试版_Debug
然后 保存退出就可以了
回到首页 --> build with paramters --> 选择环境和分支,开始构建
第一次构建需要从Git拉去代码 如果超时了 更改一下 超时时间 上面有介绍
如果提示 fastlaneCommand not found 点击此链接 [jenkins执行shell脚本时候出现 fastlaneCommand not found解决方案](jenkins执行shell脚本时候出现 fastlaneCommand not found)
静候佳音 Jenkins打包操作 搞定了!!!
打包成功了之后发现 每次还是要点击去蒲公英的链接然后才能下载
经研究了一下怎么直接把蒲公英的链接放在构建挖成之后
如: 酱事儿~
生成蒲公英二维码
最开始我使用的是 fastlane 上传蒲公英的操作,但是想要拿到二维码不是很容易
最后想到了直接让 jenkins哪去fastlane打的包然后上传蒲公英就好了,然后成功了!
下面介绍一下操作步骤
-
上传蒲公英
还是进入到我们当前项目的配置里面去 --> 到最后的构建后操作 --> 增加构建后操作步骤
pgyer api_key : 你的蒲公英api_key
// 这个位置自己决定就好了,和fastfile文件中的ipa_output_upload_directory地址 是一样就行 Scandir: 打的api包的地址
file wildcard: 包名字.ipa
注意你需要 吧 fastlane中的fastfile文件中 ###### 这句话的注释打开 ##### FileUtils.cp_r("#{ipa_output_directory}" + "/#{outputName}", "#{ipa_output_upload_directory}" + "/#{$jenkins_name}.ipa") 这个是讲打出来的包拷贝一份到 workspace中,保证ipa文件夹的包只有一个最新的。这个包用于上传蒲公英
-
获取二维码操作:
构建后操作 --> 增加构建后操作步骤 -->Set build description
直接拷贝 <a href="${appBuildURL}"><img src="${appQRCodeURL}" width="118" height="118"/></a> 从上传蒲公英的信息中获取图片 -
最后一步 回到首页 --> manager Jenkins --> Configure Floable Security
标记格式器设置为 Safe HTML
OK!! 大功告成!!!去首页去 构建吧! !!
结束语
介绍了一下 fastlane 和 Jenkins 的结合使用的过程。比较流水线,如果哪里不对 还望各位指出,
然后我们拿到自己电脑的ip http://电脑ip:8080/ 交给测试就好了 要包自己去点构建把,
建议使用网线,这样ip不容易变。
之前也研究过 全部使用Jenkins实现打包上传等过程, 但是jenkins需要配置的东西真的很多,证书、xcode、一系列操作,配置错误就会失败 而且还不容易找出问题,所以选择了fastlane进行打包上传蒲公英,之后为了获取到二维码直接使用选择了 jenkins上传蒲公英。
暂时的解决方法 如果有更好的方法 希望大家多多指出,我也会继续研究更好的方法。
感谢!
后期遇到的问题
1. Pod 出现错误
如果你在输入pod命令的时候出现以下错误
 /Library/Ruby/Site/2.3.0/rubygems.rb:289:in `find_spec_for_exe': can't find gem cocoapods (>= 0.a) with executable pod (Gem::GemNotFoundException)
 	from /Library/Ruby/Site/2.3.0/rubygems.rb:308:in `activate_bin_path'
 	from /usr/local/bin/pod:23:in `<main>'
-
原因1:
- ruby版本问题导致,请先升级ruby到最新版本
-
原因2:
-
如果确定了都没有问题 那么执行一下命令
gem install cocoapodspod install之后会发现 pod 已经可以正常使用了
-
2. git clone 太慢
查找域名所对应的ip 地址,并修改host文件
-
获取 github/gitlab.global.ssl.fastly.Net的ip地址
nslookup github.global.ssl.fastly.Net -
获取github.com 的ip地址
nslookup github.com -
在etc/hosts 文件中添加
151.101.76.249 github.global.ssl.fastly.net 192.30.253.112 github.com -
强制更新DNS缓存
-
windows
ipconfig /flushdns -
linux
sudo /etc/init.d/networking restart -
mac
sudo killall -HUP mDNSResponder
-
3. jenkins执行shell脚本时候出现 fastlaneCommand not found
在安装完fastkane之后执行 fastlane xxx desc:xxx 可以成功打包执行 在jenkins中的shell脚本无法执行出现以下错误
16:20:30 xxx/xxx/xxx/xxx.sh: line 4: fastlane: command not found
16:20:30 Build step 'Execute shell' marked build as failure
16:20:30 New run name is 'iOS_xxx_develop_debug_build(17)'
16:20:30 [UPLOAD TO PGYER] - The build FAILURE, so the file was not uploaded.
16:20:30 [description-setter] Description set:
16:20:30 Finished: FAILURE
解决方法:
在jenkins的shell脚本命令前添加 #!/bin/bash -ilex命令 eg:
#!/bin/bash -ilex
cd /Users/xxxx/xxxx       # 你的项目地址
fastlane topgyer_debug desc:测试版_Debug
**再去执行构建就可以了。 **
参考:
再次感谢!!
小李小李一路有你
Dian。
