Spring Cloud通过为Eureka增加了Spring Boot风格的自动化配置,只需要通过简单引入依赖和注解配置就能让Spring Boot构建的微服务轻松地与Eureka服务治理体系进行整合。
使用示例
搭建服务注册中心
使用Gradle创建一个基础的SpringBoot工程,命名为eureka-server,eureka-service/build.gradle文件内容如下:
buildscript {
	ext {
		springBootVersion = '2.1.6.RELEASE'
	}
	repositories {
		mavenCentral()
	}
	dependencies {
		classpath("org.springframework.boot:spring-boot-gradle-plugin:${springBootVersion}")
	}
}

apply plugin: 'java'
apply plugin: 'eclipse'
apply plugin: 'idea'
apply plugin: 'org.springframework.boot'
apply plugin: 'io.spring.dependency-management'

bootJar {
	baseName = 'eureka-service'
	version = '0.0.1-SNAPSHOT'
}
sourceCompatibility = 1.8
targetCompatibility = 1.8

repositories {
	mavenCentral()
}


dependencyManagement {
	imports {
		mavenBom 'org.springframework.cloud:spring-cloud-dependencies:Finchley.SR2'
	}
}

dependencies {
	compile('org.springframework.cloud:spring-cloud-starter-netflix-eureka-server')
	testCompile('org.springframework.boot:spring-boot-starter-test')
}


eclipse {
	classpath {
		 containers.remove('org.eclipse.jdt.launching.JRE_CONTAINER')
		 containers 'org.eclipse.jdt.launching.JRE_CONTAINER/org.eclipse.jdt.internal.debug.ui.launcher.StandardVMType/JavaSE-1.8'
	}
}
启动一个服务注册中心非常简单,只需在Spring boot应用的Application类添加@EnableEurekaServer注解即可。代码如下:
@SpringBootApplication
@EnableEurekaServer
public class EurekaServiceApplication {

    public static void main(String[] args) {
        SpringApplication.run(EurekaServiceApplication.class, args);
    }
}
配置文件application.properties内容如下:
server.port=8761
# 该应用为注册中心,因此不向注册中心注册自己
eureka.client.register-with-eureka=false
# 注册中心不需要检索服务
eureka.client.fetch-registry=false
eureka.client.serviceUrl.defaultZone=http://localhost:${server.port}/eureka/
启动应用并访问http://localhost:8761/,可以看到Eureka信息面板。
注册服务提供者
接下来创建一个命名为hello-service服务提供者,hello-service/build.gradle文件内容如下:
buildscript {
    ext {
        springBootVersion = '2.1.6.RELEASE'
    }
    repositories {
        mavenCentral()
    }
    dependencies {
        classpath("org.springframework.boot:spring-boot-gradle-plugin:${springBootVersion}")
    }
}

apply plugin: 'java'
apply plugin: 'eclipse'
apply plugin: 'idea'
apply plugin: 'org.springframework.boot'
apply plugin: 'io.spring.dependency-management'

group 'com.blockmao'
version '1.0-SNAPSHOT'

sourceCompatibility = 1.8
targetCompatibility = 1.8


repositories {
    mavenCentral()
    maven { url "http://maven.aliyun.com/nexus/content/groups/public/" }
    maven { url "https://repo.spring.io/milestone" }
}


dependencyManagement {
    imports {
        mavenBom 'org.springframework.cloud:spring-cloud-dependencies:Finchley.SR2'
    }
}

dependencies {
    compile('org.springframework.cloud:spring-cloud-starter-netflix-eureka-server')
    testCompile('org.springframework.boot:spring-boot-starter-test')
}
使用@EnableEurekaClient表明该应用为Eureka Client,代码如下:
@SpringBootApplication
@EnableEurekaClient
public class EurekaClientApplication {

    public static void main(String[] args) {
        SpringApplication.run(EurekaClientApplication.class, args);
    }
}
配置文件application.properties内容如下:
spring.application.name=hello-service
server.port=8080
eureka.client.serviceUrl.defaultZone=http://localhost:8761/eureka/
启动应用并访问http://localhost:8761/,可以看到服务的注册信息,如下所示:

服务发现与消费
最后,创建一个命名为hello-consumer服务消息者,hello-consumer/build.gradle和服务提供者相同。
@EnableEurekaClient
@SpringBootApplication
public class ConsumerApplication {

    @Bean
    @LoadBalanced
    RestTemplate restTemplate(){
        return new RestTemplate();
    }

    public static void main(String[] args) {
        SpringApplication.run(ConsumerApplication.class,args);
    }
}

@RestController
public class ConsumerController {

    @Resource
    private RestTemplate restTemplate;

    @RequestMapping(value = "/hello-consumer",method = RequestMethod.GET)
    public String helloConsumer(String msg){
        return restTemplate.getForEntity("http://MSC-SITE-API/hello?msg="+msg,String.class).getBody();
    }
}
配置文件application.properties内容如下:
spring.application.name=hello-consumer
server.port=9090
eureka.client.serviceUrl.defaultZone=http://localhost:8761/eureka/
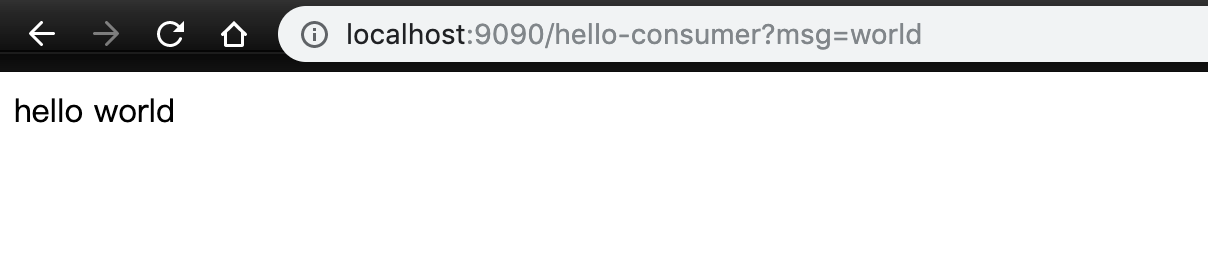
启动应用并访问http://localhost:9090/hello-consumer?msg=world,如下图所示:
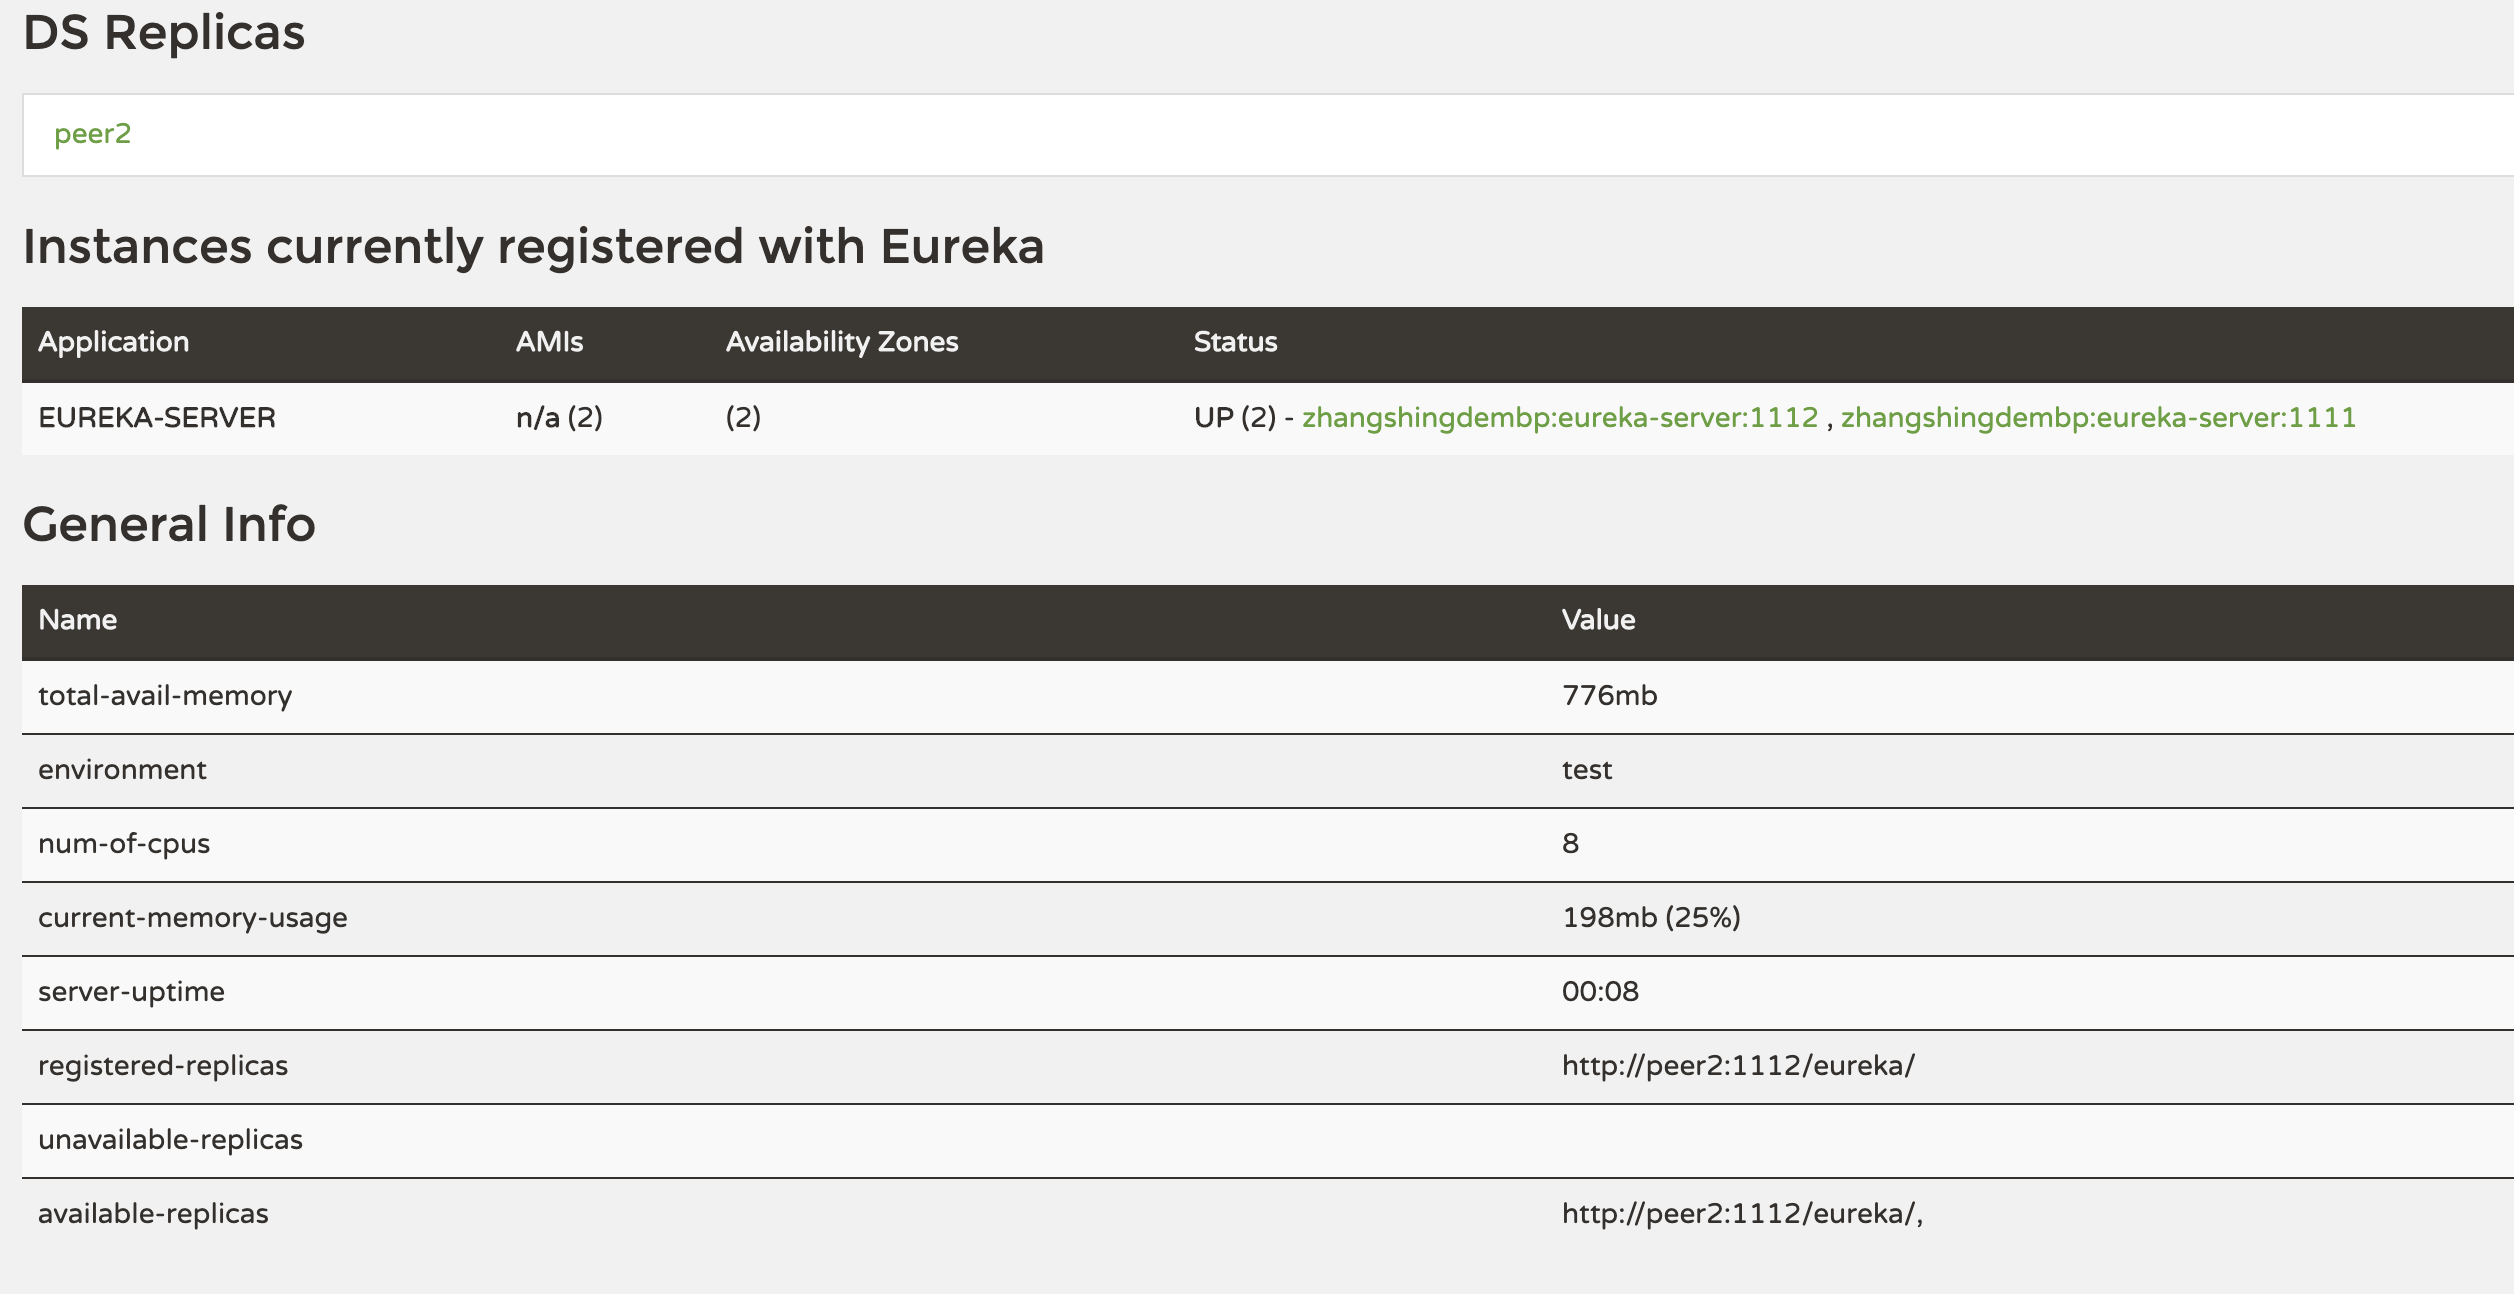
注册中心高可用
Eureka Server的高可用是将自己作为服务向其他服务注册中心注册自己,这样就可以形成一组相互注册的服务注册中心,以实现服务清单的互相同步,达到高可用的效果。在单节点的注册中心基础之上进行扩展,构建一个双节点的服务注册中心集群。
-
首先修改一下
/etc/hosts文件,添加如下:127.0.0.1 peer1 peer2 -
创建
application-peer1.properties,作为peer1服务中心的配置,并将serviceUrl指向peer2:spring.application.name=eureka-server server.port=1111 eureka.instance.prefer-ip-address=true eureka.client.serviceUrl.defaultZone=http://127.0.0.1:1112/eureka -
创建
application-peer2.properties,作为peer2服务中心的配置,并将serviceUrl指向peer1:spring.application.name=eureka-server server.port=1112 eureka.instance.prefer-ip-address=true eureka.client.serviceUrl.defaultZone=http://127.0.0.1:1111/eureka -
通过
spring.profiles.active属性来分别启动peer1和peer2:java -jar eureka-server-1.0-SNAPSHOT.jar --spring.profiles.active=peer1 java -jar eureka-server-1.0-SNAPSHOT.jar --spring.profiles.active=peer2
访问peer1的注册中心http://localhost:1111,如下图所示: