

搭建开发测试环境非常麻烦,公司的开发测试服务器中毒做数据恢复,顺带整理下搭建的方式。
本人是程序员,linux系统知识比较薄弱,故系统的安全方面本文未涉及,请酌情做安全策略。
本来是内网服务器,用frp暴露到了公网,导致被挖矿。。感觉frp还是不安全,现在只能在需要穿透的时候开下,其他时候
关闭。
mysql数据备份和恢复参考:juejin.cn/post/684490…
更新日志
- 2019-11-18 添加安装ssh方式
- 2019-10-27 添加修改hostname的方式
- 2019-10-25 添加elastic search的安装方式
- 2019-10-23 添加docker安装RabbitMq
- 2019-10-23 添加docker的安装方式
- 2019-10-14 添加nginx安装后绑定80端口冲突的解决方式
- 2019-10-13 添加zookeeper的安装方式
基本配置
安装基本命令
有些命令可能未默认安装,如果发现命令无法使用,再通过下面的方式进行安装。
安装ifconfig
centos 7中自带的查看网络的命令是: ip addr
如果还是想要 ifconfig
安装net-tools
yum install net-tools
安装vim
yum install vim
网络配置
如果是虚拟机模式,VM box的网络模式修改为
桥接。
修改hostname
- 查看hostname
[root@zhirui-base ~]# hostnamectl
   Static hostname: zhirui-base
         Icon name: computer-vm
           Chassis: vm
        Machine ID: c9cea1249eaf47379236a0ed4e371584
           Boot ID: 94a2959e5c684c94ad6e4e4b096af282
    Virtualization: kvm
  Operating System: CentOS Linux 7 (Core)
       CPE OS Name: cpe:/o:centos:centos:7
            Kernel: Linux 3.10.0-957.el7.x86_64
      Architecture: x86-64
只查看静态、瞬态或灵活主机名,分别使用“--static”,“--transient”或“--pretty”选项
- 修改hostname且退出连接
[root@zhirui-base ~]# hostnamectl --static set-hostname zhirui-test
[root@zhirui-base ~]# exit
logout
Connection closing...Socket close.

Connection closed by foreign host.

Disconnected from remote host(192.168.1.234) at 12:33:40.

Type `help' to learn how to use Xshell prompt.
[C:\~]$
如果你只想修改特定的主机名(静态,瞬态或灵活),你可以使用“--static”,“--transient”或“--pretty”选项。
- 重新连上查看hostname
Connecting to 192.168.1.234:22...
Connection established.
To escape to local shell, press 'Ctrl+Alt+]'.

Last login: Sun Oct 27 12:29:20 2019 from 192.168.1.119
[root@zhirui-test ~]# hostnamectl --static
zhirui-test
[root@zhirui-test ~]# hostnamectl
   Static hostname: zhirui-test
         Icon name: computer-vm
           Chassis: vm
        Machine ID: c9cea1249eaf47379236a0ed4e371584
           Boot ID: 94a2959e5c684c94ad6e4e4b096af282
    Virtualization: kvm
  Operating System: CentOS Linux 7 (Core)
       CPE OS Name: cpe:/o:centos:centos:7
            Kernel: Linux 3.10.0-957.el7.x86_64
      Architecture: x86-64
[root@zhirui-test ~]#
- 修改hosts
[root@zhirui-test ~]# vim /etc/hosts
127.0.0.1      zhirui-test  localhost
#127.0.0.1  localhost localhost.localdomain localhost4 localhost4.localdomain
::1        localhost localhost.localdomain localhost6 localhost6.localdomai
在修改静态/瞬态主机名时,任何特殊字符或空白字符会被移除,而提供的参数中的任何大写字母会自动转化为小写。一旦修改了静态主机名,/etc/hostname 将被自动更新。然而,/etc/hosts 不会更新以保存所做的修改,所以你每次在修改主机名后一定要手动更新/etc/hosts,之后再重启CentOS 7。否则系统再启动时会很慢。
修改ip地址
服务器默认是dhcp获取地址,地址会随时变动,所以我们需要修改成固定地址,方便管理。
命令为:
[root@localhost ~]# vi /etc/sysconfig/network-scripts/ifcfg-enp0s3
修改为如下即可,然后重启网卡service network restart:
只需要保证注释中的配置存在即可,其他的不一定要完全相同。
TYPE="Ethernet"
PROXY_METHOD="none"
BROWSER_ONLY="no"
BOOTPROTO="static"                   ###修改为static模式才能配置ip,默认是dhcp模式
IPADDR="192.168.1.254"               ###网卡IP地址
BROADCAST-"192.168.1.255"            ###子网广播地址
GATEWAY="192.168.1.1"				 ###网关地址
NETMASK="255.255.255.0"				 ###网卡对应网络掩码
DNS1="192.168.1.1"					 ###DNS地址
DEFROUTE="yes"
IPV4_FAILURE_FATAL="no"
IPV6INIT="yes"
IPV6_AUTOCONF="yes"
IPV6_DEFROUTE="yes"
IPV6_FAILURE_FATAL="no"
IPV6_ADDR_GEN_MODE="stable-privacy"
NAME="enp0s3"
UUID="226a0768-3a2f-4485-9694-d8fea85694ad"
DEVICE="enp0s3"
ONBOOT="yes"            #系统启动时是否设置此网络接口,设置为yes时,系统启动时激活此设备。默认设置为yes。
通过ifconfig或ip addr查看配置的ip地址:
[root@zhirui-base ~]# ifconfig
enp0s3: flags=4163<UP,BROADCAST,RUNNING,MULTICAST>  mtu 1500
        inet 192.168.1.254  netmask 255.255.255.0  broadcast 192.168.1.255
        inet6 fe80::28c9:6c73:d85e:2845  prefixlen 64  scopeid 0x20<link>
        ether 08:00:27:6b:14:19  txqueuelen 1000  (Ethernet)
        RX packets 73394352  bytes 11462789475 (10.6 GiB)
        RX errors 0  dropped 0  overruns 0  frame 0
        TX packets 80460498  bytes 119337796839 (111.1 GiB)
        TX errors 0  dropped 0 overruns 0  carrier 0  collisions 0

lo: flags=73<UP,LOOPBACK,RUNNING>  mtu 65536
        inet 127.0.0.1  netmask 255.0.0.0
        inet6 ::1  prefixlen 128  scopeid 0x10<host>
        loop  txqueuelen 1000  (Local Loopback)
        RX packets 10370731  bytes 3481539349 (3.2 GiB)
        RX errors 0  dropped 0  overruns 0  frame 0
        TX packets 10370731  bytes 3481539349 (3.2 GiB)
        TX errors 0  dropped 0 overruns 0  carrier 0  collisions 0

[root@zhirui-base ~]# ip addr
1: lo: <LOOPBACK,UP,LOWER_UP> mtu 65536 qdisc noqueue state UNKNOWN group default qlen 1000
    link/loopback 00:00:00:00:00:00 brd 00:00:00:00:00:00
    inet 127.0.0.1/8 scope host lo
       valid_lft forever preferred_lft forever
    inet6 ::1/128 scope host
       valid_lft forever preferred_lft forever
2: enp0s3: <BROADCAST,MULTICAST,UP,LOWER_UP> mtu 1500 qdisc pfifo_fast state UP group default qlen 1000
    link/ether 08:00:27:6b:14:19 brd ff:ff:ff:ff:ff:ff
    inet 192.168.1.254/24 brd 192.168.1.255 scope global noprefixroute enp0s3
       valid_lft forever preferred_lft forever
    inet6 fe80::28c9:6c73:d85e:2845/64 scope link noprefixroute
       valid_lft forever preferred_lft forever
[root@zhirui-base ~]#
从上面可以看到ip地址为192.168.1.254,说明配置成功:
安装ssh服务
我们一般用xshell登陆服务器,是用的开启ssh协议,所以需要在服务器开启ssh服务。
1) 查看ssh服务是否安装
[root@zhirui-base ~]# rpm -qa | grep openssh
openssh-7.4p1-21.el7.x86_64
openssh-clients-7.4p1-21.el7.x86_64
openssh-server-7.4p1-21.el7.x86_64
[root@zhirui-base ~]#
上面是已经成功安装了,通过命令service sshd start开启即可。
2) 如果没成功安装进行安装
$ yum install openssh-server
3) 启动ssh
$ /bin/systemctl start sshd.service
开启后用 ps -e | grep sshd 检查一下ssh服务是否开启
$ ps -e | grep sshd
 1554 ?        00:00:00 sshd
 4162 ?        00:00:00 sshd
再用netstat -an | grep 22检查一下22端口是否开启
$ netstat -an | grep 22
tcp        0      0 0.0.0.0:22              0.0.0.0:*               LISTEN
将ssh服务添加到自启动列表中:systemctl enable sshd.service
$ systemctl enable sshd.service
修改dns
1) vi /etc/resolv.conf
[root@localhost ~]# vi /etc/resolv.conf
# Generated by NetworkManager
nameserver 192.168.1.1        #本机的网关地址(路由器的地址),在ip配置的时候有指定
nameserver 114.114.114.114    #其他dns
naemserver 1.1.1.1

search localdomain
3)确保可用DNS解析
[root@localhost Desktop]# grep hosts /etc/nsswitch.conf
配置更新源
配置更新源为阿里源
新建sourceSet.sh文件,贴上如下代码执行即可:
chmod 775 sourceSet.sh
#!/bin/bash
#########################################
#Function:    update source
#Usage:       bash update_source.sh
#Author:      Customer service department
#Company:     Alibaba Cloud Computing
#Version:     5.0
#########################################

check_os_release()
{
  while true
  do
    os_release=$(grep "Red Hat Enterprise Linux Server release" /etc/issue 2>/dev/null)
    os_release_2=$(grep "Red Hat Enterprise Linux Server release" /etc/redhat-release 2>/dev/null)
    if [ "$os_release" ] && [ "$os_release_2" ]
    then
      if echo "$os_release"|grep "release 5" >/dev/null 2>&1
      then
        os_release=redhat5
        echo "$os_release"
      elif echo "$os_release"|grep "release 6" >/dev/null 2>&1
      then
        os_release=redhat6
        echo "$os_release"
      else
        os_release=""
        echo "$os_release"
      fi
      break
    fi
    os_release=$(grep "Aliyun Linux release" /etc/issue 2>/dev/null)
    os_release_2=$(grep "Aliyun Linux release" /etc/aliyun-release 2>/dev/null)
    if [ "$os_release" ] && [ "$os_release_2" ]
    then
      if echo "$os_release"|grep "release 5" >/dev/null 2>&1
      then
        os_release=aliyun5
        echo "$os_release"
      elif echo "$os_release"|grep "release 6" >/dev/null 2>&1
      then
        os_release=aliyun6
        echo "$os_release"
      elif echo "$os_release"|grep "release 7" >/dev/null 2>&1
      then
        os_release=aliyun7
        echo "$os_release"
      else
        os_release=""
        echo "$os_release"
      fi
      break
    fi
    os_release_2=$(grep "CentOS" /etc/*release 2>/dev/null)
    if [ "$os_release_2" ]
    then
      if echo "$os_release_2"|grep "release 5" >/dev/null 2>&1
      then
        os_release=centos5
        echo "$os_release"
      elif echo "$os_release_2"|grep "release 6" >/dev/null 2>&1
      then
        os_release=centos6
        echo "$os_release"
      elif echo "$os_release_2"|grep "release 7" >/dev/null 2>&1
      then
        os_release=centos7
        echo "$os_release"
      else
        os_release=""
        echo "$os_release"
      fi
      break
    fi
    os_release=$(grep -i "ubuntu" /etc/issue 2>/dev/null)
    os_release_2=$(grep -i "ubuntu" /etc/lsb-release 2>/dev/null)
    if [ "$os_release" ] && [ "$os_release_2" ]
    then
      if echo "$os_release"|grep "Ubuntu 10" >/dev/null 2>&1
      then
        os_release=ubuntu10
        echo "$os_release"
      elif echo "$os_release"|grep "Ubuntu 12.04" >/dev/null 2>&1
      then
        os_release=ubuntu1204
        echo "$os_release"
      elif echo "$os_release"|grep "Ubuntu 12.10" >/dev/null 2>&1
      then
        os_release=ubuntu1210
        echo "$os_release"
     elif echo "$os_release"|grep "Ubuntu 14.04" >/dev/null 2>&1
     then
        os_release=ubuntu1204
        echo "$os_release"
      else
        os_release=""
        echo "$os_release"
      fi
      break
    fi
    os_release=$(grep -i "debian" /etc/issue 2>/dev/null)
    os_release_2=$(grep -i "debian" /proc/version 2>/dev/null)
    if [ "$os_release" ] && [ "$os_release_2" ]
    then
      if echo "$os_release"|grep "Linux 6" >/dev/null 2>&1
      then
        os_release=debian6
        echo "$os_release"
      elif echo "$os_release"|grep "Linux 7" >/dev/null 2>&1
      then
        os_release=debian7
        echo "$os_release"
      else
        os_release=""
        echo "$os_release"
      fi
      break
    fi
    os_release=$(grep -i "opensuse" /etc/issue 2>/dev/null)
    os_release_2=$(grep -i "opensuse" /etc/*release 2>/dev/null)
    if [ "$os_release" ] && [ "$os_release_2" ]
    then
      if echo "$os_release"|grep "openSUSE 13.1" >/dev/null 2>&1
      then
        os_release=opensuse1301
        echo "$os_release"
      else
        os_release=""
        echo "$os_release"
      fi
      break
    fi
    break
    done
}

modify_aliyun5_yum()
{
  wget -O /etc/yum.repos.d/CentOS-Base.repo http://mirrors.aliyun.com/repo/Centos-5.repo
  sed -i 's/\$releasever/5/' /etc/yum.repos.d/CentOS-Base.repo
  wget -qO /etc/yum.repos.d/epel.repo http://mirrors.aliyun.com/repo/epel-5.repo
  yum clean metadata
  yum makecache
  cd ~
}

modify_rhel5_yum()
{
  wget -O /etc/yum.repos.d/CentOS-Base.repo http://mirrors.aliyun.com/repo/Centos-5.repo
  wget -qO /etc/yum.repos.d/epel.repo http://mirrors.aliyun.com/repo/epel-5.repo
  yum clean metadata
  yum makecache
  cd ~
}

modify_rhel6_yum()
{
  wget -O /etc/yum.repos.d/CentOS-Base.repo http://mirrors.aliyun.com/repo/Centos-6.repo
  wget -qO /etc/yum.repos.d/epel.repo http://mirrors.aliyun.com/repo/epel-6.repo
  yum clean metadata
  yum makecache
  cd ~
}

modify_rhel7_yum()
{
  wget -O /etc/yum.repos.d/CentOS-Base.repo http://mirrors.aliyun.com/repo/Centos-7.repo
  wget -qO /etc/yum.repos.d/epel.repo http://mirrors.aliyun.com/repo/epel-7.repo
  yum clean metadata
  yum makecache
  cd ~
}

update_ubuntu10_apt_source()
{
echo -e "\033[40;32mBackup the original configuration file,new name and path is /etc/apt/sources.list.back.\n\033[40;37m"
cp -fp /etc/apt/sources.list /etc/apt/sources.list.back
cat > /etc/apt/sources.list <<EOF
#ubuntu
deb http://cn.archive.ubuntu.com/ubuntu/ maverick main restricted universe multiverse
deb-src http://cn.archive.ubuntu.com/ubuntu/ maverick main restricted universe multiverse
#163
deb http://mirrors.163.com/ubuntu/ maverick main universe restricted multiverse
deb-src http://mirrors.163.com/ubuntu/ maverick main universe restricted multiverse
deb http://mirrors.163.com/ubuntu/ maverick-updates universe main multiverse restricted
deb-src http://mirrors.163.com/ubuntu/ maverick-updates universe main multiverse restricted
#lupaworld
deb http://mirror.lupaworld.com/ubuntu/ maverick main universe restricted multiverse
deb-src http://mirror.lupaworld.com/ubuntu/ maverick main universe restricted multiverse
deb http://mirror.lupaworld.com/ubuntu/ maverick-security universe main multiverse restricted
deb-src http://mirror.lupaworld.com/ubuntu/ maverick-security universe main multiverse restricted
deb http://mirror.lupaworld.com/ubuntu/ maverick-updates universe main multiverse restricted
deb http://mirror.lupaworld.com/ubuntu/ maverick-proposed universe main multiverse restricted
deb-src http://mirror.lupaworld.com/ubuntu/ maverick-proposed universe main multiverse restricted
deb http://mirror.lupaworld.com/ubuntu/ maverick-backports universe main multiverse restricted
deb-src http://mirror.lupaworld.com/ubuntu/ maverick-backports universe main multiverse restricted
deb-src http://mirror.lupaworld.com/ubuntu/ maverick-updates universe main multiverse restricted
EOF
apt-get update
}

update_ubuntu1204_apt_source()
{
echo -e "\033[40;32mBackup the original configuration file,new name and path is /etc/apt/sources.list.back.\n\033[40;37m"
cp -fp /etc/apt/sources.list /etc/apt/sources.list.back
cat > /etc/apt/sources.list <<EOF
#12.04
deb http://mirrors.aliyun.com/ubuntu/ precise main restricted universe multiverse
deb http://mirrors.aliyun.com/ubuntu/ precise-security main restricted universe multiverse
deb http://mirrors.aliyun.com/ubuntu/ precise-updates main restricted universe multiverse
deb http://mirrors.aliyun.com/ubuntu/ precise-proposed main restricted universe multiverse
deb http://mirrors.aliyun.com/ubuntu/ precise-backports main restricted universe multiverse
deb-src http://mirrors.aliyun.com/ubuntu/ precise main restricted universe multiverse
deb-src http://mirrors.aliyun.com/ubuntu/ precise-security main restricted universe multiverse
deb-src http://mirrors.aliyun.com/ubuntu/ precise-updates main restricted universe multiverse
deb-src http://mirrors.aliyun.com/ubuntu/ precise-proposed main restricted universe multiverse
deb-src http://mirrors.aliyun.com/ubuntu/ precise-backports main restricted universe multiverse
EOF
apt-get update
}

update_ubuntu1210_apt_source()
{
echo -e "\033[40;32mBackup the original configuration file,new name and path is /etc/apt/sources.list.back.\n\033[40;37m"
cp -fp /etc/apt/sources.list /etc/apt/sources.list.back
cat > /etc/apt/sources.list <<EOF
#12.10
deb http://mirrors.aliyun.com/ubuntu/ quantal main restricted universe multiverse
deb http://mirrors.aliyun.com/ubuntu/ quantal-security main restricted universe multiverse
deb http://mirrors.aliyun.com/ubuntu/ quantal-updates main restricted universe multiverse
deb http://mirrors.aliyun.com/ubuntu/ quantal-proposed main restricted universe multiverse
deb http://mirrors.aliyun.com/ubuntu/ quantal-backports main restricted universe multiverse
deb-src http://mirrors.aliyun.com/ubuntu/ quantal main restricted universe multiverse
deb-src http://mirrors.aliyun.com/ubuntu/ quantal-security main restricted universe multiverse
deb-src http://mirrors.aliyun.com/ubuntu/ quantal-updates main restricted universe multiverse
deb-src http://mirrors.aliyun.com/ubuntu/ quantal-proposed main restricted universe multiverse
deb-src http://mirrors.aliyun.com/ubuntu/ quantal-backports main restricted universe multiverse
EOF
apt-get update
}

update_ubuntu1404_apt_source()
{
echo -e "\033[40;32mBackup the original configuration file,new name and path is /etc/apt/sources.list.back.\n\033[40;37m"
cp -fp /etc/apt/sources.list /etc/apt/sources.list.back
cat > /etc/apt/sources.list <<EOF
#14.04
deb http://mirrors.aliyun.com/ubuntu/ trusty main restricted universe multiverse
deb http://mirrors.aliyun.com/ubuntu/ trusty-security main restricted universe multiverse
deb http://mirrors.aliyun.com/ubuntu/ trusty-updates main restricted universe multiverse
deb http://mirrors.aliyun.com/ubuntu/ trusty-proposed main restricted universe multiverse
deb http://mirrors.aliyun.com/ubuntu/ trusty-backports main restricted universe multiverse
deb-src http://mirrors.aliyun.com/ubuntu/ trusty main restricted universe multiverse
deb-src http://mirrors.aliyun.com/ubuntu/ trusty-security main restricted universe multiverse
deb-src http://mirrors.aliyun.com/ubuntu/ trusty-updates main restricted universe multiverse
deb-src http://mirrors.aliyun.com/ubuntu/ trusty-proposed main restricted universe multiverse
deb-src http://mirrors.aliyun.com/ubuntu/ trusty-backports main restricted universe multiverse
EOF
apt-get update
}

update_debian6_apt_source()
{
echo -e "\033[40;32mBackup the original configuration file,new name and path is /etc/apt/sources.list.back.\n\033[40;37m"
cp -fp /etc/apt/sources.list /etc/apt/sources.list.back
cat > /etc/apt/sources.list <<EOF
#debian6
deb http://mirrors.aliyun.com/debian/ squeeze main non-free contrib
deb http://mirrors.aliyun.com/debian/ squeeze-proposed-updates main non-free contrib
deb-src http://mirrors.aliyun.com/debian/ squeeze main non-free contrib
deb-src http://mirrors.aliyun.com/debian/ squeeze-proposed-updates main non-free contrib
EOF
apt-get update
}

update_debian7_apt_source()
{
echo -e "\033[40;32mBackup the original configuration file,new name and path is /etc/apt/sources.list.back.\n\033[40;37m"
cp -fp /etc/apt/sources.list /etc/apt/sources.list.back
cat > /etc/apt/sources.list <<EOF
#debian7
deb http://mirrors.aliyun.com/debian/ wheezy main non-free contrib
deb http://mirrors.aliyun.com/debian/ wheezy-proposed-updates main non-free contrib
deb-src http://mirrors.aliyun.com/debian/ wheezy main non-free contrib
deb-src http://mirrors.aliyun.com/debian/ wheezy-proposed-updates main non-free contrib
EOF
apt-get update
}

update_opensuse_source()
{
  mv /etc/zypp/repos.d/* /tmp/
  zypper addrepo -f http://mirrors.aliyun.com/opensuse/distribution/13.1/repo/oss/ openSUSE-13.1-Oss
  zypper addrepo -f http://mirrors.aliyun.com/opensuse/distribution/13.1/repo/non-oss/ openSUSE-13.1-Non-Oss
  zypper addrepo -f http://mirrors.aliyun.com/opensuse/update/13.1/ openSUSE-13.1-Update-Oss
  zypper addrepo -f http://mirrors.aliyun.com/opensuse/update/13.1-non-oss/ openSUSE-13.1-Update-Non-Oss
  zypper addrepo -f http://mirrors.aliyun.com/opensuse/distribution/13.1/repo/oss/ openSUSE-13.1-Oss-aliyun
  zypper addrepo -f http://mirrors.aliyun.com/opensuse/distribution/13.1/repo/non-oss/ openSUSE-13.1-Non-Oss-aliyun  zypper addrepo -f http://mirrors.aliyun.com/opensuse/update/13.1/ openSUSE-13.1-Update-Oss-aliyun
  zypper addrepo -f http://mirrors.aliyun.com/opensuse/update/13.1-non-oss/ openSUSE-13.1-Update-Non-Oss-aliyun
}

####################Start###################
#check lock file ,one time only let the script run one time
LOCKfile=/tmp/.$(basename $0)
if [ -f "$LOCKfile" ]
then
  echo -e "\033[1;40;31mThe script is already exist,please next time to run this script.\n\033[0m"
  exit
else
  echo -e "\033[40;32mStep 1.No lock file,begin to create lock file and continue.\n\033[40;37m"
  touch $LOCKfile
fi

#check user
if [ $(id -u) != "0" ]
then
  echo -e "\033[1;40;31mError: You must be root to run this script, please use root to install this script.\n\033[0m"
  rm -rf $LOCKfile
  exit 1
fi
echo -e "\033[40;32mStep 2.Begin to check the OS issue.\n\033[40;37m"
os_release=$(check_os_release)
if [ "X$os_release" == "X" ]
then
  echo -e "\033[1;40;31mThe OS does not identify,So this script is not executede.\n\033[0m"
  rm -rf $LOCKfile
  exit 0
else
  echo -e "\033[40;32mThis OS is $os_release.\n\033[40;37m"
fi

echo -e "\033[40;32mStep 3.Begin to modify the source configration file and update.\n\033[40;37m"
case "$os_release" in
aliyun5)
  modify_aliyun5_yum
  ;;
redhat5|centos5)
  modify_rhel5_yum
  ;;
redhat6|centos6|aliyun6)
  modify_rhel6_yum
  ;;
centos7|aliyun7)
  modify_rhel7_yum
  ;;
ubuntu10)
  update_ubuntu10_apt_source
  ;;
ubuntu1204)
  update_ubuntu1204_apt_source
  ;;
ubuntu1210)
  update_ubuntu1210_apt_source
  ;;
ubuntu1404)
  update_ubuntu1404_apt_source
  ;;
debian6)
  update_debian6_apt_source
  ;;
debian7)
  update_debian7_apt_source
  ;;
opensuse1301)
  update_opensuse_source
  ;;
esac
echo -e "\033[40;32mSuccess,exit now!\n\033[40;37m"
rm -rf $LOCKfile
开发环境
JDK
下载jdk
最新jdk1.8.0_211我已经上传到网盘:
链接:pan.baidu.com/s/1B9DRL5iZ… 提取码:5e92 复制这段内容后打开百度网盘手机App,操作更方便哦)
上传和解压到该路径:
/usr/local/base/jdk1.8.0_211
设置环境变量:
vi /etc/profile 在最后添加如下内容:
#java environment
export JAVA_HOME=/usr/local/base/jdk1.8.0_211
export CLASSPATH=.:${JAVA_HOME}/jre/lib/rt.jar:${JAVA_HOME}/lib/dt.jar:${JAVA_HOME}/lib/tools.jar
export PATH=$PATH:${JAVA_HOME}/bin
重新加载环境变量:
[root@izwz9hy3mj62nle7573jv5z jdk1.8.0_181]# source /etc/profile
[root@izwz9hy3mj62nle7573jv5z jdk1.8.0_181]# java -version
java version "1.8.0_181"
Java(TM) SE Runtime Environment (build 1.8.0_181-b13)
Java HotSpot(TM) 64-Bit Server VM (build 25.181-b13, mixed mode)
卸载jdk:
如果需要卸载,那么删除环境变量和jdk解压后的目录即可。
安装服务
elastic search(ES)
centos下安装
- jdk环境配置(参考上文)
- 安装
curl -L -O https://artifacts.elastic.co/downloads/elasticsearch/elasticsearch-6.2.4.tar.gz
tar -xvf elasticsearch-6.2.4.tar.gz
我们将解压后elasticsearch-6.2.4的路径称为${elasticsearch},后面会用到。
- 启动
在root下对${elasticsearch}/bin目录权限设置
chmod 775 *
添加用户"elastic"
adduser elastic
解压目录授权给"elastic"用户
chown -R elastic elasticsearch-6.2.4
su到elastic用户
su elastic
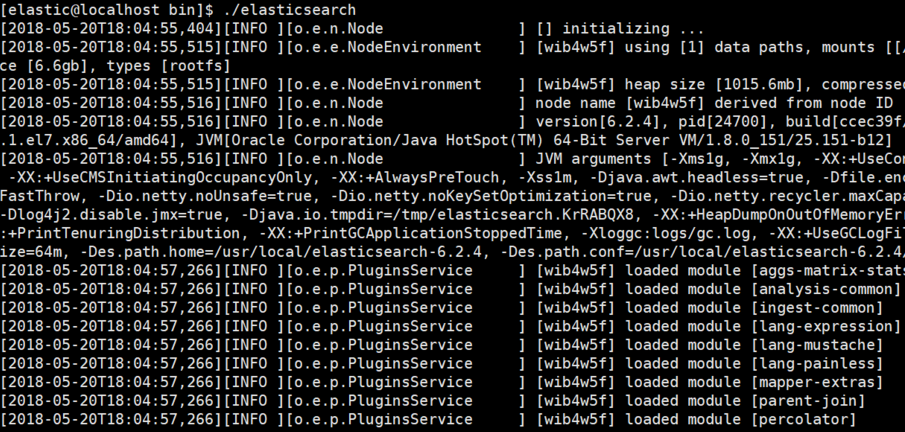
执行${elasticsearch}/bin/elasticsearch
启动成功,节点名为wib4w5f,启动如图所示:
通过
ps -ef | grep elastic查看进程信息:
[root@localhost ~]# ps -ef | grep elastic
root     24494 24002  0 17:54 pts/0    00:00:00 su elastic
elastic  24495 24494  0 17:54 pts/0    00:00:00 bash
root     24670 24521  0 18:03 pts/0    00:00:00 su elastic
elastic  24671 24670  0 18:03 pts/0    00:00:00 bash
elastic  24700 24671  2 18:04 pts/0    00:00:10 /apps/jdk8/bin/java -Xms1g -Xmx1g -XX:+UseConcMarkSweepGC -XX:CMSInitiatingOccupancyFraction=75 -XX:+UseCMSInitiatingOccupancyOnly -XX:+AlwaysPreTouch -Xss1m -Djava.awt.headless=true -Dfile.encoding=UTF-8 -Djna.nosys=true -XX:-OmitStackTraceInFastThrow -Dio.netty.noUnsafe=true -Dio.netty.noKeySetOptimization=true -Dio.netty.recycler.maxCapacityPerThread=0 -Dlog4j.shutdownHookEnabled=false -Dlog4j2.disable.jmx=true -Djava.io.tmpdir=/tmp/elasticsearch.KrRABQX8 -XX:+HeapDumpOnOutOfMemoryError -XX:+PrintGCDetails -XX:+PrintGCDateStamps -XX:+PrintTenuringDistribution -XX:+PrintGCApplicationStoppedTime -Xloggc:logs/gc.log -XX:+UseGCLogFileRotation -XX:NumberOfGCLogFiles=32 -XX:GCLogFileSize=64m -Des.path.home=/usr/local/elasticsearch-6.2.4 -Des.path.conf=/usr/local/elasticsearch-6.2.4/config -cp /usr/local/elasticsearch-6.2.4/lib/* org.elasticsearch.bootstrap.Elasticsearch
root     24876 24858  0 18:11 pts/1    00:00:00 grep --color=auto elastic
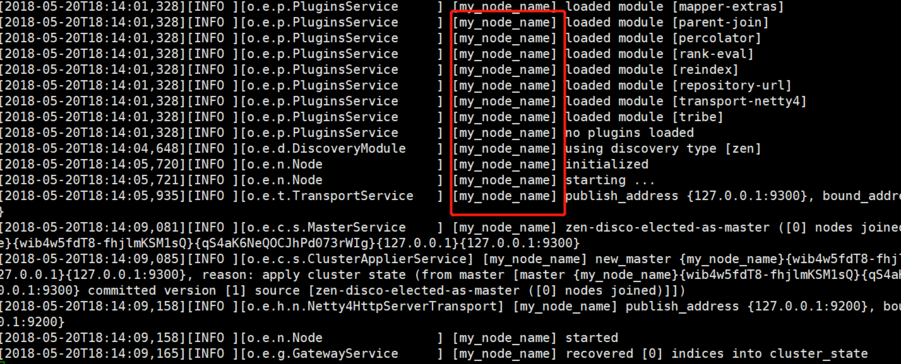
- 还可以指定节点名称启动
./elasticsearch -Ecluster.name=my_cluster_name -Enode.name=my_node_name
启动成功:
- 集群模式(未测试)
安装后,每个节点启用各自的启动方式即可。
举例,两个节点:
- 节点1启动方式:
./elasticsearch -Ecluster.name=my_cluster_name -Enode.name=my_node_name01
- 节点2启动方式:
./elasticsearch -Ecluster.name=my_cluster_name -Enode.name=my_node_name02
docker
docker版本介绍:
docker-io 是以前早期的版本,版本号是 1.,最新版是 1.13,而 docker-ce 是新的版本,分为社区版 docker-ce 和企业版 docker-ee,版本号是 17. ,最新版是 17.12。企业版本需要付费。
安装的前提条件
- 配置了静态ip地址,且配置了dns。如果未配置,请参考
- 卸载掉旧版本,卸载方式:
$ sudo yum remove docker \
               docker-client \
               docker-client-latest \
               docker-common \
               docker-latest \
               docker-latest-logrotate \
               docker-logrotate \
               docker-selinux \
               docker-engine-selinux \
               docker-engine
卸载不会删除掉docker的数据,可以数据默认在/var/lib/docker目录下。
安装一些必要的系统工具:
sudo yum install -y yum-utils device-mapper-persistent-data lvm2
添加软件源信息:
sudo yum-config-manager --add-repo http://mirrors.aliyun.com/docker-ce/linux/centos/docker-ce.repo
执行以下命令,更新yum的包索引
sudo yum makecache fast
安装docker
yum -y install docker-ce
查看安装后的版本
docker version
启动docker
systemctl start docker
rabbitmq(docker方式)
进入docker hub镜像仓库地址:hub.docker.com/
搜索需要的镜像

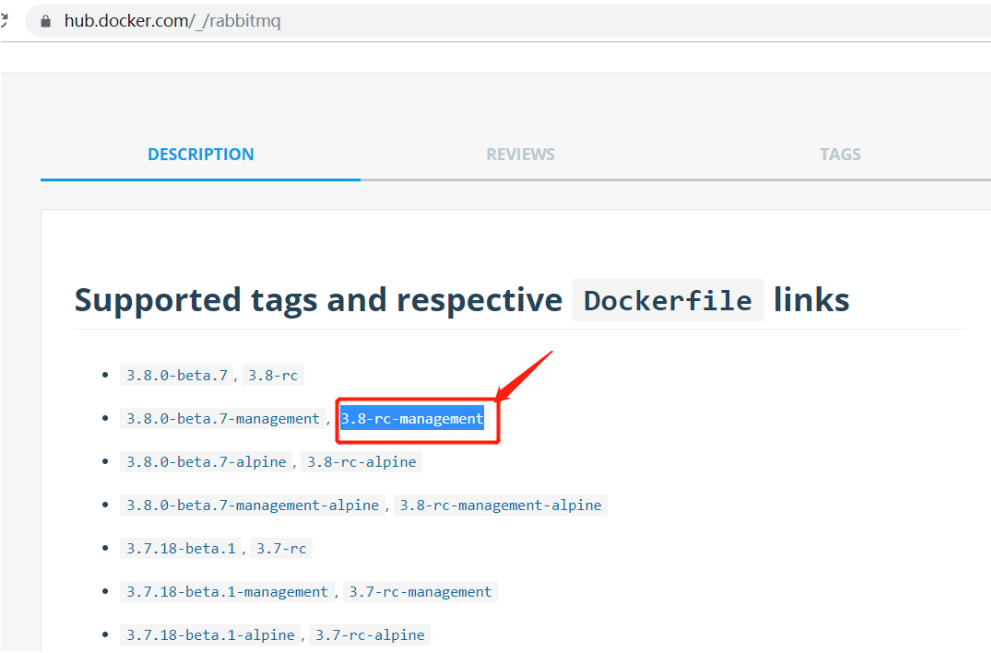
拉取镜像
docker pull rabbitmq:3.8-rc-management
使用docker images查看

启动rabbitmq
docker run -d --name rabbitmq3.8.2 -p 5672:5672 -p 15672:15672 -v /data:/var/lib/rabbitmq --hostname myRabbit -e RABBITMQ_DEFAULT_VHOST=my_vhost -e RABBITMQ_DEFAULT_USER=admin -e RABBITMQ_DEFAULT_PASS=admin --privileged=true docker.io/rabbitmq:3.8-rc-management
说明: -d 后台运行容器; --name 指定容器名; -p 指定服务运行的端口(5672:应用访问端口;15672:控制台Web端口号); -v 映射目录或文件; --hostname 主机名(RabbitMQ的一个重要注意事项是它根据所谓的 “节点名称” 存储数据,默认为主机名); -e 指定环境变量;(RABBITMQ_DEFAULT_VHOST:默认虚拟机名;RABBITMQ_DEFAULT_USER:默认的用户名;RABBITMQ_DEFAULT_PASS:默认用户名的密码); --privileged=true 做了-v目录映射,可能会导致没权限。
使用命令:docker ps 查看正在运行容器
[root@test1 data]# docker ps
CONTAINER ID        IMAGE                                  COMMAND                  CREATED             STATUS              PORTS                                                                                        NAMES
872e75cf838b        docker.io/rabbitmq:3.8-rc-management   "docker-entrypoint..."   4 minutes ago       Up 4 minutes        4369/tcp, 5671/tcp, 0.0.0.0:5672->5672/tcp, 15671/tcp, 25672/tcp, 0.0.0.0:15672->15672/tcp   rabbitmq3.8.2
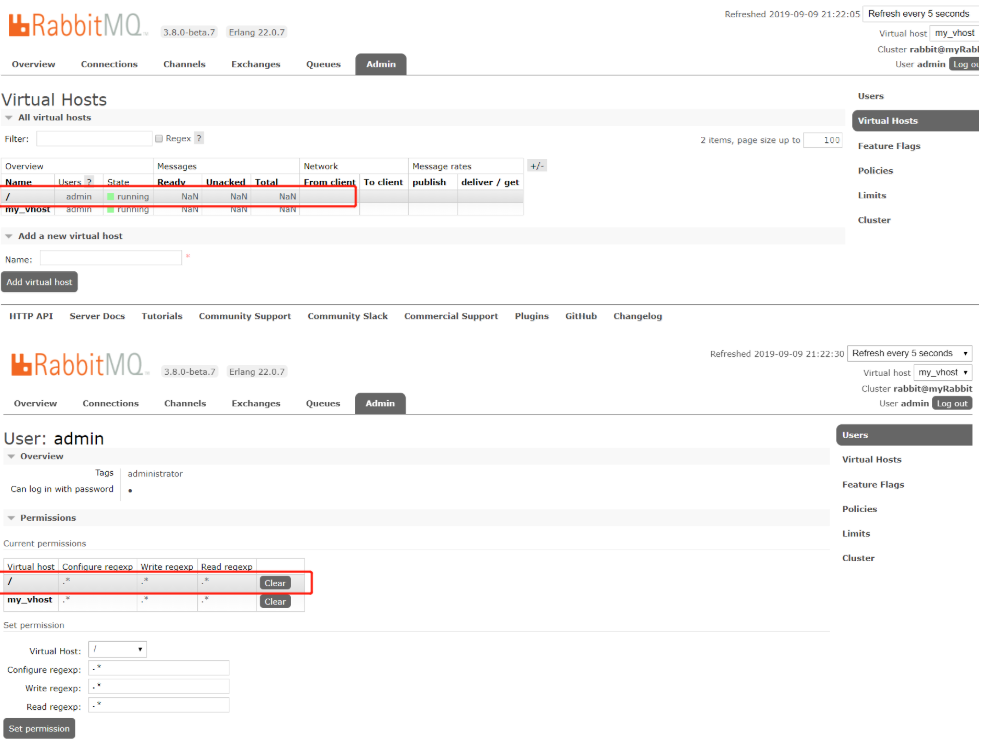
打开web管理端:http://youip:15672
需要配置权限,登陆账号密码在docker容器启动的时候有指定为admin/admin。
点击右边的Virtual Hosts添加一个为/的Virtual Hosts。
zookeeper
在安装zookeeper之前需要先安装好jdk,因为zookeeper启动需要jdk支持
下载
https://mirrors.tuna.tsinghua.edu.cn/apache/zookeeper/zookeeper-3.5.5/apache-zookeeper-3.5.5-bin.tar.gz
解压
tar -xf apache-zookeeper-3.5.5-bin.tar.gz
配置
zookeeper的配置文件是 zoo.cfg,需要先创建
[root@localhost ~]# cd apache-zookeeper-3.5.5-bin/conf/
[root@localhost conf]# ll
total 12
-rw-r--r--. 1 2002 2002  535 Feb 15  2019 configuration.xsl
-rw-r--r--. 1 2002 2002 2712 Apr  2  2019 log4j.properties
-rw-r--r--. 1 2002 2002  922 Feb 15  2019 zoo_sample.cfg
[root@localhost conf]# cp zoo_sample.cfg zoo.cfg
然后进行如下配置:
tickTime=2000    ##Zookeeper最小时间单元,单位毫秒(ms),默认值为3000
dataDir=/var/lib/zookeeper    ##Zookeeper服务器存储快照文件的目录,必须配置
dataLogDir=/var/lib/log     ##Zookeeper服务器存储事务日志的目录,默认为dataDir
clientPort=2181    ##服务器对外服务端口,一般设置为2181
initLimit=5    ##Leader服务器等待Follower启动并完成数据同步的时间,默认值10,表示tickTime的10倍
syncLimit=2    ##Leader服务器和Follower之间进行心跳检测的最大延时时间,默认值5,表示tickTime的5倍
启动
进入bin命令下,然后启动
[root@localhost conf]# cd ../bin
[root@localhost bin]# ./zkServer.sh start
ZooKeeper JMX enabled by default
Using config: /root/apache-zookeeper-3.5.5-bin/bin/../conf/zoo.cfg
Starting zookeeper ... STARTED
[root@localhost bin]# ./zkServer.sh status
ZooKeeper JMX enabled by default
Using config: /root/apache-zookeeper-3.5.5-bin/bin/../conf/zoo.cfg
Client port found: 2181. Client address: localhost.
Mode: standalone
集群安装参考:www.cnblogs.com/cyfonly/p/5…
nginx
添加源
# rpm -ivh http://nginx.org/packages/centos/7/noarch/RPMS/nginx-release-centos-7-0.el7.ngx.noarch.rpm
安装
yum install -y nginx
查看安装后的目录
# whereis nginx
nginx: /usr/sbin/nginx /usr/lib64/nginx /etc/nginx /usr/share/nginx /usr/share/man/man8/nginx.8.gz /usr/share/man/man3/nginx.3pm.gz
- Nginx配置路径:/etc/nginx/
- 执行程序路径:/usr/sbin/nginx
- PID目录:/var/run/nginx.pid
- 错误日志:/var/log/nginx/error.log
- 访问日志:/var/log/nginx/access.log
- 默认站点目录:/usr/share/nginx/html
需要主要的是配置路径和执行程序路径。
启停命令
#启动
[root@nginx]#/usr/sbin/nginx -c /etc/nginx/nginx.conf
#检测配置
[root@nginx]#/usr/sbin/nginx -c /etc/nginx/nginx.conf -t
#重启
[root@nginx]# /usr/sbin/nginx -s reload
[root@nginx]# /usr/sbin/nginx -c /etc/nginx/nginx.conf -s reload
测试
如果显示表示成功
[root@zhirui-base nginx]# curl localhost:80
<!DOCTYPE html PUBLIC "-//W3C//DTD XHTML 1.1//EN" "http://www.w3.org/TR/xhtml11/DTD/xhtml11.dtd">

<html xmlns="http://www.w3.org/1999/xhtml" xml:lang="en">
    <head>
        <title>Test Page for the Nginx HTTP Server on Fedora</title>
        <meta http-equiv="Content-Type" content="text/html; charset=UTF-8" />
        <style type="text/css">
       ...
当然也可以在浏览器打开网址测试。
记得防火墙放开端口!,CentOS7防火墙操作参考:juejin.cn/post/684490…
nginx配置文件配置参考:
遇到的问题
第一次配置80端口后台提示冲突问题
在安装后修改配置文件,添加了80端口的监听
[root@zhirui-base nginx]# vim /etc/nginx/nginx.conf
server {
        listen       80;
        server_name  localhost;
        #charset koi8-r;
        #access_log  logs/host.access.log  main;
        location / {
            root /wms/website;
            index  index.html index.htm;
        }
    }
通过命令/usr/sbin/nginx -c /etc/nginx/nginx.conf -t检测,报错如下:
[root@zhirui-base ~]# /usr/sbin/nginx -c /etc/nginx/nginx.conf -s reload
nginx: [warn] conflicting server name "localhost" on 0.0.0.0:80, ignored
解决方式:
通过grep -r localhost /etc/nginx/命令查看冲突的地方,发现一个default.conf下也绑定了80端口。
[root@zhirui-base ~]# grep -r localhost /etc/nginx/
/etc/nginx/conf.d/default.conf:    server_name  localhost;
Binary file /etc/nginx/.nginx.conf.swp matches
/etc/nginx/nginx.conf:        server_name  localhost;
将default.conf改名后再检测和启动nginx成功。
mv /etc/nginx/conf.d/default.conf /etc/nginx/conf.d/default.conf.bak
mysql
安装:
这里安装的是mariadb,mariadb和mysql是可以通用的,是mysql的开源分支,比mysql更加有前景。
# yum install mariadb-server mariadb
配置配置文件:
#vim /etc/my.cnf
[mysqld]
character-set-server = utf8    #设置默认编码, 在[mysqld]下配置,[client][mysql]不配置!!!
lower_case_table_names = 1   #配置大小写不敏感, 查询时不区分大小写, 1:不区分, 0:区分
group_concat_max_len = 204800  #修改最大返回字符串的长度
启停操作:
systemctl start mariadb  #启动MariaDB
systemctl stop mariadb  #停止MariaDB
systemctl restart mariadb  #重启MariaDB
systemctl enable mariadb  #设置开机启动
配置帐号和权限
第一次登陆的时候不需要密码
# mysql -uroot -p
use mysql;
GRANT ALL PRIVILEGES ON *.* TO 'root'@'%' IDENTIFIED BY 'password' WITH GRANT OPTION;
update user set password=password("123456") where user='root';
flush privileges;
exit
添加端口到防火墙,并重启防火墙:
firewall-cmd --zone=public --add-port=3306/tcp --permanent
firewall-cmd --reload
如果需要卸载使用如下方式:
参考:www.cnblogs.com/javahr/p/92…
- 使用以下命令查看当前安装mysql情况,查找以前是否装有mysql
`rpm -qa|grep -i mysql`可以看到如下图的所示:
显示之前安装了:
MySQL-client-5.5.25a-1.rhel5
MySQL-server-5.5.25a-1.rhel5
- 停止mysql服务、删除之前安装的mysql
删除命令:rpm -e –nodeps 包名
  rpm -ev --nodeps MySQL-client-5.5.25a-1.rhel5   rpm -ev --nodeps MySQL-server-5.5.25a-1.rhel5
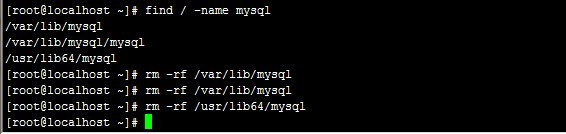
- 查找之前老版本mysql的目录、并且删除老版本mysql的文件和库**
`find / -name mysql`查找结果如下:
`find / -name mysql` `/var/lib/mysql``/var/lib/mysql/mysql``/usr/lib64/mysql `删除对应的mysql目录
`rm -rf /var/lib/mysql``rm -rf /var/lib/mysql``rm -rf /usr/lib64/mysql`具体的步骤如图:查找目录并删除
**注意:**卸载后/etc/my.cnf不会删除,需要进行手工删除
`rm -rf /etc/my.cnf`
- 再次查找机器是否安装mysql
`rpm -qa|grep -i mysql`如果是yum命令安装的还需要执行如下命令:
yum remove mariadb*
yum remove mysql*

redis
安装一个仓库
为了能够实现yum命令安装,故先需要安装该仓库
yum install epel-release
安装redis数据库
`yum ``install` `redis`
安装完毕后,使用下面的命令启动redis服务
`# 启动redis``service redis start``# 停止redis``service redis stop``# 查看redis运行状态``service redis status``# 查看redis进程``ps` `-ef | ``grep` `redis`
设置redis为开机自动启动
`chkconfig redis on`
进入redis服务
`# 进入本机redis``redis-cli``# 列出所有key``keys *`
修改配置
打开配置文件
`vi` `/etc/redis``.conf`
修改默认端口
查找 port 6379 修改为相应端口即可
修改默认密码
查找 requirepass foobared 将 foobared 修改为你的密码
允许远程访问
# 找到 bind 127.0.0.1 将其注释
# 找到 protected-mode yes 将其改为
protected-mode no
nexus
安装
官网地址:www.sonatype.com/download-os…
# cd /opt
# wget https://download.sonatype.com/nexus/3/nexus-3.2.0-01-unix.tar.gz
# tar zxvf nexus-3.2.0-01-unix.tar.gz
解压后,在当前目录中除了nexus-3.2.0-01还有一个sonatyoe-work目录,用户存放仓库数据的,可根据需要将其改为其他路径,或使用软链接的方式。
这里说下通过改配置文件的方式,将其改为其他路径吧。
查看nexus-3.2.0-01/bin/nexus.vmoptions文件:
# vim /opt/nexus-3.2.0-01/bin/nexus.vmoptions
分别对应着以下属性,有需求可以修改:
-XX:LogFile=../sonatype-work/nexus3/log/jvm.log
-Dkaraf.data=../sonatype-work/nexus3
-Djava.io.tmpdir=../sonatype-work/nexus3/tmp
sonatype-work/nexus3/etc的目录下有个配置文件nexus.properties,可以配置对应的ip地址和端口
用vim打开文件:
vim nexus.properties
默认是如下配置,如果ip冲突可以按需修改端口等:
# Jetty section
# application-port=8081
# application-host=0.0.0.0
# nexus-args=${jetty.etc}/jetty.xml,${jetty.etc}/jetty-http.xml,${jetty.etc}/jetty-requestlog.xml
# nexus-context-path=/
...
也可以在nexus-3.2.0-01/bin/nexus.rc上指定新的帐号运行nexus。
编辑nexus.rc:
run_as_user="nexus"那么linux系统中需要添加一个叫做
nexus的用户,用来启动nexus。
配置
访问nexus:http://serverip:8081,配置之前需要先登录
默认帐号是admin,默认密码是admin123。
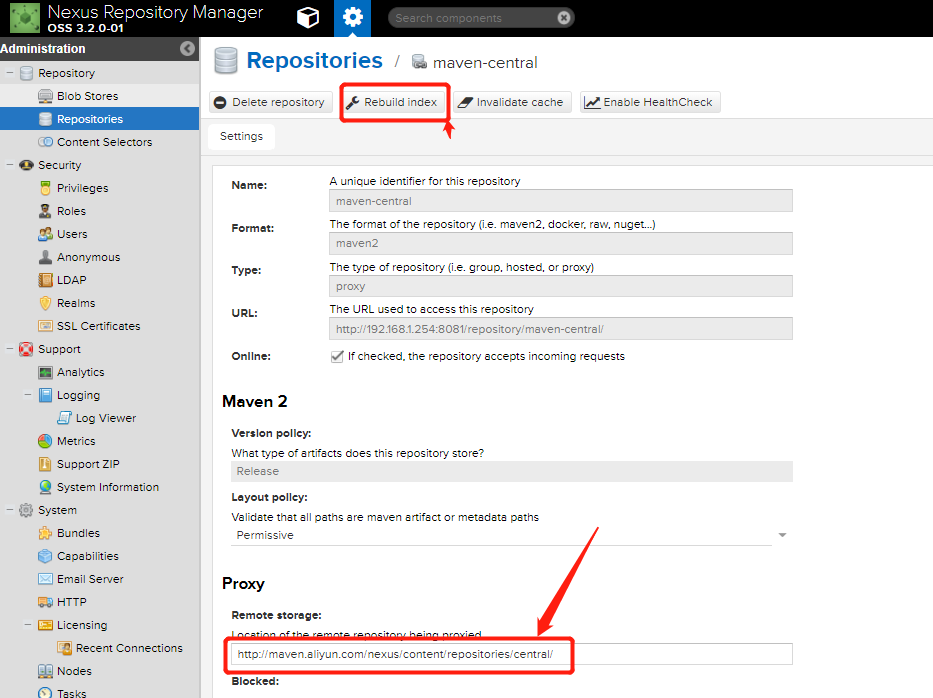
配置maven-central
修改central仓库的远程仓库地址(建议修改成spring或者阿里云的仓库)
仓库地址如下:
1.http://repo1.maven.org/maven2 (官方,速度一般)
2.http://maven.aliyun.com/nexus/content/repositories/central/ (阿里云,速度快)
3.http://repository.jboss.com/maven2/
4.<https://repository.sonatype.org/content/groups/public/>
5.http://mvnrepository.com/
修改后rebuild下index
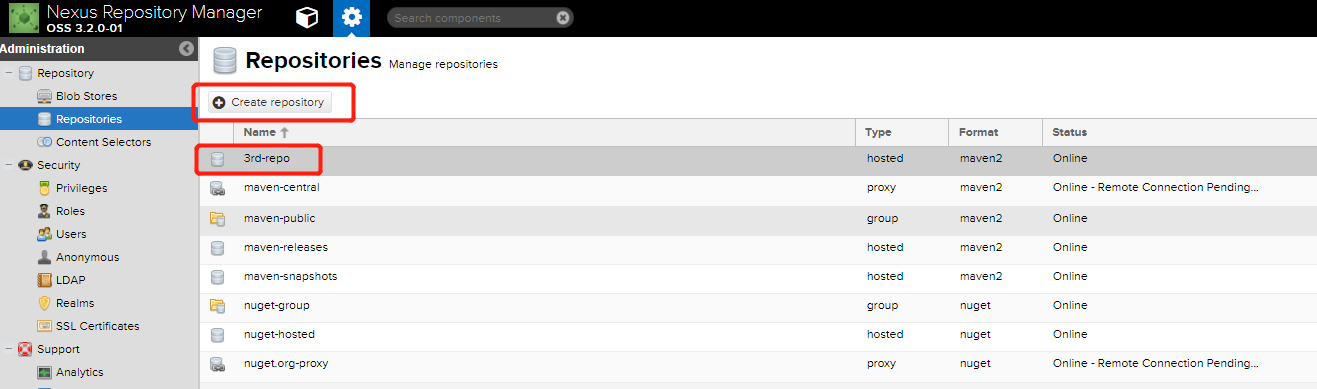
配置第三方仓库
该仓库用于上传私有jar用。
点击Create repository填写名称3rd-repo,其他默认即可。
配置maven-public
maven-public是nexus的中心组,我们使用的nexus的url填写的就是这个组的地址。所以我们需要在这里将刚刚创建的仓库添加到这个组里面。
选中,添加到右边即可:

maven部署到nexus
我在这里整理了几种部署到maven的方式:juejin.cn/post/684490…
git
安装jinkens之前需要安装git,直接用yum命令进行安装
# yum install git
安装后需要通过如下方式找到git程序位置,后面的jenkins需要使用。
# find / -name git
/usr/bin/git
可以查看到git所在位置为/usr/bin/git。
查看git的版本
# git --version
git version 1.8.3.1
maven
安装
安装jinkens之前需要安装maven
下载页:maven.apache.org/download.cg…
下载和安装:
wget http://mirrors.tuna.tsinghua.edu.cn/apache/maven/maven-3/3.6.2/binaries/apache-maven-3.6.2-bin.tar.gz
tar -zxf apache-maven-3.6.2-bin.tar.gz
mv apache-maven-3.6.2
cd apache-maven-3.6.2/conf
vim settings.xml
settings.xml配置
在conf目录下,有个settings.xml,在使用前需要进行配置。
如果配置后jenkins无法构建,请参考:《maven配置:jenkins的生产环境》
需要配置的几个配置项:
- 配置下载jar的存储路径
<localRepository>/path/to/local/repo</localRepository>
-
<mirrors></mirrors>下配置仓库地址我在jenkins构建的时候,同时配置了下面两个仓库,程序需要的私服私有jar一直跑去阿里云下载,然后提示下载不下来。如果出现这种情况,请只保留私服的仓库地址试试。
<!-- 私服地址 -->
<mirror>
	<id>com.zhirui.group</id>
	<mirrorOf>central</mirrorOf>
	<name>com.zhirui.group</name>
	<url>http://192.168.1.254:8081/repository/maven-public/</url>
</mirror>
<!-- 阿里云的仓库地址 -->
<mirror>
	<id>alimaven</id>
	<name>aliyun maven</name>
	<url>http://maven.aliyun.com/nexus/content/groups/public/</url>
	<mirrorOf>central</mirrorOf>
</mirror>
jenkins
jenkins安装比较复杂,我另外写了篇文章来详细讲解如果安装和配置,点击查看《jenkins自动部署Spring Cloud服务实战》
jira
jira安装比较复杂,我另外写了篇文章来详细讲解如果安装和配置,点击查看《jenkins自动部署Spring Cloud服务实战》
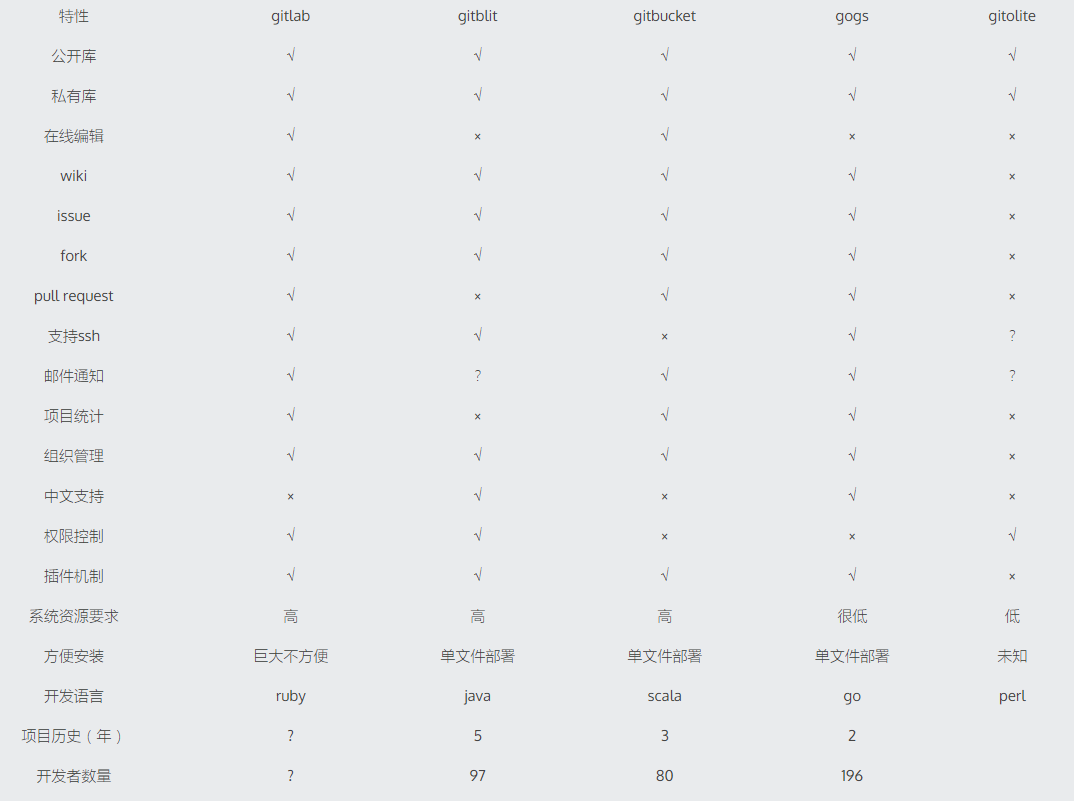
gitblit
几大代码管理工具对比,这里只讲gitblit:
官网地址:
安装:
wget http://dl.bintray.com/gitblit/releases/gitblit-1.8.0.tar.gz
修改端口:
server.httpPort = 7000
server.httpsPort = 7443
开始访问
url:http://192.168.1.234:7000/
默认账号密码:admin/admin
frp
frp用于内网穿透用,可以实现在公网访问内网的服务。
下载
wget https://github.com/fatedier/frp/releases/download/v0.29.0/frp_0.29.0_linux_amd64.tar.gz
更多的版本下载:github.com/fatedier/fr…
服务器端
配置
# 配置和frp客户端连接用
[common]
bind_port = 7000
token = javasea@frp

dashboard_port = 7557
#仪表板的用户名和密码都是可选的,如果没有设置,默认是admin。
dashboard_user = admin
dashboard_pwd = javasea@frpdash
启动
# frps -c frps.ini
客户端
配置
# 配置和frp服务端连接用
[common]
server_addr = 120.xx.xx.166
server_port = 7000
token = zhirui@frp   #用于和服务器端认证
# mysql暴露到公网
[mysql]
type = tcp
local_port = 3306
remote_port = 7575
# gitblit暴露到公网
[gitblit]
type = tcp
local_port = 7000
remote_port = 7576
启动
# frpc -c frpc.ini
管理页面:
url: http://192.168.1.254:7557, 7557就是上面服务器端配置的dash端口。
