

完整叫法应该是圆形揭露动画,下文简称揭露动画,因为 Android 系统中只提供了这一种圆形的(Circular)揭露动画!
所谓揭露动画,就是一种用于 View (之间),甚至界面之间的特殊过渡动画效果。
AndroidPlatform 的 android.view 包下有个 ViewAnimationUtils 类,这是使用系统所提供揭露动画的唯一入口,其对外暴露的唯一接口如下:
| Public methods | |
|---|---|
| static Animator! | createCircularReveal(view: View!, centerX: Int, centerY: Int, startRadius: Float, endRadius: Float)Returns an Animator which can animate a clipping circle. |
通过其静态的 createCircularReveal 方法来构造一个动画(Animator)对象,具体其实是个 RevealAnimator 类对象,进而可以实现一种炫酷(到底炫不炫酷就很主观了)的动画效果!
靠动图来阐明揭露之意再合适不过,为此我写了个小 demo,运行效果如下:
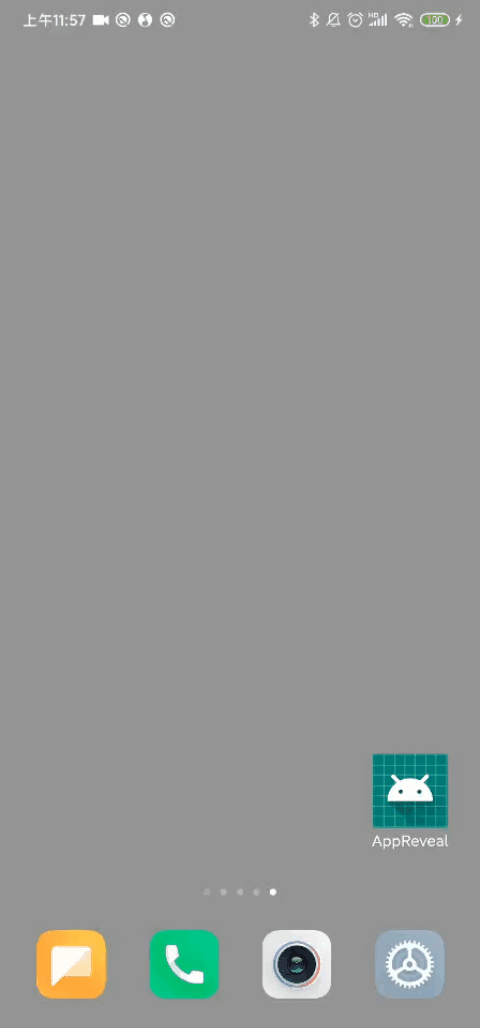
App 的揭露效果:
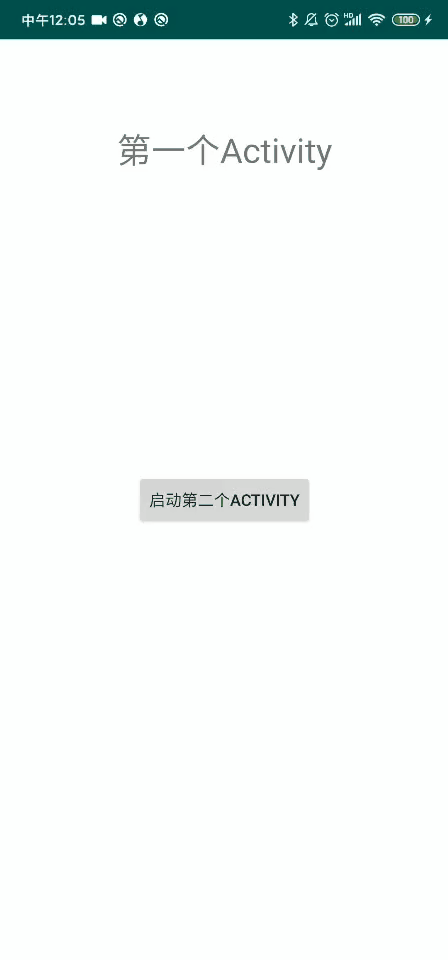
Activity 的揭露效果:
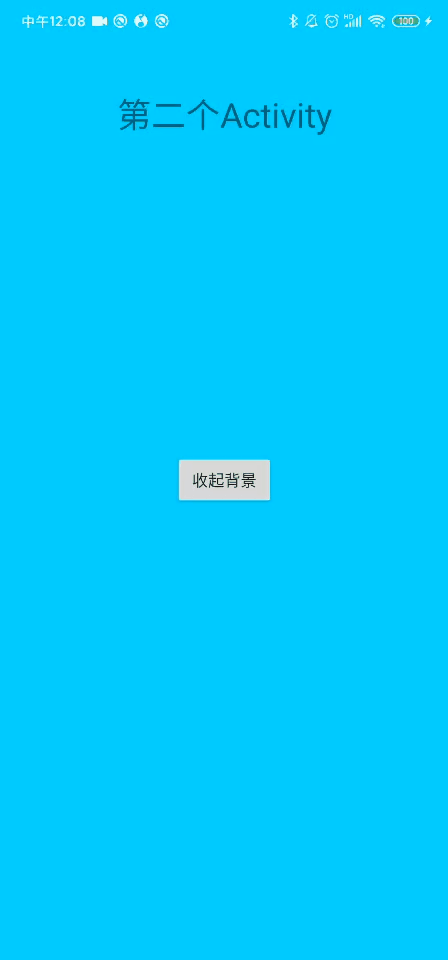
普通 View 的揭露效果:
几图胜千言!以上就是所谓的揭露动画。Demo 源码(Kotlin)我已放至 Github,源码在此,下面我们好好聊下这种过渡动画的具体实现。
墙裂建议结合 Demo 阅读本文,另外 Demo 中的代码注释十分详细,读者可以试试如果仅根据 Demo 中的源码注释就能理解上面效果背后的所有原理……下面的正文我还是建议你读一下!
正文
基础 API
先来聊聊揭露动画 Api 的基础用法。
上面说到揭露动画对外暴露的唯一使用接口是 ViewAnimationUtils 类的一个静态方法 createCircularReveal。看此方法的完整签名有五个参数,用于在方法内部构造一个揭露动画以返回给用例:
createCircularReveal(View view, int centerX, int centerY, float startRadius, float endRadius)
第一个参数是个 View,揭露动画的应用对象必须是一个 View,这点不难理解。
第二个参数是圆形揭露效果的圆心 X 轴坐标,同理第三个参数是 Y 轴坐标。
第三个参数是圆形揭露效果的开始半径,同理第四个参数是圆形揭露效果的终止半径,开始半径传 0,终止半径传 View 的宽度或高度就是个典型的从无到有的揭露(显示)过程,反之,开始半径传 View 的宽度或高度,终止半径传 0 就是个从有到无的反揭露(隐藏)过程。
拿到此方法返回的 Animator 对象我们就可以随时控制 View 进行揭露动画了。
是不是很简单?
View 级别的揭露动画
我们先来看看最简单的普通 View 的揭露动画效果(上面第三张图)其具体代码是怎样的,
/* Demo 的关键代码文件结构
appreveal
            │  MainActivity.kt
            │  SecondActivity.kt //普通 View 的揭露效果见 Demo 里的这个文件中的代码
            │
            ├─base
            │      BaseActivity.kt //Activity 和 App 层面的揭露动画效果主要见 Demo 里此文件中的代码
            │
            ├─ext
            │      ActicityExtension.kt
            │
            └─util
                   StatusBarUtil.kt
*/
普通 View 的揭露动画见 Demo 里的 SecondActivity,其布局如下:
<?xml version="1.0" encoding="utf-8"?>
<androidx.constraintlayout.widget.ConstraintLayout
    xmlns:android="http://schemas.android.com/apk/res/android"
    xmlns:app="http://schemas.android.com/apk/res-auto"
    xmlns:tools="http://schemas.android.com/tools"
    android:layout_width="match_parent"
    android:layout_height="match_parent"
    android:background="@android:color/white"
    tools:context=".SecondActivity">
    <!--我们要对这个蓝色背景 View 做揭露和反揭露动画-->
    <View
        android:id="@+id/viewBg"
        android:layout_width="0dp"
        android:layout_height="0dp"
        app:layout_constraintStart_toStartOf="parent"
        app:layout_constraintEnd_toEndOf="parent"
        app:layout_constraintTop_toTopOf="parent"
        app:layout_constraintBottom_toBottomOf="parent"
        android:background="@android:color/holo_blue_bright"
        android:visibility="visible"/>

    <TextView
        android:layout_width="wrap_content"
        android:layout_height="wrap_content"
        app:layout_constraintStart_toStartOf="parent"
        app:layout_constraintEnd_toEndOf="parent"
        app:layout_constraintTop_toTopOf="parent"
        app:layout_constraintBottom_toBottomOf="parent"
        app:layout_constraintVertical_bias="0.1"
        android:text="@string/app_second"
        android:textSize="30sp"/>

    <!--点击这个按钮开始揭露、反揭露动画-->
    <Button
        android:id="@+id/btnReveal"
        android:layout_width="wrap_content"
        android:layout_height="wrap_content"
        android:text="@string/app_reveal_r"
        app:layout_constraintBottom_toBottomOf="parent"
        app:layout_constraintLeft_toLeftOf="parent"
        app:layout_constraintRight_toRightOf="parent"
        app:layout_constraintTop_toTopOf="parent" />
</androidx.constraintlayout.widget.ConstraintLayout>
SecondActivity 中设置点击中间的按钮开始 id 为 viewBg 界面控件的揭露动画,关键代码如下:
//中间按钮的点击事件
btnReveal.setOnClickListener { view ->
            //系统提供的揭露动画需 5.0 及以上的 sdk 版本
            if (Build.VERSION.SDK_INT < Build.VERSION_CODES.LOLLIPOP) {
                return@setOnClickListener
            }
            //动画开始半径和结束半径,两者相对关系可用于控制是揭露还是反揭露,也即是从无到有还是从有到无
            val startRadius:Float
            val endRadius:Float
            if (viewBg.visibility == View.VISIBLE){
                //从有到无,即反揭露
                startRadius = viewBg.height.toFloat()
                endRadius = 0f
            }else{
                //从无到有,即揭露效果
                startRadius = 0f
                endRadius = viewBg.height.toFloat()
            }
            val location = IntArray(2)
            view.getLocationInWindow(location)
            //关键代码,构建一个揭露动画对象,注意圆形揭露动画的圆心以及开始半径和结束半径是如何计算出来的,应该很好理解,这里不做过多解释
            val animReveal = ViewAnimationUtils.createCircularReveal(viewBg,
                    location[0] + view.width/2,
                    location[1] + view.height/2,
                    startRadius,
                    endRadius

            )
            //构建好了揭露动画对象,开始设置动画的一些属性和相关监听
            animReveal.duration = 400
            animReveal.interpolator = LinearInterpolator()
            animReveal.addListener(onStart = {
                viewBg.visibility = View.VISIBLE
            },onEnd = {
                if (startRadius != 0f){
                    viewBg.visibility = View.INVISIBLE
                    btnReveal.setText(R.string.app_reveal)
                }else{
                    viewBg.visibility = View.VISIBLE
                    btnReveal.setText(R.string.app_reveal_r)
                }
            })
            animReveal.start()
        }
代码真机运行的具体界面效果如下:
基本使用如此,为界面中的某个 View 应用揭露动画效果还是很简单的,下面我们看看如何为应用内 Activity 间的切换(上面Activity 的揭露效果一图)应用我们炫酷(主观上的)的揭露动画效果。
Activity 级别的揭露动画
首先我们会遇到两个问题:
- 揭露动画用于 Activity 切换时,我们该把揭露动画应用于哪个 View(揭露动画的应用对象必须是一个 View)?
- 何时开始执行揭露动画?
根据我们得 Demo,一一作答。
揭露动画用于 Activity 切换时,最合适的对象肯定是此 Activity 相关 Window 的根视图,真正的根视图,没错正是此 Activity 的 Window 的 DecorView(DecorView 不是很了解?相关知识参考这篇博文)。
至于揭露动画的开始时机,太早或太晚都不好。首先不能太早,如果当前 View 还未 Attach 到 Window 上就对其应用揭露动画会抛出异常,其次不能太晚,不然会严重影响动画的视觉效果。
经作者实践,这个最好的揭露动画开始时机在视图的可见性刚变为对用户可见时最佳!我们通过为 View 的 ViewTreeObserver 设置一个 OnGlobalLayoutListener 回调可完美监听到这个最佳时机~
我把相关实现代码全都放在了 Demo 的 BaseActivity 类里,用例 Activity 只要继承 BaseActivity 即可在打开时应用揭露动画效果。这里注意为了动画的连贯性我们需要把 Activity 揭露动画开始的圆心坐标从它的上个 Activity 里通过 Intent 传递过来,这点并不难实现。关键代码如下:
//将 Activity 的揭露效果写在 Base 类中,需要揭露动画效果时继承
abstract class BaseActivity : AppCompatActivity(){
    companion object {
        //手动往 intent 里传入上个界面的点击位置坐标
        val CLICK_X = "CLICK_X"
        val CLICK_Y = "CLICK_Y"
    }
    private var onGlobalLayout : ViewTreeObserver.OnGlobalLayoutListener? = null
    //揭露(进入)动画
    var mAnimReveal : Animator? = null
    //反揭露(退出)动画
    var mAnimRevealR : Animator? = null

    override fun onCreate(savedInstanceState: Bundle?) {
        super.onCreate(savedInstanceState)
        circularReveal(intent)
    }

    //Activity 揭露(进入)动画,进入时使用
    private fun circularReveal(intent: Intent?){
        //系统提供的揭露动画需 5.0 及以上的 sdk 版本,当我们获取不到上个界面的点击区域时就不展示揭露动画,因为此时没有合适的锚点
        if (Build.VERSION.SDK_INT < Build.VERSION_CODES.LOLLIPOP ||
                (intent?.sourceBounds == null && intent?.hasExtra(CLICK_X)?.not()?:true)) return
        val rect = intent?.sourceBounds
        val v = window.decorView
        v.visibility = View.INVISIBLE

        @SuppressWarnings
        onGlobalLayout = object : ViewTreeObserver.OnGlobalLayoutListener{
            override fun onGlobalLayout() {//此时既是开始揭露动画的最佳时机
                mAnimReveal?.removeAllListeners()
                mAnimReveal?.cancel()
                mAnimReveal = ViewAnimationUtils.createCircularReveal(v,
                        rect?.centerX()?:intent?.getIntExtra(CLICK_X, 0)?:0,
                        rect?.centerY()?:intent?.getIntExtra(CLICK_Y, 0)?:0,
                        0f,
                        v.height.toFloat()
                )
                mAnimReveal?.duration = 400
                mAnimReveal?.interpolator = LinearInterpolator()
                mAnimReveal?.addListener(onEnd = {
                    onGlobalLayout?.let {
                        //我们需要在揭露动画进行完后及时移除回调
                        v?.viewTreeObserver?.removeOnGlobalLayoutListener(it)
                    }
                })
                mAnimReveal?.start()
            }
        }
        //视图可见性发生变化时的回调,回调里正是开始揭露动画的最佳时机
        v.viewTreeObserver.addOnGlobalLayoutListener(onGlobalLayout)
    }

    //Activtiy 反揭露(退出)动画,即退出时的过渡动画,
    //这么起名可能不恰当,其实还是同样的动画,
    //只不过揭露的起始和终结半径跟上面相比反过来了
    private fun circularRevealReverse(intent: Intent?){
        //系统提供的揭露动画需 5.0 及以上的 sdk 版本,当我们获取不到上个界面的点击区域时就不展示揭露动画,因为此时没有合适的锚点
        if (Build.VERSION.SDK_INT < Build.VERSION_CODES.LOLLIPOP ||
                (intent?.sourceBounds == null && intent?.hasExtra(CLICK_X)?.not()?:true)) {
            super.onBackPressed()
            return
        }
        val rect = intent?.sourceBounds
        val v = window.decorView
        mAnimRevealR?.removeAllListeners()
        mAnimRevealR?.cancel()
        mAnimRevealR = ViewAnimationUtils.createCircularReveal(v,
                rect?.centerX()?:intent?.getIntExtra(CLICK_X, 0)?:0,
                rect?.centerY()?:intent?.getIntExtra(CLICK_Y, 0)?:0,
                v.height.toFloat(),
                0f

        )
        mAnimRevealR?.duration = 400
        mAnimRevealR?.interpolator = LinearInterpolator()
        mAnimRevealR?.addListener(onEnd = {
            v.visibility = View.GONE
            super.onBackPressed()
        })
        mAnimRevealR?.start()
    }

    //回退时应用反揭露动画
    override fun onBackPressed() {
        circularRevealReverse(intent)
    }

    //省略的其他代码,见 Demo 里的 BaseActivity
    ...
}
MainActivity 里打开 SecondActivity(继承了 BaseActivity) 的代码:
btnNext.setOnClickListener {view ->
            val intent = Intent(this, SecondActivity::class.java)
            val location = IntArray(2)
            view.getLocationInWindow(location)
            //把点击按钮的中心位置坐标传过去作为 SecondActivity 的揭露动画圆心
            intent.putExtra(CLICK_X, location[0] + view.width/2)
            intent.putExtra(CLICK_Y, location[1] + view.height/2)
            startActivity(intent)
        }
我们重点看下 BaseActivity 的 circularReveal 方法,此方法在 onCreate 方法里被调用了一次,它的功能就是给整个 Activity 加上合适的揭露动画效果,即在 DecorView 刚对用户可见时开始构建并执行揭露动画。
方法里的判断有个条件:intent?.sourceBounds == null,这里的 intent?.sourceBounds 是什么东西?其实在当前应用内,为 Activity 间切换时应用揭露动画效果完全可以不判断这个条件,此代码是写给文章最后才会聊到的整个 App 的揭露效果(上面 App 的揭露效果那张图)的。Intent 类里面有个方法签名如下:
| open Rect? | getSourceBounds()Get the bounds of the sender of this intent, in screen coordinates. |
|---|---|
此方法返回一个 Rect ,里面存储着桌面(Launcher)里本应用的图标的位置信息,后面会详细说到,且先略过不谈。
onBackPressed 方法中调用了执行反揭露动画的方法 circularRevealReverse。
其他代码经过上面的铺垫结合注释应该很好理解,最终运行到真机上动画效果如下:
还有很重要的一点,因为 Activity 的 Window 会自带有背景色(一般为黑色),所以我们需要对 Activity 的主题做些定制,以保证揭露动画的效果:
<!-- Base application theme. -->
    <style name="AppTheme" parent="Theme.AppCompat.Light.NoActionBar">
        <!-- Customize your theme here. -->
        <item name="colorPrimary">@color/colorPrimary</item>
        <item name="colorPrimaryDark">@color/colorPrimaryDark</item>
        <item name="colorAccent">@color/colorAccent</item>
    </style>

    <!--背景透明且屏蔽系统默认的 Activity 过渡动画-->
    <style name="trans_no_anim" parent="AppTheme">
        <!--屏蔽系统默认的 Activity 过渡动画-->
        <item name="android:windowAnimationStyle">@null</item>

        <!--单纯实现 Activity 窗口背景透明-->
        <item name="android:windowIsTranslucent">true</item>
        <item name="android:windowBackground">@android:color/transparent</item>
    </style>
对 Activity 使用揭露动画必须在清单文件中把其主题设置成 trans_no_anim。
App 级别的揭露动画
最后要聊到的揭露动画应用场景比较有意思。
我们能不能给整个 App 加上一个完美的揭露动画效果呢?
此处所谓完美的揭露动画效果,即我们每次从 Launcher(Android 系统的 Launcher,即系统桌面,按 Home 键会回到的那个地方,也叫启动器。注意 Launcher 在安卓系统中是个单独的 APP,从桌面点击应用图标启动应用的时候 Launcher 会把图标的位置信息通过 intent 一路传到应用的 Launcher Activity,相关知识还请读者自行 Google) 里点击我们的应用图标,不管应用是不是初次启动,不管停留在哪个界面,都能通过揭露动画打开或回到我们应用,在我们的应用中,通过回退按钮(back 键)回到 Launcher 时都能通过反揭露动画收起我们应用(通过 Home 键回到 Launcher 时不应用反揭露动画,因为全面屏手势正在 Android 系统中普及,其会令反揭露动画效果不佳,此时用系统的默认动画最好)。已知揭露动画必须有个圆心,此处这个圆心必然应该是 Launcher 中我们应用图标的中心位置的坐标。前文有提到,这个坐标的相关信息可通过 Launcher Activity 的 Intent 的 getSourceBounds() 方法获得(非 Launcher Activity 通过此方法获取到的只是个 null)。这里会有个问题,即 Launcher 中的图标,其位置可是会随时变化的(由用户手动拖动)!完美的效果必然要能适应坐标随时会变化的启动图标。大概效果会是这样:
答案是很遗憾,经作者本人实践,通过 Android 提供的现有 API 无法实现这种给整个 App 加上一个完美揭露动画效果的需求!反正作者本人的尝试以失败而终!
从上面的动图可以看出,我几乎就要完美实现这种效果了。问题就出在 Launcher 中的图标,其位置可能会随时变化(由用户手动拖动),而我找不到及时更新 Launcher 图标位置信息的方法!
先来看看光上图所示效果是如何实现的。
还记得上面贴的比较重要的 BaseActivity 的代码吗,上面没贴全,其下面还有代码(注意结合上面贴过的代码看):
//将 Activity 的揭露效果写在 Base 类中,需要揭露动画效果时继承
abstract class BaseActivity : AppCompatActivity(){
    //省略上文已贴过的代码
    ...
    ...

    override fun onDestroy() {
        //及时释放资源以保证代码健壮性
        mAnimReveal?.removeAllListeners()
        mAnimReveal?.cancel()
        mAnimRevealR?.removeAllListeners()
        mAnimRevealR?.cancel()
        //及时释放资源以保证代码健壮性
        onGlobalLayout?.let {
            window.decorView.viewTreeObserver?.removeOnGlobalLayoutListener(it)
        }
        super.onDestroy()
    }

    //这个方法很重要,如果我们应用的启动图标在桌面上的位置有变化,可在此收到新的位置信息,然而经作者本人实践作用十分有限
    override fun onNewIntent(intent: Intent?) {
        super.onNewIntent(intent)
        circularReveal(intent)
        //更新intent
        this.intent = intent
    }
}
注意 onNewIntent 方法,我们就是在这里更新本应用的启动图标在 Launcher 中的位置信息的。
如何更新的呢?
已知点击桌面上的图标初次启动应用时,图标的位置信息会通过 intent 传递给应用的 Launcher Activity,应用如果已经启动,只是退居后台,此时再点击启动图标回到应用,会调用 onNewIntent 方法吗?
一般不会,然而当从清单文件中把 Launcher Activity 的启动模式设置成 standard 外的任意一种时,只要 Launcher Activity 在栈顶,从桌面点击启动图标就会回调其 onNewIntent 方法,这个方法传入的 intent 参数中保存着应用启动图标在 Launcher 中的最新坐标信息!
比如我们把 MainActivity 的启动模式设置成 singleTop:
<activity
            android:name=".MainActivity"
            android:launchMode="singleTop"> <!-- 只要 Activity 的 lanuchMode 不是 standard 的,当此 Activity 处于自己所在任务栈的栈顶时,每次点击桌面中本应用的启动图标时都会触发此 Activity 的 onNewIntent 方法 -->
            <intent-filter>
                <action android:name="android.intent.action.MAIN" />

                <category android:name="android.intent.category.LAUNCHER" />
            </intent-filter>
        </activity>
即可实现上图所示的效果。
注意上文所言的限制条件,Launcher Activity 必须在栈顶,且点击启动图标时只有 Launcher Activity 可能会被回调 onNewIntent 方法!作者本人始终没找到系统中有别的接口来更新或者获取最新的本应用图标的位置信息!
正因如此,所以我最后得出的结论是我们无法给整个 App 加上一个完美的揭露动画效果,只能在有限的条件下(不去太关心应用启动图标的位置随时可能被用户更改这件事)给 App 加上一个乍看上去还行的揭露动画效果,如上图所示!
言止于此。
未完待续。
