1.什么是“事件监听“?
从字面上就可以看出来,无非就是监听一个事件。
2.使用场景
例句一个物流发货的场景:我有个小程序商城,用户下单后需要在后台发货,发完货后我想在微信发送个模块通知提示用户,我想了想用户不登录微信或者把消息提示关闭了,那岂不是不能实时通知用户已经发货了,我决定再加个短信通知用户。有了模块通知,短信通知后我还嫌不够...然后我继续加.... 通常我们会这么写:
<?php
namespace App\Http\Controllers;
use Illuminate\Http\Request;
class OrderController extends Controller
{
    public function sendGoods()
    {
        //@todo:发货逻辑
        //@todo:模块通知逻辑
        //@todo:短信通知逻辑
        //@todo:等等....
    }
}
**这样写不是不可以,但是逻辑功能越来越多,控制器只会变得臃肿起来,后期不便于维护。这时候可能会有人说,那我可以封装起来啊,是的,你可以封装起来,然后就可以用简短的代码来实现。但是实际项目中,会涉及多人开发,这样就不方便了。所以推荐使用laravel自带的“事件监听“... **
3.使用”事件监听"优化代码
3.1 打开终端->切换到项目根目录->使用artisan命令创建事件监听文件
php artisan make:event OrderEvent
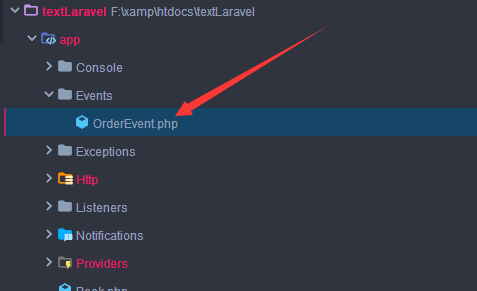
执行完命令,发现 app/Events 目录下多了个 OrderEvent.php 文件

我们可以打开看看...
<?php

namespace App\Events;

use Illuminate\Broadcasting\Channel;
use Illuminate\Queue\SerializesModels;
use Illuminate\Broadcasting\PrivateChannel;
use Illuminate\Broadcasting\PresenceChannel;
use Illuminate\Foundation\Events\Dispatchable;
use Illuminate\Broadcasting\InteractsWithSockets;
use Illuminate\Contracts\Broadcasting\ShouldBroadcast;

class OrderEvent
{
    use Dispatchable, InteractsWithSockets, SerializesModels;

    /**
     * Create a new event instance.
     *
     * @return void
     */
    public function __construct()
    {
        //
    }

    /**
     * Get the channels the event should broadcast on.
     *
     * @return \Illuminate\Broadcasting\Channel|array
     */
    public function broadcastOn()
    {
        return new PrivateChannel('channel-name');
    }
}
简单的修改下构造函数,因为到时候我们可能会 传入 购买商品的 用户
<?php

namespace App\Events;

use App\User;
use Illuminate\Broadcasting\Channel;
use Illuminate\Queue\SerializesModels;
use Illuminate\Broadcasting\PrivateChannel;
use Illuminate\Broadcasting\PresenceChannel;
use Illuminate\Foundation\Events\Dispatchable;
use Illuminate\Broadcasting\InteractsWithSockets;
use Illuminate\Contracts\Broadcasting\ShouldBroadcast;

class OrderEvent
{
    use Dispatchable, InteractsWithSockets, SerializesModels;

    public $user;
    /**
     * Create a new event instance.
     *
     * @return void
     */
    public function __construct(User $user)
    {
        $this->user = $user;
    }

    /**
     * Get the channels the event should broadcast on.
     *
     * @return \Illuminate\Broadcasting\Channel|array
     */
    public function broadcastOn()
    {
        return new PrivateChannel('channel-name');
    }
}
3.2 绑定事件
打开 app/Providers/EventServiceProvider.php 文件,找到 成员属性 listen下:
    protected $listen = [
        Registered::class => [
            SendEmailVerificationNotification::class,
        ],
    ];
把事件关联起来,修改为:
    protected $listen = [
        Registered::class => [
            SendEmailVerificationNotification::class,
        ],
        'App\Events\OrderEvent' => [
            'App\Listeners\sendModel',
            'App\Listeners\sendPhone',
        ]
    ];
接着打开终端,执行 artisan 命令 生成 监听文件
php artisan event:generate
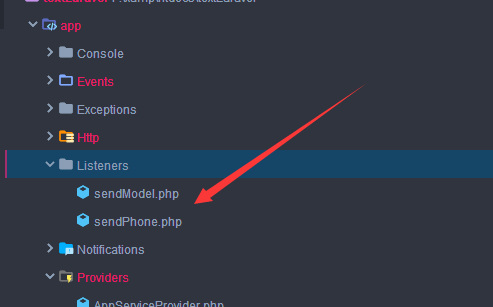
然后我们可以在 app/Listeners 文件下发现多了两个文件

打开这两个文件,依次修改为:
sendModel.php:
<?php

namespace App\Listeners;

use App\Events\OrderEvent;
use Illuminate\Queue\InteractsWithQueue;
use Illuminate\Contracts\Queue\ShouldQueue;

class sendModel
{
    /**
     * Create the event listener.
     *
     * @return void
     */
    public function __construct()
    {
        //
    }

    /**
     * Handle the event.
     *
     * @param  OrderEvent  $event
     * @return void
     */
    public function handle(OrderEvent $event)
    {
        $user = $event->user; // @todo: 当前用户
        //@todo:发送消息模板逻辑
        dump('发送消息模板成功');
    }
}
sendPhone.php:
<?php

namespace App\Listeners;

use App\Events\OrderEvent;
use Illuminate\Queue\InteractsWithQueue;
use Illuminate\Contracts\Queue\ShouldQueue;

class sendPhone
{
    /**
     * Create the event listener.
     *
     * @return void
     */
    public function __construct()
    {
        //
    }

    /**
     * Handle the event.
     *
     * @param  OrderEvent  $event
     * @return void
     */
    public function handle(OrderEvent $event)
    {
        $user = $event->user; // @todo: 当前用户
        //@todo:发送短信消息
        dump('发送短信消息成功');
    }
}
3.3 最后我们再打开 OrderController.php 修改为:
<?php
namespace App\Http\Controllers;
use App\Events\OrderEvent;
use App\User;
use Illuminate\Http\Request;
class OrderController extends Controller
{
    public function sendGoods()
    {
        $user = User::find(1);
        //@todo:发货逻辑
        dump('发货成功!!');
        event(new OrderEvent($user));
    }
}
3.4 绑定路由
Route::get('/sendGoods','OrderController@sendGoods');
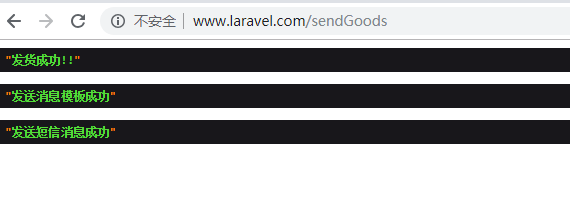
3.5 访问路由结果:

4. 总结
这样是不是简单,便于维护了许多呢... 还不会的小伙伴赶紧去试试吧!如果对你有帮助,请给个赞,谢谢!