

本文是扫码登录实战系列的第三篇,完整目录:
有了后端的接口,现在就具备了实现扫码登录的所需的一切了,只需要 web 端和 app 端调用即可。为了 web 端能够更方便地调用,我们接下来一步一步封装成 sdk。这也是我们文章最开头所展示的最终成果:
startAppAuthScanning({
  onSuccess(userInfo) {
    localStorage.setItem('token', userInfo.token);
  }
})
我们一共要封装 4 个 API:
- geneQRCode 生成二维码
- checkQRCodeStatus: 查询二维码状态
- startPollingQRCodeStatus: 开始轮询
- startAppAuthScanning: 对上述所有方法的封装,一键生成扫码登录组件
geneQRCode
const host = "http://localhost:8888"
function geneQRCode() {
  let url = `${host}/qrcode/gene`
  return axios.get(url).then(res => {
    return res.data
  }).catch(err => {
    return err
  });
}
checkQRCodeStatus
// 检验微信二维码扫描状态
function checkQRCodeStatus(qrcodeId) {
  let url = `${host}/qrcode/check?qrcodeId=${qrcodeId}`
  return axios.get(url).then(res => {
    return res.data
  }).catch(err => {
    return err
  });
}
startPollingQRCodeStatus
先设计接口:采用注册回调函数的方式,一共有以下可用注册函数:
- onPollingStart,轮询开始时回调,回调参数 intervalNum 是 startInterval 返回的 interval id,可以调用 clearInterval 手动关闭轮询。
- onResult:每次获取到最新二维码状态时都会回调。
- onScanned:用户扫码时回调,只回调一次。
- onSuccess:用户同意授权时回调,只回调一次,之后轮询结束。
- onCancel:用户取消授权时回调,只回调一次,之后轮询结束。
- onExpired:二维码过期时回调,只回调一次,之后轮询结束。
- onError:每次获取二维码信息失败时回调,失败原因可能有二维码不存在等。
authing.startPollingQRCodeStatus({
  qrcodeId,
  interval: 1000,
  onPollingStart: (intervalNum) => { },
  onResult: (res) => { },
  onScanned: (userInfo) => { },
  onSuccess: (userInfo) => { },
  onCancel: () => { },
  onExpired: () => { },
  onError: (data) => { }
})
以下是具体实现:每当发生某事件时,判断一下是否有相应回调函数注册,如果有就调用回调函数。
由于篇幅限制,这里就不对参数进行检验了。
function startPollingQRCodeStatus(options) {
  let { qrcodeId, interval = 800, onPollingStart, onResult, onScanned, onExpired, onSuccess, onCancel, onError } = options

  let intervalNum = 0
  let calledOnScanned = false
  let calledOnPoolingStart = false

  intervalNum = setInterval(() => {
    // 开始轮询时回调 onPollingStart
    if (onPollingStart && ! calledOnPoolingStart) {
      onPollingStart(intervalNum)
      calledOnPoolingStart = true
    }

    checkQRCodeStatus(qrcodeId).then(res => {

      // 业务状态码 code = 200 表示成功查询到二维码状态
      if (res.code === 200) {

        // 每次获取到数据都回调 onResult 函数
        if (onResult) {
          onResult(res)
        }

        const data = res.data;
        // 第一次查询到已扫码状态,回调 onScanned
        if (data.scanned) {
          if (onScanned && !calledOnScanned) {
            const { userInfo } = data
            onScanned(userInfo)
            calledOnScanned = true
          }
        }

        // 二维码过期,清除定时器
        if (data.expired) {
          clearInterval(intervalNum)
          if (onExpired) {
            onExpired()
          }
        }

        // 成功登录
        if (data.success) {
          clearInterval(intervalNum)
          const { ticket, userInfo } = data
          if (onSuccess) {
            onSuccess({
              ticket,
              userInfo
            })
          }
        }

        // 用户取消
        if (data.canceled) {
          clearInterval(intervalNum)
          if (onCancel) {
            onCancel()
          }
        }

      } else {
        // 业务状态码不为 200,可能是由于二维码不存在等原因
        if (onError) {
          onError(res)
        }
      }
    })
  }, interval)

  return intervalNum
}
startAppAuthScanning
先设计 API:
- mount:可选,二维码挂载点,如不写则默认漂浮在文档中间
- interval:轮询间隔时间。
- onPollingStart 到 onError 和 startPollingQRCodeStatus 意义一致,事实上这部分就是直接调用的 startPollingQRCodeStatus。
- onQRCodeLoad:二维码首次成功加载时回调。参数 qrcode 是一个字典,包含两个字段:qrcodeId、qrcodeUrl。
- onQRCodeShow:二维码首次出现在页面上时回调。参数 qrcode 同上。
- onQRCodeLoadFaild:二维码加载失败时会被回调。
- 其余的是一些自定义文字展示
startAppAuthScanning({
  mount: '', // 可选,二维码挂载点,如不写则默认漂浮在文档中间
  interval: 1000, // 可选,轮询间隔时间,默认为 800 ms
  onPollingStart: (intervalNum) => {},
  onResult: (res) => {},
  onScanned: (userInfo) => {},
  onSuccess: (data) => {
      const { ticket, userInfo } = data;
  },
  onCancel: () => {},
  onExpired: () => {},
  onError: (data) => {},

  onQRCodeShow: (qrcode) => {},
  onQRCodeLoad: (qrcode) => {},
  onQRCodeLoadFaild: (error) => {},
  tips: '使用 <strong> APP </strong> 扫码登录',
  scannedTips: '用户已扫码,等待确认',
  canceledTips: '用户取消授权',
  expiredTips: '二维码已过期',
  successTips: '扫码成功',
  retryTips: '重试',
  failedTips: '网络出错,请重试'
})
这个方法是以上所有方法的封装,主要逻辑如下:
- 调用 geneQRCode 生成二维码
- 在浏览器文档中展示二维码
- 调用 startPollingQRCodeStatus 开始轮询
- 发生相应事件的时候调用注册的回调函数
具体实现如下:
function startAppAuthScanning(options) {

  let { mount = "authing__app-scan-qrcode-root-node", interval = 800,
    onPollingStart, onResult, onScanned, onExpired, onSuccess, onCancel, onError, onQRCodeShow, onQRCodeLoad,
    onQRCodeLoadFaild,
    tips = "使用 <strong> APP </strong> 扫码登录",
    scannedTips = "用户已扫码,等待确认",
    canceledTips = "用户取消授权",
    expiredTips = "二维码已过期",
    successTips = "扫码成功",
    retryTips = "重试",
    failedTips = "网络出错,请重试",
    qrcodeSize = {
      height: 240,
      width: 240
    },
    containerSize = {
      height: 300,
      width: 300
    },
  } = options


  // mount 二维码
  const mountNode = mount
  let qrcodeNode = document.getElementById(mountNode);
  let qrcodeWrapper;
  let needGenerate = false;
  if (!qrcodeNode) {
    qrcodeNode = document.createElement('div');
    qrcodeNode.id = mountNode;
    qrcodeNode.style = `z-index: 65535;position: fixed;background: #fff;width: ${containerSize.width}px;height: ${containerSize.height}px;left: 50%;margin-left: -${containerSize.width / 2}px;display: flex;justify-content: center;align-items: center;top: 50%;margin-top: -${containerSize.height / 2}px;border: 1px solid #ccc;`;
    document.getElementsByTagName('body')[0].appendChild(qrcodeNode);
    needGenerate = true;
  } else {
    qrcodeNode.style = 'position:relative';
  }

  // 创建 <style>
  const styleNode = document.createElement('style'); const
    style = '#authing__retry a:hover{outline:0px;text-decoration:none;}#authing__spinner{position:absolute;left:50%;margin-left:-6px;}.spinner{margin:100px auto;width:20px;height:20px;position:relative}.container1>div,.container2>div,.container3>div{width:6px;height:6px;background-color:#00a1ea;border-radius:100%;position:absolute;-webkit-animation:bouncedelay 1.2s infinite ease-in-out;animation:bouncedelay 1.2s infinite ease-in-out;-webkit-animation-fill-mode:both;animation-fill-mode:both}.spinner .spinner-container{position:absolute;width:100%;height:100%}.container2{-webkit-transform:rotateZ(45deg);transform:rotateZ(45deg)}.container3{-webkit-transform:rotateZ(90deg);transform:rotateZ(90deg)}.circle1{top:0;left:0}.circle2{top:0;right:0}.circle3{right:0;bottom:0}.circle4{left:0;bottom:0}.container2 .circle1{-webkit-animation-delay:-1.1s;animation-delay:-1.1s}.container3 .circle1{-webkit-animation-delay:-1.0s;animation-delay:-1.0s}.container1 .circle2{-webkit-animation-delay:-0.9s;animation-delay:-0.9s}.container2 .circle2{-webkit-animation-delay:-0.8s;animation-delay:-0.8s}.container3 .circle2{-webkit-animation-delay:-0.7s;animation-delay:-0.7s}.container1 .circle3{-webkit-animation-delay:-0.6s;animation-delay:-0.6s}.container2 .circle3{-webkit-animation-delay:-0.5s;animation-delay:-0.5s}.container3 .circle3{-webkit-animation-delay:-0.4s;animation-delay:-0.4s}.container1 .circle4{-webkit-animation-delay:-0.3s;animation-delay:-0.3s}.container2 .circle4{-webkit-animation-delay:-0.2s;animation-delay:-0.2s}.container3 .circle4{-webkit-animation-delay:-0.1s;animation-delay:-0.1s}@-webkit-keyframes bouncedelay{0%,80%,100%{-webkit-transform:scale(0.0)}40%{-webkit-transform:scale(1.0)}}@keyframes bouncedelay{0%,80%,100%{transform:scale(0.0);-webkit-transform:scale(0.0)}40%{transform:scale(1.0);-webkit-transform:scale(1.0)}}';
  styleNode.type = 'text/css';
  if (styleNode.styleSheet) {
    styleNode.styleSheet.cssText = style;
  } else {
    styleNode.innerHTML = style;
  }
  document.getElementsByTagName('head')[0].appendChild(styleNode);


  // 一些显示事件
  const loading = () => {
    qrcodeNode.innerHTML = '<div id="authing__spinner" class="spinner"><div class="spinner-container container1"><div class="circle1"></div><div class="circle2"></div><div class="circle3"></div><div class="circle4"></div></div><div class="spinner-container container2"><div class="circle1"></div><div class="circle2"></div><div class="circle3"></div><div class="circle4"></div></div><div class="spinner-container container3"><div class="circle1"></div><div class="circle2"></div><div class="circle3"></div><div class="circle4"></div></div></div>';
  };

  const unloading = () => {
    const child = document.getElementById('authing__spinner');
    qrcodeNode.removeChild(child);
  };

  const genTip = (text) => {
    const tip = document.createElement('span');
    tip.class = 'authing__heading-subtitle';
    if (!needGenerate) {
      tip.style = 'display: block;font-weight: 400;font-size: 15px;color: #888;ine-height: 48px;';
    } else {
      tip.style = 'display: block;font-weight: 400;font-size: 12px;color: #888;';
    }
    tip.innerHTML = text;
    return tip;
  };

  const genImage = (src) => {
    const qrcodeImage = document.createElement('img');
    qrcodeImage.class = 'authing__qrcode';
    qrcodeImage.src = src;
    qrcodeImage.width = qrcodeSize.width;
    qrcodeImage.height = qrcodeSize.height;
    return qrcodeImage;
  };

  const genShadow = (text, aOnClick, shadowAId) => {

    let shadowId = 'authing__retry'

    if (document.getElementById(shadowId)) {
      document.getElementById(shadowId).remove()
    }

    const shadow = document.createElement('div');
    shadow.id = shadowId;
    shadow.style = `text-align:center;width: ${qrcodeSize.width}px;height: ${qrcodeSize.height}px;position: absolute;left: 50%;top: 0px;margin-left: -${qrcodeSize.width / 2}px;background-color: rgba(0,0,0, 0.5);line-height:${qrcodeSize.height}px;color:#fff;font-weight:600;`;

    const shadowA = document.createElement('a');
    shadowA.innerHTML = text;
    shadowA.style = 'color:#fff;border-bottom: 1px solid #fff;cursor: pointer;';
    shadowA.onclick = aOnClick;
    shadowA.id = shadowAId;
    shadow.appendChild(shadowA);
    return shadow;
  };

  const displayScannedUser = (nickname, photo) => {

    let shadowId = 'authing__retry'

    if (document.getElementById(shadowId)) {
      document.getElementById(shadowId).remove()
    }
    const shadow = document.createElement('div');
    shadow.style = `text-align:center;width: ${qrcodeSize.width}px;height: ${qrcodeSize.height}px;position: absolute;left: 50%;top: 0px;margin-left: -${qrcodeSize.width / 2}px;line-height:${qrcodeSize.height}px;color:#fff;font-weight:600;display: flex;
    align-items: center; /*垂直居中*/
    justify-content: center; /*水平居中*/`;
    shadow.id = shadowId;

    const img = document.createElement('img');
    img.id = 'authing__scanned-user';
    img.src = photo
    img.style = "width: 100px; height: 100px"
    shadow.appendChild(img);
    return shadow;
  };

  function genRetry(qrcodeElm, tipText, retryId) {
    const tip = genTip(tipText);

    qrcodeWrapper = document.createElement('div');
    qrcodeWrapper.id = 'authing__qrcode-wrapper';
    qrcodeWrapper.style = 'text-align: center;position: relative;';

    // TODO: 这里换一个二维码
    const qrcodeImage = genImage('https://usercontents.authing.cn/0ab3a1bf19c0d7106673e494d532f91a.png');

    if (!needGenerate) {
      qrcodeImage.style = 'margin-top: 12px;';
    } else {
      qrcodeImage.style = 'margin-top: 16px;';
    }

    qrcodeImage.onload = () => {
      unloading();
    };

    const shadow = genShadow(retryTips, () => {
      start();
    }, retryId || '__authing_retry_btn');

    qrcodeWrapper.appendChild(qrcodeImage);
    qrcodeWrapper.appendChild(shadow);
    qrcodeWrapper.appendChild(tip);
    qrcodeElm.appendChild(qrcodeWrapper);
  }


  let start = () => {
    loading();
    geneQRCode().then((res) => {
      if (res.code !== 200) {
        genRetry(qrcodeNode, res.message);
        if (onQRCodeLoadFaild) {
          onQRCodeLoadFaild(res);
        }
      } else {
        const { qrcodeId, qrcodeUrl } = res.data
        if (onQRCodeLoad) {
          onQRCodeLoad(qrcode);
        }

        if (qrcodeNode) {
          qrcodeWrapper = document.createElement('div');
          qrcodeWrapper.id = 'authing__qrcode-wrapper';
          qrcodeWrapper.style = 'text-align: center;position: relative;';

          const qrcodeImage = genImage(qrcodeUrl);
          qrcodeImage.onload = () => {
            unloading();
            if (onQRCodeShow) {
              onQRCodeShow({
                qrcodeId,
                qrcodeUrl
              });
            }

            // 需要对用户的 onSuccess, onScanned, onExpired, onCancel 进行加工从而在页面上展示相关提示
            let decoratedOnSuccess = function (data) {
              const shadow = genShadow(successTips, null, '__authing_success_tip');
              qrcodeWrapper.appendChild(shadow);
              if (onSuccess) {
                onSuccess(data)
              }
            }

            let decoratedOnScanned = function (userInfo) {
              const shadow = displayScannedUser(
                userInfo.nickname,
                userInfo.photo
              )
              qrcodeWrapper.appendChild(shadow);
              if (onScanned) {
                onScanned(userInfo)
              }
            }

            let decoratedOnCancel = function () {
              const shadow = genShadow(canceledTips, null, '__authing_success_tip');
              qrcodeWrapper.appendChild(shadow);
              if (onCancel) {
                onCancel()
              }
            }

            let decoratedOnExpired = function () {
              const shadow = genShadow(expiredTips, null, '__authing_success_tip');
              qrcodeWrapper.appendChild(shadow);
              if (onExpired) {
                onExpired()
              }
            }

            let decoratedOnError = function (data) {
              if (onError) {
                onError(data)
              }
            }

            // 开始轮询
            startPollingQRCodeStatus({
              qrcodeId,
              interval,
              onPollingStart,
              onResult,
              onScanned: decoratedOnScanned,
              onExpired: decoratedOnExpired,
              onSuccess: decoratedOnSuccess,
              onCancel: decoratedOnCancel,
              onError: decoratedOnError
            })
          };

          const tip = genTip(tips);
          qrcodeWrapper.appendChild(qrcodeImage);
          qrcodeWrapper.appendChild(tip);
          qrcodeNode.appendChild(qrcodeWrapper);
        }
      }
    }).catch((error) => {
      genRetry(qrcodeNode, failedTips);
      if (onQRCodeLoadFaild) {
        onQRCodeLoadFaild(error);
      }
    });
  };

  start();
}
有几点说明一下:
- 调用
startPollingQRCodeStatus的时候,注册的onScanned回调函数用的是decoratedOnScanned
startPollingQRCodeStatus({
  qrcodeId,
  interval,
  onPollingStart,
  onResult,
  onScanned: decoratedOnScanned,
  onExpired: decoratedOnExpired,
  onSuccess: decoratedOnSuccess,
  onCancel: decoratedOnCancel,
  onError: decoratedOnError
})
decoratedOnScanned 函数的作用是:先在扫码登录组件中展示用户头像,然后再回调用户注册的 onScanned。这样就即实现了 UI 展示,又没有影响正常的回调业务逻辑。
let decoratedOnScanned = function (userInfo) {
  const shadow = displayScannedUser(
    userInfo.nickname,
    userInfo.photo
  )
  qrcodeWrapper.appendChild(shadow);
  if (onScanned) {
    onScanned(userInfo)
  }
}
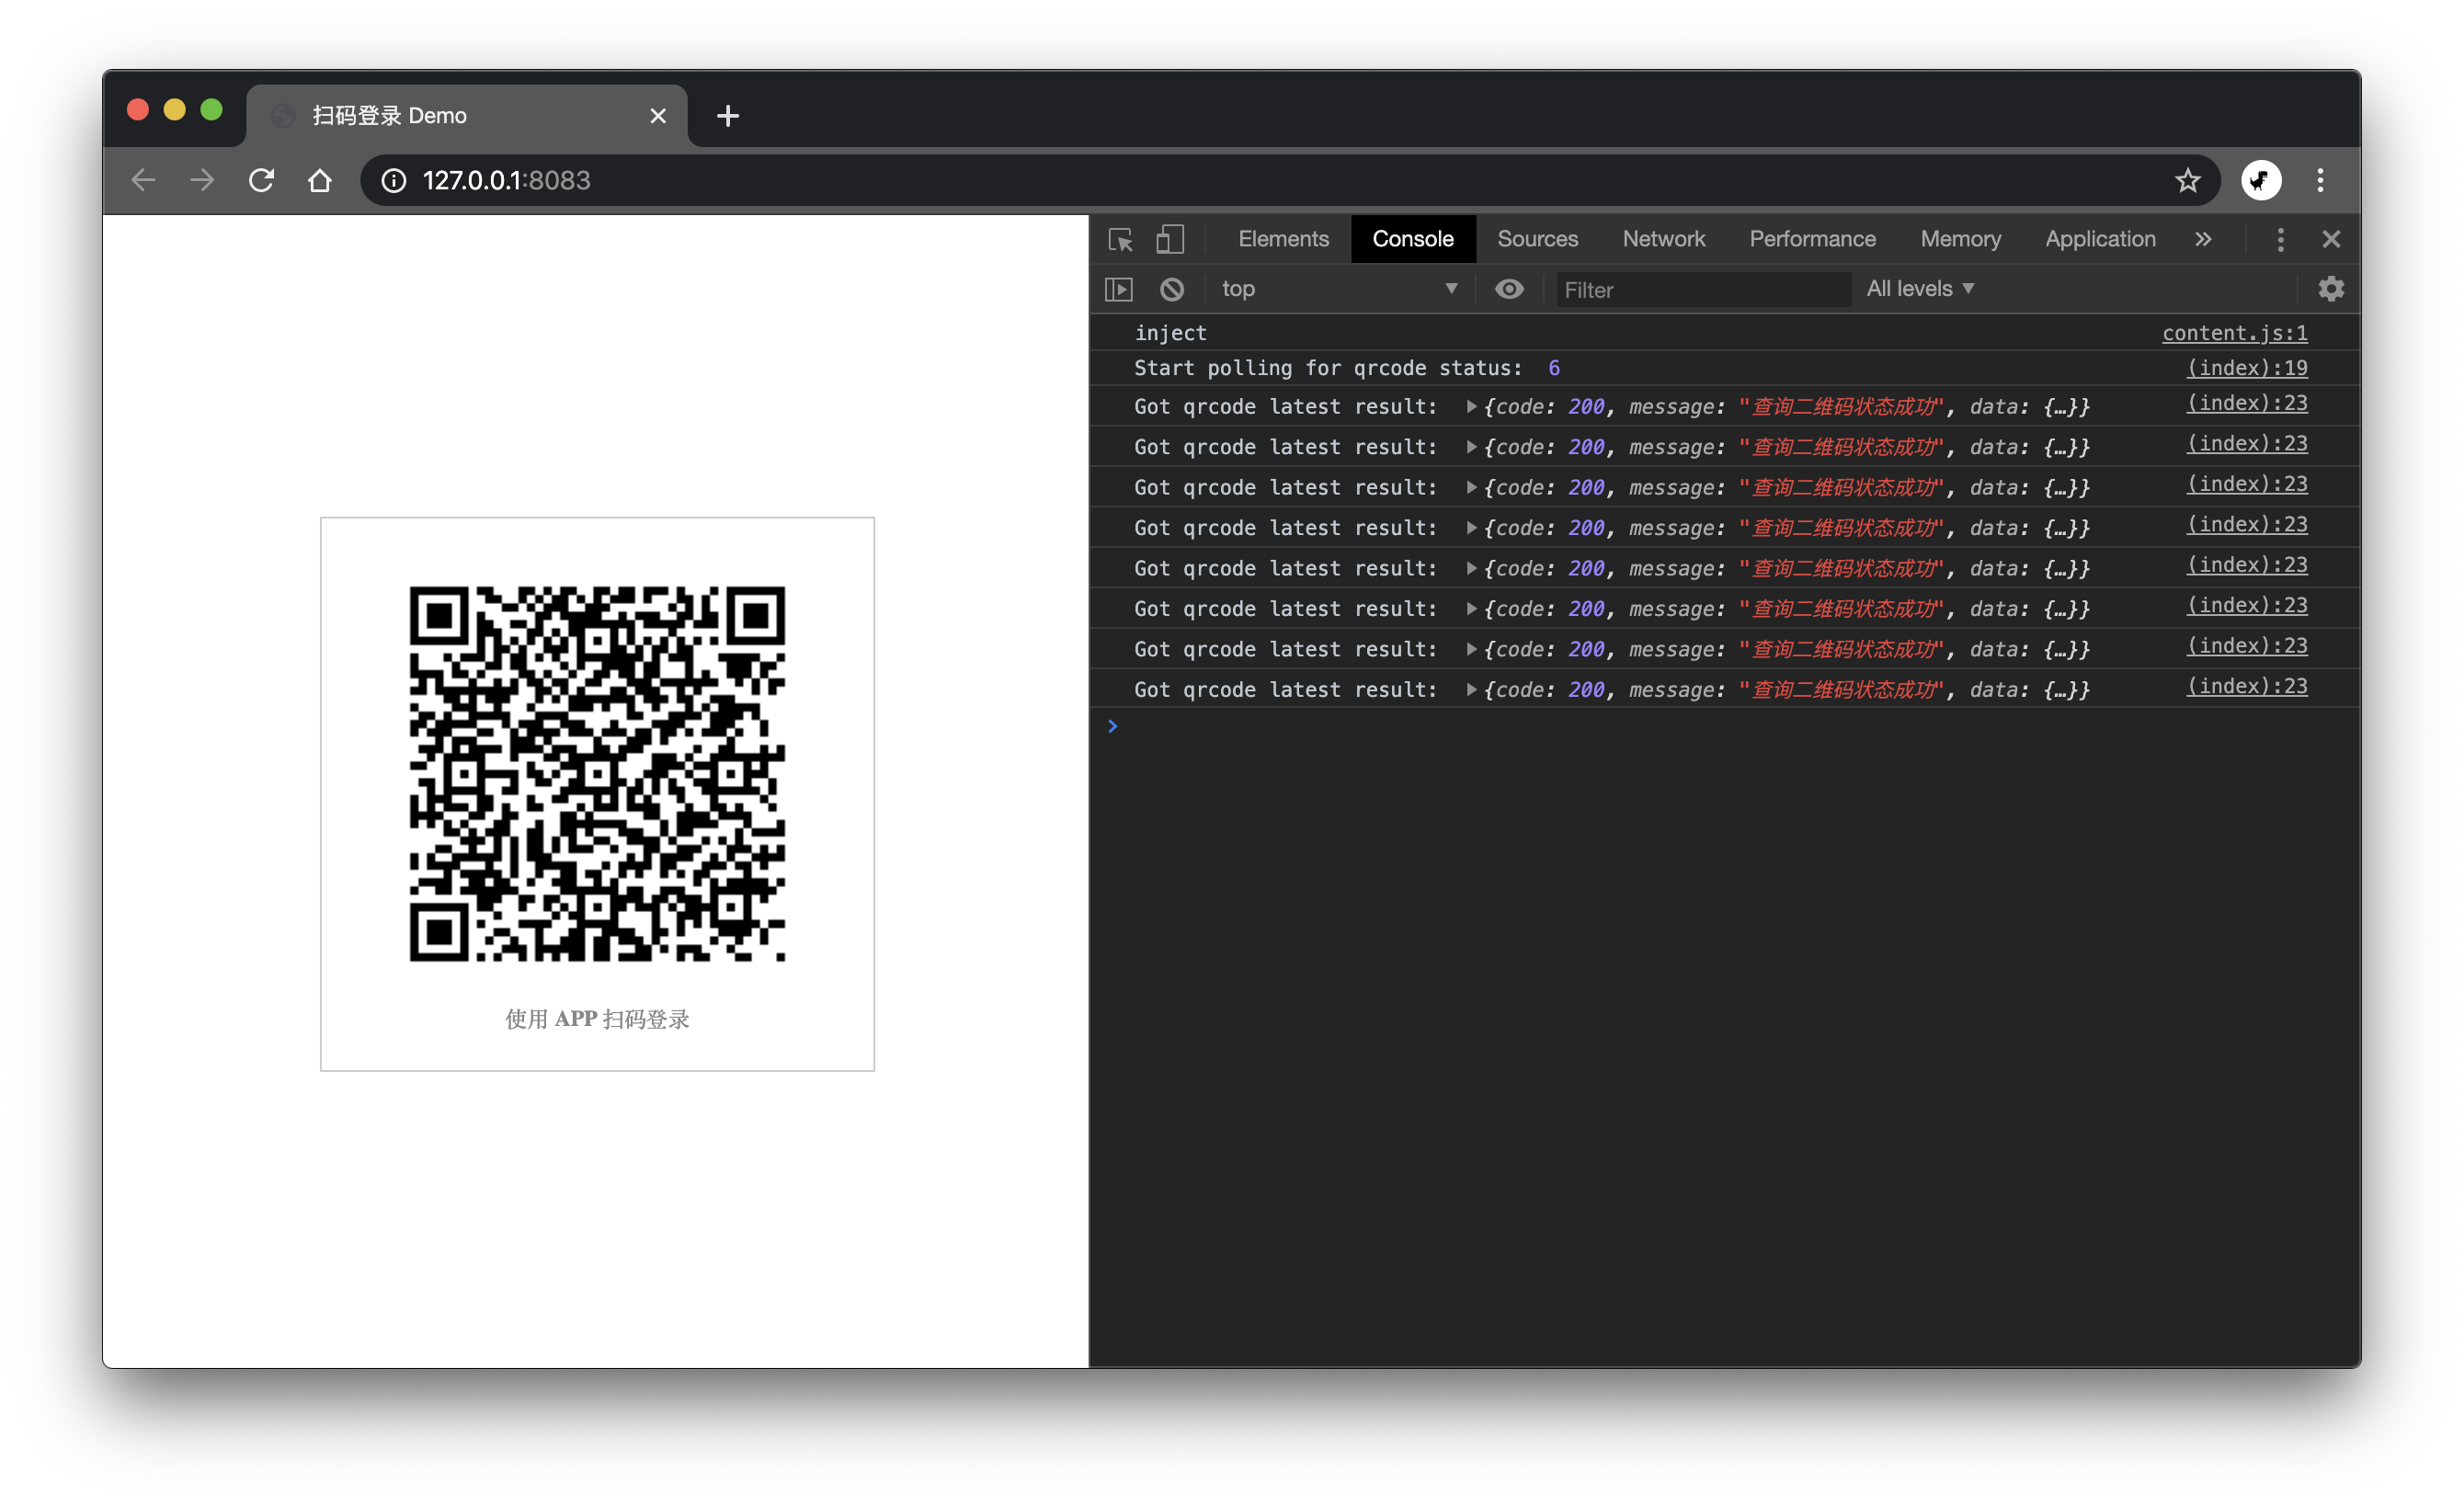
现在我们所有的函数就封装好了,创建一个 html 文件看下效果:
<!DOCTYPE html>
<html lang="en">

<head>
  <meta charset="UTF-8">
  <meta name="viewport" content="width=device-width, initial-scale=1.0">
  <meta http-equiv="X-UA-Compatible" content="ie=edge">
  <title>扫码登录 Demo</title>
</head>

<body>

</body>
<script src="https://unpkg.com/axios/dist/axios.min.js"></script>
<script src="./sdk/index.js"></script>
<script>
  startAppAuthScanning({
    onPollingStart: function (intervalNum) {
      console.log("Start polling for qrcode status: ", intervalNum)
      // clearInterval(intervalNum)
    },
    onResult: function (res) {
      console.log("Got qrcode latest result: ", res)
    },
    onScanned: function (userInfo) {
      console.log("User scanned qrcode: ", userInfo)
    },
    onSuccess: function (userInfo) {
      console.log(userInfo)
    },
    onCancel: function () {
      console.log("User canceled authorization")
    },
    onExpired: function () {
      console.log("QRCode has expired.")
    },
    onError: function (data) {
      console.log("Chcek qrcode status failed: ", data)
    }
  })
</script>

</html>
本文的所有代码都在这里了:github.com/liaochangji…
