

目标
- koa 项目 API 接口能自动生成 API 文档
- 简单, 不需要过多配置
结束
主要用到两个库
- 用 koa2-swagger-ui 可以把 json 文件的 api 数据渲染成 swagger ui。
npm i koa2-swagger-ui -D
app.js
const Koa = require('koa')
const swagger = require('koa2-swagger-ui')
const koa = new Koa()

app.use(
  koaSwagger({
    routePrefix: '/swagger', // host at /swagger instead of default /docs
    swaggerOptions: {
      url: 'http://petstore.swagger.io/v2/swagger.json', // example path to json
    },
  }),
);

app.listen(3000)
- 另外一个库
koa2-swagger-ui 库需要提供 api json 文件。swagger-jsdoc 库可以将注释生成这样的 json 文件。 还没开始就已经结束了。就是这么简单。
安装 swagger-jsdoc
npm i swagger-jsdoc -D
swagger.conf.js
const swaggerJSDoc = require('swagger-jsdoc')
const swaggerDefinition = {
info: {
// API informations (required)
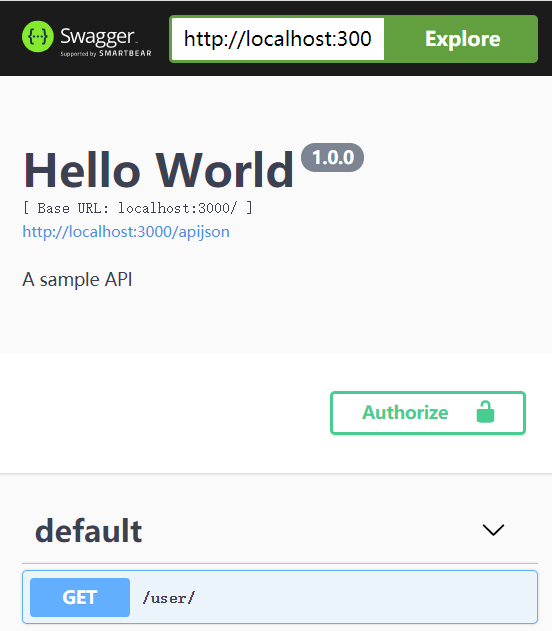
title: 'Hello World', // Title (required)
version: '1.0.0', // Version (required)
description: 'A sample API', // Description (optional)
},
host: `localhost:3000`, // Host (optional)
basePath: '/', // Base path (optional)
};
const options = {
swaggerDefinition,
apis: ['./routes/*.js'], // all api
};
const swaggerSpec = swaggerJSDoc(options); // swaggerSpec 就是生成的api json
需要注意的是, swagger-docs 是通过 apis 下文件中的注释 生成 json 的。所以我们需要这样写注释:
routes/user.js
/**
 * @swagger
 *
 * /user/:
 *   get:
 *     description: get all users
 *     produces:
 *       - application/json
 *     responses:
 *       200:
 *         description: get all users
 */
也可以有参数, 详细写法就看看官网事例吧。swagger 注释
 /*     parameters:
 *       - name: username
 *         description: Username to use for login.
 *         in: formData
 *         required: true
 *         type: string
 *       - name: password
 *         description: User's password.
 *         in: formData
 *         required: true
 *         type: string
 */
为了不单独维护这个文件, 新建一个路由
app.js
route.get('/apijson', async (ctx) => {
    ctx.body = swaggerSpec
})
相应的把 koa2-swagger-ui 中 swaggerOptions.url 改成 http://localhost:3000/apijson
直接访问 http://localhost:3000/swagger 就可以看到界面了
传送门
各个模块简单拆分一下,完整代码在 github 上
