

无需双系统,无需虚拟机,即可体验windows原生支持的linux子系统:
准备工作
Windows 10
- 需要保证 Windows 10 至少为 Windows 10 Fall Creators Update 及之后的版本。
- 安装之前必须保证为 Windows 10 开启了「Windows Subsystem for Linux」的可选功能。
- Windows 用户名不能有空格。(有空格会对 WSL 环境造成影响。)
- Windows 用户名不能为中文。(两个系统下的编码格式不一样,会对 VSCode 的调试功能造成影响。)
WSL 的介绍与使用
由少数派作者 @化学心情下2 介绍的有关具体的 WSL 安装使用参考阅读:不用装双系统,直接在 Windows 上体验 Linux:Windows Subsystem for Linux
WSL 的下载与安装
直接从微软商店下载。
终端配置
准备
为了加速 Ubuntu 18.04 软件包在中国大陆的下载速度,我们将包管理工具 apt 源更换至中科大镜像源:
注意
替换内容前记得备份文件:
sudo cp /etc/apt/sources.list /etc/apt/sources.list.bac
将 /etc/apt/sources.list 文件内容前面添加如下内容:
deb https://mirrors.ustc.edu.cn/ubuntu/ bionic main restricted universe multiverse
deb-src https://mirrors.ustc.edu.cn/ubuntu/ bionic main restricted universe multiverse

deb https://mirrors.ustc.edu.cn/ubuntu/ bionic-security main restricted universe multiverse
deb-src https://mirrors.ustc.edu.cn/ubuntu/ bionic-security main restricted universe multiverse

deb https://mirrors.ustc.edu.cn/ubuntu/ bionic-updates main restricted universe multiverse
deb-src https://mirrors.ustc.edu.cn/ubuntu/ bionic-updates main restricted universe multiverse

deb https://mirrors.ustc.edu.cn/ubuntu/ bionic-backports main restricted universe multiverse
deb-src https://mirrors.ustc.edu.cn/ubuntu/ bionic-backports main restricted universe multiverse

## Not recommended
# deb https://mirrors.ustc.edu.cn/ubuntu/ bionic-proposed main restricted universe multiverse
# deb-src https://mirrors.ustc.edu.cn/ubuntu/ bionic-proposed main restricted universe multiverse
然后更新缓存:sudo apt update && sudo apt upgrade
更多详细内容请见:LUG@USTC | Ubuntu 镜像使用帮助
Windows terminal
(打开~\Documents\WindowsPowerShell,新建文本文档,叫做Microsoft.PowerShell_profile.ps1(记得开拓展名显示),输入以下内容,保存。
Import-Module posh-git
Import-Module oh-my-posh
Set-Theme Powerlevel10k-Lean
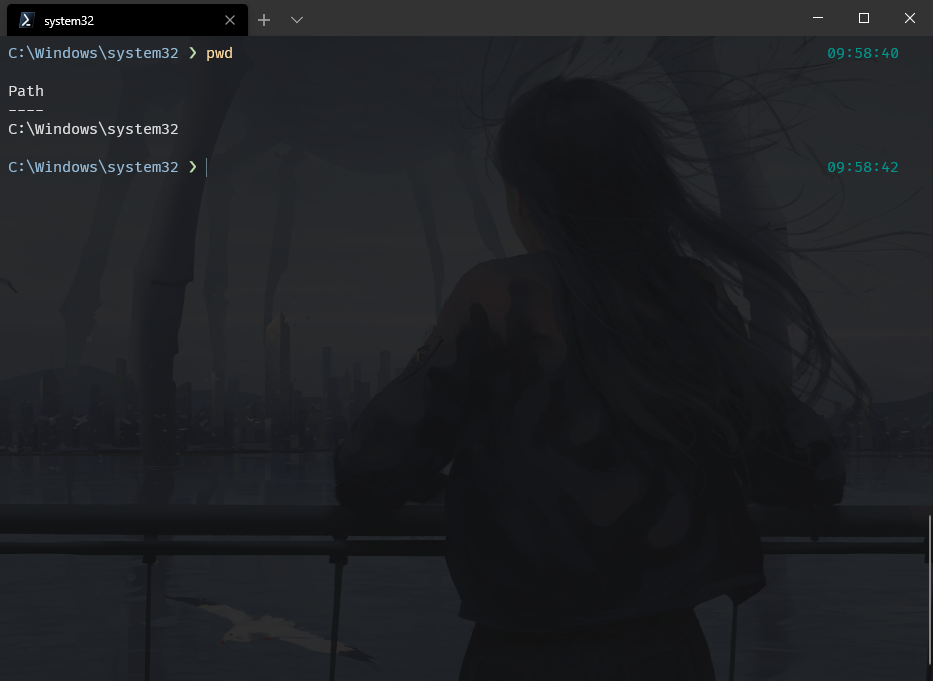
我使用的是OneHalfDark配色+FiraCode-NF字体
配置如下
// To view the default settings, hold "alt" while clicking on the "Settings" button.
// For documentation on these settings, see: https://aka.ms/terminal-documentation

{
    "$schema": "https://aka.ms/terminal-profiles-schema",
    "initialRows": 35,
    "initialCols": 100,
    "defaultProfile": "{574e775e-4f2a-5b96-ac1e-a2962a402336}",
    "requestedTheme": "dark",
    "profiles":
    [
    	{
            "guid": "{574e775e-4f2a-5b96-ac1e-a2962a402336}",
            "hidden": false,
            "name": "PowerShell Core",
            "source": "Windows.Terminal.PowershellCore",
            "acrylicOpacity" : 0.8,
            "closeOnExit" : true,
            "startingDirectory" : null,
            "colorScheme" : "Jellybeans",
            "cursorColor" : "#657B83",
            "cursorShape" : "bar",
            "fontFace" : "FiraCode NF",
            "fontSize" : 11,
            "historySize" : 9001,
            "icon" : "C:\\Users\\xxxxx\\AppData\\Local\\Packages\\Microsoft.WindowsTerminal_8wekyb3d8bbwe\\LocalState\\powershell_32px.ico",
            // "padding" : "0, 0, 0, 0",
            "snapOnInput" : true,
            "useAcrylic" : false,
            "backgroundImage" : "C:\\Program Files\\test.jpg",
            "backgroundImageOpacity" : 0.15
        },
        {
            "guid": "{c6eaf9f4-32a7-5fdc-b5cf-066e8a4b1e40}",
            "hidden": false,
            "name": "Ubuntu-18.04",
            "source": "Windows.Terminal.Wsl",
            "startingDirectory" : null,
            "acrylicOpacity" : 0.8,
            "closeOnExit" : true,
            "colorScheme" : "Jellybeans",
            "cursorColor" : "#657B83",
            "cursorShape" : "bar",
            "fontFace" : "FiraCode NF",
            "fontSize" : 11,
            "historySize" : 9001,
            // "padding" : "0, 0, 0, 0",
            "snapOnInput" : true,
            "useAcrylic" : false,
            "backgroundImage" : "C:\\Program Files\\test.jpg",
            "backgroundImageOpacity" : 0.15
        },
        {
		    "acrylicOpacity" : 0.8,
		    "closeOnExit" : true,
		    "colorScheme" : "OneHalfDark",
		    "commandline" : "powershell.exe",
		    "cursorColor" : "#657B83",
		    "cursorShape" : "bar",
		    "fontFace" : "FiraCode NF",
		    "fontSize" : 12,
		    "guid" : "{08b5e85b-3615-463d-8df1-70bc4703843f}",
		    "historySize" : 9001,
		    "icon" : "C:\\Users\\xxxxx\\AppData\\Local\\Packages\\Microsoft.WindowsTerminal_8wekyb3d8bbwe\\LocalState\\powershell_32px.ico",
		    "name" : "PowerShell",
		    "padding" : "0, 0, 0, 0",
		    "snapOnInput" : true,
		    "useAcrylic" : false,
		    "backgroundImage" : "C:\\Program Files\\test.jpg",
		    "backgroundImageOpacity" : 0.1
		},
        {
            // Make changes here to the cmd.exe profile
            "guid": "{0caa0dad-35be-5f56-a8ff-afceeeaa6101}",
            "name": "cmd",
            "commandline": "cmd.exe",
            "hidden": false
        },
        {
            "guid": "{b453ae62-4e3d-5e58-b989-0a998ec441b8}",
            "hidden": false,
            "name": "Azure Cloud Shell",
            "source": "Windows.Terminal.Azure"
        }
    ],

    // Add custom color schemes to this array
    "schemes": [
    	{
		  "name": "3024 Day",
		  "black": "#090300",
		  "red": "#db2d20",
		  "green": "#01a252",
		  "yellow": "#fded02",
		  "blue": "#01a0e4",
		  "purple": "#a16a94",
		  "cyan": "#b5e4f4",
		  "white": "#a5a2a2",
		  "brightBlack": "#5c5855",
		  "brightRed": "#e8bbd0",
		  "brightGreen": "#3a3432",
		  "brightYellow": "#4a4543",
		  "brightBlue": "#807d7c",
		  "brightPurple": "#d6d5d4",
		  "brightCyan": "#cdab53",
		  "brightWhite": "#f7f7f7",
		  "background": "#f7f7f7",
		  "foreground": "#4a4543"
		},
		{
		  "name": "Jellybeans",
		  "black": "#929292",
		  "red": "#e27373",
		  "green": "#94b979",
		  "yellow": "#ffba7b",
		  "blue": "#97bedc",
		  "purple": "#e1c0fa",
		  "cyan": "#00988e",
		  "white": "#dedede",
		  "brightBlack": "#bdbdbd",
		  "brightRed": "#ffa1a1",
		  "brightGreen": "#bddeab",
		  "brightYellow": "#ffdca0",
		  "brightBlue": "#b1d8f6",
		  "brightPurple": "#fbdaff",
		  "brightCyan": "#1ab2a8",
		  "brightWhite": "#ffffff",
		  "background": "#121212",
		  "foreground": "#dedede"
		},
		{
		  "name": "OneHalfDark",
		  "black": "#282c34",
		  "red": "#e06c75",
		  "green": "#98c379",
		  "yellow": "#e5c07b",
		  "blue": "#61afef",
		  "purple": "#c678dd",
		  "cyan": "#56b6c2",
		  "white": "#dcdfe4",
		  "brightBlack": "#282c34",
		  "brightRed": "#e06c75",
		  "brightGreen": "#98c379",
		  "brightYellow": "#e5c07b",
		  "brightBlue": "#61afef",
		  "brightPurple": "#c678dd",
		  "brightCyan": "#56b6c2",
		  "brightWhite": "#dcdfe4",
		  "background": "#282c34",
		  "foreground": "#dcdfe4"
		}
    ],

    // Add any keybinding overrides to this array.
    // To unbind a default keybinding, set the command to "unbound"
    "keybindings": []
}
wsl工具
git梯子
~/.zshrc
alias proxy="git config --global http.proxy http://127.0.0.1:1080"
alias unproxy="git config --global --unset http.proxy"
- SSR->选项设置->允许来自局域网的连接:1080端口
ssh
-
下面配置与 GitHub 连接的 SSH 密钥:[1]
- 在 WSL 下生成 SSH 公钥 — 私钥对(将邮箱替换为你的邮箱),此时生成的 SSH 密钥默认位于
~/.ssh路径下,公钥为id_rsa.pub,私钥为id_rsa:
ssh-keygen -t rsa -b 4096 -C "your_email@example.com"- 打开 ssh-agent 使之在后台运行:
eval "$(ssh-agent -s)"- 将私钥添加到 ssh-agent 之中:
ssh-add ~/.ssh/id_rsa- 查看公钥并将之复制到剪贴板:
# 查看公钥内容 cat ~/.ssh/id_rsa.pub # 将公钥复制到剪贴板 cat ~/.ssh/id_rsa.pub | clip.exe- 将复制好的公钥添加到 GitHub 账户密钥里面[2]
- 在 WSL 下生成 SSH 公钥 — 私钥对(将邮箱替换为你的邮箱),此时生成的 SSH 密钥默认位于
-
ssh连接云服务器配置
~/.ssh/config
Host leo
HostName xxx.xxx.xx.xx
User root
IdentitiesOnly yes
之后ssh leo即可完成登陆
wsl-open
wsl-open 是类似于 macOS 里面 open 命令的程序。它能够在 WSL 中用 Windows 文件资源管理器打开文件夹,用 Windows 默认照片打开图片等等,方便开发。
sudo npm install -g wsl-open
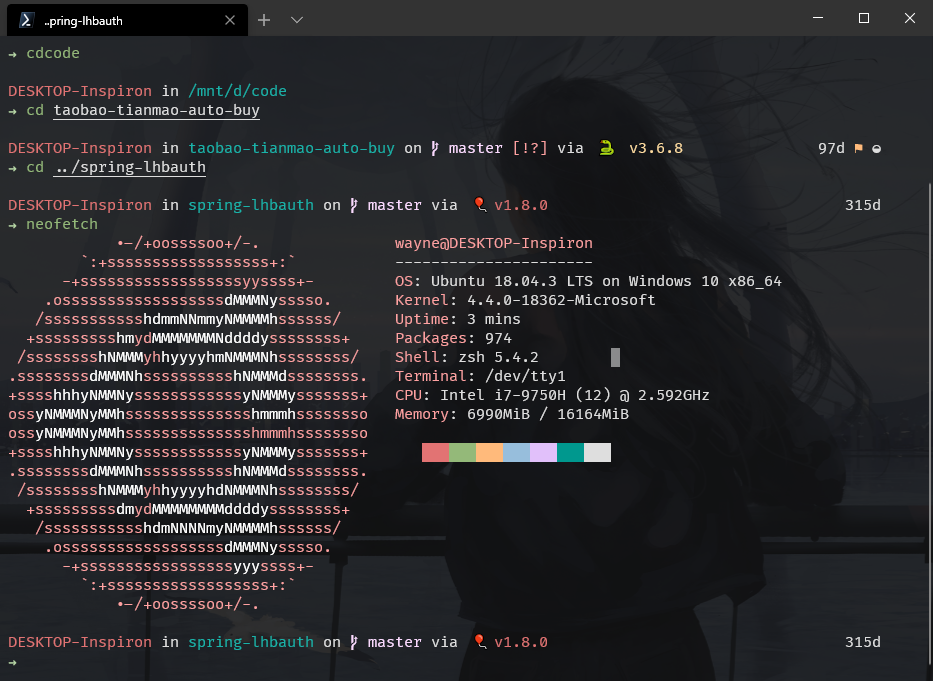
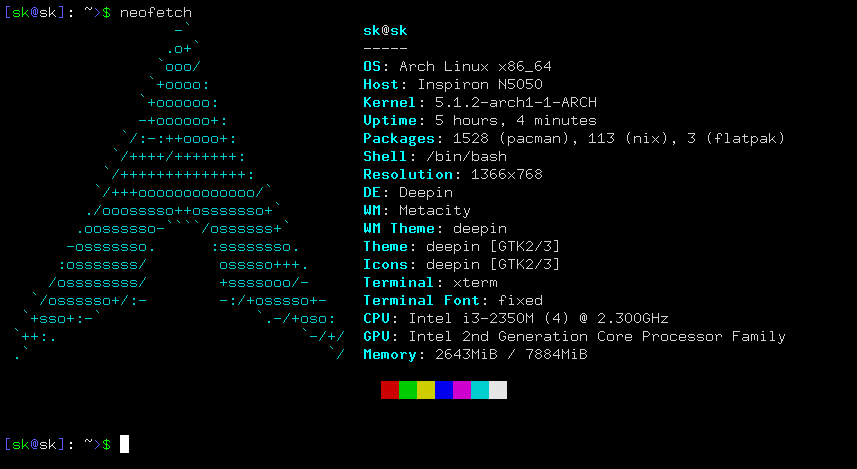
neofetch
炫酷小工具
字体
使用FiraCode-NF
ZSH
安装、配置
安装 zsh 并将之设置为默认 Shell:
- 利用 apt 安装
zsh
sudo apt install zsh
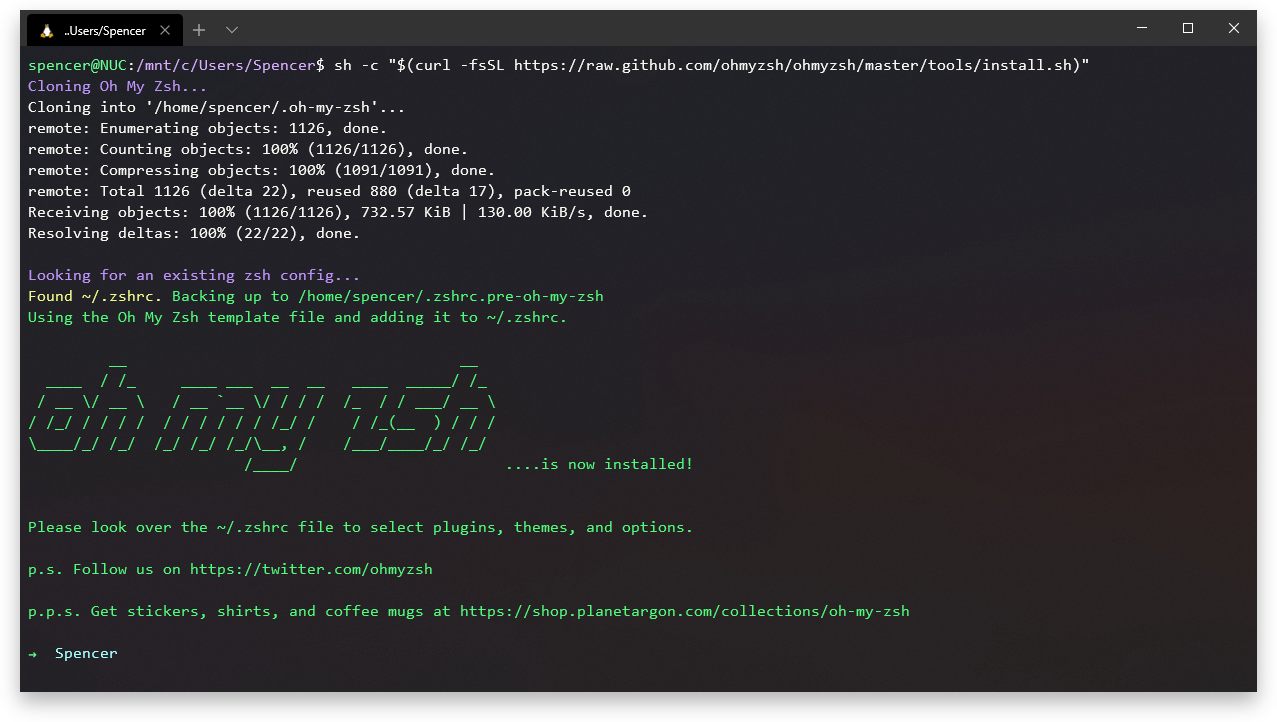
下载安装 oh-my-zsh,可能是市面上最好的 zsh 配置管理工具:
- 运行命令下载安装
sh -c "$(curl -fsSL https://raw.github.com/ohmyzsh/ohmyzsh/master/tools/install.sh)"
- 将
zsh作为默认的 Shell 环境(如果刚刚安装脚本没有这样做的话):
chsh -s $(which zsh)
配置 zsh
下载安装 zsh 代替自动补全功能欠缺的 bash:
- 利用 Ubuntu 的包管理器安装
zsh:sudo apt install zsh - 使用
zsh作为默认的 Shell 环境:
sudo chsh -s $(which zsh)
下载oh-my-zsh
下载安装 oh-my-zsh,一个好用的 zsh 配置管理工具:
- 运行命令下载安装:
sh -c "$(curl -fsSL https://raw.githubusercontent.com/robbyrussell/oh-my-zsh/master/tools/install.sh)"
zsh插件推荐
-
zsh-autosuggestions : 为
zsh提供基于输入历史的自动命令提示-
Clone this repository into
$ZSH_CUSTOM/plugins(by default~/.oh-my-zsh/custom/plugins)git clone https://github.com/zsh-users/zsh-autosuggestions ${ZSH_CUSTOM:-~/.oh-my-zsh/custom}/plugins/zsh-autosuggestions -
Add the plugin to the list of plugins for Oh My Zsh to load (inside
~/.zshrc):plugins=(zsh-autosuggestions) -
Start a new terminal session.
-
配色修改:
- 修改文件: .oh-my-zsh/custom/plugins/zsh-autosuggestions/zsh-autosuggestions.zsh
- 修改颜色: ZSH_AUTOSUGGEST_HIGHLIGHT_STYLE='fg=cyan'
-
-
zsh-syntax-highlighting
-
Clone this repository in oh-my-zsh's plugins directory:
git clone https://github.com/zsh-users/zsh-syntax-highlighting.git ${ZSH_CUSTOM:-~/.oh-my-zsh/custom}/plugins/zsh-syntax-highlighting -
Activate the plugin in
~/.zshrc:plugins=( [plugins...] zsh-syntax-highlighting) -
Restart zsh (such as by opening a new instance of your terminal emulator).
-
zsh主题配置
安装 starship 二进制文件:
1.下载预构建的二进制文件,使用 Shell 命令:
curl -fsSL https://starship.rs/install.sh | bash
2.将初始化脚本添加到您的 shell 的配置文件:
在 ~/.zshrc 的最后,添加以下内容:
# ~/.zshrc

eval "$(starship init zsh)"
zsh环境配置
~/.zshrc
# ~/.zshrc

#Add wisely, as too many plugins slow down shell startup.
ZSH_THEME="avit"

export ZSH="/home/wayne/.oh-my-zsh"
plugins=(git zsh-autosuggestions)
#
source $ZSH/oh-my-zsh.sh
#
# # User configuration
#
# # export MANPATH="/usr/local/man:$MANPATH"
#
# # You may need to manually set your language environment
# # export LANG=en_US.UTF-8
#
# # Preferred editor for local and remote sessions
# # if [[ -n $SSH_CONNECTION ]]; then
# #   export EDITOR='vim'
# # else
# #   export EDITOR='mvim'
# # fi
#
# # Compilation flags
# # export ARCHFLAGS="-arch x86_64"
#
# # Set personal aliases, overriding those provided by oh-my-zsh libs,
# # plugins, and themes. Aliases can be placed here, though oh-my-zsh
# # users are encouraged to define aliases within the ZSH_CUSTOM folder.
# # For a full list of active aliases, run `alias`.
# #
# # Example aliases
alias pip="pip3"
alias cdc="cd /mnt/c"
alias cdd="cd /mnt/d"
alias cde="cd /mnt/e"
alias untar="tar -xzvf"
alias proxy="git config --global http.proxy http://127.0.0.1:1080"
alias unproxy="git config --global --unset http.proxy"
alias devstart="sudo service redis-server start;sudo service mysql start"
alias devstop="sudo service redis-server stop;sudo service mysql stop"
alias cdcode="cd /mnt/d;cd code"
#
# # alias zshconfig="mate ~/.zshrc"
# # alias ohmyzsh="mate ~/.oh-my-zsh"
#
# # Change ls colours
LS_COLORS="ow=01;36;40" && export LS_COLORS
# # # make cd use the ls colours
zstyle ':completion:*' list-colors "${(@s.:.)LS_COLORS}"
autoload -Uz compinit
compinit
export TERM=xterm-256color
source /home/wayne/zsh-syntax-highlighting/zsh-syntax-highlighting.zsh
eval "$(starship init zsh)"
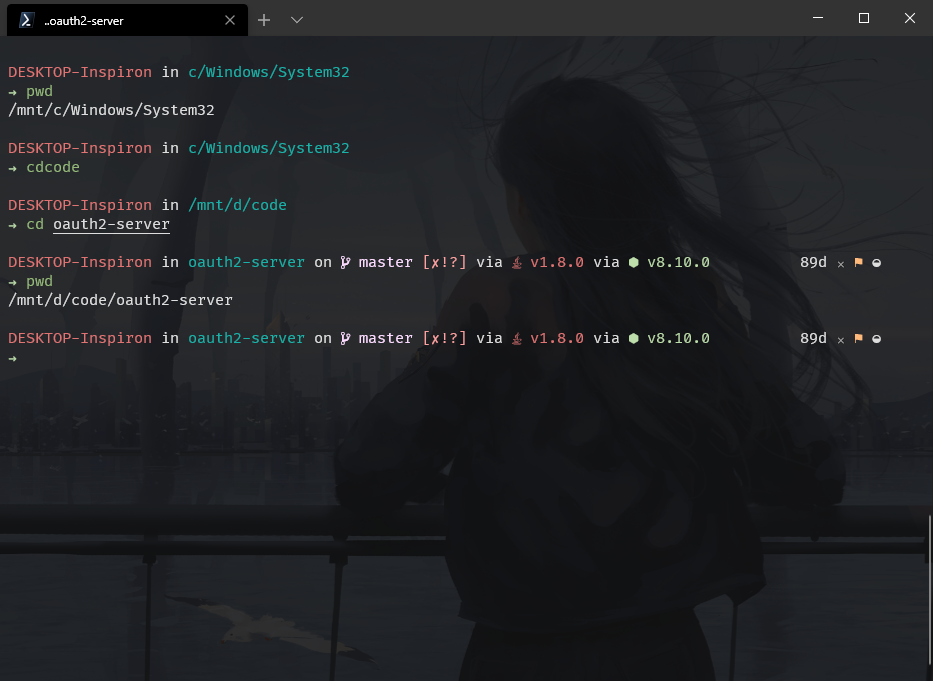
starship环境配置
我的这套配置使用的是nerd字体,当然你也可以使用默认的emoji标志
~/.config/starship.toml
# ~/.config/starship.toml
add_newline = true
[hostname]
ssh_only = false
style = "red"
[character]
symbol = "➜"
error_symbol = "✗"
use_symbol_for_status = true
[aws]
symbol = " "
[battery]
full_symbol = ""
charging_symbol = ""
discharging_symbol = ""
[conda]
symbol = " "
[git_branch]
symbol = " "
[golang]
symbol = " "
[hg_branch]
symbol = " "
[java]
symbol = " "
[memory_usage]
symbol = " "
[nodejs]
symbol = " "
[package]
symbol = " "
[php]
symbol = " "
[python]
symbol = " "
[ruby]
symbol = " "
[rust]
symbol = " "
解决字符渲染问题
由于 Windows 下的终端们,除了微软自己开发的 Windows Terminal 外,都尚未很好的支持全角(Double width)的 Unicode 字体渲染,因此 oh-my-zsh 默认主题 robbyrussell 在某些终端(比如 Hyper)下会出现光标位置不正确的问题(见 Issue #5)。目前有这样的几种解决方法:
#使用 Windows Terminal
最方便、理智、没有妥协的方法:使用 Windows Terminal。🤣

最新的 Windows Terminal 在底层修改了字符的渲染方式,采取最新的渲染引擎,拥有最好的性能和最美的 UI,能够支持几乎全部字符的渲染(甚至包括 Emoji),我认为没有不选择直接使用 Windows Terminal 的理由。
如果你一定要使用非 Windows Terminal 的终端来进入 WSL 的话,下面两个方法可能可以解决你的问题。
#修改终端显示内容
对 oh-my-zsh 默认主题文件 robbyrussell 来说:
- 在
~/.oh-my-zsh/themes目录下打开 oh-my-zsh 默认主题文件:robbyrussell.zsh-theme,将其中的全角 Unicode 字符「➜」更改为其他字符(比如「>」或者「→」) - 加载设置:
source ~/.zshrc
需要注意的是,很多 oh-my-zsh 主题(包括 更加酷炫的 Powerlevel9k 主题包)都用到了上文提到的 Powerline Fonts 和 Nerd Fonts,而这些字形在 Windows 任何终端下都没有很好的支持,因此目前一个很好的解决方法是:
- 将酷炫的命令前部分放在一行单独显示
- 将需要输入的带有光标的命令部分放在第二行显示
比如:如果你使用了 Powerlevel9k 主题包,可以考虑将下面的内容加入 .zshrc 来实现命令单独在第二行的显示:
# 让命令主体单独在第二行显示
POWERLEVEL9K_PROMPT_ON_NEWLINE=true
# 让右侧命令不显示(右侧命令同样无法正常在 Windows 下渲染)
POWERLEVEL9K_DISABLE_RPROMPT=true
# 上文截图中的两行命令前部字符的配置
POWERLEVEL9K_MULTILINE_FIRST_PROMPT_PREFIX="╭"
POWERLEVEL9K_MULTILINE_LAST_PROMPT_PREFIX="╰\u276F\u276F\u276F "
解决 ls 命令背景色问题
🔋 贡献
感谢 @printempw 提供的从根源解决这个问题的方式。由于 DrvFs 文件权限问题导致出现有问题的背景色根本原因在于这里:DrvFs 文件权限问题。
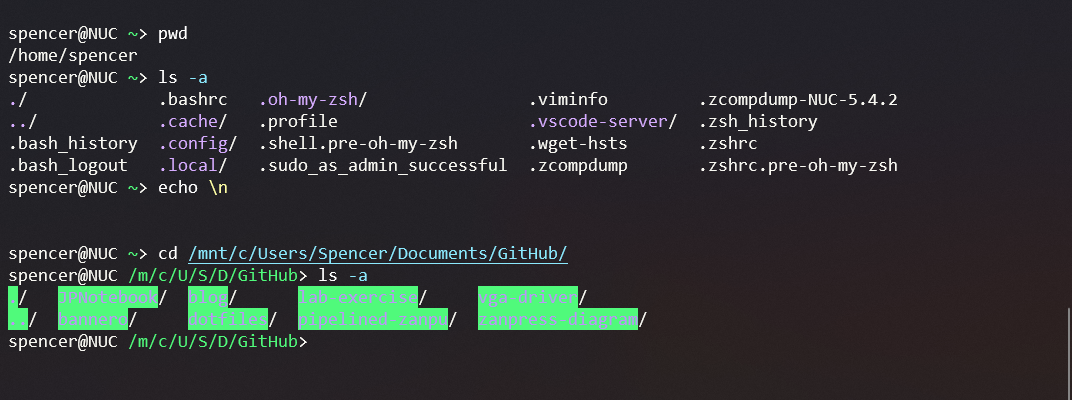
可以发现,上面我们在 Linux 自己的文件系统中时,ls 命令的输出没什么问题,但是当我们在 WSL 中进入 Windows 文件系统中时,ls 命令输出则变成了白底绿色背景。简单来说,这是由于 DrvFs 文件系统的权限问题,导致 Windows 原有 NTFS 文件系统中的文件到 WSL 下权限全部变成 0777。这样在 WSL 中执行 ls 和 cd 命令之后,显示出来的结果背景色就会出现「问题」。(不过,事实上这是有意而为之的。)
#如果不想对文件系统的权限进行修改
- 可以在
.zshrc最尾部添加如下代码
# Change ls colours
LS_COLORS="ow=01;36;40" && export LS_COLORS

# make cd use the ls colours
zstyle ':completion:*' list-colors "${(@s.:.)LS_COLORS}"
autoload -Uz compinit
compinit
- 加载设置:
source ~/.zshrc
#如果希望从根本上解决 DrvFs 文件系统的权限问题
以下内容来自 @printempw 提供的这篇文章 > DrvFs 文件权限问题。
- 在 WSL 中创建
/etc/wsl.conf,在其中填写如下内容:
[automount]
enabled = true
root = /mnt/
options = "metadata,umask=22,fmask=111"
mountFsTab = true
- 重启终端,所有的盘符就会使用上面的配置自动挂载(可以使用
mount -l查看)
另外,如果你想要给不同的盘符设定不同的挂载参数(上面的方法对所有盘符都有效,如果你想在 WSL 中运行 Windows 下的应用程序,就得每次都 chmod +x 一下,所以我一般都会把 C: 排除掉),就需要手动修改 /etc/fstab。首先确保 wsl.conf 中的 mountFsTab 为 true,然后编辑 /etc/fstab,添加如下内容:
# 不在此列表中的盘符会使用 wsl.conf 中的参数挂载
# 格式可以自己去查 fstab 的帮助文档
E: /mnt/e drvfs rw,relatime,uid=1000,gid=1000,metadata,umask=22,fmask=111 0 0
效果
WSL 的GUI
虽然上面的方案有时候能够解决问题,但是最为深度整合的方案是:在 WSL 侧的 Linux 环境下安装 VSCode 并从 Linux 侧打开,这样就一定能保证 VSCode 使用的工具链全部是 WSL 侧工具链了。
方案:安装一个 XServer 来让 Linux 侧 GUI 程序有窗口显示。
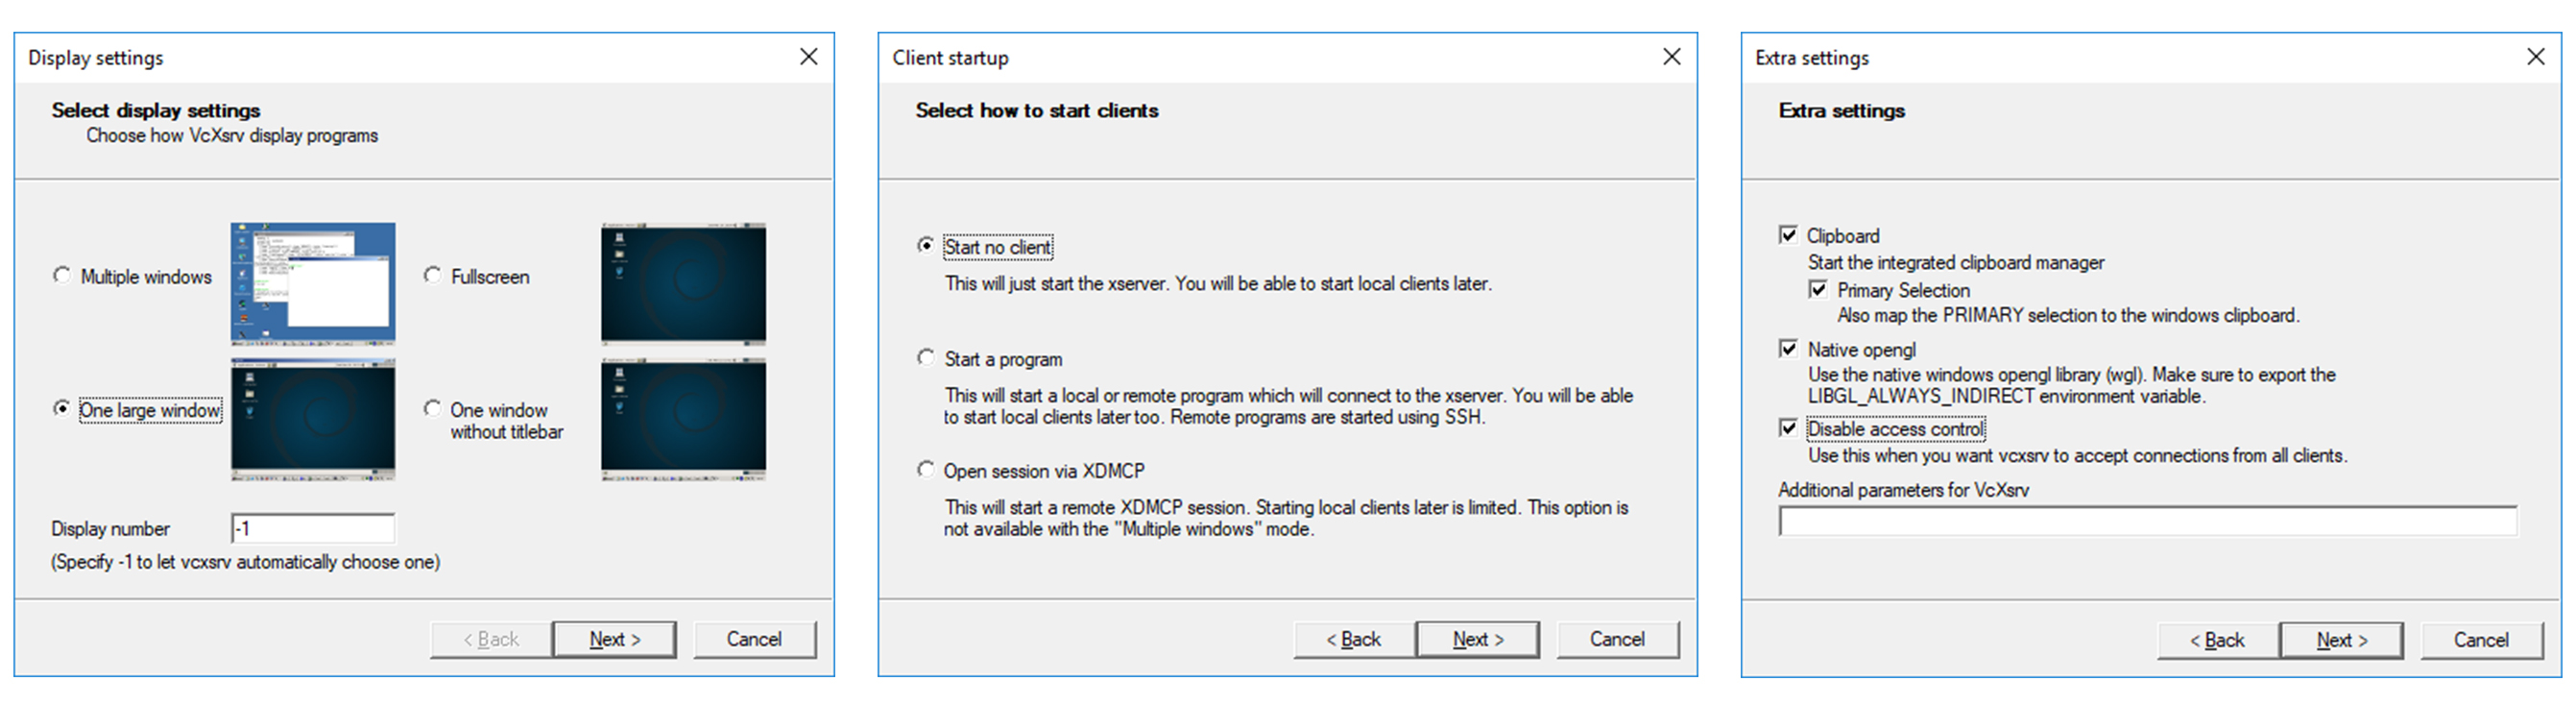
#安装 XServer for windows
- 推荐安装 VcXsrv Windows X Server,并以这样的配置打开:
- 在 WSL 中安装必要组件:
sudo apt install libgtk2.0-0 libxss1 libasound2
- 配置 WSL 参数:
echo 'export DISPLAY=:0.0' >> .profile
- 安装一个小眼睛,看看图形窗口安装成功没有:
sudo apt install x11-apps -y && xeyes
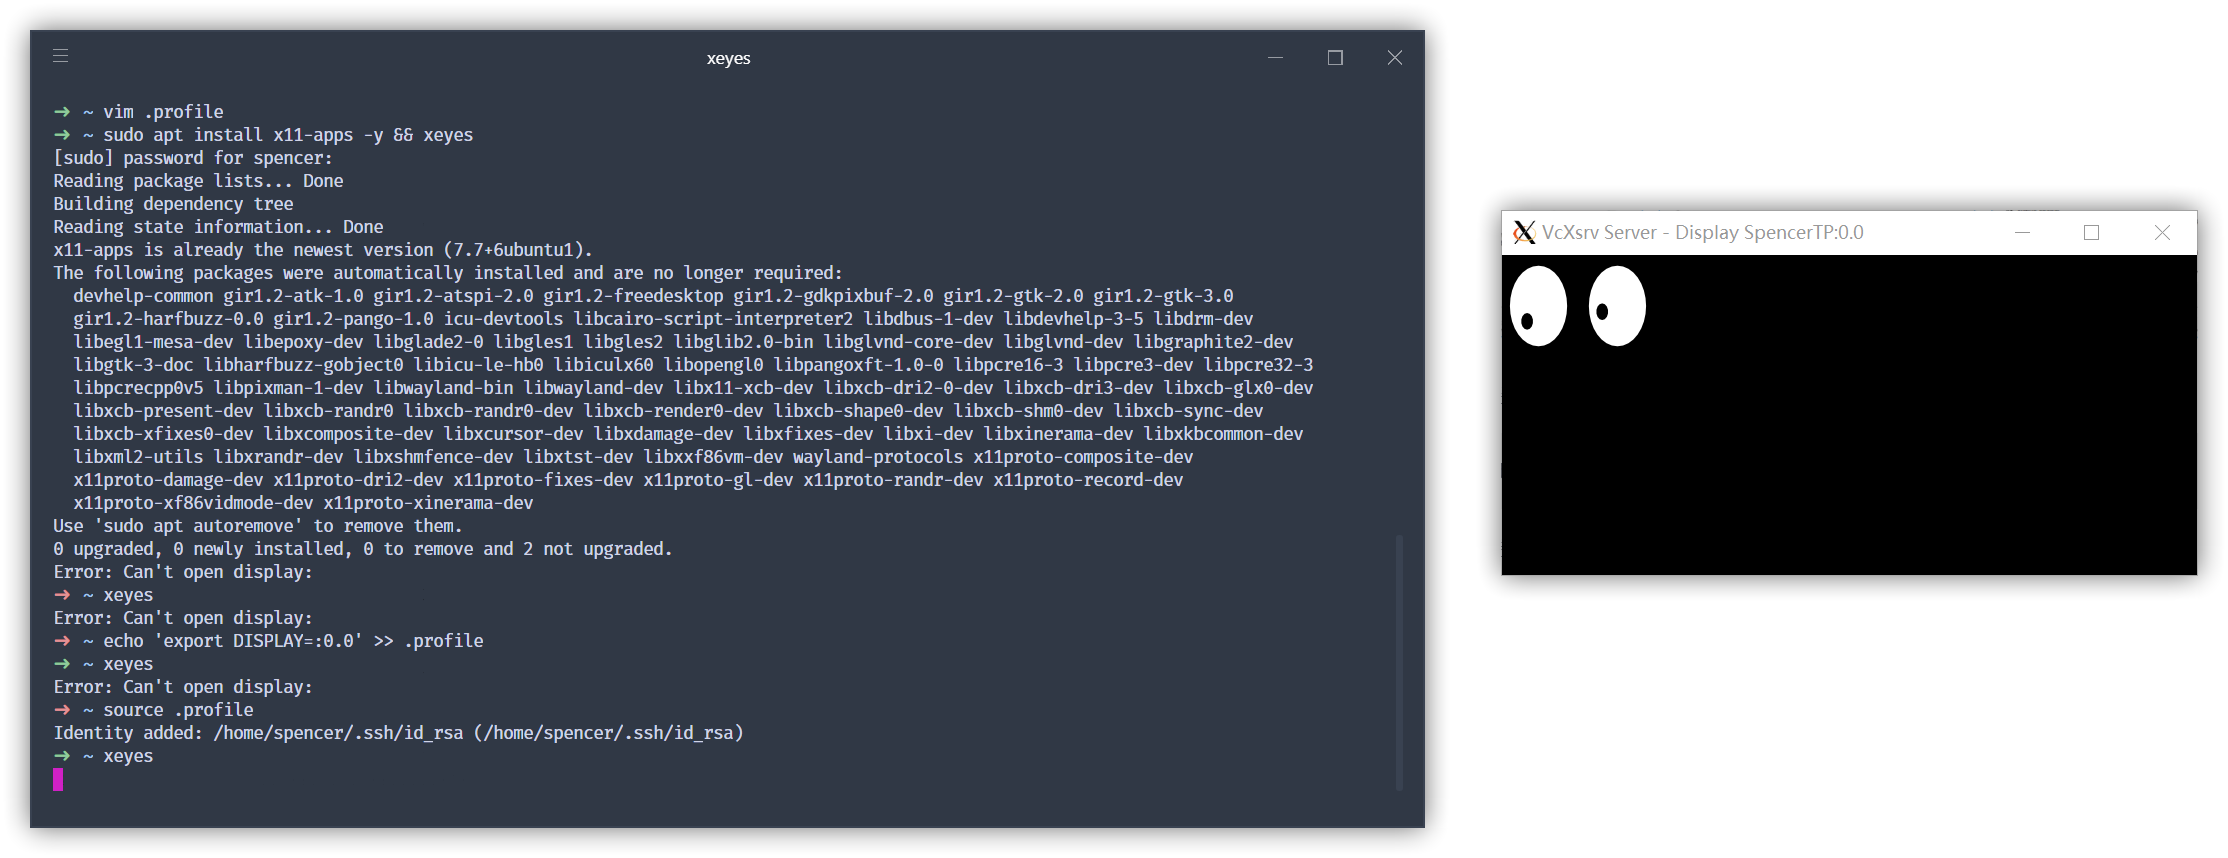
如果出现了这样的小眼睛盯着你的鼠标看,那么说明我们的 XServer 安装成功了。
WSL 侧安装 Visual Studio Code
- 添加 Visual Studio Code 库:
curl https://packages.microsoft.com/keys/microsoft.asc | gpg --dearmor > microsoft.gpg
sudo mv microsoft.gpg /etc/apt/trusted.gpg.d/microsoft.gpg
sudo sh -c 'echo "deb [arch=amd64] https://packages.microsoft.com/repos/vscode stable main" > /etc/apt/sources.list.d/vscode.list'
- 安装 Visual Studio Code:
sudo apt update && sudo apt upgrade
sudo apt install code
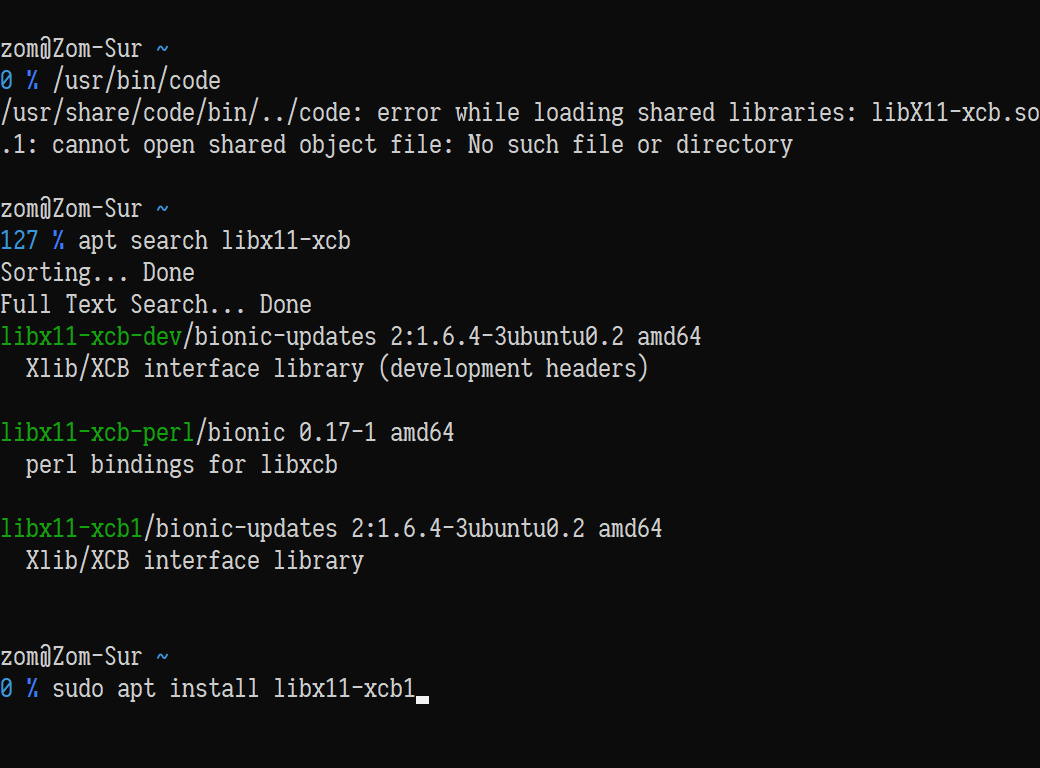
TIP
有可能还需要安装 libx11-xcb1,安装即可:
- 打开 XServer 窗口,在 WSL 终端执行
code,应该就可以看到 WSL 中的 VSCode 窗口启动了。
Idea使用wsl开发
settings->terminal->application settings>shell path>C:\Users\xxxxx\AppData\Local\Microsoft\WindowsApps\ubuntu1804.exe
开发环境配置
npm
npm config set registry https://registry.npm.taobao.org
yarn
yarn config set registry https://registry.npm.taobao.org/
maven
-
打开 ${maven_home}/conf/settings.xml
-
在****上面配置
<mirror>
    <id>aliyun-public</id>
    <mirrorOf>*</mirrorOf>
    <name>aliyun public</name>
    <url>https://maven.aliyun.com/repository/public</url>
</mirror>

<mirror>
    <id>aliyun-central</id>
    <mirrorOf>*</mirrorOf>
    <name>aliyun central</name>
    <url>https://maven.aliyun.com/repository/central</url>
</mirror>

<mirror>
    <id>aliyun-spring</id>
    <mirrorOf>*</mirrorOf>
    <name>aliyun spring</name>
    <url>https://maven.aliyun.com/repository/spring</url>
</mirror>

<mirror>
    <id>aliyun-spring-plugin</id>
    <mirrorOf>*</mirrorOf>
    <name>aliyun spring-plugin</name>
    <url>https://maven.aliyun.com/repository/spring-plugin</url>
</mirror>

<mirror>
    <id>aliyun-apache-snapshots</id>
    <mirrorOf>*</mirrorOf>
    <name>aliyun apache-snapshots</name>
    <url>https://maven.aliyun.com/repository/apache-snapshots</url>
</mirror>

<mirror>
    <id>aliyun-google</id>
    <mirrorOf>*</mirrorOf>
    <name>aliyun google</name>
    <url>https://maven.aliyun.com/repository/google</url>
</mirror>

<mirror>
    <id>aliyun-gradle-plugin</id>
    <mirrorOf>*</mirrorOf>
    <name>aliyun gradle-plugin</name>
    <url>https://maven.aliyun.com/repository/gradle-plugin</url>
</mirror>

<mirror>
    <id>aliyun-jcenter</id>
    <mirrorOf>*</mirrorOf>
    <name>aliyun jcenter</name>
    <url>https://maven.aliyun.com/repository/jcenter</url>
</mirror>

<mirror>
    <id>aliyun-releases</id>
    <mirrorOf>*</mirrorOf>
    <name>aliyun releases</name>
    <url>https://maven.aliyun.com/repository/releases</url>
</mirror>

<mirror>
    <id>aliyun-snapshots</id>
    <mirrorOf>*</mirrorOf>
    <name>aliyun snapshots</name>
    <url>https://maven.aliyun.com/repository/snapshots</url>
</mirror>

<mirror>
    <id>aliyun-grails-core</id>
    <mirrorOf>*</mirrorOf>
    <name>aliyun grails-core</name>
    <url>https://maven.aliyun.com/repository/grails-core</url>
</mirror>

<mirror>
    <id>aliyun-mapr-public</id>
    <mirrorOf>*</mirrorOf>
    <name>aliyun mapr-public</name>
    <url>https://maven.aliyun.com/repository/mapr-public</url>
</mirror>
apt
为了加速 Ubuntu 18.04 软件包在中国大陆的下载速度,我们将包管理工具 apt 源更换至中科大镜像源:
注意
替换内容前记得备份文件:
sudo cp /etc/apt/sources.list /etc/apt/sources.list.bac
将 /etc/apt/sources.list 文件内容前面添加如下内容:
deb https://mirrors.ustc.edu.cn/ubuntu/ bionic main restricted universe multiverse
deb-src https://mirrors.ustc.edu.cn/ubuntu/ bionic main restricted universe multiverse

deb https://mirrors.ustc.edu.cn/ubuntu/ bionic-security main restricted universe multiverse
deb-src https://mirrors.ustc.edu.cn/ubuntu/ bionic-security main restricted universe multiverse

deb https://mirrors.ustc.edu.cn/ubuntu/ bionic-updates main restricted universe multiverse
deb-src https://mirrors.ustc.edu.cn/ubuntu/ bionic-updates main restricted universe multiverse

deb https://mirrors.ustc.edu.cn/ubuntu/ bionic-backports main restricted universe multiverse
deb-src https://mirrors.ustc.edu.cn/ubuntu/ bionic-backports main restricted universe multiverse

## Not recommended
# deb https://mirrors.ustc.edu.cn/ubuntu/ bionic-proposed main restricted universe multiverse
# deb-src https://mirrors.ustc.edu.cn/ubuntu/ bionic-proposed main restricted universe multiverse
然后更新缓存:sudo apt update && sudo apt upgrade
python
临时设置可以通过 -i 选项:
$ pip install -i https://pypi.doubanio.com/simple/ flask
全局设置有不同的层级和文件位置,以用户全局(per-user)为例,在 Linux & macOS 中,配置需要写到 ~/.pip/pip.conf 文件中;Windows 中,配置文件位置为 %HOMEPATH%\pip\pip.ini,%HOMEPATH% 即你的用户文件夹,一般为“\Users<你的用户名>”,具体值可以使用 echo %HOMEPATH% 命令查看。
通常你需要手动创建对应的目录和文件,然后写入下面的内容:
[global]
index-url = https://pypi.doubanio.com/simple
[install]
trusted-host = pypi.doubanio.com
附注:按照 pip 文档,上面的配置文件位置是旧(legacy)的配置方式,但是因为比较方便设置,这里沿用了。新的建议是 Linux & macOS 放到 $HOME/.config/pip/pip.conf,Windows 则放到 %APPDATA%\pip\pip.ini。具体可以访问 pip 文档配置部分查看。
mysql
java
sudo apt install openjdk-8-jdk
redis
首先,需要输入以下内容来安装redis-server:
sudo apt-get install redis-server
接下来,要编辑/etc/redis/redis.conf并将以下行
bind 127.0.0.1
更改为
bind 0.0.0.0
最后,键入以下命令重新启动服务:
sudo service redis-server restart
node
apt
nginx
sudo apt install nginx
- 执行关闭命令: systemctl stop firewalld.service
- 再次执行查看防火墙命令:systemctl status firewalld.service
- 执行开机禁用防火墙自启命令 : systemctl disable firewalld.service
git
apt
tomcat
apt
