前言
上篇文章讲述了 简易路由实现——(hash路由)的简单实现,本文续讲 history 路由的实现
话不多说,先上 demo&& 源码&& 工程文件(htmlRouter文件夹下)
history 路由原理
History 是 HTML5 新增的标准,对比 hash 它的展示更加优雅,但低版本 ie 还有兼容问题。
History 的 pushState,replacestate 方法可以添加修改历史记录且不会发送新的服务器请求,因此可以利用此特性实现前端路由跳转。
History 的 go ,back, forward 方法可以实现跳转,后退,前进功能,还有 popstate 事件可以监听到记录变更。
页面结构
由于 a 标签 <a href="/monday"> 会导致页面页面跳转,因此页面结构需改写一番,使用插件方法进行路由跳转
<ul class="nav-list">
  <li class="nav-item"><a onclick="router.push({name: 'monday'})">周一</a></li>
  <li class="nav-item"><a onclick="router.push({name: 'tuesday', query: {name: 'suporka', age: '26'}})">周二</a></li>
  <li class="nav-item"><a onclick="router.push({path: '/wednesday'})">周三</a></li>
  <li class="nav-item"><a onclick="router.push({path: '/thursday', query: {name: 'suporka', age: '20'}})">周四</a></li>
  <li class="nav-item"><a onclick="router.replace({name: 'friday'})">周五</a></li>
</ul>
实现 history 路由
init()
在 MDN 上,是这样介绍 popstate 的
当活动历史记录条目更改时,将触发 popstate 事件。如果被激活的历史记录条目是通过对
history.pushState()的调用创建的,或者受到对history.replaceState()的调用的影响,popstate 事件的 state 属性包含历史条目的状态对象的副本。需要注意的是调用
history.pushState()或history.replaceState()不会触发 popstate 事件。只有在做出浏览器动作时,才会触发该事件,如用户点击浏览器的回退按钮(或者在 Javascript 代码中调用history.back()或者history.forward()方法)不同的浏览器在加载页面时处理 popstate 事件的形式存在差异。页面加载时 Chrome 和 Safari 通常会触发 popstate 事件,但 Firefox 则不会。
因此在 history 路由的初始化方法中,需要对 popstate 和 load 事件进行监听
export default class HistoryRouter extends RouterParent {
    constructor(routerConfig) {
        super(routerConfig);
    }

    init() {
        // refresh 实现对应组件和当前路由绑定显示
        // bind(this) 传入此实例对象,否则this指向有问题
        window.addEventListener('popstate', this.refresh.bind(this), false);
        window.addEventListener('load', this.refresh.bind(this), false);
    }
}
refresh()
与 hash 路由实现一致,这里是对组件控制显示隐藏,只不过在这里可以直接使用 history 的功能, 不用自己建立 routeHistory 来控制跳转
refresh() {
    let path = window.location.pathname,
        currentComponentName = '',
        nodeList = document.querySelectorAll('[data-component-name]');
    // 找出当前路由的名称
    for (let i = 0; i < this._routes.length; i++) {
        if (this._routes[i].path === path) {
            currentComponentName = this._routes[i].name;
            break;
        }
    }
    // 根据当前路由的名称显示对应的组件
    nodeList.forEach(item => {
        if (item.dataset.componentName === currentComponentName) {
            item.style.display = 'block';
        } else {
            item.style.display = 'none';
        }
    });
}
back() && front()
后退前进直接调用 history 的 api 即可,此时会触发 popstate 事件调用 refresh 方法渲染页面
back() {
    window.history.back();
}
front() {
    window.history.forward();
}
push(option)
在vue-router中,可以通过 path, name 修改当前路由,并且可以携带 query 参数
因此优先判断 path, 如果有 path, 则直接调用 pushState 添加历史记录; 没有 path, 则根据 name 从 routes 中找出 path, 再调用 pushState 添加历史记录。因为 history.pushState() 或 history.replaceState() 不会触发 popstate,因此我们需要手动调用一下 refresh 方法
push(option) {
    if (option.path) {
      // 绑定this指向,使函数可以调用类的方法
      pushHistory.call(this, option.path,option.query);
    } else if (option.name) {
        let routePath = '';
        // 根据路由名称找路由path
        for (let i = 0; i < this._routes.length; i++) {
            if (this._routes[i].name === option.name) {
                routePath = this._routes[i].path;
                break;
            }
        }
        if (!routePath) {
            error('组件名称不存在');
        } else {
            pushHistory.call(this, routePath, option.query);
        }
    }
}

// 路由跳转
function pushHistory(routePath, query) {
    let path = getTargetPath(routePath, query);
    if (path !== window.location.pathname) {
        window.history.pushState(path, '', path);
        this.refresh();
    }
}

function error(message) {
    typeof console !== 'undefined' && console.error(`[html-router] ${message}`);
}

// 获取即将跳转的路径
function getTargetPath(path, query) {
    if (!query) return path;
    let str = '';
    for (let i in query) {
        str += '&' + i + '=' + query[i];
    }
    return path + '?' + str.slice(1);
}
replace(option)
replace 和 push 的逻辑基本一致,只是调用的不是 pushState,而是 replaceState 方法。因此对 push 方法改造一下,使其兼容 replace
replace(option) {
    // 表示当前处于replace
    this.replaceRouter = true;
    this.push(option);
}
push(option) {
    if (option.path) {
        pushHistory.call(this, option.path, option.query, this.replaceRouter);
    } else if (option.name) {
        let routePath = '';
        // 根据路由名称找路由path
        for (let i = 0; i < this._routes.length; i++) {
            if (this._routes[i].name === option.name) {
                routePath = this._routes[i].path;
                break;
            }
        }
        if (!routePath) {
            error('组件名称不存在');
        } else {
            pushHistory.call(this, routePath, option.query, this.replaceRouter);
        }
    }
}

// 改写路由跳转
function pushHistory(routePath, query, replace) {
    let path = getTargetPath(routePath, query);
    if (path !== window.location.pathname) {
        if (replace) {
            window.history.replaceState(path, '', path);
            this.replaceRouter = false;
        } else window.history.pushState(path, '', path);
        this.refresh();
    }
}
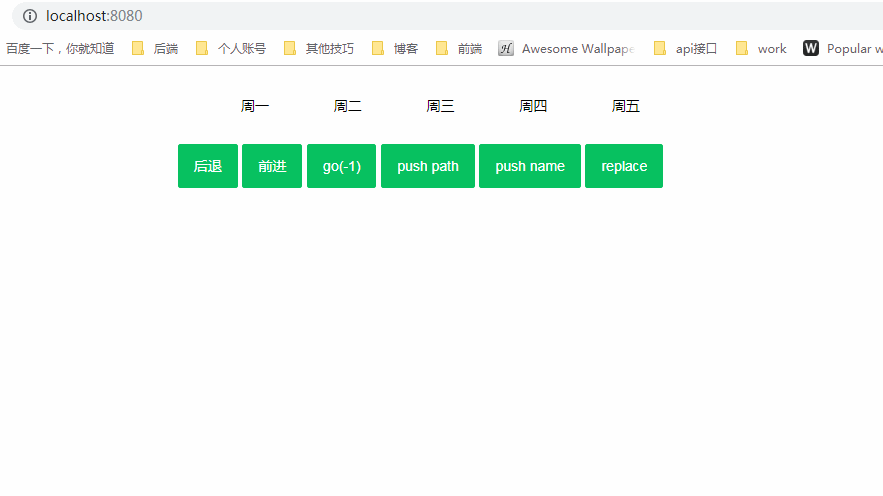
demo 测试
测试代码就不写了,与前文 hash 路由一致,效果如下:
但是在这里发现一个问题,当处于某个路由时,刷新页面,会出现下面这种情况
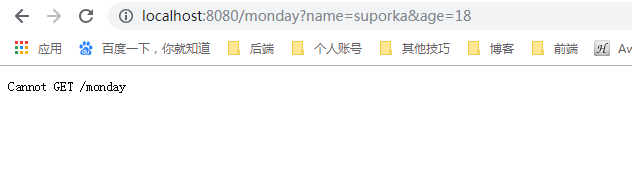
一刷新就会出现404,在 vue-router官方文档 中也有介绍,开启 history 需要服务端支持!
当你使用 history 模式时,URL 就像正常的 url,例如 yoursite.com/user/id,也好看…
不过这种模式要玩好,还需要后台配置支持。因为我们的应用是个单页客户端应用,如果后台没有正确的配置,当用户在浏览器直接访问 oursite.com/user/id 就会返回 404,这就不好看了。
所以呢,你要在服务端增加一个覆盖所有情况的候选资源:如果 URL 匹配不到任何静态资源,则应该返回同一个 index.html 页面,这个页面就是你 app 依赖的页面。
以上便是《简易路由实现》的完整内容,更多文章可进入我的专栏查看,感谢您的观看
更多推荐
Canvas 进阶(二)写一个生成带logo的二维码npm插件
Canvas 进阶(三)ts + canvas 重写”辨色“小游戏