

前言
LNMP 分布式集群的部署实践 系列文章:
- 《(一):Nginx+PHP平台搭建与负载均衡配置》
- 《(二):NFS文件服务器的搭建与文件缓冲上传的配置》
- 《(三):MySQL主从数据库服务器的搭建》
- 《(四):Memcached 缓存服务器的搭建》
- 《(五):ThinkPHP项目部署》
- 《(六):keepalived 高可用方案》
回顾一下基本的架构:
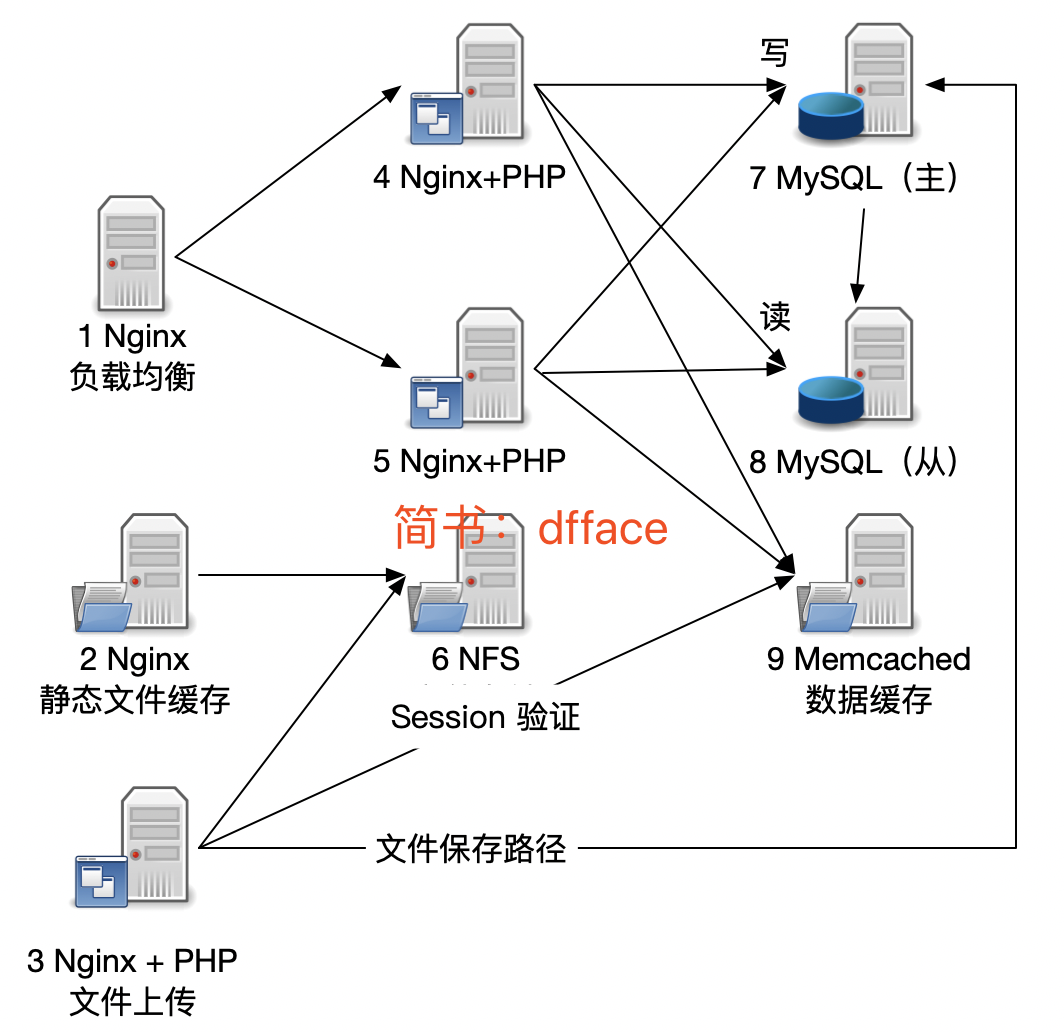
这一篇我们部署9号机,Memcached缓存服务器。
Memcached 是一个高性能的分布式内存对象缓存系统,是一种基于内存的key-value存储。可以利用内存来缓存一些被频繁访问的数据,一般的使用目的是,通过缓存数据库查询结果,减少数据库访问次数,以提高动态Web应用的速度、提高可扩展性。
但近年来已被redis赶超,redis被称为“强化版memcached”在功能多样性方面要胜过memcached,虽然强大且更具灵活性,但复杂程度也比memcached更甚。不过有两类特殊场景仍然是memcached的一家天下。首先就是对小型静态数据进行缓存处理,最具代表性的例子就是HTML代码片段。除此之外,memcached在横向扩展方面也比redis更具优势。除非大家需要考虑某种限定性条件(例如处理传统应用程序)对于memcached的特殊依赖性,或者自己的实际用例属于前面提到的两类场景中的一种,否则请直接选择redis并加以运用。——《memcached redis 对比分析》
部署
编译安装 Memcached (9号机)
yum -y install gcc libevent-devel
wget http://www.memcached.org/files/memcached-1.4.39.tar.gz
tar -zxvf memcached-1.4.39.tar.gz
cd memcached-1.4.39
./configure && make && make install
cd scripts
cp memcached-init /etc/init.d/memcached
chkconfig --add memcached
# Memcached服务脚本调用了start-memcached 脚本,也需要复制到指定路径
mkdir -p /usr/share/memcached/scripts
cp start-memcached /usr/share/memcached/scripts/
cd ~
# 为start-memcached 脚本中指定的路径创建连接
ln -s /usr/local/bin/memcached /usr/bin/memcached
# Memcached 中的脚本依赖于Perl和start-stop-daemon,start-stop-daemon是Debain中提供的命令,还需要在CentOS中单独安装
yum -y install gcc-c++ wget patch perl-core xz ncurses-devel # 注意不是perl是perl-core,也可以采取下面的在装了perl之后补充安装:
#yum -y install perl-version perl-Data-Dumper # centOS minimal 安装需要几个软件包才能运行。“最小”确实很小,而且完全没有Perl。个人建议安装 perl-core
# 以上的安装解答请看https://community.opmantek.com/display/OA/questions/17760323/how-to-resolve-openaudit-install-error-cant-locate-version.pm-in-inc-on-centos-7

wget https://mirrors.tuna.tsinghua.edu.cn/debian/pool/main/d/dpkg/dpkg_1.18.25.tar.xz
tar -xvf  dpkg_1.18.25.tar.xz
cd dpkg-1.18.9
./configure --without-libselinux && make  # without-libselinux用于解决系统中安装libselinux-devel 导致dpkg编译失败的问题
# 将编译后的成怒复制到/usr/local/sbin/使用
cp utils/start-stop-daemon /usr/local/sbin/
# 启动 Memcached 服务
vi /etc/memcached.conf
-m 512  # 分配内存大小
-p 11211  # 监听的TCP端口
-u nobody  # 配置工作用户
-c 1024  # 配置最高并发连接数
-t 16  # 配置使用的线程数

/usr/local/bin/memcached -h
service memcached start
iptables -I INPUT -p tcp --dport 11211 -j ACCEPT
service iptables save
安装 Memcached 扩展(3、4、5号机)
# PHP的Memcached扩展下载(于PECL:PHP社区扩展库)
wget http://pecl.php.net/get/memcached-2.2.0.tgz
# 该扩展依赖于 libmemcached
wget https://launchpad.net/libmemcached/1.0/1.0.18/+download/libmemcached-1.0.18.tar.gz

yum -y install cyrus-sasl-devel m4 autoconf  # 防止运行phpize时出现:Cannot find autoconf

tar -zxvf libmemcached-1.0.18.tar.gz
cd libmemcached-1.0.18
./configure && make && make install && cd ..
tar -zxvf memcached-2.2.0.tgz
cd memcached-2.2.0
/usr/local/php/bin/phpize
./configure \
--with-php-config=/usr/local/php/bin/php-config
make && make install && cd ..

vi /usr/local/php/lib/php.ini
extension=/usr/local/php/lib/php/extensions/no-debug-non-zts-20131226/memcached.so

service php-fpm reload
测试Memcached
vi /data/www/test.php
<?php
# 连接Memcached服务器
$mem = new Memcached();
$mem->addServer('192.168.177.19', 11211);
# 保存数据(Key/Value形式,Key=UserName,Value=James)
$mem->set('UserName', 'James');
# 获取数据(根据Key=UserName,获得Value)输出结果:James
echo $mem->get('UserName');

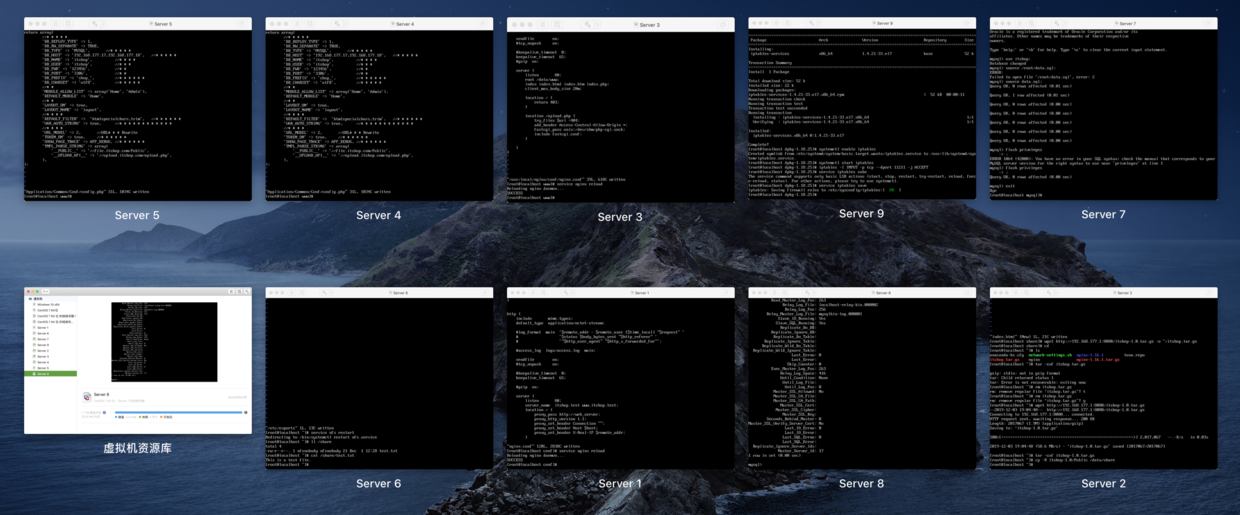
现在我们的虚拟机都齐全了:
LNMP 分布式集群的部署实践 系列文章:
- 《(一):Nginx+PHP平台搭建与负载均衡配置》
- 《(二):NFS文件服务器的搭建与文件缓冲上传的配置》
- 《(三):MySQL主从数据库服务器的搭建》
- 《(四):Memcached 缓存服务器的搭建》
- 《(五):ThinkPHP项目部署》
- 《(六):keepalived 高可用方案》
dfface 的版权声明:所有文章除特别声明外,均采用 CC BY-NC-SA 4.0 许可协议。转载请注明出处,严禁商业用途!
