

一、何为SSR
1.CSR介绍
在介绍SSR之前,我们可以先了解CSR。那什么是CSR呢?CSR即Client Side Render在我们传统的REACT/VUE项目中采取的是单页(SPA)方式,即只有一个html,结构大致如下:
<html>
<head>
<title>传统spa应用</title>
</head>
<body>
<script src="bundle.js"></script>
</body>
</html>
所有的页面元素都是由打包后的bundle.js渲染出来的。

client(客户端)向server(服务端)发送ajax请求,服务端向客户端返回json数据,很明显,这样的前后端分离使得前后端职责更加清晰,后端只负责给前端提供数据,前端渲染界面。所谓CSR为客户端渲染,即页面是由js渲染出来的,不是由服务端直接返回的。
2.SSR介绍
SSR即Server Slide Render,服务端渲染。即后端直接返回一个HTML页面。我们写一个服务端渲染的简单内容。新建文件夹react-ssr-frame->文件目录下执行npm init->在入口文件src/index.js编写如下代码:
var http=require("http");

const server=http.createServer(function(req,res){
    res.writeHead(200,{'Content-Type':"text/html"})
    res.end(`
        <!doctype html>
        <html>
            <head>
                <title>REACT SSR</title>
            </head>
            <body>
                <p>Hello World</p>
            </body>
        </html>
    `)
})

server.listen(3000,'127.0.0.1');
执行node src/index命令并打开localhost:3000
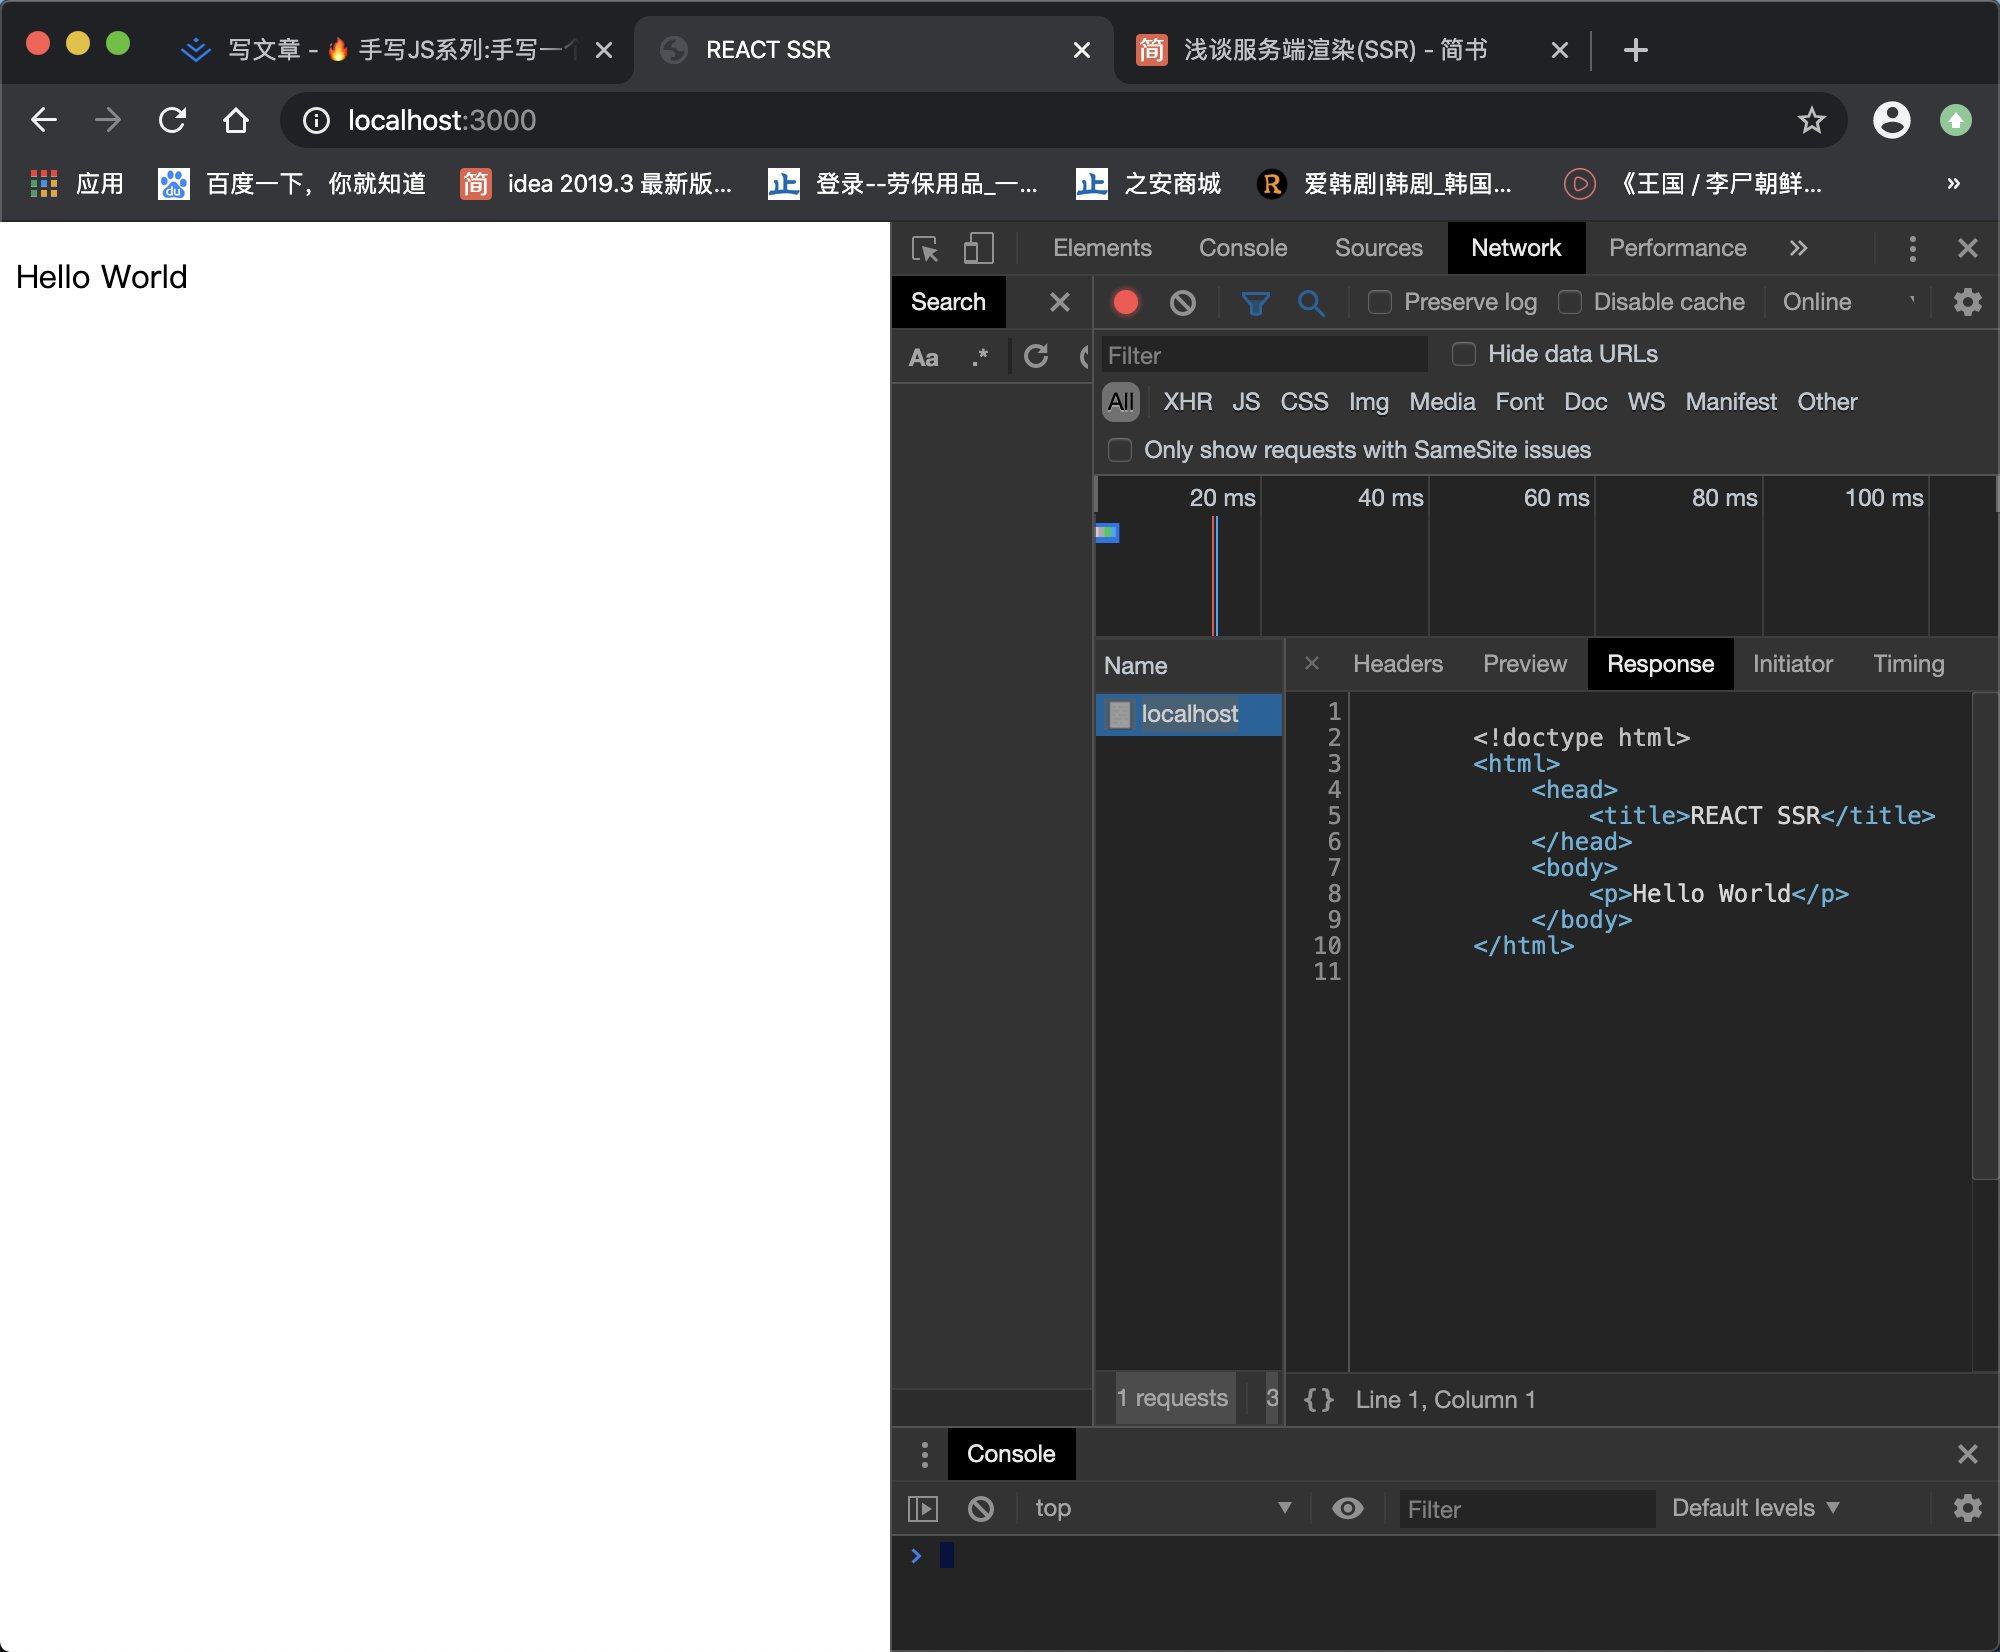
可以看到后端返回了一个HTML页面并直接渲染到页面上。为了更确定我们页面的内容是服务端直接返回的。谷歌浏览器有个关闭js开关的选项,我们将其关闭。可以看到页面依旧显示正常(正常情况下CSR框架下页面会渲染失败)。

3.SSR VS CSR

CSR和SSR流程。
3.1 CSR
- 浏览器下载
HTML页面 - 解析
HTML时解析到script标签,下载JS文件 - 浏览器接受到
JS文件,执行运行React代码 - 页面开始渲染
3.2 SSR
1.浏览器下载HTML页面,页面开始渲染HTML页面。
3.3 优劣势对比
由上面的流程我们不难发现,SSR只需要发送1次http请求,CSR需要发送2次http请求(实际上不止2次)因为还需要发送http请求图标等。由于CSR的步骤繁杂,这就造成了一个CSR劣势,也就是我们经常头疼的单页应用的通病-首屏加载速度很慢。由于客户端只有一个HTML页面,在搜索引擎SEO爬虫爬行时只认识HTML中的内容,并不认识JS内的内容,所以不利于我们在搜索引擎上的排名。由此我们总结出SSR相比CSR的优势。
1.首屏加载速度较快。
2.
SEO搜索引擎排名较好。
虽然SSR优势很多,但是对于SSR非常的消耗服务器端的性能。我们在项目首屏速度已经很快的时候并且不需要引擎排名的时候尽量还是使用CSR技术。
3.4 现有React流行SSR框架
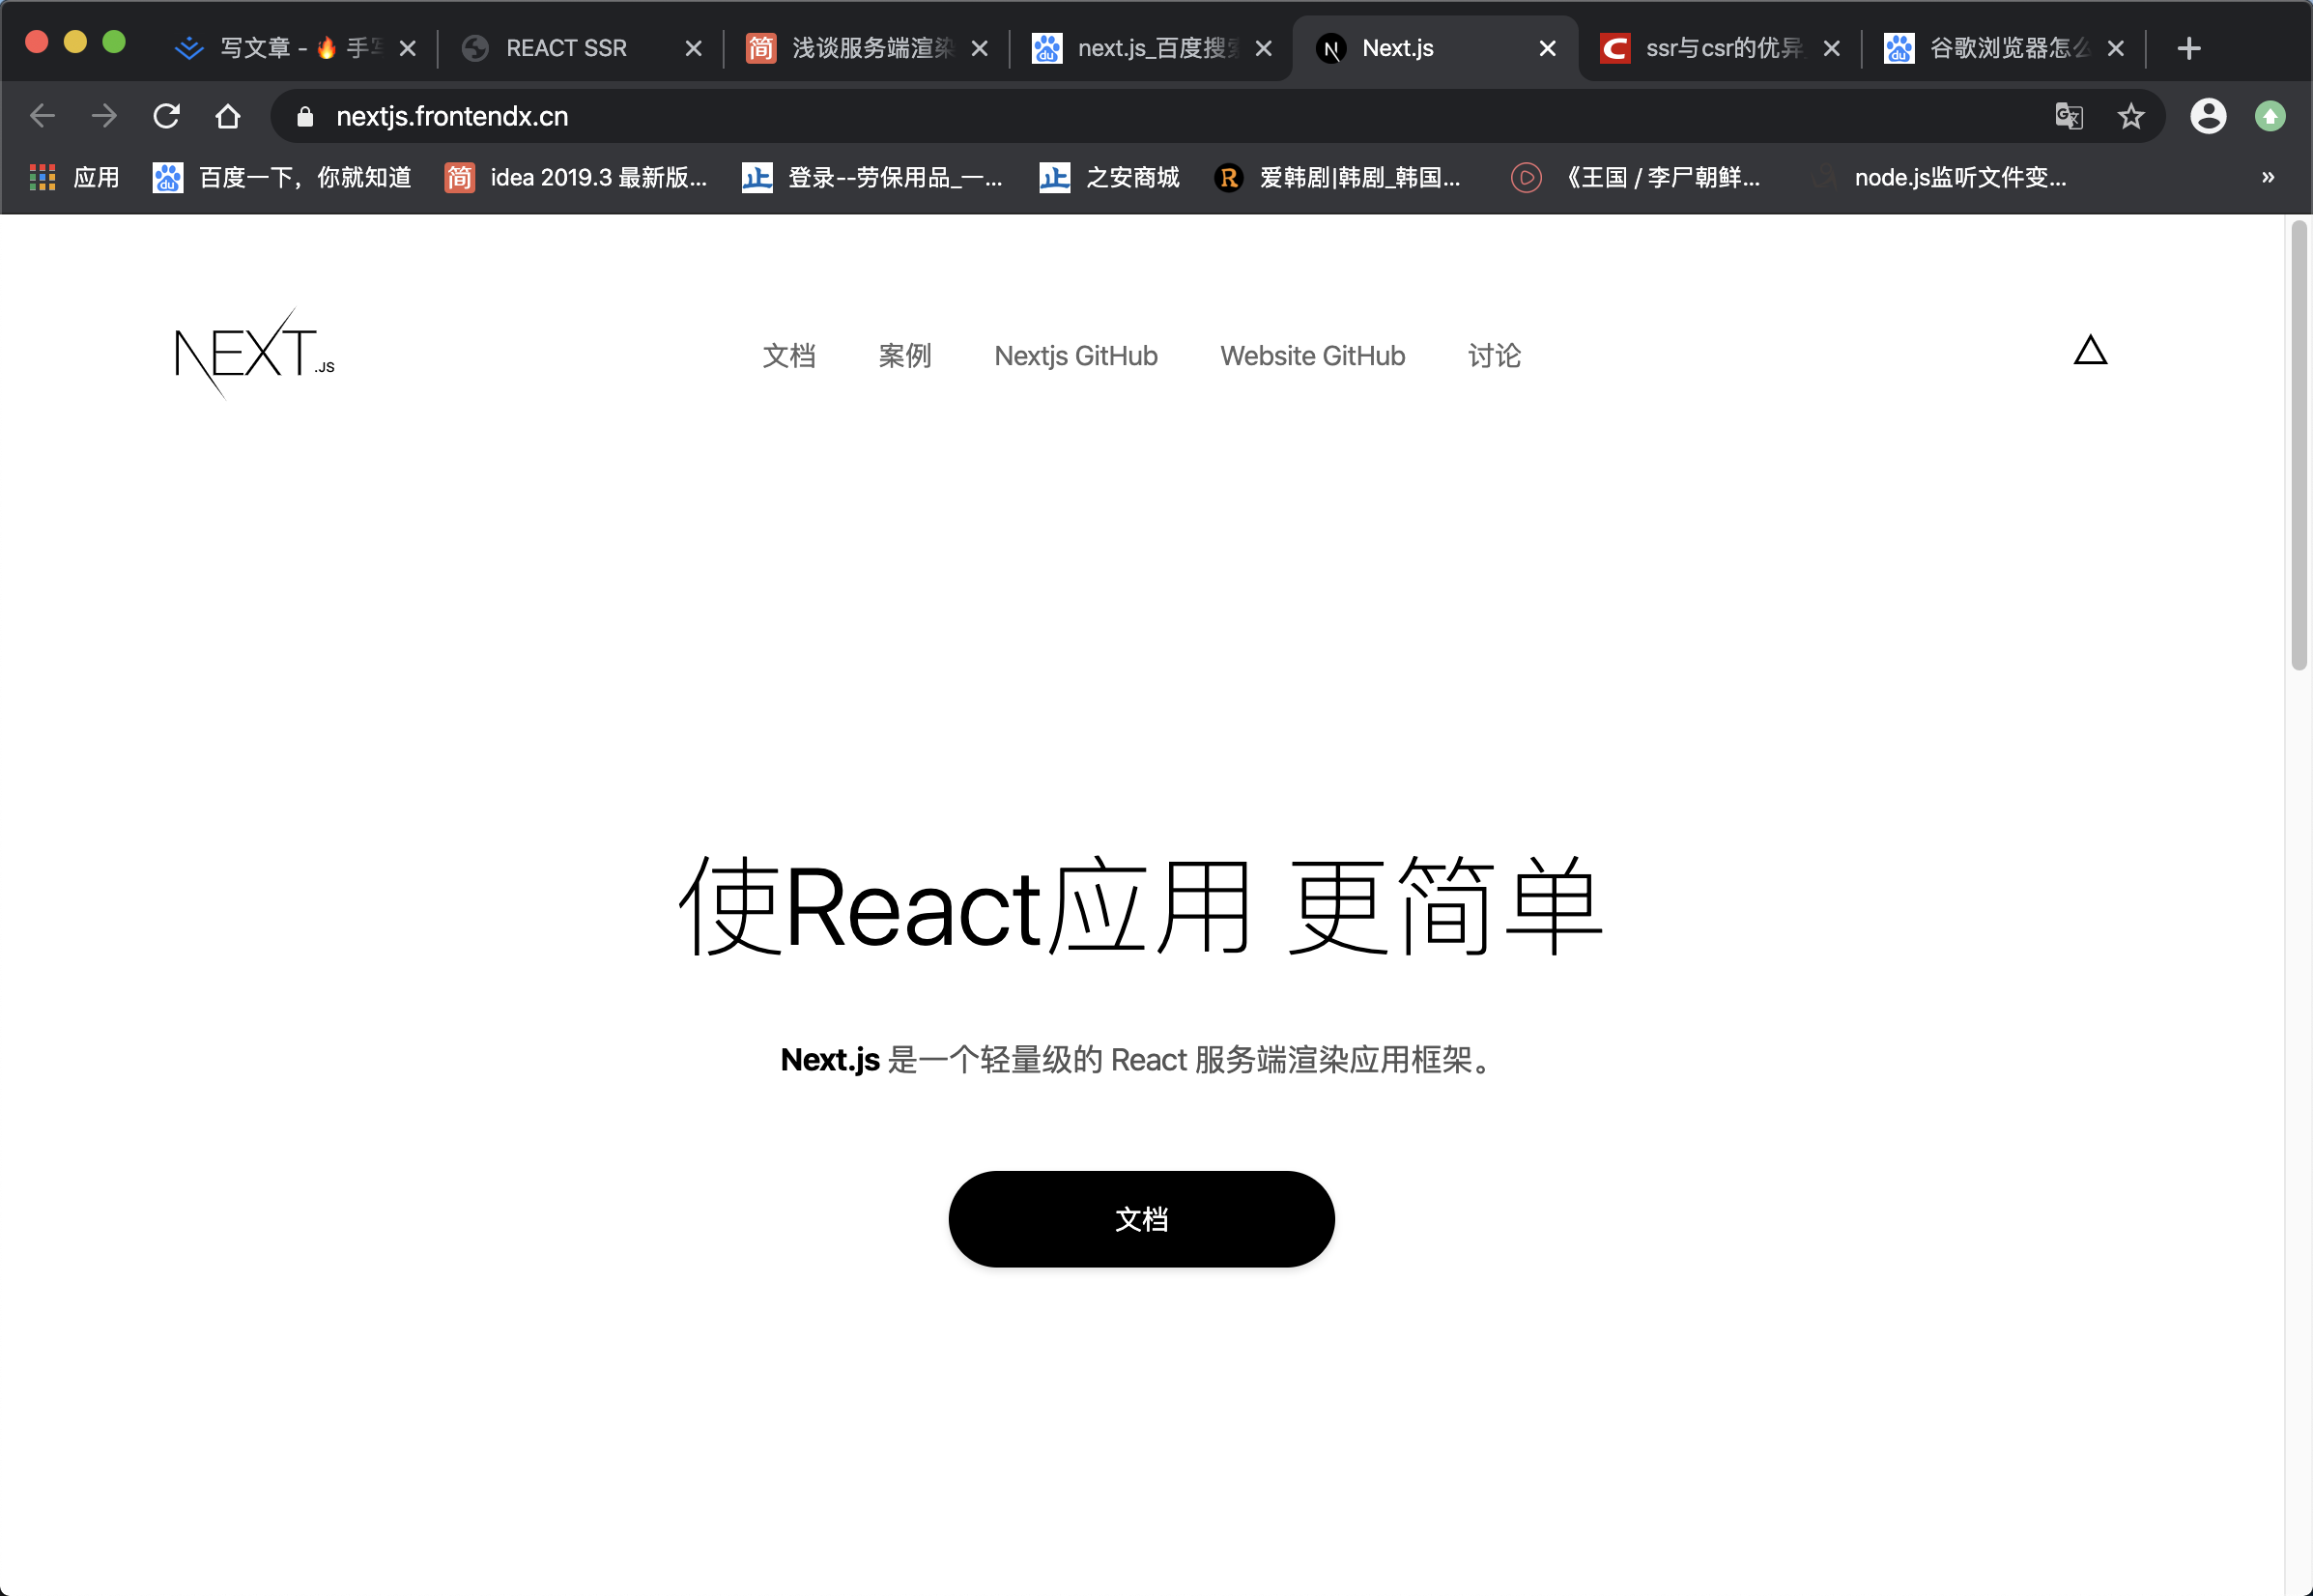
现有比较主流的
React SSR流行框架为next.js,next.js封装的很好,但是由于封装的太好了,对于我们扩展起来十分的不方便。有看Next.js文档的时间我们不如自己实现一个SSR服务端渲染框架,岂不乐哉?接下来我们就一步步为大家实现一个可以在实际项目中使用的SSR框架。
二、服务端编写React代码
我们接着使用上一章搭建的服务端项目。
既然是React项目,我们使用npm install 安装react,还记得在传统React/Vue项目中,浏览器端由于不认识我们的React等语法,我们需要使用Webpack打包,那么在服务器端呢?在服务器端node环境下也是不认识我们的React语法的,那么意味着我们也需要在服务器端渲染中使用Webpack进行打包。
const path=require("path");
const nodeExternals=require("webpack-node-externals");
module.exports={
    //由于在相同的require引用下,浏览器和服务器端效果是不一样的,所以需要指定目标平台
    target:"node",
    entry:"./src/index.js",
    mode:"development",
    output:{
        filename:"bundle.js",
        path:path.resolve(__dirname,'build')
    },
    externals:[nodeExternals()],
    //配置以后 require引用的node_modules不会被打包,还会保存之前的引用形式https://www.cnblogs.com/fanqshun/p/10073493.html
    module:{
        rules:[
            {
                test:/\.js?$/,
                loader:"babel-loader",
                exclude:/node_modules/
            }
        ]
    }
}
在react-dom中给我们提供了服务端渲染的方法renderToString,这个方法可以将react节点渲染成字符串。改造后的index.js页面如下:
var http=require("http");
import React from 'react';
import Hello from './pages/Hello';
import { renderToString } from 'react-dom/server';

const content=renderToString(<Hello />)

const server=http.createServer(function(req,res){
    res.writeHead(200,{'Content-Type':"text/html; charset=utf-8"})
    res.end(`
        <!doctype html>
        <html>
            <head>
                <title>REACT SSR</title>
            </head>
            <body>
                ${content}
            </body>
        </html>
    `)
})

server.listen(3000,'127.0.0.1');
在package.json中的script标签下
"build":"webpack --config webpack.server.config.js",
"start":"node build/bundle.js"
在项目根目录下新建.babelrc配置文件
{
    "presets":[
        ["@babel/preset-env", {
            "modules": false,
            "targets": {
              "browsers": ["> 1%", "last 2 versions", "ie >= 10"]
            },
            "useBuiltIns": "usage"
        }],
        "@babel/preset-react"
    ]
}
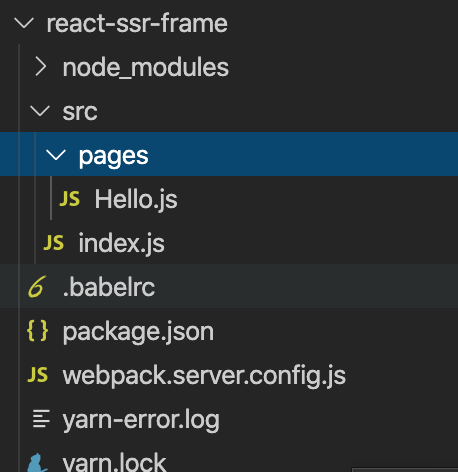
现在让我们来回顾下项目目录
yarn add react-dom webpack webpack-cli webpack-node-externals babel-loader @babel/core @babel/node @babel/preset-react @babel/preset-env --save-dev
- 开启一个窗口执行
npm run build打包项目 - 开启一个窗口执行
npm run start运行项目
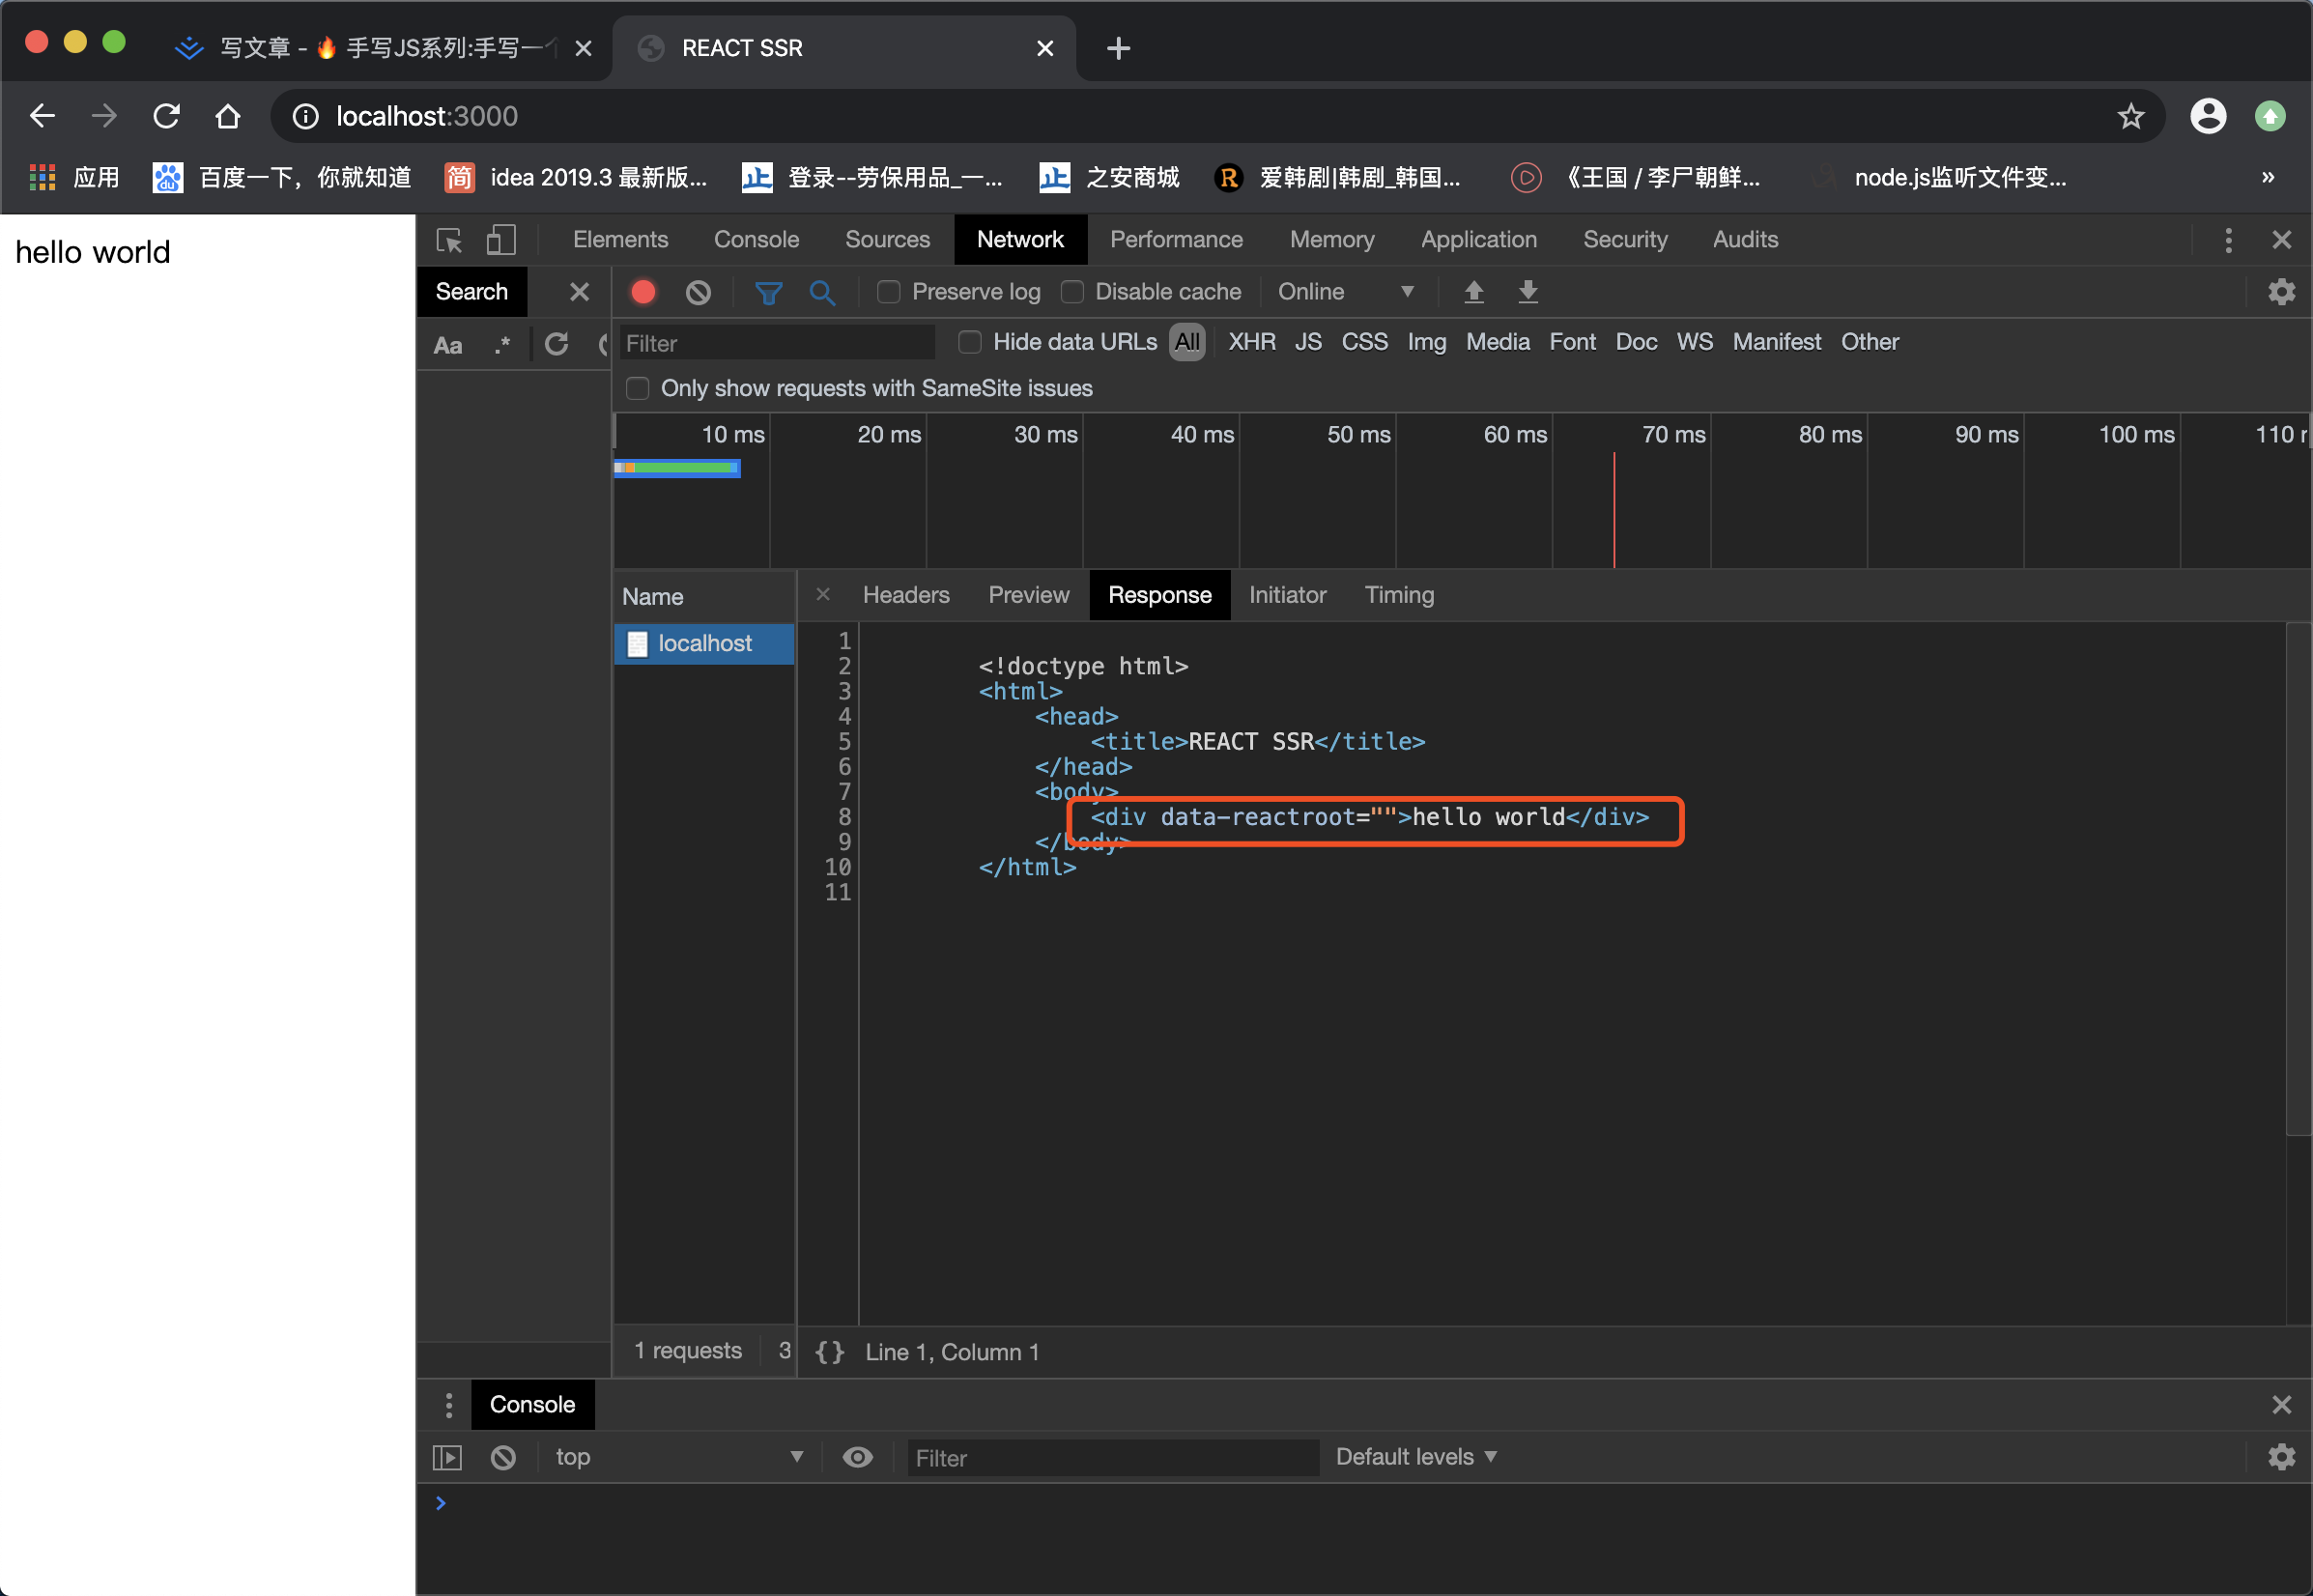
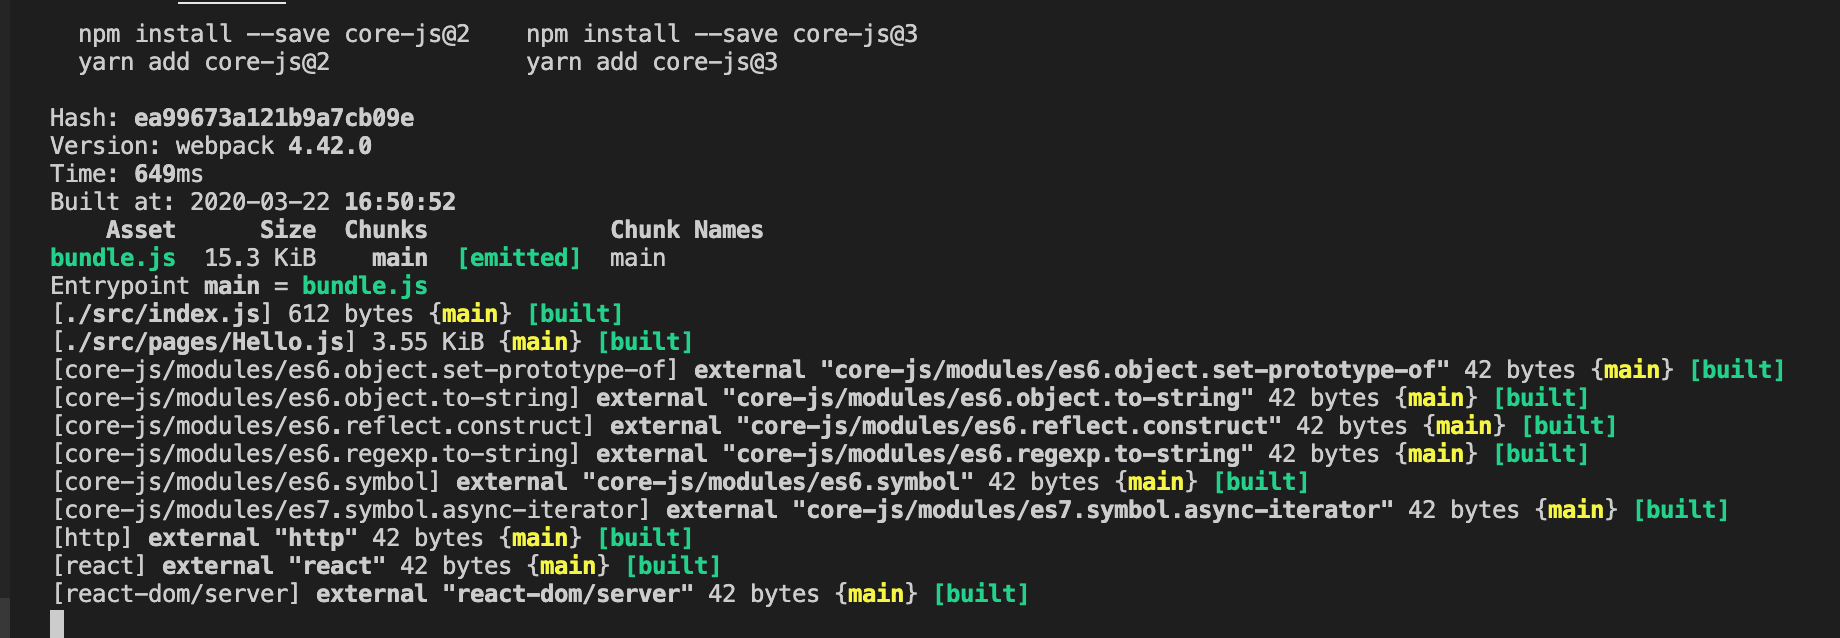
执行完打包后,我们会发现根目录下生成一个build目录,目录下的bundle.js就是本次打包后生成的源码目录。然后执行运行命令,启动打包后的bundle.js。然后我们打开浏览器看到:
有时候我们在运行项目中会出先莫名奇妙的错误,原因是
node包有错误,这时候我们需要删除node_modules目录进行重新安装,但是删除node_modules本身就会出各种各样的异常,在这里我们借助rimraf来删除我们的node_modules包
- 安装
rimraf :npm install rimraf --save-dev package.json中的script定义delete字段"delete": "rimraf node_modules"- 执行命令
npm run delete

在服务器端编写React算是基本成功了。但是有没有发现这样的一个问题?在我们每次修改完代码。我们首先需要打包再运行,但是正常情况下这样肯定是不行的。我们借助--watch来监听文件的变化,借助nodemon来监听打包文件的变化并执行node命令运行项目。
首先更改build命令
"build": "webpack --config webpack.server.config.js --watch"
--watch可以监听文件的变化并生成打包文件
npm install nodemon --save
"start": "nodemon --watch build --exec node build/bundle.js"

npm-all-run可以帮助我们完成这个任务,首先安装。
npm install npm-run-all --save
"scripts": {
    "delete": "rimraf node_modules",
    //--parallel表示并行执行后面的那个文件
    "dev": "npm-run-all --parallel dev:**",
    "dev:build": "webpack --config webpack.server.config.js --watch",
    "dev:start": "nodemon --watch build --exec node build/bundle.js"
},
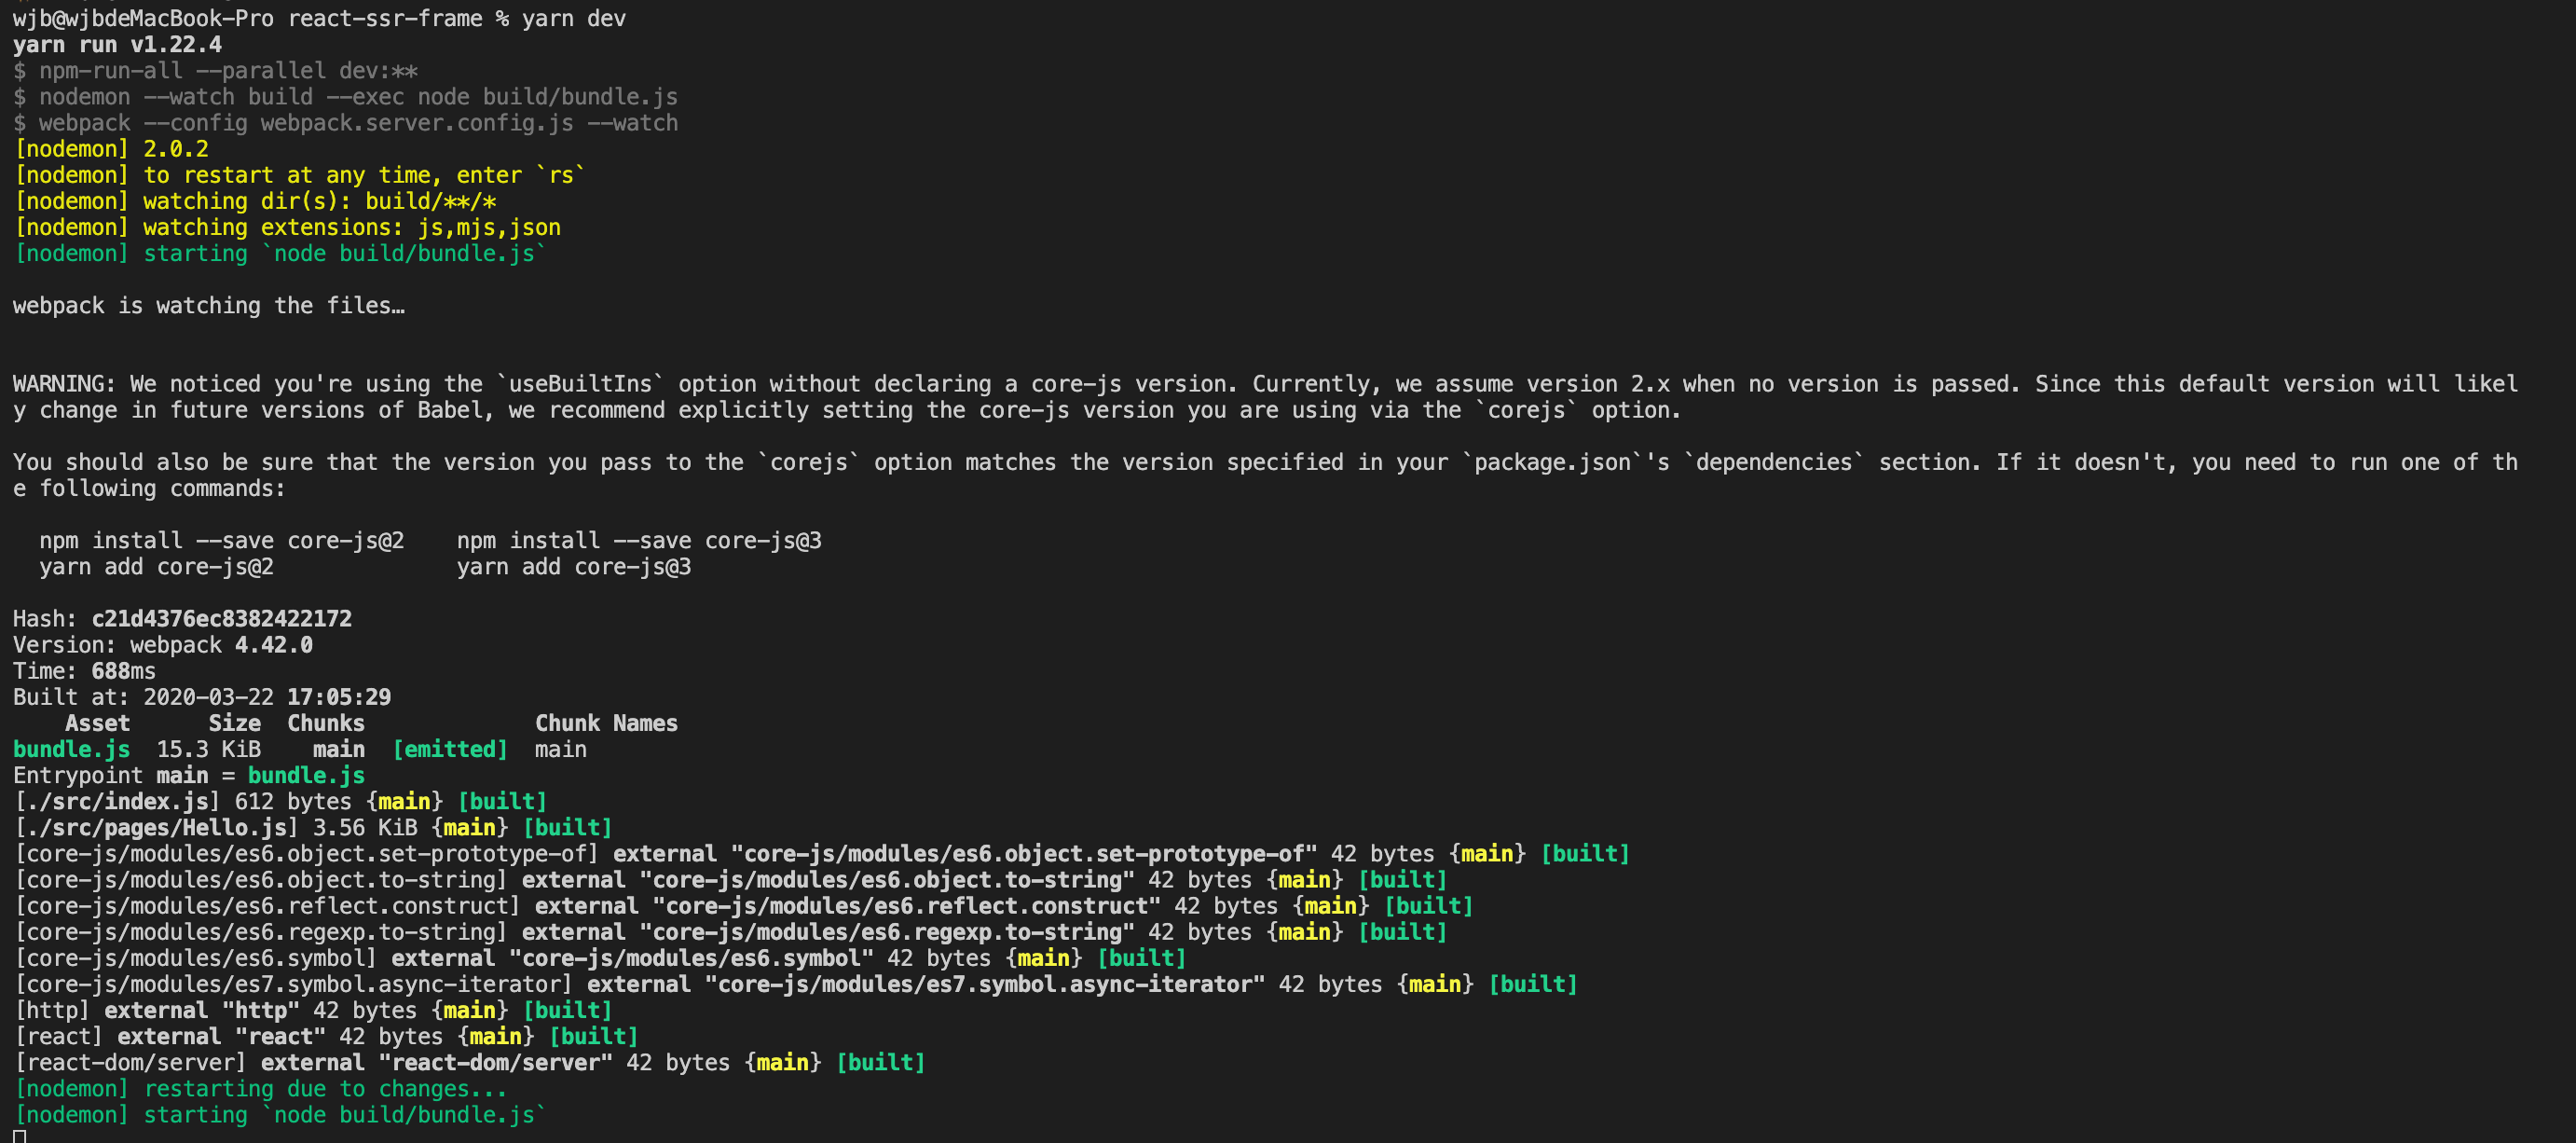
执行npm run dev,如下图所示即大功告成
三、事件响应
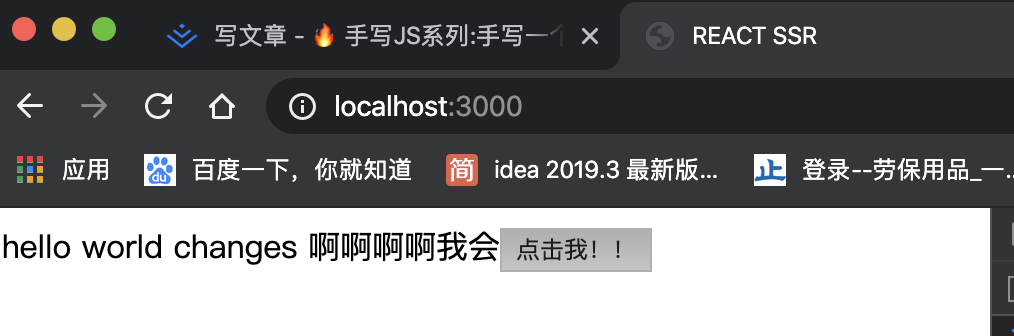
上一章,同学们都写出来了代码,我猜很多同学都以为服务端渲染仅仅如此?但是事实并非如此。我们在页面添加一个点击事件。
<button onClick={()=>alert("2")}>点击我!!</button>
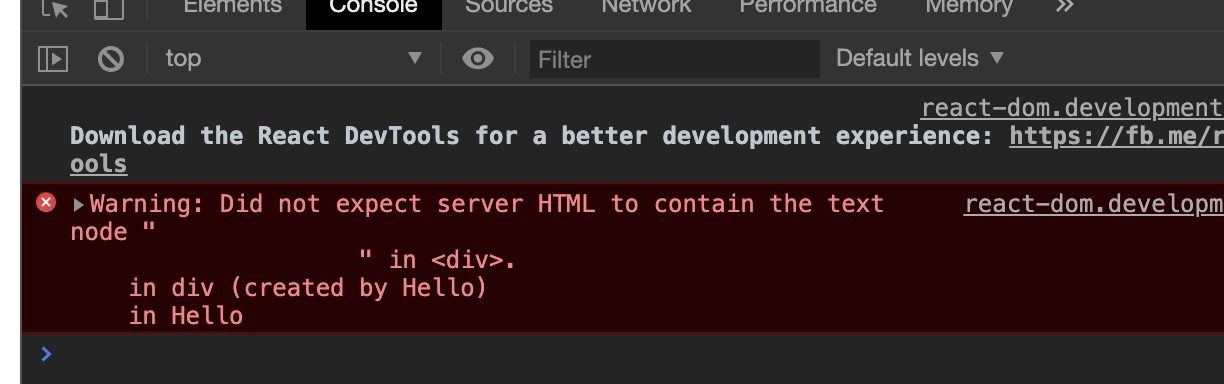
network。

enderToString方法。原来是因为renderToString方法仅仅是将React组件变成了字符串组件,但是并没有将其的事件绑定。那这就完了。服务端渲染怎么可以连最常见的点击事件都没有呢?这就要用到我们的同构。
1.什么是同构
简而言之,一套代码在服务端跑一遍,同时在客户端再跑一遍。这样的应用则为同构应用。
2.创造同构应用
服务端的代码我们已经有了,那么我们接下来编写客户端的代码。我们将src中的index.js文件移至新建的server文件夹下,该文件夹下编写的是服务端的代码。再新建客户端的文件夹取名为client,其中也放置一个index.js文件来写客户端渲染的代码。
//这是我们典型的客户端渲染挂载节点的方式,不同的是这里我们需要使用hydate,而不是render
import React from 'react';
import ReactDom from 'react-dom';
import Hello from './pages/Hello';

ReactDom.hydrate(<Hello />,document.getElementById("root"))
然后我们需要创造一个id为root的节点方便挂载。
<!doctype html>
<html>
    <head>
        <title>REACT SSR</title>
    </head>
    <body>
        <div id="root">
            ${content}
        </div>
        <script src="./public/index.js"></script>
    </body>
</html>
body里面script标签里面放置的是客户端渲染的代码。那么我们依旧需要将客户端代码打包。新建客户端打包文件webpack.client.config.js。
const Path=require("path")

module.exports={
    entry:"./src/client/index.js",
    mode:"development",
    output:{
        filename:"index.js",
        path:Path.resolve(__dirname,'public')
    },
    module:{
        rules:[{
            test:/\.js?$/,
            loader:"babel-loader",
            exclude:/node_modules/
        }]
    }
}
script标签内声明一个命令
"dev:build:client":"webpack --config webpack.client.config.js --watch",
执行命令npm run dev可见public目录下生成了public目录以及目录下的index.js文件。
我们需要将node服务器文件改一下
const server = http.createServer(function (req, res) {

    let path = req.url;
    if (path === "/") {
        res.writeHead(200, { 'Content-Type': "text/html; charset=utf-8" });

        res.end(`
        <!DOCTYPE html>
        <html>
            <head>
                <title>REACT SSR</title>
            </head>
            <body>
                <div id="root">
                    ${content}
                </div>
                <script src="/index.js"></script>
            </body>
        </html>
    `)
    }else if(path==="/index.js"){
        let filePath=Path.join("public",req.url);
        fs.readFile(filePath,function(err,data){
            if(err){
                throw err;
            }
            // 设置请求头,访问文件类型为js文件
            res.setHeader("Content-Type", "text/js");
            res.end(data);
        })
    }

})
当访问路径为index.js时,将public目录下的index.js文件返回。
接下来我们点击按钮就可以弹出框了。


3.同构原理分析
首先我们分析一下:
-
当用户输入
localhost:3000,浏览器请求路径为/。 -
node服务器返回一个html。 -
浏览器接受到
html渲染html。 -
浏览器加载到
JS文件。 -
浏览器中执行
JS中的React代码 -
JS中的React代码接管页面的操作
由此我们总结出:服务端渲染只发生在第一次进入页面的时候,当页面渲染完以后,路由跳转由
JS进行控制,React中的JS文件将接管页面。服务端渲染并不是每一个页面都进行服务端渲染,二是第一个访问的页面进行服务端渲染。
由此我们大概知道了SSR主要作用就是使白屏事件缩短和SEO。SSR离不开CSR的配合。
四、路由处理(一级)
解决了事件处理,接下来便是重头戏了--路由。大家都知道在一个项目中肯定会有多个页面,每个页面都有相应的路由配置。路由的配置向来是react的一个重难点。在服务端渲染路由配置是和客户端渲染配置不一样的。
- 我们在使用客户端渲染的时候,页面跳转路由是前端控制的,主要有两种模式,一种是 history 模式,另外一种是 hash 模式。
- 无论是哪种模式,都可以进行路由跳转操作,唯一的不同是 history 模式需要后端控制 404 页面,而 hash 模式不需要。
- 路由的控制,不仅仅是在服务端,客户端也需要进行同样的路由规则,那么我们就可以写一份路由,供客户端和服务端一起使用
1.路由搭建
首先我们安装react-router-dom,新建router文件夹并在其下新建index.js文件,存放服务端渲染和客户端渲染的公共页面路由文件。
import Hello from './../pages/Hello';
import { Route } from 'react-router-dom';
import React from 'react';

export default(
    <div>
        <Route path="/" exact component={Hello}/>
    </div>
)
客户端渲染文件中
import React from 'react';
import ReactDom from 'react-dom';
import Hello from './../pages/Hello';
import Routes from './../router/index';
import { BrowserRouter } from 'react-router-dom';

const App=()=>{
    return(
        <BrowserRouter>
            {Routes}
        </BrowserRouter>
    )
}

ReactDom.hydrate(<App />,document.getElementById("root"))
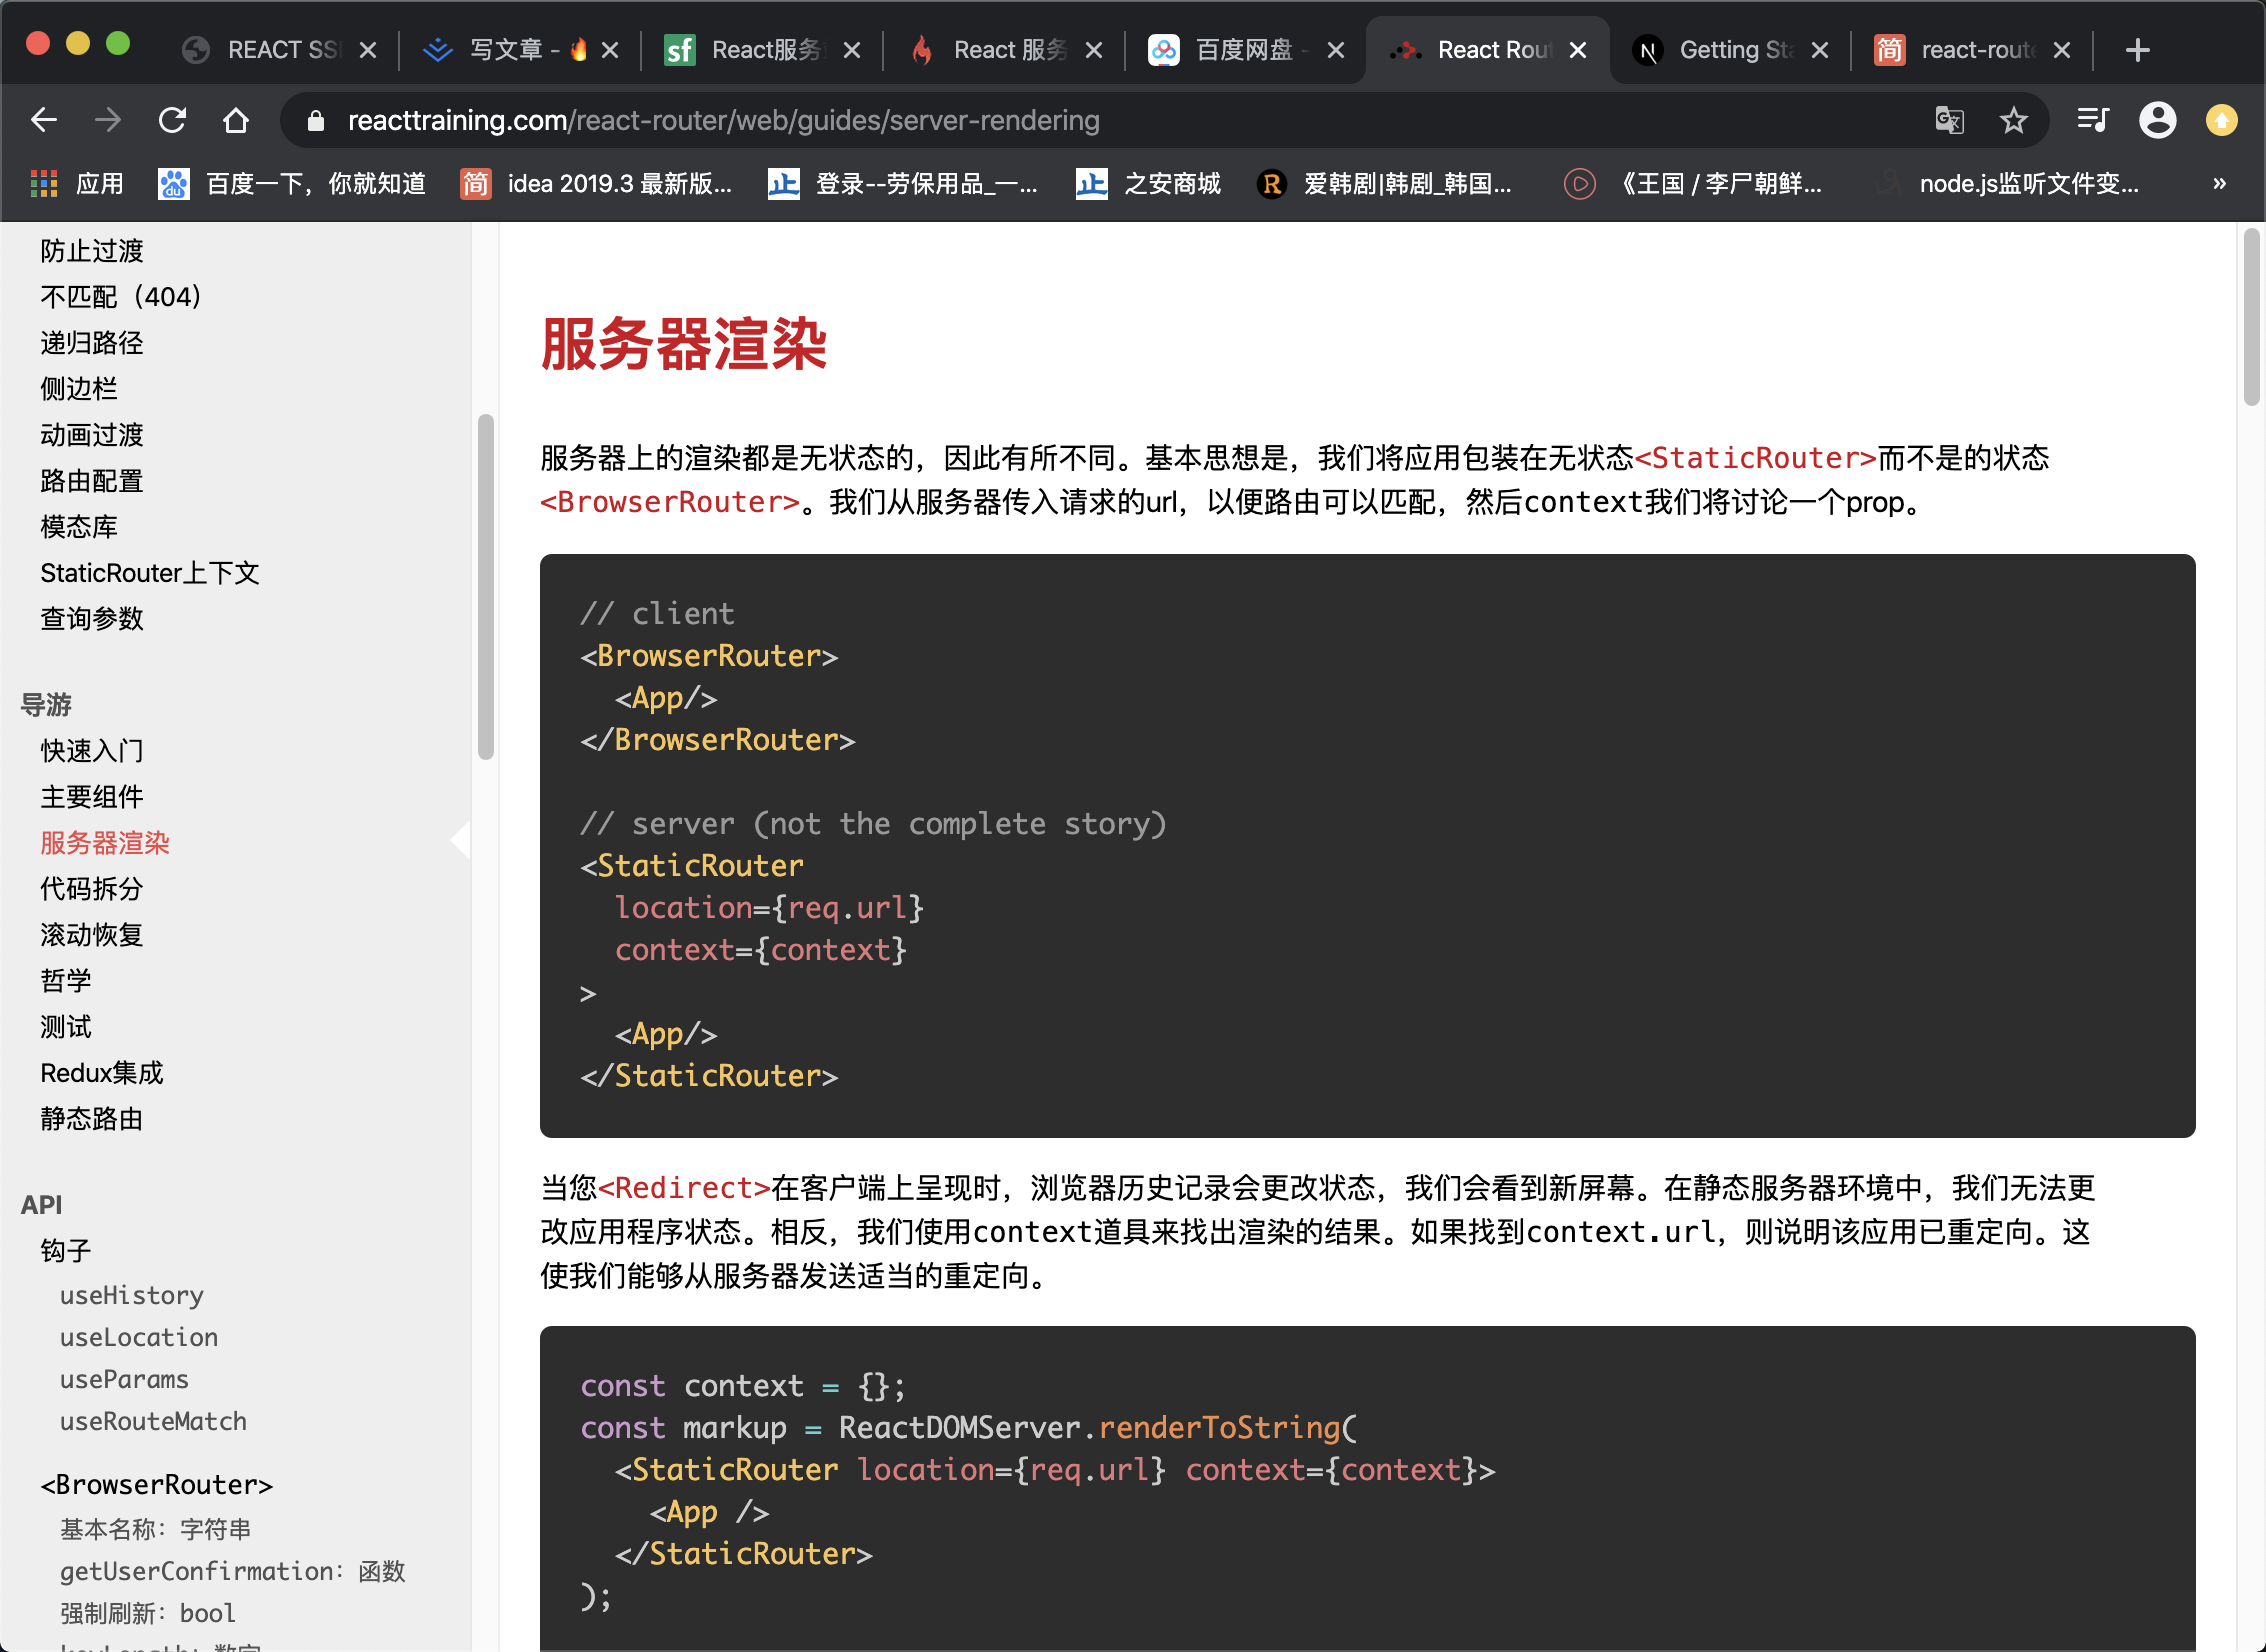
服务端渲染则和客户端渲染路由不同,BrowserRouter可以智能感知你页面路径的变化并匹配相应的路由文件,但是服务端渲染并不能直接感应你路由的变化,所以我们将服务端路由写在请求方法里面,并将路径传给服务端渲染组件。
因为服务端并不知道请求是通过什么模式,而且服务端也无需知道,服务端只需要根据客户端发送的请求,做相应的处理即可。
StaticRouter 里需要传递两个属性,一个是 context,一个是 location。
context 主要是用来给组件传递数据信息,这个属性可以在客户端和服务端互相传递参数,比如 css 样式的参数。
location 主要是用来接收请求路径信息,比如 pathname,search,hash 等 此时路由文件。
var http = require("http");
var fs =require("fs");
var Path=require("path");
import Routes from './../router/index';
import React from 'react';
import { renderToString } from 'react-dom/server';
import { StaticRouter } from 'react-router-dom';

const server = http.createServer(function (req, res) {
    const content = renderToString((
        <StaticRouter location={req.path} context={{}}>
            {Routes}
        </StaticRouter>
    ))

    let path = req.url;
    if(path.split(".").length===1){//判断是否是资源文件
        res.writeHead(200, { 'Content-Type': "text/html; charset=utf-8" });

        res.end(`
            <!DOCTYPE html>
            <html>
                <head>
                    <title>REACT SSR</title>
                </head>
                <body>
                    <div id="root">${content}</div>
                    <script src="/index.js"></script>
                </body>
            </html>
        `)

    }else if(path==="/index.js"){
        let filePath=Path.join("public",req.url);
        fs.readFile(filePath,function(err,data){
            if(err){
                throw err;
            }
            // 设置请求头,访问文件类型为js文件
            res.setHeader("Content-Type", "text/js");
            res.end(data);
        })
    }

})

server.listen(3000, '127.0.0.1');
从上面的路由文件中我们得到:
添加了 StaticRouter 组件,传入了一个 context 值,把req.url 传递给了 location 属性,这样服务端就可以知道客户端的路由地址
- 客户端通过路由修改了请求的地址,服务端接收相应,在 StaticRouter 中我们获取到了客户端请求的路由地址。
- routes 就开始进行匹配,如果匹配到了,那么就把匹配到的路由组件进行渲染成 HTML 字符串,发送给客户端。
- 如果没有匹配到呢,假如我们访问了 http://localhost:3000/hello 路由,那么我们的 routes 是匹配不到的,既然匹配不到,那么 renderToString 渲染的结果就是空,domContent 作为空值插入 HTML 模板,得到的就是一个空白页面
我们新建一个LinkDemo.js页面查看效果是否生效
import React from 'react';
import { Link } from 'react-router-dom';

export default class LinkDemo extends React.Component{
    render(){
        return (
            <div>
                LINK
            </div>
        )
    }
}

2.使用Link标签实现路由间的跳转
import React from 'react';
import { Link } from 'react-router-dom';

export default class LinkDemo extends React.Component{
    render(){
        return (
            <div>
                LINK
                <Link to="hello">hello</Link>
            </div>
        )
    }
}
点击hello会跳转到Hello页面。
3.改造路由
我们需要将路由进行改造
//根路由文件
import Hello from './../pages/Hello';
import Link from './../pages/Link';

export default [
    {
        path:"/",
        exact:true,
        component:Hello,
        key:"/"
    },
    {
        path:"/link",
        exact:true,
        component:Link,
        key:"/link"
    }
]
//客户端渲染
<BrowserRouter>
            {
                Routes.map(props=>(
                        <Route {...props} />
                ))
            }
</BrowserRouter>
//服务端渲染
<StaticRouter location={req.path} context={{}}>
            {
                Routes.map(props=>(
                        <Route {...props} />
                ))
            }
</StaticRouter>
五、样式相关处理
1.图标处理
纵观大大小小的网站,图标都是一个很常见的一部分,那么如何实现这样的功能呢?其实浏览器在我们输入地址的时候,会默默的发送一个获取网站图标的请求,用于获取网站的图标。

x-icon,即后缀名为.ico的图标文件,我一般是在在线生成ico这个网站生成自己喜欢的图标,然后我们放进public文件夹下,public文件夹存放网站的静态资源文件。然后node代码需要修改为:
if(path.split(".").length===1){
        res.writeHead(200, { 'Content-Type': "text/html; charset=utf-8" });

        res.end(`
            <!DOCTYPE html>
            <html>
                <head>
                    <title>REACT SSR</title>
                </head>
                <body>
                    <div id="root">${content}</div>
                    <script src="/index.js"></script>
                </body>
            </html>
        `)

    }else if(path.split(".").length===2&&path.split(".")[1]==="js"){//判断请求js文件
        let filePath=Path.join("public",req.url);
        fs.readFile(filePath,function(err,data){
            if(err){
                throw err;
            }
            // 设置请求头,访问文件类型为js文件
            res.setHeader("Content-Type", "text/js");
            res.end(data);
        })
    }else if(path.split(".").length===2&&path.split(".")[1]==="ico"){//判断请求ico文件
        let filePath=Path.join("public",req.url);
        fs.readFile(filePath,function(err,data){
            if(err){
                throw err;
            }
            // 设置请求头,访问文件类型为icon文件
            res.setHeader("Content-Type", "image/x-icon");
            res.end(data);
        })
    }
重新启动npm run dev,在tab标签的左上角你会发现
2.所需loader介绍
css-loader:将css文件转化为js导入,其中为了不让类目混乱等,可以采取css module将css模块化,模块化将按照配置的一定的规则进行类名的转化,但是转化完以后用户完全不知道转化后的类名,所以需要改变类名
//不加css module
module.exports = "原css文件中的样式";
//加css module
module.exports = {
	toString: () => “原css文件中的样式(类名被转换了,代码可能也被压缩过)”
	locals: {
		[原文件中写的类名等]: “被转换后的实际类名等”
	}
}
style-loader:正常情况下是css-loader处理完css,使其变成js对象以后,假设该css对象为cssContent,然后简单粗暴的通过DOM操作将假设该css对象为cssContent中的样式插入到style标签中。
var cssContent = 【css-loader转换css文件后的结果】;
addStylesToDom(cssContent.toString());
module.exports = cssContent.locals;
isomorphic-style-loade:因为在node环境下没有dom,就不能像style-loader一样简单粗暴的挂载到dom上,与style-loader不同,isomorphic-style-loader导出了一些辅助方法,让用户依据实际情况来调用不同的方法。
var content = 【css-loader转换css文件后的结果】;
// 方便用户使用类名等
exports = module.exports = content.locals || {};
exports._getContent = () => content;
// 方便用户获取样式
exports._getCss = () => context.toString();
// 方便用户将样式插入到DOM中
exports._insertCss = 【作用同上面的addStylesToDom】;
3.css样式处理
这部分内容主要与webpack相关,小伙伴可以看我的另一篇文章webpack4搭建开发环境。上节我们知道需要将css-module开启,同时也可以保证css在全局的唯一性,避免样式混乱。
我们新建css文件并在Hello.js文件引入css样式
import React from 'react';
import { Link } from 'react-router-dom';
import styles from "./index.css";
export default class Hello extends React.Component{
render(){
return (
<div className={styles.hello}>
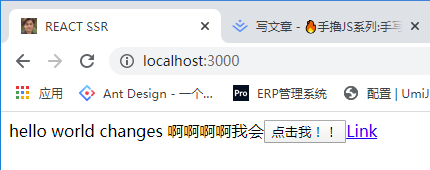
hello world changes 啊啊啊啊我会
<button onClick={()=>alert("2")}>点击我!!</button>
<Link to="/link">Link</Link>
</div>
)
}
}
//index.css样式
.hello{
background-color: aqua;
}
1.首先我们需要安装处理css需要的包
npm install style-loader css-loader --save
2.我们在服务端/客户端打包文件下写上loader的处理
//webpack.client.config.js
{
        test:/\.css?$/,
        use:[
            'style-loader',
            {loader:'css-loader',options:{
                modules:true
            }}
        ],
        exclude:/node_modules/
}
//webpack.server.config.js
{
        test:/\.css?$/,
        use:[
            'style-loader',
            {loader:'css-loader',options:{
                modules:true
            }}
        ],
        exclude:/node_modules/
}
重新运行代码,我们会发现终端报了这样一个错误

document is not defined?为什么会产生这样的错误呢,原因是style-loader需要将css挂在到document对象上,但是在服务器端没有document对象,所以需要借助另一个和style-loader相同的库来处理,这里我们安装
npm install isomorphic-style-loader --save
然后我们在服务器端打包文件中将style-loader改为isomorphic-style-loader,这个库可以在服务端渲染css。
{
    test:/\.css?$/,
    use:[
        'isomorphic-style-loader',
        {loader:'css-loader',options:{
            modules:true
        }}
    ],
    exclude:/node_modules/
}
重启项目,样式已经成功!

4.问题凸显
当我们禁用页面js的时候,我们会发现样式消失不见,这个时候我们打开网页源代码,可以发现dom节点上class已经加载进去了。并且当我们重复刷新时,页面会出现抖动的效果。这是因为当服务器端首次渲染时,head标签并无style样式,当加载js的时候才会将style样式写进head。这是一个从无到有的过程,所以会产生一定的抖动。
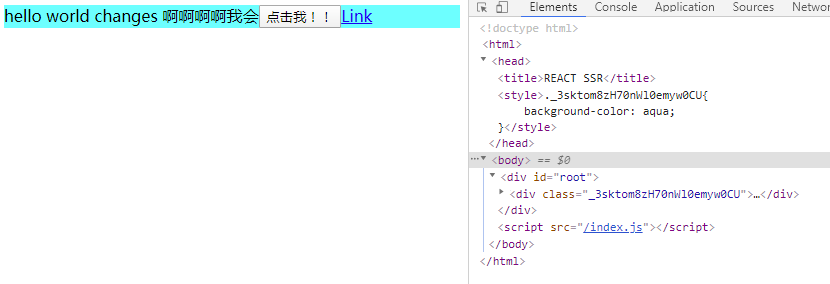
isomorphic-style-loader并不能将样式写到head头部,那么他不能,我们就手动写呗!在第二节中,我们知道,isomorphic-style-loader给我们提供了_getContent、_getCss、_insertCss方法。我们可以通过styles对象的_getCss方法获取到css。由于css-loader并没有这个方法,所以我们判断打印一下服务端的getCss会出现什么?
constructor(props){
        super(props);
        console.log("contrucotr");
        if(styles._getContent){
            console.log(styles._getCss());
        }
}

所以我们可以通过_getCss得出当前的css,那么如何将我们的css注入到head头部呢?在路由中我们使用StaticRouter时说过,context属性可以使路由和当前页面进行通行。
//声明对象并注入到StaticRouter里面
let context={
        css:[]
};

const content = renderToString((
        <StaticRouter location={req.path} context={context}>
            {
                Routes.map(props=>(
                        <Route {...props} />
                ))
            }
        </StaticRouter>
))
这个时候路由页面会得到一个staticContext属性。我们打印一下。
let staticContext=this.props.staticContext;
if(styles._getContent){
            console.log(styles._getCss());
            console.log(staticContext);
}

css样式,那么我们可以将css推进一个新数组里面。
constructor(props){
        super(props);
        let staticContext=this.props.staticContext;

        if(styles._getContent){
            staticContext.css.push(styles._getCss());
        }
}
接下来在路由下面打印一下context即可看到。

css字符串挂载到head的style标签处即可。
 let cssStr = context.css.length ? context.css.join('\n') : '';
 <!DOCTYPE html>
            <html>
                <head>
                    <title>REACT SSR</title>
                    <style>${cssStr}</style>
                </head>
                <body>
                    <div id="root">${content}</div>
                    <script src="/index.js"></script>
                </body>
</html>
接下来我们将js禁止掉样式依旧可以显示,并且并无页面抖动现象。
5.less配置
less可以使我们的css代码变得更加简洁明了,同时复用性也会大大的提高。接下来我们将演示如何配置less:
1.安装相应loader
npm install less less-loader --save
2.服务端配置文件rules下添加
{
                test:/\.less?$/,
                use:[
                    'isomorphic-style-loader',
                    {loader:'css-loader',options:{
                        modules:true
                    }},
                    "less-loader"
                ],
                exclude:/node_modules/
}
3.客户端配置文件rules下添加
{
                test:/\.less?$/,
                use:[
                    'style-loader',
                    {loader:'css-loader',options:{
                        modules:true
                    }},
                    "less-loader"
                ],
                exclude:/node_modules/
}
接下来新建index.less文件测试发现正常,可以运行。
scss配置
同less一样,也是我们常见的配置之一。
1.安装相应loader
npm install scss scss-loader sass-loader node-sass--save
2.服务端配置文件rules下添加
{
                test:/\.scss?$/,
                use:[
                    'isomorphic-style-loader',
                    {loader:'css-loader',options:{
                        modules:true
                    }},
                    "scss-loader"
                ],
                exclude:/node_modules/
}
3.客户端配置文件rules下添加
{
                test:/\.scss?$/,
                use:[
                    'style-loader',
                    {loader:'css-loader',options:{
                        modules:true
                    }},
                    "scss-loader"
                ],
                exclude:/node_modules/
}
接下来新建index.scss文件测试发现正常,可以运行。
6.使用高阶函数优化css代码
如果我们在每个文件的构造方法里面这样操作,代码难免会冗余。我们可以利用高阶函数来优化我们的代码来达到复用的效果。关于高阶函数,可以看我掘金的另外一篇文章高阶函数。新建component文件夹来放我们的高阶函数,新建ConnectStyle.js文件。在高阶函数中处理逻辑很明显复用性会大大提高。
//ConnectStyle.js
import React, { Component } from 'react';

export default (WrappedComponent, styles) => {
  class NewComponent extends Component {
    componentWillMount() {
      if (this.props.staticContext) {
        this.props.staticContext.csses.push(styles._getCss());
      }
    }

    render() {
      return (<WrappedComponent {...this.props} />);
    }

  };

  return <NewComponent />;
};
这里我们会使用装饰器语法
//安装babel插件转化装饰器语法
npm install @babel/plugin-proposal-decorators --save
//.babelrc配置
"plugins":[
        ["@babel/plugin-proposal-decorators", { "legacy": true }]
]
//高阶函数WithStyle
import React, { Component } from 'react';

export default (styles) =>(WrappedComponent)=> {
  class NewComponent extends Component {
    constructor(props) {
      super(props);
      let staticContext=this.props.staticContext;

      if(styles._getContent){
          staticContext.css.push(styles._getCss());
      }
    }

    render() {
      return (<WrappedComponent {...this.props} />);
    }

  };

  return NewComponent;
};
//测试页面
import React from 'react';
import { Link } from 'react-router-dom';
import styles from './Test.scss';
import ConnectStyle from './../component/ConnectStyle';

@ConnectStyle(styles)
class Hello extends React.Component{
    render(){
        return (
            <div className={styles.color}>
                hello world changes 啊啊啊啊我会
                <button  onClick={()=>alert("2")}>点击我!!</button>
                <Link to="/link">Link</Link>
            </div>
        )
    }
}

export default Hello;
//Test.scss
.color {
    color:red;
}

六、404页面处理与重定向页面
在本文第四章说到,如果用户未定义路由,在用户输入某个地址,服务端路由接収到客户端请求的路由地址。如果没有匹配到,那么 renderToString 渲染的结果就是空,domContent作为空值插入 HTML 模板,得到的就是一个空白页面。这个时候用户看到一片空白,不知道是什么意思?乍一看还以为是代码出错了。这个时候404就显得尤为重要。
1.404页面
404页面需要客户端告诉服务端,这个页面是否匹配到了,如果没有匹配到,该如何操作,所以我们还是需要使用StaticRouter的context属性来传递数据。新建一个404的组件,/src/pages/NotFound.js 此时路由页面这么写
import Hello from './../pages/Hello';
import Link from './../pages/Link';
import NotFound from './../pages/NotFound';

export default [
    {
        path:"/hello",
        exact:true,
        component:Hello,
        key:"hello"
    },
    {
        path:"/link",
        exact:true,
        component:Link,
        key:"link"
    },
    {
        path:"*",
        component:NotFound
    }
]
当用户输入的路径没有找到时,会进入NotFound页面,需要在NotFound页面给路由的context挂载一个NotFound属性。
import React from 'react';
import { Link } from 'react-router-dom';
import styles from './Test.scss';
import ConnectStyle from './../component/ConnectStyle';
@ConnectStyle(styles)
class NotFound extends React.Component{
componentWillMount(){
const { staticContext } = this.props;
staticContext && (staticContext.NotFound = true);
}
render(){
return (
<div className={styles.color}>
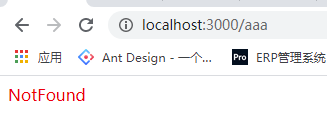
NotFound
</div>
)
}
}
export default NotFound;
判断Context中如果有NotFound属性,则将NotFound页面传给客户端并更改状态为404
if (context.NotFound) {
            res.writeHead(404, { 'Content-Type': "text/html; charset=utf-8" });
            res.end(`
                <!DOCTYPE html>
                <html>
                    <head>
                        <title>REACT SSR</title>
                        <style>${cssStr}</style>
                    </head>
                    <body>
                        <div id="root">${content}</div>
                        <script src="/index.js"></script>
                    </body>
                </html>
            `)
            return ;
}
需要注意的是客户端和服务端路由渲染时应用
Switch标签进行包裹,否则会多次匹配。
输入aaa测试成功。
2. 重定向页面
假如我们有一个需要登录才能查看的页面,但是用户没有登录,所以他不能查看,但是我们要把页面重定向到登录页面,让用户进行登录,所以我们需要进行重定向。
我们假设登录到link页面的时候进行跳转到登录页面。
1.首先定义一个登录页面
import React from 'react';
import { Link } from 'react-router-dom';
import styles from './Test.scss';
import ConnectStyle from './../component/ConnectStyle';

@ConnectStyle(styles)
class Hello extends React.Component{
    render(){
        return (
            <div className={styles.color}>
                登录界面
            </div>
        )
    }
}

export default Hello;
2.更改路由配置
import Hello from './../pages/Hello';
import Link from './../pages/Link';
import NotFound from './../pages/NotFound';
import Login from './../pages/Login';

export default [
    {
        path:"/hello",
        exact:true,
        component:Hello,
        key:"hello"
    },
    {
        path:"/link",
        exact:true,
        component:Link,
        key:"link"
    },
    {
        path:"/login",
        exact:true,
        component:Login,
        key:"login"
    },
    {
        path:"*",
        component:NotFound,
        key:"notfound"
    }
]
3.更改link页面
import React from 'react';
import { Link,Redirect } from 'react-router-dom';

export default class LinkDemo extends React.Component{
    render(){
        return (
            <div>
                LINK
                <Link to="hello">hello</Link>
                <Redirect to="/login" />
            </div>
        )
    }
}
这是典型的客户端路由渲染,这个时候路由已经可以完成跳转,但是你将js关闭就不行了,我们还需要配置服务端渲染的跳转。 我们打印一下context的值。

这里有一个
action的属性,值是REPLACE,这个是react-router-dom帮我们做的,当页面使用Redirect组件进行重定向的时候,context里会添加action,location和url属性。 我们可以利用这个属性来判断并重定向登录页面
if (context.action==="REPLACE") {//404
            console.log(context.url)
            res.writeHead(302,{
                'Location': context.url
            })
            res.end();
            return ;
}
至此,本章代码已写完。server路由完整代码
var http = require("http");
var fs =require("fs");
var Path=require("path");
import Routes from './../router/index';
import React from 'react';
import { renderToString } from 'react-dom/server';
import { StaticRouter,Route,Switch } from 'react-router-dom';

const server = http.createServer(function (req, res) {

    let context={
        css:[]
    };


    const content = renderToString((
        <StaticRouter location={req.url} context={context}>
            <Switch>
                {
                    Routes.map(props=>(
                            <Route {...props} />
                    ))
                }
            </Switch>
        </StaticRouter>
    ));

    let cssStr = context.css.length ? context.css.join('\n') : '';

    let path = req.url;

    if(path.split(".").length===1){

        if (context.NotFound) {//404
            res.writeHead(404, { 'Content-Type': "text/html; charset=utf-8" });
            res.end(`
                <!DOCTYPE html>
                <html>
                    <head>
                        <title>REACT SSR</title>
                        <style>${cssStr}</style>
                    </head>
                    <body>
                        <div id="root">${content}</div>
                        <script src="/index.js"></script>
                    </body>
                </html>
            `)
            return ;
        }

        if (context.action==="REPLACE") {//404
            console.log(context.url)
            res.writeHead(302,{
                'Location': context.url
            })
            res.end();
            return ;
        }

        res.writeHead(200, { 'Content-Type': "text/html; charset=utf-8" });

        res.end(`
            <!DOCTYPE html>
            <html>
                <head>
                    <title>REACT SSR</title>
                    <style>${cssStr}</style>
                </head>
                <body>
                    <div id="root">${content}</div>
                    <script src="/index.js"></script>
                </body>
            </html>
        `)

    }else if(path.split(".").length===2&&path.split(".")[1]==="js"){
        let filePath=Path.join("public",req.url);
        fs.readFile(filePath,function(err,data){
            if(err){
                throw err;
            }
            // 设置请求头,访问文件类型为js文件
            res.setHeader("Content-Type", "text/js");
            res.end(data);
        })
    }else if(path.split(".").length===2&&path.split(".")[1]==="ico"){
        let filePath=Path.join("public",req.url);
        fs.readFile(filePath,function(err,data){
            if(err){
                throw err;
            }
            // 设置请求头,访问文件类型为icon文件
            res.setHeader("Content-Type", "image/x-icon");
            res.end(data);
        })
    }

})

server.listen(3000, '127.0.0.1',function(){
    console.log("node is listening...")
});
七、生命周期函数
在开发react项目中,生命周期函数使我们的开发变得越来越便捷。那么在我们的服务端渲染中,可以使用生命周期函数吗? 我们可以试一下。
construtor构造函数可以在服务端渲染中进行
UNSAFE_componentWillMount是服务端渲染唯一会调用的生命周期函数。
componentDidMount(){
    console.log("componentDidMount")
}
我们在Hello.js页面写上我们的componentDidMount函数中。我们运行一下,在客户端渲染中我们可以看见打印的componentDidMount。那么在我们的终端里面并没有打印出componentDidMount。写过react的小伙伴肯定都很熟悉componentDidMount,在react客户端渲染中这是当组件挂载完毕以后执行的钩子函数,我们一般在这里执行我们的异步请求的操作,但是在服务端渲染中这个生命周期函数并不会执行,那么我们怎么办呢?
要想达到访问某个路由就执行某个路由的componentDidMount的效果,我们该怎么做呢?
{
        path:"/hello",
        exact:true,
        component:Hello,
        key:"hello",
        loadData:Hello.loadData
},
其中Hello.loadData对应的就是Hello组件里面的loadData方法。
import React from 'react';
import { Link } from 'react-router-dom';
import styles from './Test.scss';
import ConnectStyle from './../component/ConnectStyle';

@ConnectStyle(styles)
class Hello extends React.Component{

    render(){
        return (
            <div className={styles.color}>
                hello world changes 啊啊啊啊我会
                <button  onClick={()=>alert("2")}>点击我!!</button>
                <Link to="/link">Link</Link>
            </div>
        )
    }
}

Hello.loadData=()=>{
    console.log("loadData")
}

export default Hello;
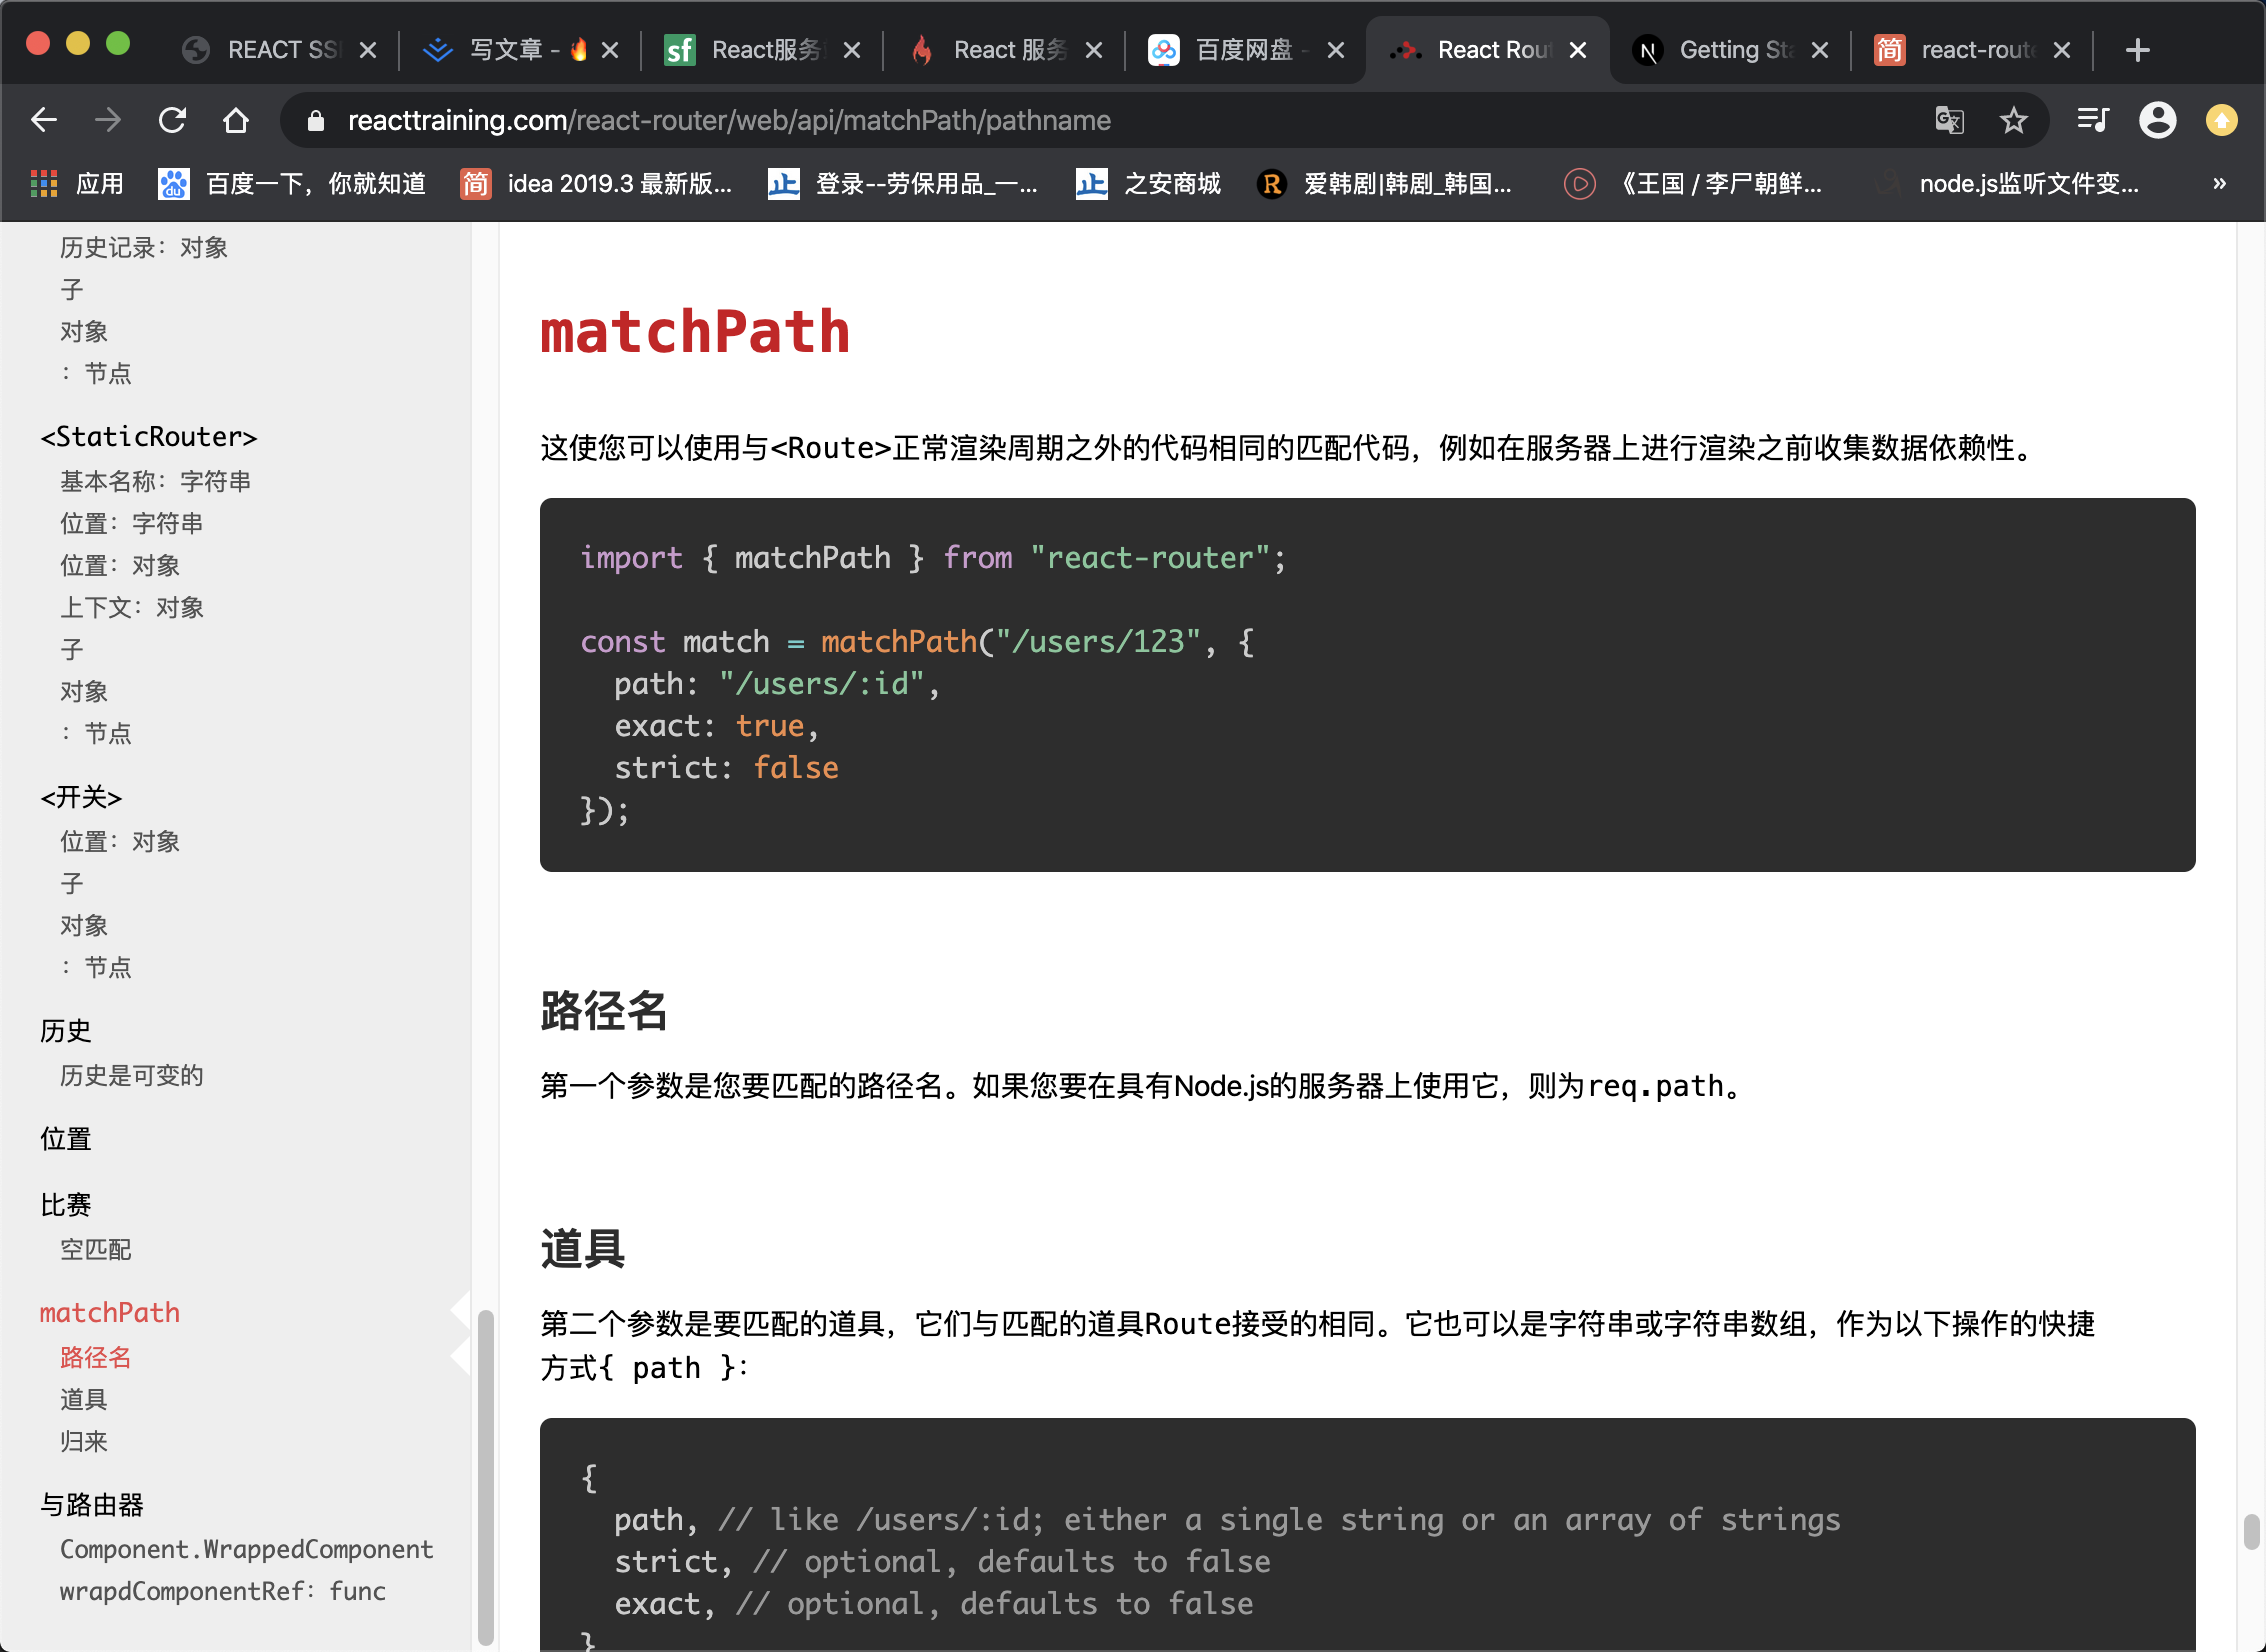
我们可以在服务端渲染里面这么写
const matchRoutes=[];//定义匹配的路由

Routes.some(route=>{
        //遍历匹配相应的路由
        const match=matchPath(req.url,route);
        //如果匹配到了,就将匹配到的路由推进matchRoutes
        if(match){
            matchRoutes.push(route)
        }
})
那么在matchRoutes里面应该有对应的路由组件。
接下来我们就可以让组件里面的loadData执行一遍就行。
matchRoutes.forEach(item=>{
        item&&item.loadData&&item.loadData()
})
至此我们就可以在终端看到打印的loadData,大功告成!

八、优化SSR
1.小技巧
当我们搜索关键词时,排名靠前的带有广告字样的都是花钱打的广告,排名靠前。

2.SEO
如果你不花钱,也想自己的网站排名靠前,可以通过IT相关技术进行搜索引擎优化使得自己的网站排名靠前,那么搜索引擎的技术就被叫做SEO。
3.Title和Description的真正作用
比如你搜索关键词,搜索引擎不仅会通过Title展示,而且会全文搜索关键词进行排名。
4.如何做好SEO
如何做好SEO使得网站排名靠前呢?
网站由三部分组成:文字、多媒体、链接
- 优化文字 搜索引擎需要吃透你的价值,而原创则比抄袭更有价值,所以原创比较有价值。
- 优化链接 外部链接越多,相关性越强,价值越高。
- 优化多媒体/图片 图片高清种类更多更有价值。
5.React-Helmet的使用
react-helmet可以给我们的网页增加标题描述等信息。
import React from 'react';
import { Link } from 'react-router-dom';
import styles from './Test.scss';
import ConnectStyle from './../component/ConnectStyle';
import { Helmet } from 'react-helmet';

@ConnectStyle(styles)
class Hello extends React.Component{

    render(){
        return (
            <div className={styles.color}>
                 <Helmet>
                     <title>ReactHelmet使用</title>
                    <meta name="描述" content="这是hello"></meta>
                 </Helmet>
                hello world changes 啊啊啊啊我会
                <button  onClick={()=>alert("2")}>点击我!!</button>
                <Link to="/link">Link</Link>
            </div>
        )
    }
}

Hello.loadData=()=>{
    console.log("loadData")
}

export default Hello;

//服务端渲染
import { Helmet } from 'react-helmet';
const helmet=Helmet.renderStatic();
<!DOCTYPE html>
<html>
        <head>
            ${helmet.title.toString()}
            ${helmet.meta.toString()}
            <style>${cssStr}</style>
        </head>
        <body>
            <div id="root">${content}</div>
            <script src="/index.js"></script>
        </body>
</html>
6.预渲染
预渲染可以不使用SSR而用CSR进行SEO的优化。
九、项目总结
这下子我们就搭建了一个简易版的React ssr项目,当然这离next.js这样的SSR框架还是有一定的距离,比如我们常用的
二级路由、数据状态管理、异步数据加载。打包等等。本文旨在了解服务端渲染方面的相关知识点。在后续的文章中,我会带大家在本项目的基础上实现更多实战需要的功能并完善我们的服务端渲染框架,以达到商用级别。
