

本系列代码地址 github
我们在上一边已经将“publishReleaseRelease”和“assembleRelease”这两个任务关联起来了。并已经确定了“publishReleaseRelease”执行前会先执行“assembleRelease”,接下来就是把“assembleRelease”执行完后生成的apk来上传到蒲公英了。 我们先来介绍下蒲公英。
蒲公英提供专业的手机应用内测服务,您只需将需要内测的应用上传至蒲公英,生成二维码,内测用户通过在手机上扫描二维码,即可将内测应用安装至手机等设备中进行测试。
当我们把内测的apk上传到蒲公英以后,会生成一个安装页面,如下:

这样,测试人员就可以在这个下载页面下载对应的版本进行测试。而且这个页面还会保存版本的历史记录,方便我们进行版本对比。
我们可以在蒲公英的后台进行手动上传,但我们要实现的是让上传过程自动化。
蒲公英提供了一个api接口来提供apk文件上传,网址。基本上是很简单的,就不详细说了,看文档就可以了。
接下来实现apk文件上传功能。
我们先写一个工具类,来实现http的文件上传功能,代码如下:
class MultipartUtility {

    private final String boundary = UUID.randomUUID().toString()
    private static final String LINE_FEED = "\r\n"
    private HttpURLConnection httpConn
    private String charset
    private OutputStream outputStream
    private PrintWriter writer

    /**
     * This constructor initializes a new HTTP POST request with content type
     * is set to multipart/form-data
     *
     * @param requestURL
     * @param charset
     * @throws IOException
     */
    MultipartUtility(String requestURL, String charset)
            throws IOException {
        this.charset = charset

        URL url = new URL(requestURL)
//        Log.e("URL", "URL : " + requestURL.toString());
        println "URL : " + requestURL.toString()

        httpConn = (HttpURLConnection) url.openConnection()

//        httpConn = url.openConnection(new Proxy(Proxy.Type.HTTP, new InetSocketAddress(8888)))


        httpConn.setRequestMethod("POST")
        httpConn.setUseCaches(false)
        httpConn.setDoOutput(true) // indicates POST method
        httpConn.setDoInput(true)
        httpConn.setRequestProperty("Content-Type", "multipart/form-data; boundary=" + boundary)
//        httpConn.setRequestProperty("User-Agent", "CodeJava Agent")
//        httpConn.setRequestProperty("Test", "Bonjour")
        outputStream = httpConn.getOutputStream()
        writer = new PrintWriter(new OutputStreamWriter(outputStream, charset), true)
    }

    /**
     * Adds a form field to the request
     *
     * @param name field name
     * @param value field value
     */
    void addFormField(String name, String value) {
        writer.append("--" + boundary).append(LINE_FEED)
        writer.append("Content-Disposition: form-data; name=\"" + name + "\"")
                .append(LINE_FEED)
        writer.append("Content-Type: text/plain; charset=" + charset).append(
                LINE_FEED)
        writer.append(LINE_FEED)
        writer.append(value).append(LINE_FEED)
        writer.flush()
    }

    /**
     * Adds a upload file section to the request
     *
     * @param fieldName name attribute in <input type="file" name="..." />
     * @param uploadFile a File to be uploaded
     * @throws IOException
     */
    void addFilePart(String fieldName, File uploadFile)
            throws IOException {
        String fileName = uploadFile.getName()
        writer.append("--" + boundary).append(LINE_FEED)
        writer.append(
                "Content-Disposition: form-data; name=\"" + fieldName + "\"; filename=\"" + fileName + "\"")
                .append(LINE_FEED)
        writer.append("Content-Type: " + "application/vnd.android.package-archive")
                .append(LINE_FEED)
        writer.append("Content-Transfer-Encoding: binary")
                .append(LINE_FEED)
        writer.append(LINE_FEED)
        writer.flush()

        FileInputStream inputStream = new FileInputStream(uploadFile)

        byte[] buffer = new byte[1024 * 6]
        int bytesRead = -1
        int countBytes = 0
        while ((bytesRead = inputStream.read(buffer)) != -1) {
            outputStream.write(buffer, 0, bytesRead)
            outputStream.flush()
            countBytes += bytesRead
        }

        println "countBytes:${countBytes}"


        inputStream.close()
//        writer.append(LINE_FEED)
        writer.flush()
    }

    /**
     * Adds a header field to the request.
     *
     * @param name - name of the header field
     * @param value - value of the header field
     */
    void addHeaderField(String name, String value) {
        writer.append(name + ": " + value).append(LINE_FEED)
        writer.flush()
    }

    /**
     * Completes the request and receives response from the server.
     *
     * @return a list of Strings as response in case the server returned
     * status OK, otherwise an exception is thrown.
     * @throws IOException
     */
    String finish() throws IOException {
        StringBuffer response = new StringBuffer()

        writer.append(LINE_FEED).flush()
        writer.append("--" + boundary + "--").append(LINE_FEED)
        writer.close()

        // checks server's status code first
        int status = httpConn.getResponseCode()
        if (status == HttpURLConnection.HTTP_OK) {
            BufferedReader reader = new BufferedReader(new InputStreamReader(
                    httpConn.getInputStream()))
            String line = null
            while ((line = reader.readLine()) != null) {
                response.append(line)
            }
            reader.close()
            httpConn.disconnect()
        } else {
            throw new IOException("Server returned non-OK status: " + status)
        }

        return response.toString()
    }
}
接下来我们创建一个任务“uploadPgyerByApi”,代码如下:
task uploadPgyerByApi() {
    doLast {
        //apk打包完成后存在的位置
        def file_path = "./build/outputs/apk/release/app-release-unsigned.apk"
        //apk上传api url
        def api_url = "http://www.pgyer.com/apiv2/app/upload"
        //用户api_key 可从蒲公英后台获取
        def api_key = "1540c89d7f12ade530a14ac4ad******"
        //用户user_key 可从蒲公英后台获取
        def user_key = "15391e4e9f1d62962b97ff630d******"
        MultipartUtility utility = new MultipartUtility(api_url, "UTF-8")

        utility.addFormField("_api_key", api_key)
        utility.addFormField("userKey", user_key)
        utility.addFormField("buildInstallType", "2")
        utility.addFormField("buildPassword", "123456")
        utility.addFormField("buildUpdateDescription", "serverName")
        utility.addFilePart("file", file(file_path))

        def result = utility.finish()
        println result
    }
}
“uploadPgyerByApi”这个task在doLast这个action中实现了apk文件的上传。“file_path”这参数指定了“assembleRelease”这个任务执行完成后生成的apk所在的位置,即我们要上传的apk的文件路径。
这样我们apk文件上传的task便完成了。接下来就需要把“uploadPgyerByApi”和“publishReleaseRelease”这两个任务串在一起。我们在“publishReleaseRelease”这个task的最后样加入如下代码:
finalizedBy(uploadPgyerByApi)
即为:
task publishReleaseRelease(dependsOn: "assembleRelease") {
    group "publish"

    doFirst {
        println "publishReleaseRelease doFirst called......"
    }
    doLast {
        println "publishReleaseRelease doLast called......"
    }

    finalizedBy(uploadPgyerByApi)
}
这样我们就实现了这样一个流程: 1.打包应用 2.上传apk文件到蒲公英
我们执行“publishReleaseRelease”这个task,得到如下结果:
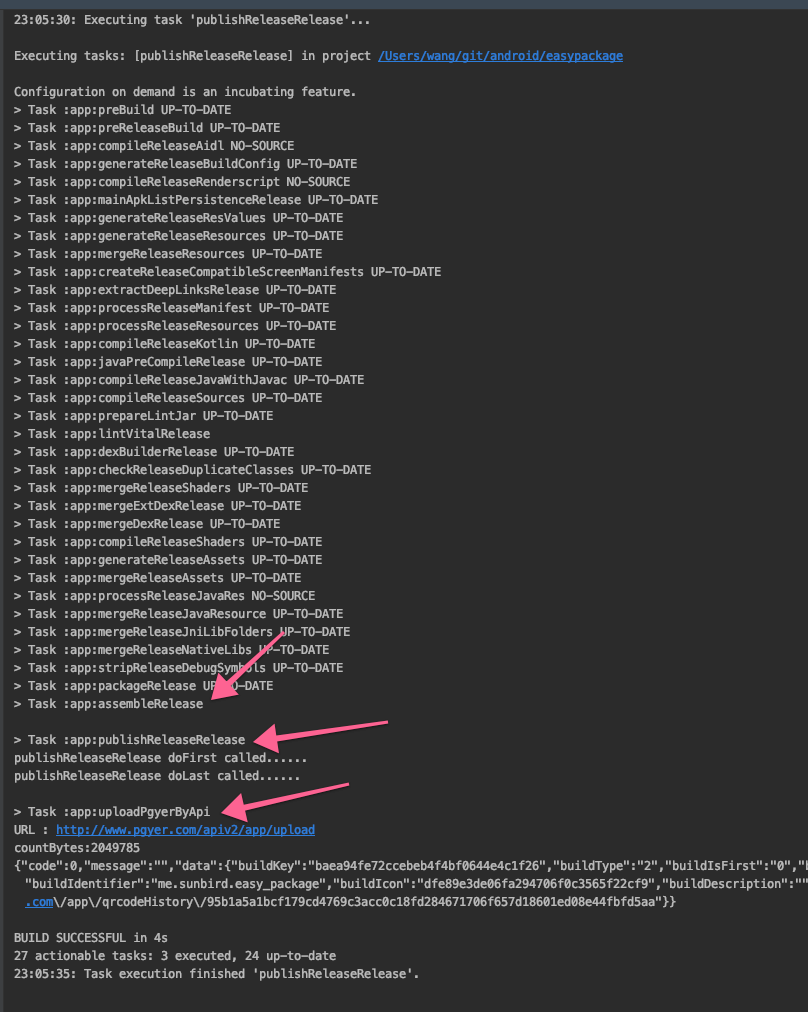
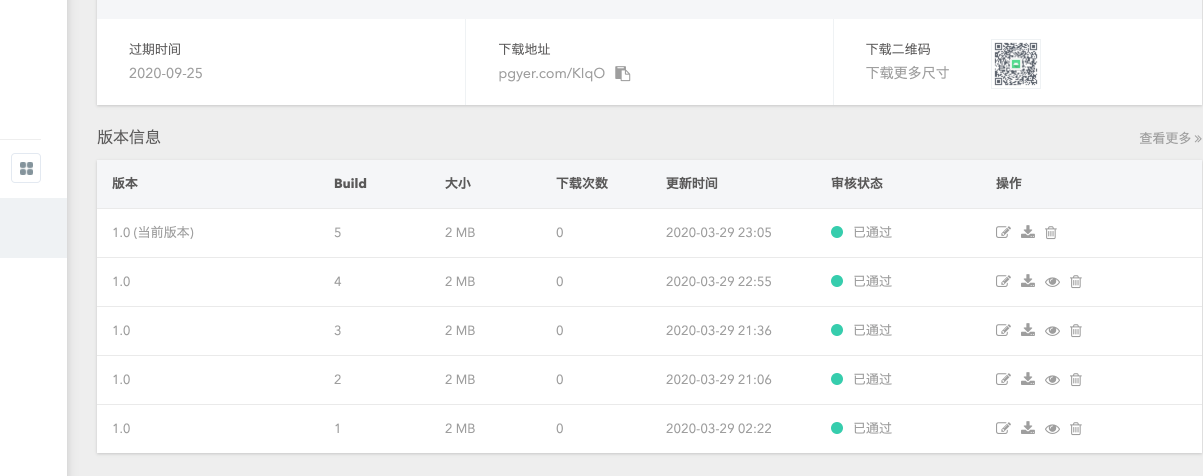
我们看到,“assembleRelease”,“publishReleaseRelease”,“uploadPgyerByApi”这三个任务依次执行了,我们到蒲公英后台看一下,发现apk已经上传完成:
fir上传的实现和蒲公英的基本一致,感兴趣的同学可以自己实现以下,就当练习了。
