


大数据生态对每个组成的技术版本有一定要求,如果不是适配版本,则很可能会出现各种问题。
像hadoop1.x、2.x、3.x每个大版本都有很大区别,如果基于Hadoop-hdfs去搭建诸如hive数据仓库或者hbase数据库的时候,对版本的选定是优先的。
像平常版本的支持,网上也有很多文章指明,但是基于Hadoop2.10.0的可能较为少见,于是作一整理:
资源地址(hive,hadoop,zookeeper,hbase,mysql数据库驱动等等):
链接: pan.baidu.com/s/1n4wRfi9G…提取码: s8yx
链接: https://pan.baidu.com/s/1n4wRfi9G5Ff9yfcKlMdVLg 提取码: s8yx
一:Hadoop2.10.0的安装
参考环境:
- 16g内存笔记本(mac pro)
- 虚拟机parallels DeskTop
- 虚拟机中安装操作系统CentOs7
- jdk版本:sun的jdk1.8
- hadoop2.10.0高可用(HA)模式,hive2.3.7单节点,hbase2.2.4集群(未设置备master),zookeeper3.4.14(三节点集群),hive元数据存储至mysql
- hadoop集群启动hdfs集群和yarn
- 四个虚拟机centos
前置准备:
- 四台虚拟机分别安装jdk1.8并配置/etc/profile 环境变量 JAVA_HOME 和 path,参考如下
export JAVA_HOME=/usr/local/jdk1.8.0_65 export HADOOP_HOME=/home/hadoop/hadoop-2.10.0 export HIVE_HOME=/home/hadoop/apache-hive-2.3.7-bin export HBASE_HOME=/home/hadoop/hbase-2.2.4 export PATH=$JAVA_HOME/bin:$PATH:$HADOOP_HOME/bin:$HADOOP_HOME/sbin:$HIVE_HOME/bin:$HBASE_HOME/bin export CLASSPATH=.:$JAVA_HOME/lib/dt.jar:$JAVA_HOME/lib/tools.jar export HADOOP_CLASSPATH=${JAVA_HOME}/lib/tools.jar export HADOOP_CONF_DIR=$HADOOP_HOME/etc/hadoop export HADOOP_COMMON_HOME=$HADOOP_HOME export HADOOP_HDFS_HOME=$HADOOP_HOME export HADOOP_MAPRED_HOME=$HADOOP_HOME export HADOOP_YARN_HOME=$HADOOP_HOME export HADOOP_OPTS="-Djava.library.path=$HADOOP_HOME/lib/native" export HADOOP_COMMON_LIB_NATIVE_DIR=$HADOOP_HOME/lib/native - 设置节点名称,在/etc/hosts中添加 node01:ip地址,node02:IP地址,node03:ip地址,node04:ip地址,四台机器设置一样,使用scp命令进行分发。 /etc/hosts的配置参考:
19.211.55.3 node01 19.211.55.4 node02 19.211.55.5 node03 19.211.55.6 node04 - 四台虚拟机配置ssh免密登陆(每台都要设置,设置在/root目录下,.ssh/ 即为完成后的..)
ssh-keygen ssh-copy-id -i /root/.ssh/id_rsa.pub node01(节点名称) - 四台虚拟机时间同步,同步aliyun
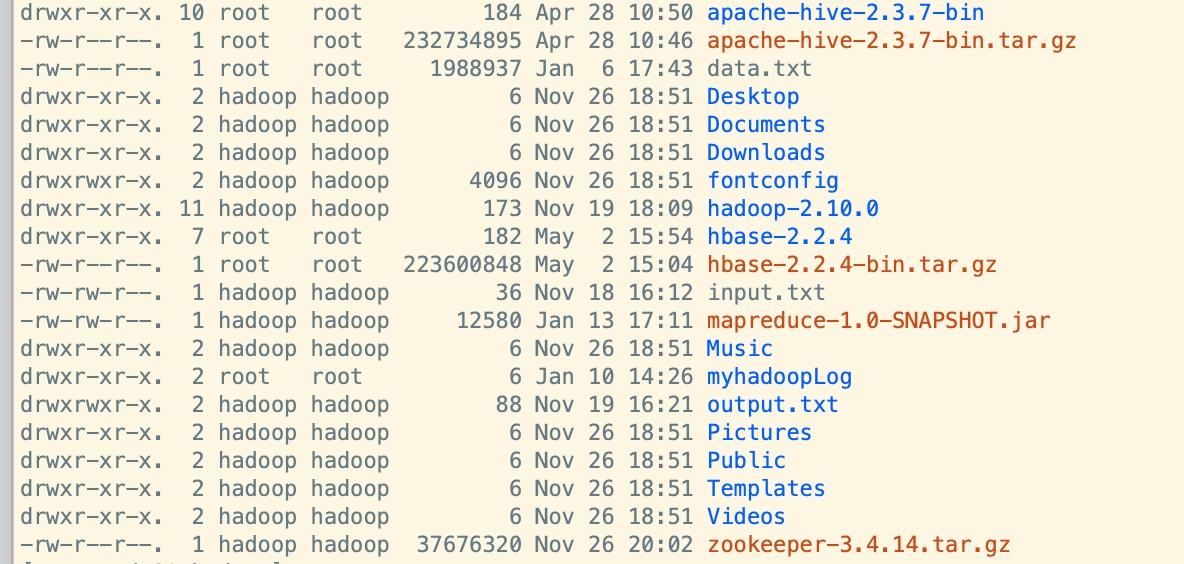
yum install ntpdate ntpdate ntp1.aliyun.com - hadoop2.10.0的tar.gz包上传至虚拟机 /home/hadoop目录下并进行解压(为方便期间,不设置单独用户,全部使用root用户做启动等操作)参考如下:
- 设置 /etc/profile 环境变量,完成后进行 source /etc/profile 并分发至其他节点进行同等操作
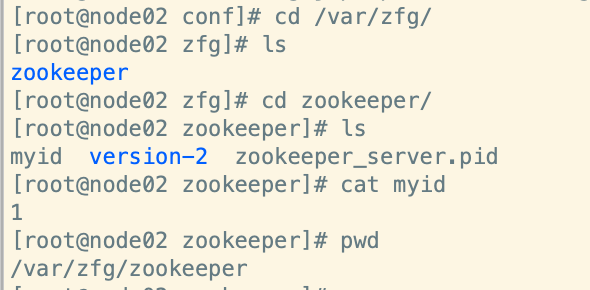
- 准备zookeeper集群,在node02,node03,node04设置zookeeper集群,/home/hadoop/zookeeper-3.4.14/conf/zoo.cfg 文件配置参考如下:(/var/zfg/zookeeper 目录下设置myid文件,根据服务名不同,分别设置1,2,3作为zookeeper识别标记)
# The number of milliseconds of each tick tickTime=2000 # The number of ticks that the initial # synchronization phase can take initLimit=10 # The number of ticks that can pass between # sending a request and getting an acknowledgement syncLimit=5 # the directory where the snapshot is stored. # do not use /tmp for storage, /tmp here is just # example sakes. dataDir=/var/zfg/zookeeper server.1=node02:2888:3888 server.2=node03:2888:3888 server.3=node04:2888:3888 # the port at which the clients will connect clientPort=2181 # the maximum number of client connections. # increase this if you need to handle more clients #maxClientCnxns=60 # # Be sure to read the maintenance section of the # administrator guide before turning on autopurge. # # http://zookeeper.apache.org/doc/current/zookeeperAdmin.html#sc_maintenance # # The number of snapshots to retain in dataDir #autopurge.snapRetainCount=3 # Purge task interval in hours # Set to "0" to disable auto purge feature #autopurge.purgeInterval=1 - hadoop配置文件设置(同时将hdfs和yarn配置文件都写好,便于一次分发),分别对hdfs-site.xml,mapred-site.xml,core-site.xml,yarn-site.xml,slaves等文件做配置添加和修改。设置 hadoop-env.sh 参数,主要设置jdk目录等。
- hdfs-site.xml 配置文件参考:
<?xml version="1.0" encoding="UTF-8"?> <?xml-stylesheet type="text/xsl" href="configuration.xsl"?> <!-- Licensed under the Apache License, Version 2.0 (the "License"); you may not use this file except in compliance with the License. You may obtain a copy of the License at http://www.apache.org/licenses/LICENSE-2.0 Unless required by applicable law or agreed to in writing, software distributed under the License is distributed on an "AS IS" BASIS, WITHOUT WARRANTIES OR CONDITIONS OF ANY KIND, either express or implied. See the License for the specific language governing permissions and limitations under the License. See accompanying LICENSE file. --> <!-- Put site-specific property overrides in this file. --> <configuration> <property> <name>dfs.nameservices</name> <value>mycluster</value> </property> <property> <name>dfs.ha.namenodes.mycluster</name> <value>nn1,nn2</value> </property> <property> <name>dfs.namenode.rpc-address.mycluster.nn1</name> <value>node01:8020</value> </property> <property> <name>dfs.namenode.rpc-address.mycluster.nn2</name> <value>node02:8020</value> </property> <property> <name>dfs.namenode.http-address.mycluster.nn1</name> <value>node01:50070</value> </property> <property> <name>dfs.namenode.http-address.mycluster.nn2</name> <value>node02:50070</value> </property> <property> <name>dfs.namenode.shared.edits.dir</name> <value>qjournal://node01:8485;node02:8485;node03:8485/mycluster</value> </property> <property> <name>dfs.journalnode.edits.dir</name> <value>/var/sxt/hadoop/ha/jn</value> </property> <property> <name>dfs.client.failover.proxy.provider.mycluster</name> <value>org.apache.hadoop.hdfs.server.namenode.ha.ConfiguredFailoverProxyProvider</value> </property> <property> <name>dfs.ha.fencing.methods</name> <value>sshfence</value> </property> <property> <name>dfs.ha.fencing.ssh.private-key-files</name> <value>/root/.ssh/id_rsa</value> </property> <property> <name>dfs.ha.automatic-failover.enabled</name> <value>true</value> </property> <property> <name>dfs.replication</name> <value>3</value> </property> </configuration> - core-site.xml配置文件参考:
<?xml version="1.0" encoding="UTF-8"?> <?xml-stylesheet type="text/xsl" href="configuration.xsl"?> <!-- Licensed under the Apache License, Version 2.0 (the "License"); you may not use this file except in compliance with the License. You may obtain a copy of the License at http://www.apache.org/licenses/LICENSE-2.0 Unless required by applicable law or agreed to in writing, software distributed under the License is distributed on an "AS IS" BASIS, WITHOUT WARRANTIES OR CONDITIONS OF ANY KIND, either express or implied. See the License for the specific language governing permissions and limitations under the License. See accompanying LICENSE file. --> <!-- Put site-specific property overrides in this file. --> <configuration> <property> <name>hadoop.tmp.dir</name> <value>/var/abc/hadoop/cluster</value> </property> <property> <name>fs.defaultFS</name> <value>hdfs://mycluster</value> </property> <property> <name>ha.zookeeper.quorum</name> <value>node02:2181,node03:2181,node04:2181</value> </property> </configuration> - yarn-site.xml配置文件参考:
<?xml version="1.0"?> <!-- Licensed under the Apache License, Version 2.0 (the "License"); you may not use this file except in compliance with the License. You may obtain a copy of the License at http://www.apache.org/licenses/LICENSE-2.0 Unless required by applicable law or agreed to in writing, software distributed under the License is distributed on an "AS IS" BASIS, WITHOUT WARRANTIES OR CONDITIONS OF ANY KIND, either express or implied. See the License for the specific language governing permissions and limitations under the License. See accompanying LICENSE file. --> <configuration> <!-- Site specific YARN configuration properties --> <property> <name>yarn.nodemanager.aux-services</name> <value>mapreduce_shuffle</value> </property> <property> <name>yarn.resourcemanager.ha.enabled</name> <value>true</value> </property> <property> <name>yarn.resourcemanager.zk-address</name> <value>node02:2181,node03:2181,node04:2181</value> </property> <property> <name>yarn.resourcemanager.cluster-id</name> <value>mashibing</value> </property> <property> <name>yarn.resourcemanager.ha.rm-ids</name> <value>rm1,rm2</value> </property> <property> <name>yarn.resourcemanager.hostname.rm1</name> <value>node03</value> </property> <property> <name>yarn.resourcemanager.hostname.rm2</name> <value>node04</value> </property> <property> <name>yarn.nodemanager.resource.memory-mb</name> <value>2048</value> </property> <property> <name>yarn.nodemanager.resource.cpu-vcores</name> <value>1</value> </property> <property> <!-- 客户端通过该地址向RM提交对应用程序操作 --> <name>yarn.resourcemanager.address.rm1</name> <value>master:8032</value> </property> <property> <!--ResourceManager 对ApplicationMaster暴露的访问地址。ApplicationMaster通过该地址向RM申请资源、释放资源等。 --> <name>yarn.resourcemanager.scheduler.address.rm1</name> <value>node03:8030</value> </property> <property> <!-- RM HTTP访问地址,查看集群信息--> <name>yarn.resourcemanager.webapp.address.rm1</name> <value>node03:8088</value> </property> <property> <!-- NodeManager通过该地址交换信息 --> <name>yarn.resourcemanager.resource-tracker.address.rm1</name> <value>node03:8031</value> </property> <property> <!--管理员通过该地址向RM发送管理命令 --> <name>yarn.resourcemanager.admin.address.rm1</name> <value>node03:8033</value> </property> <property> <name>yarn.resourcemanager.ha.admin.address.rm1</name> <value>node03:23142</value> </property> <property> <name>yarn.resourcemanager.address.rm2</name> <value>node04:8032</value> </property> <property> <name>yarn.resourcemanager.scheduler.address.rm2</name> <value>node04:8030</value> </property> <property> <name>yarn.resourcemanager.webapp.address.rm2</name> <value>node04:8088</value> </property> <property> <name>yarn.resourcemanager.resource-tracker.address.rm2</name> <value>node04:8031</value> </property> <property> <name>yarn.resourcemanager.admin.address.rm2</name> <value>node04:8033</value> </property> <property> <name>yarn.resourcemanager.ha.admin.address.rm2</name> <value>node04:23142</value> </property> </configuration> - slaves文件参考:
node02 node03 node04 - mapred-site.xml文件参考
<?xml version="1.0"?> <?xml-stylesheet type="text/xsl" href="configuration.xsl"?> <!-- Licensed under the Apache License, Version 2.0 (the "License"); you may not use this file except in compliance with the License. You may obtain a copy of the License at http://www.apache.org/licenses/LICENSE-2.0 Unless required by applicable law or agreed to in writing, software distributed under the License is distributed on an "AS IS" BASIS, WITHOUT WARRANTIES OR CONDITIONS OF ANY KIND, either express or implied. See the License for the specific language governing permissions and limitations under the License. See accompanying LICENSE file. --> <!-- Put site-specific property overrides in this file. --> <configuration> <property> <name>mapreduce.framework.name</name> <value>yarn</value> </property> </configuration> - 将解压的hadoop目录进行分发,分发到node02,node03,node04三台机器。
- 启动zookeeper集群
- 开始初始化启动hadoop集群。
- 启动hdfs集群,yarn,或者start-all.sh
二:hive2.3.7的安装启动(单机+mysql版)
前置准备:
- mysql安装,可以直接使用yum命令安装,安装下来的应该是5.6版本的mysql:平时在linxu中安装mysql注意大小写区分设置,默认是区分大小写的。同时注意设置允许本机之外的机器访问。
- hive的2.3.7的tar.gz包上传至/home/hadoop/目录下并进行解压
- 配置hive-site.xml,主要配置mysql连接参数和hdfs地址
- hive-site.xml设置参考:
<?xml version="1.0" encoding="UTF-8" standalone="no"?> <?xml-stylesheet type="text/xsl" href="configuration.xsl"?><!-- Licensed to the Apache Software Foundation (ASF) under one or more contributor license agreements. See the NOTICE file distributed with this work for additional information regarding copyright ownership. The ASF licenses this file to You under the Apache License, Version 2.0 (the "License"); you may not use this file except in compliance with the License. You may obtain a copy of the License at http://www.apache.org/licenses/LICENSE-2.0 Unless required by applicable law or agreed to in writing, software distributed under the License is distributed on an "AS IS" BASIS, WITHOUT WARRANTIES OR CONDITIONS OF ANY KIND, either express or implied. See the License for the specific language governing permissions and limitations under the License. --><configuration> <property> <name>hive.metastore.warehouse.dir</name> <value>/user/hive/warehouse</value> </property> <property> <name>javax.jdo.option.ConnectionURL</name> <value>jdbc:mysql://46.77.56.200:3306/hive?createDatabaseIfNotExist=true</value> </property> <property> <name>javax.jdo.option.ConnectionDriverName</name> <value>com.mysql.jdbc.Driver</value> </property> <property> <name>javax.jdo.option.ConnectionUserName</name> <value>root</value> </property> <property> <name>javax.jdo.option.ConnectionPassword</name> <value>123456</value> </property> </configuration> - 配置 /etc/profile环境变量,将mysql数据库连接驱动拷贝进hive的lib库中
- 初始化hive元数据存入mysql
三:hbase2.2.4集群安装
前置准备:
- hbase2.2.4的tar.gz包上传至/home/hadoop目录并进行解压
- 配置hbase-site.xml,hbase-env.sh,并将hadoop集群下的配置文件hdfs-site.xml拷贝至hbase的conf目录下。hbase-site.xml参考:
<?xml version="1.0"?> <?xml-stylesheet type="text/xsl" href="configuration.xsl"?> <!-- /** * * Licensed to the Apache Software Foundation (ASF) under one * or more contributor license agreements. See the NOTICE file * distributed with this work for additional information * regarding copyright ownership. The ASF licenses this file * to you under the Apache License, Version 2.0 (the * "License"); you may not use this file except in compliance * with the License. You may obtain a copy of the License at * * http://www.apache.org/licenses/LICENSE-2.0 * * Unless required by applicable law or agreed to in writing, software * distributed under the License is distributed on an "AS IS" BASIS, * WITHOUT WARRANTIES OR CONDITIONS OF ANY KIND, either express or implied. * See the License for the specific language governing permissions and * limitations under the License. */ --> <configuration> <property> <name>hbase.rootdir</name> <value>hdfs://mycluster/hbase</value> </property> <property> <name>hbase.cluster.distributed</name> <value>true</value> </property> <property> <name>hbase.zookeeper.quorum</name> <value>node02,node03,node04</value> </property> <property> <name>hbase.unsafe.stream.capability.enforce</name> <value>false</value> </property> <property> <name>hbase.master.info.port</name> <value>60010</value> </property> </configuration> - 设置 /etc/profile 环境变量,完成后进行 source /etc/profile 并分发至其他节点进行同等操作,设置 hbase-env.sh参数,jdk路径和不使用自带zookeeper。
- 修改regionservers文件,设置region分布在那几台服务器,可以分布于node02,node03,node04等
- 进行节点分发(四台集群的目录保持一致)
- 启动hbase集群,进行基本操作 hbase shell进去后,使用status 和processlist命令查看状态和是否正常启动
安装过程中可能存在的问题罗列及排查思路:
hadoop集群安装配置过程中的问题:
- hadoop可能针对不同版本,在搭建集群过程中会出现各种各样的问题,因为它的每个版本区别都比较大,需要做的就是去认真看错误日志,针对端口号去看,能较快的定位问题,然后作一修复。
zookeeper集群安装配置过程中的问题:
- zookeeper集群在设置过程中,要注意myid的设置与zoo.cfg配置文件中的server.1(id值)相对应,不然节点之间无法连同,集群启动失败。
hive安装配置过程中的问题:
- 针对单节点,hive使用安装过程中的问题应该不会太多,需要注意的就是mysql驱动拷贝进hive的lib库中,驱动要对应连接的mysql版本。
mysql安装配置过程中的问题:
- mysql的在linux中安装使用要注意设置是否区分大小写,默认是区分,一般设置为不区分,如果不设置,在进行一些web开发,或者自动建表操作的时候可能会出现各种问题。mysql在windows环境下是默认不区分大小写的
hbase集群安装配置过程中的问题:
- 出现Hmaste 进程 启动后过几秒消失(jps命令查看),或者有备机的情况下,备机Hmaster存在,主机Hmaster消失的情况
- 使用hbase shell进去commanline后,输入status或者processlist命令回车后出现 :
- hbase error: KeeperErrorCode = NoNode for /hbase/master
- 日志中出现:java.lang.RuntimeException: HMaster Aborted at org.apache.hadoop.hbase.master.HMasterCommandLine.startMaster(HMasterCommandLine.java:160) at org.apache.hadoop.hbase.master.HMasterCommandLine.run(HMasterCommandLine.java:104) at org.apache.hadoop.util.ToolRunner.run(ToolRunner.java:65) at org.apache.hadoop.hbase.util.ServerCommandLine.doMain(ServerCommandLine.java:76) at org.apache.hadoop.hbase.master.HMaster.main(HMaster.java:2120)
- 启动webui界面后访问出现null或者500错误
针对这几类问题,一般都具有相关性,要么是zookeeper中默认文件路径/hbase/master目录没有产生,可能是由于启动失败,可能校验同步失败导致,这个在日志文件中详细可以看到。
hbase-site.xml中加此项配置(解决校验失败问题):
       <property>
         <name>hbase.unsafe.stream.capability.enforce</name>
         <value>false</value>
       </property>
打开hbase的webUI界面的配置(hbase-site.xml中配置):
  <property>
     <name>hbase.master.info.port</name>
     <value>60010</value>
  </property>
使用60010端口访问hbase webUI界面。
KeeperErrorCode = NoNode for /hbase/master 这种错误一般常见的就是 zookeeper中没有生成 /hbase/master 目录路径,或者生成了 /hbase,但是没有生成 其下的 /master 目录路径,这时候可以停掉 hbase集群,如果 stop-hbase.sh 停不掉(停止的时间太久),直接kill -9 杀掉进程,然后删除zookeeper集群中的的 /hbase 目录路径:
(若环境变量配置好的则不需这样)进入zookeeper安装目录下,./bin/zkCli.sh 命令进入zk Commandlined,输入 ls / 命令进行查看,然后 使用 rmr /hbase 命令删除节点路径。
查看logs日志,看除了上述报错外,日志中有没有记录其他错误,比如,sync check之类错误,若有,则加入上述第一个配置项,完成后,重启hbase即可,进行验证:hbase shell 后,输入processlist 、 status进行查看。