

底部TabBar可以说每个App的标配了,大部分一个Tab就是App的一个模块的功能首页。在Android中,底部TabBar一般用RadioGroup和RadioButton来自定义,就是单选组和单选按钮。而iOS上则提供了UITabBarController。Android上的TabBar切换一般为Fragment,而iOS上的TabBar切换是切换ViewController。
Android直观感觉就是给你一堆控件,你自己自由发挥,而iOS则是封装好了给你让你直接用,还把建议给你,按照他来做就好了。
UITabBarController创建和基本配置
UITabBarController就是多个ViewController的容器,他们之间的层级是平行的,它会在底部添加一个TabBar的UIView,通过点击TabBar上的按钮tabBarItem来切换对应的ViewController。
- UITabBarController一般配合UINavigationController来使用,这样可以实现多Tab,多栈跳转页面视图。
分为4步走:
- 创建Tab所属的ViewController。
- 创建一个数组,将控制器放到数组中。
- 创建UITabBarController,将控制器数组设置给它。
- 将UITabBarController设置为Window的rootViewController。
- 显示Window。
@interface AppDelegate ()

@end

@implementation AppDelegate


- (BOOL)application:(UIApplication *)application didFinishLaunchingWithOptions:(NSDictionary *)launchOptions {
    self.window = [[UIWindow alloc] initWithFrame:UIScreen.mainScreen.bounds];
    //1.创建Tab所属的ViewController
    //首页
    HomeViewController *homeVC = [[HomeViewController alloc] init];
    UINavigationController *homeNav = [[UINavigationController alloc] initWithRootViewController:homeVC];
    homeNav.navigationBar.translucent = NO;

    //工作
    WorkViewController *workVC = [[WorkViewController alloc] init];
    UINavigationController *workNav = [[UINavigationController alloc] initWithRootViewController:workVC];
    workNav.navigationBar.translucent = NO;

    //通知
    NoticeViewController *noticeVC = [[NoticeViewController alloc] init];
    UINavigationController *noticeNav = [[UINavigationController alloc] initWithRootViewController:noticeVC];
    noticeNav.navigationBar.translucent = NO;

    //我的
    MineViewController *mineVC = [[MineViewController alloc] init];
    UINavigationController *mineNav = [[UINavigationController alloc] initWithRootViewController:mineVC];
    mineNav.navigationBar.translucent = NO;

    //2、创建一个数组,放置多有控制器
    NSArray *vcArray = [NSArray arrayWithObjects:homeNav, workNav, noticeNav, mineNav, nil];

    //3、创建UITabBarController,将控制器数组设置给UITabBarController
    UITabBarController *tabBarVC = [[UITabBarController alloc] init];
    //设置多个Tab的ViewController到TabBarViewController
    tabBarVC.viewControllers = vcArray;

    //4、将UITabBarController设置为Window的RootViewController
    self.window.rootViewController = tabBarVC;
    //显示Window
    [self.window makeKeyAndVisible];
    return YES;
}

@end
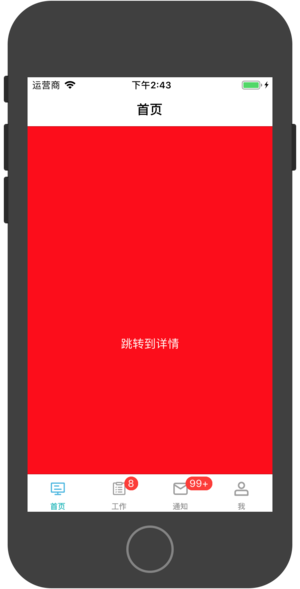
TabBar样式和红点气泡
经过上面的设置,3个Tab的ViewController能显示也能切换。但是TabBar上没有控件显示,TabBar的控件通过UITabBarItem来设置,每个ViewController都有一个self.tabBarItem属性,通过设置一个属性来设置TabBar上的Tab。下面演示的方法都在ViewContoller中使用。
- 以Tab文字和非选中、选中图片来创建Tab,按钮的UIImage默认会受TabBar的tintColor属性影响而着色,一般希望不跟随tintColor属性,会使用imageWithRenderingMode设置UIImageRenderingModeAlwaysOriginal来保持图片原有的颜色。
//根据标题、非选中图片、选中图片来构建一个Tab
UITabBarItem *tabItem = [[UITabBarItem alloc] initWithTitle:@"首页" image:[[UIImage imageNamed:@"home_icon_home_normal"] imageWithRenderingMode:UIImageRenderingModeAlwaysOriginal] selectedImage:[[UIImage imageNamed:@"home_icon_home_selected"] imageWithRenderingMode:UIImageRenderingModeAlwaysOriginal]];
//设置Tab
self.tabBarItem = tabItem;
- 以系统图标风格来构建一个Tab
UITabBarItem* tabItem = [[UITabBarItem alloc] initWithTabBarSystemItem:UITabBarSystemItemFavorites tag:1];
//设置Tab
self.tabBarItem = tabItem;
- 设置未读红点
//设置未读数量字符串
tabItem.badgeValue = @"99+";
TabBar风格
- 设置TabBar是否透明,默认为透明
tabBarVC.tabBar.translucent = NO;
- 设置TabBar的颜色
tabBarVC.tabBar.barTintColor = [UIColor redColor];
- 设置TabBar的风格颜色,会将图片和文字都设置,除非图片设置了imageWithRenderingMode为UIImageRenderingModeAlwaysOriginal。
tabBarVC.tabBar.tintColor = [UIColor redColor];
UITabBarController的Api和代理方法
- 设置默认选择控制器的索引
//选中第三个Tab
tabBarVC.selectedIndex = 2;
- 获取当前选中的Tab的索引
NSUInteger curSelectIndex = tabBarVC.selectedIndex;
NSLog(@"当前选中的Tab角标:%lu", curSelectIndex);
- 获取当前选中的Tab的ViewController
UIViewController *curSelectVC = tabBarVC.selectedViewController;
- 设置UITabBarController代理
//1.遵循协议UITabBarControllerDelegate
@interface AppDelegate : UIResponder <UIApplicationDelegate, UITabBarControllerDelegate>

@end

//2.设置代理
tabBarVC.delegate = self;

/**
 * 当选中控制器时回调
 */
- (void) tabBarController:(UITabBarController *)tabBarController didSelectViewController:(UIViewController *)viewController {
    //选中的ViewController实例
    UIViewController *selectVC = tabBarController.selectedViewController;
    NSLog(@"选中的index: %zd, 选中的ViewController: %@", tabBarController.selectedIndex, selectVC);
}
