您所知道的一些事情,您可能不知道的一些事情
Create React App是搭建React项目的快速方法。这样我们可以重点放在代码上,而不是构建工具上。
事实1:可以使用单个命令创建完整项目
这个神奇的命令可以通过以下三种方式之一调用:
npx create-react-app my-app
npm init react-app my-app
yarn create react-app my-app
Facebook保证其所有基础组件(Webpack,Babel,ESLint,Jest等)可以无缝地协同工作。
开箱即用,将设置以下脚本:
npm start: 在开发模式下运行该应用程序,然后打开 http://localhost:3000 在浏览器中查看它。

npm run build: 将用于生产的应用程序构建到build文件夹,该版本已精简并准备部署。

npm test: 以交互方式运行测试观察程序。它运行与自上次提交以来更改的文件相关的测试。
事实2:React项目可以从特定模板开始
前面的命令可以用一个特定的模板定制:
npx create-react-app my-app --template [template-name]
npm init react-app my-app --template [template-name]
yarn create react-app my-app --template [template-name]
如果你想从TypeScript的React项目开始,只需使用模板 cra-template-typescript。默认模板为 cra-template。
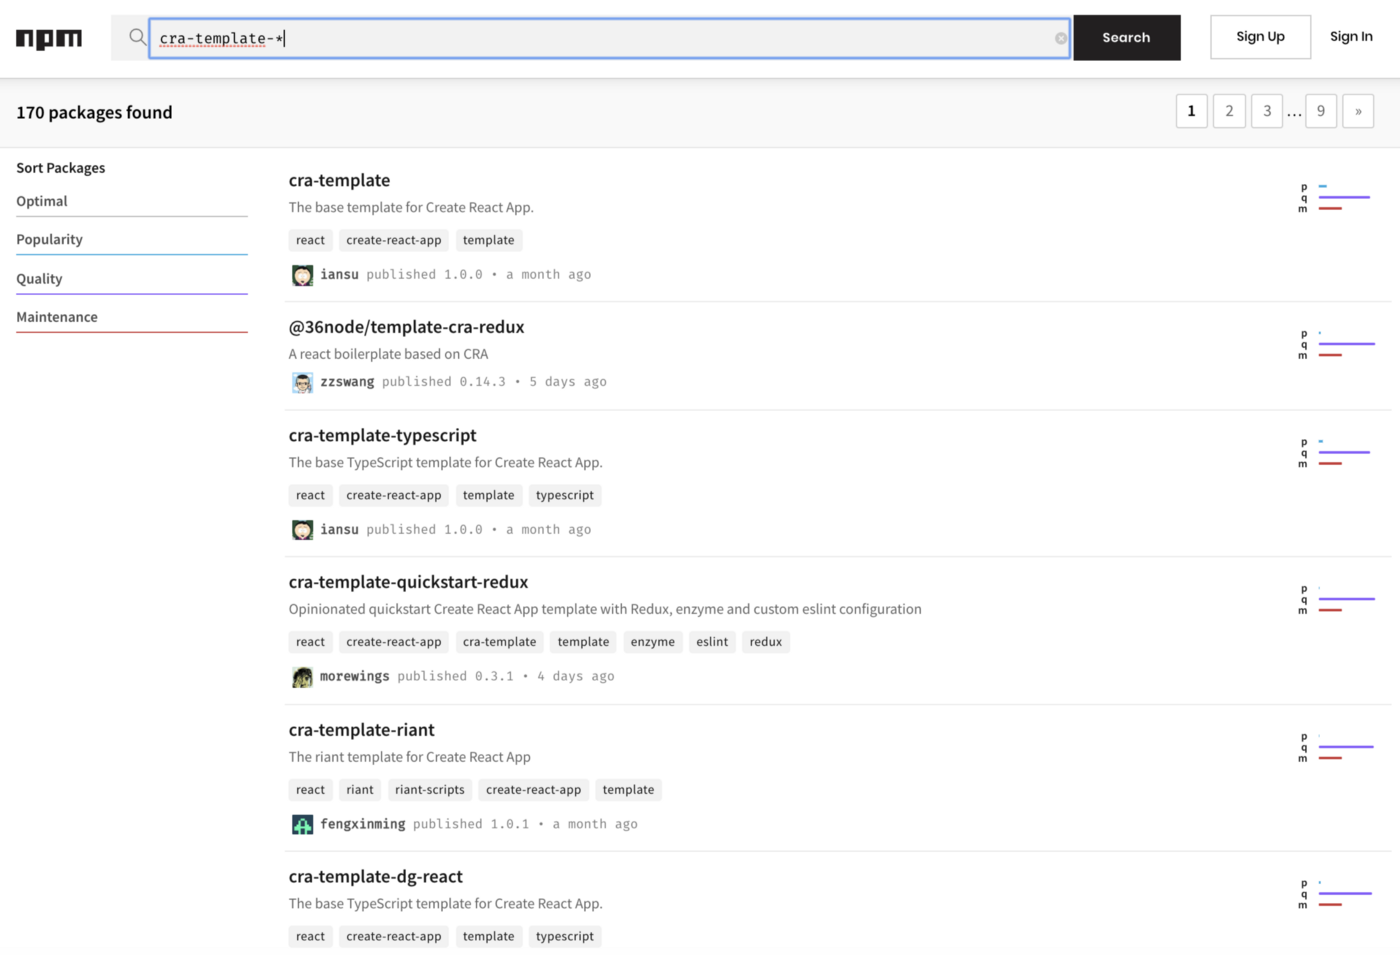
如果您想利用社区资源,请访问此网站,当前有170个模板。
事实3:一个依赖项是Create React应用程序的第一原则,这个构建依赖项不在devDependencies部分
一个依赖关系是三个Create React App哲学中的第一个。你可以在以下 package.json 中找到此构建依赖项吗?
{
  "name": "my-react-app",
  "dependencies": {
    "react": "^16.12.0",
    "react-dom": "^16.12.0",
    "react-scripts": "3.2.0"
  },
  "scripts": {
    "start": "react-scripts start",
    "build": "react-scripts build",
    "test": "react-scripts test",
    "eject": "react-scripts eject"
  },
在 package.json 中,有三个依赖项,没有 devDependencies,这个依赖在哪里?
它是react-scripts!
根据NPM依赖项定义,构建依赖项,即react-scripts,应该是一个devDependency。然儿,它与 react 和react-dom 一起在依赖项部分中。
实际上,react-scripts 是 devDependency。由于某些实际原因,Facebook自从react-scripts 1.0.8起就将其作为依赖项。
事实4:无需配置是Create React App的第二个理念——但这不是零配置
Create React App为开发和生产构建都设置了合理的配置。开发人员可以专注于编写代码,可以不进行任何配置。
下面是开箱即用的源代码目录树。我们实际上找到了一个配置文件 .gitignore,它用于github的源代码版本控制。
my-react-app/
  node_modules/
  public/
    favicon.ico
    index.html
    logo192.png
    logo512.png
    manifest.json
    robots.txt
  src/
    App.css
    App.js
    App.test.js
    index.css
    index.js
    logo.svg
    serviceWorker.js
  .gitignore
  package-lock.json
  package.json
  README.md
事实5:Jest可以使用绝对路径。
Jest是Create React App的默认测试运行程序。默认情况下,Jest在__tests__ 文件夹,.test.js 文件或 .spec.js 文件的 .js 文件中运行所有测试用例。
这是来自Create React App的 App.test.js。该测试用例使用相对路径:
import React from 'react';
import ReactDOM from 'react-dom';
import App from './App';
it('renders without crashing', () => {
  const div = document.createElement('div');
  ReactDOM.render(<App />, div);
  ReactDOM.unmountComponentAtNode(div);
});
如果将App更改为使用绝对路径,如下所示,此测试用例将中断:
import React from 'react';
import ReactDOM from 'react-dom';
import App from 'App';
it('renders without crashing', () => {
  const div = document.createElement('div');
  ReactDOM.render(<App />, div);
  ReactDOM.unmountComponentAtNode(div);
});
可以通过添加 modulePaths 选项来修复它:
{
  "scripts": {
    "start": "react-scripts start",
    "build": "react-scripts build",
    "test": "react-scripts test --modulePaths=src",
    "eject": "react-scripts eject"
  },
}
如果您使用react-app-rewired,还可以通过配置config-overrides.js来修复它:
module.exports = {
  jest: config => {
    config.moduleNameMapper = {
      '^@(.*)$': '<rootDir>/src$1'
    };
    return config;
  },
};
事实6:创建React应用程序可以处理CORS(跨域资源共享)错误
你是否遇到以下错误?
Fetch API cannot load http://myhost.com:4000/api/todos. No 'Access-Control-Allow-Origin' header is present on the requested resource. Origin 'http://localhost:3000' is therefore not allowed access. If an opaque response serves your needs, set the request's mode to 'no-cors' to fetch the resource with CORS disabled.
当API使用与Web服务器不同的主机或端口时,此错误将阻止您的应用程序运行。
通过在 package.json 中添加代理配置,Create React App提供了解决此问题的方法:
{
  “proxy”: “http://myhost.com:4000",
}
此代理选项支持HTTP,HTTPS和WebSocket连接。
如果有多个API服务器怎么办?
替代解决方案需要安装 http-proxy-middlewar:
npm install --save http-proxy-middleware
另外,在根目录中创建并配置 src/setProxy.js。以下是 src/setProxy.js 的示例。对 /api1/x 的调用将转发到 http://myhost1:4000/api1/x,而对 /api2/y 的调用将转发到 http://myhost2:5000/api1/y。
const proxy = require('http-proxy-middleware');
module.exports = function(app) {
  app.use(
    '/api1',
    proxy({
      target: 'http://myhost1:4000',
      changeOrigin: true,
    })
  );
  app.use(
    '/api2',
    proxy({
      target: 'http://myhost2:5000',
      changeOrigin: true,
    })
  );
};
事实7:创建React应用程序可以配置要支持的浏览器
开箱即用,可以在 package.json 中看到以下浏览器列表。
"browserslist": {
    "production": [
      ">0.2%",
      "not dead",
      "not op_mini all"
    ],
    "development": [
      "last 1 chrome version",
      "last 1 firefox version",
      "last 1 safari version"
    ]
  }
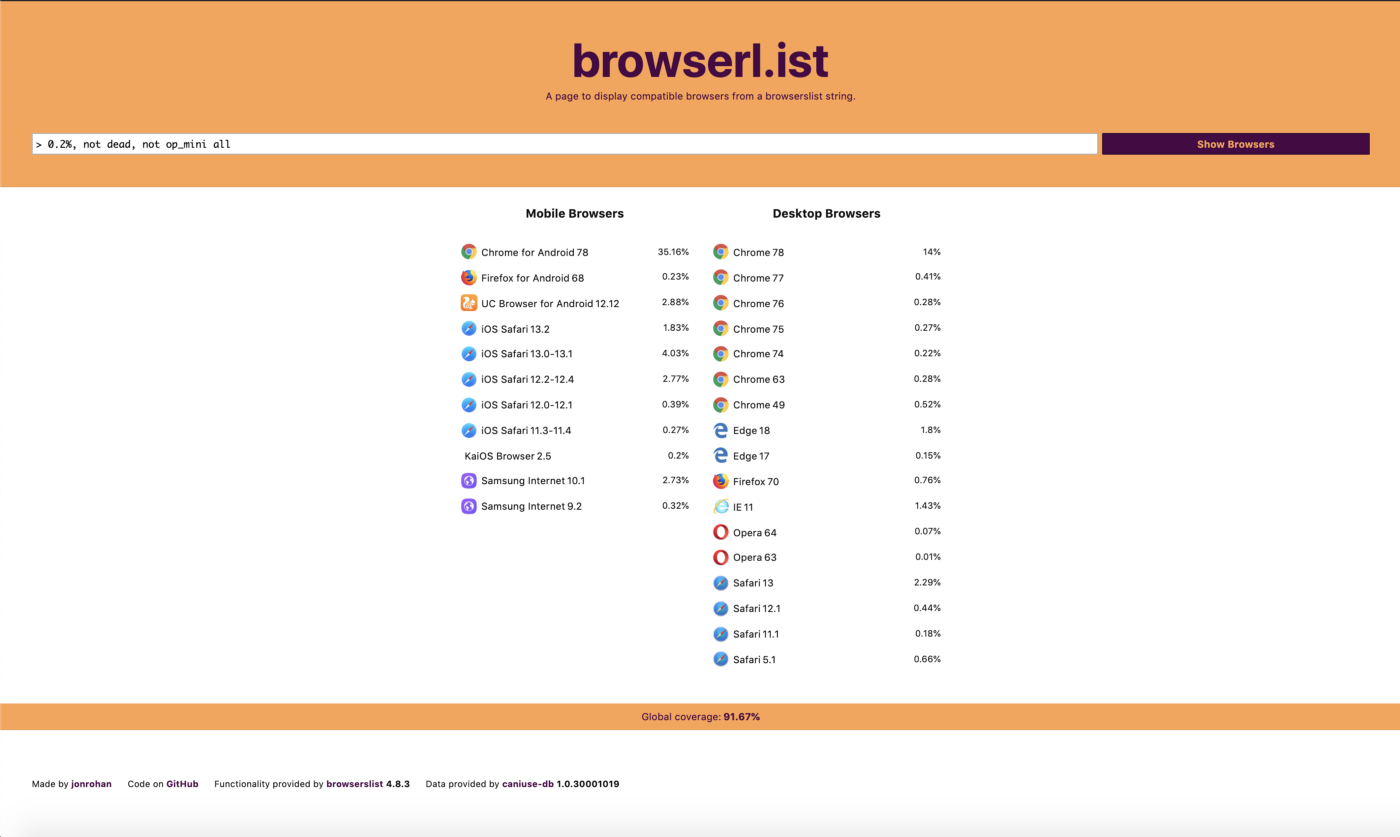
此配置控制Babel如何将JavaScript转换为与指定的浏览器兼容,以进行生产和开发。查看https://browserl.ist以获取有关如何配置浏览器列表的信息。
对于Create React App的默认浏览器列表配置,生产代码的目标是92%的浏览器:
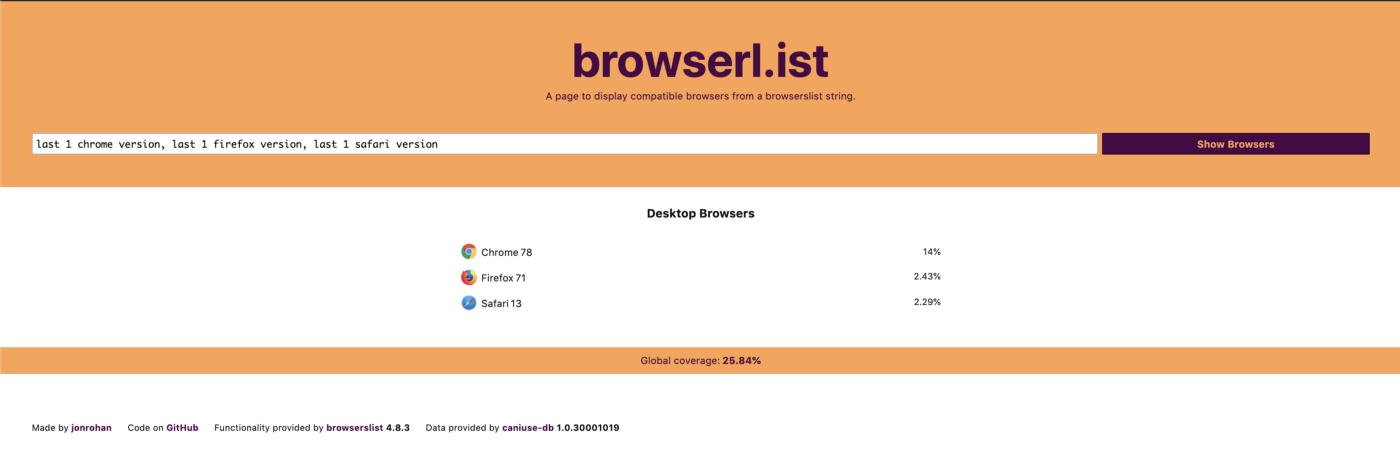
对于Create React App的默认浏览器列表配置,开发代码的目标是26%的浏览器:
事实8:可以分析生成的bundle包
Create React App隐藏了很多细节和复杂性。生成最终bundle包后,您是否有兴趣分析其空间使用情况?
source-map-explorer 使您能够通过源映射分析和调试空间使用情况。安装source-map-explorer:
npm install --save source-map-explorer
添加分析脚本:
{
  "scripts": {
    "analyze": "source-map-explorer 'build/static/js/*.js'",
    "start": "react-scripts start",
    "build": "react-scriptsd build",
    "test": "react-scripts test",
    "eject": "react-scripts eject"
  },
}
生成并运行分析命令:
npm run build
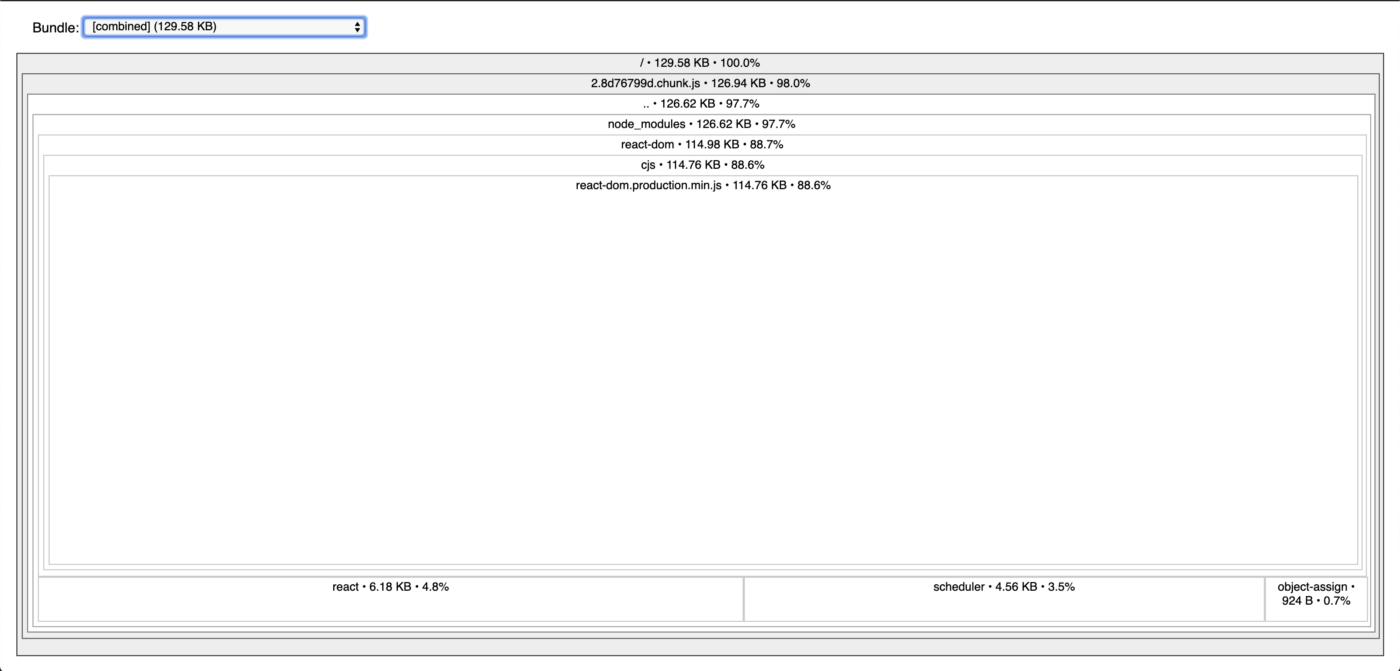
npm run analyze
然后,bundle的使用情况将显示在默认浏览器中:
来源:medium.com/better-prog…,作者:Jennifer Fu,翻译:前端外文精选