

CKEditor 介绍
CKEditor是一款非常全面的富文本编辑器,也出来很多年了,各方面支持得都比较好(对vue、react、angular都做了相应的封装),今天主要给大家总结下自己在使用过程中的经验。本文主要总结的是 CKEditor5 在vue中的用法,包括classic、inline、ballon和document editor等。
相关连接
- 首页地址:ckeditor.com/
- github地址:github.com/ckeditor
- 文档地址:ckeditor.com/docs/index.…
使用方法
CKEditor对Vue做了开箱即用的封装,不过功能上肯定做了相应的缩减,具体的使用方法可以参考说明文档,使用跟其他的插件都差不多。这里主要说明下原生的使用方法。
Classic (Inline/Ballon/Ballon block) Editor
Document Editor略微特殊,后面单独做说明
- 安装
npm install @ckeditor/ckeditor5-build-classic --save
npm install @ckeditor/ckeditor5-build-inline --save
npm install @ckeditor/ckeditor5-build-ballon --save
npm install @ckeditor/ckeditor5-build-ballon-block --save
- 创建
// 以Classic Editor为例,其他类型的Editor使用方法类似,换一下引入的包即可
<template>
	<div class="classic-editor">
		<div id="editor-classic" />
	</div>
</template>

<script lang='ts'>
	import { Component, Vue } from "vue-property-decorator";
	import ClassicEditor from "@ckeditor/ckeditor5-build-classic";
	import "@ckeditor/ckeditor5-build-classic/build/translations/zh-cn";
	export default class extends Vue {
		// 编辑器显示的初始内容
		private editorDataCopy = "";
		// 存储编辑器的实例
		private editor: any = null;
		// 语言改为中文
		private editorConfig = {
			language: "zh-cn"
		}

		mounted() {
			this.initEditor()
		}

		/**
		* 初始化容器
		*/
		public initEditor() {
			ClassicEditor.create(
				document.getElementById("editor-classic"),
				this.editorConfig
			)
			.then((editor: any) => {
				this.editor = editor;
				// 初始化设置编辑器里面的内容
				editor.setData(this.editorDataCopy);})
			.catch((error: any) => {
				console.error("There was a problem initializing the editor.", error);
			});
		}

		// 销毁editor
		beforeDestroy() {
			if(this.editor) {
				this.editor.destroy();
			}
		}
	}
</script>

<style lang="scss">
.classic-editor {
  .ck-editor__editable {
    height: 300px;
    border: 1px solid #ddd !important;
    box-shadow: none !important;
  }
}
</style>
Document Editor
- 安装
npm install @ckeditor/ckeditor5-build-decoupled-document --save
- 创建
<template>
  <div style="height: 100%">
    <div id="toolbar-container" class="toolbar-container" />
    <div id="editable-container" class="editable-container" />
  </div>
</template>

<script lang='ts'>
import DecoupledEditor from "@ckeditor/ckeditor5-build-decoupled-document";
import "@ckeditor/ckeditor5-build-decoupled-document/build/translations/zh-cn";

// 前面的代码都一样,不赘述了,主要是创建editor的时候有点变化
/**
* 初始化容器
*/
public initEditor() {
    DecoupledEditor.create(this.editorDataCopy, this.editorConfig)
      .then((editor: any) => {
        this.editor = editor
	// document editor需要单独添加一下toolbar
        const toolbarContainer = document.getElementById("toolbar-container");
        if (toolbarContainer) {
          toolbarContainer.appendChild(editor.ui.view.toolbar.element);
        }
      })
      .catch((error: any) => {
        console.error("There was a problem initializing the editor.", error);
      });
}
</script>

<style lang="scss">
// 这个是官方demo的默认样式(会好看点)
.editable-container {
	position: relative;
	border: 1px solid #ddd;
	border-top: 0;
	background: #eee;
	padding: 3em;
	overflow-y: scroll;
	height: calc(100% - 40px);
	.ck-editor__editable {
		width: 21cm;
		max-width: 100%;
		min-height: 29.7cm;
		margin: 0 auto;
		padding: 1cm 1.2cm;
		border: 1px #d3d3d3 solid !important;
		background-color: #fff;
		box-shadow: 0 0 5px rgba(0, 0, 0, 0.1) !important;
	}
}
</style>
自定义图片上传适配器(image upload adapter)
CKEditor5 可以支持自定义图片上传适配器,主要就是定义上传图片的方法,传递参数以及返回参数等。如果上传的方式比较简单,也可以考虑使用官方定义好的几种插件:Easy Image,Simple adapter,Base64 adapter。下面主要介绍下自定义上传插件的方法。
图片上传的处理过程
- 将图片放置到编辑器中(从剪贴板中粘贴,拖拽或从系统文件夹中上传)
- 这些图片会被image upload插件拦截,对于每张上传的图片,image upload会创建一个file loader的实例
- file loader 是将文件从磁盘中读取,并通过upload adapter上传到服务器
- upload adapter则是提交http请求将图片上传至服务器上,并返回相应url
- 在图片上传的过程中,image upload插件会进行如下操作:
- 为图片创建占位符
- 将它插入到编辑器中
- 展示图片上传的进度条
- 当图片被删除时,中止文件的上传
- 当图片上传成功时,upload adapter会解析Promise对象返回的值,并将对应的url设置到图片的src中
上传适配器定义
官方文档中使用的是XMLHttpRequest,由于公司项目中使用的是axios,所以这里主要介绍一下axios的用法,若不符合需求,可以参考官方文档
class ImgUploadAdapter {
	private loader: any;

	constructor(loader: any) {
		this.loader = loader
	}

	// postFile是基于axios封装的一个文件上传请求函数,请求参数和返回参数类型都和具体的接口实现方式相关,大家可以基于接口文档自行定义。由于本文的接口返回的是相对路径,因此需要加上对应的头部url
	upload() {
		return new Promise((resolve, reject) => {
			const data = new FormData()
			this.loader.file.then((file: any) => {
				data.append('file', file)
				postFile(FileTypeEnum.image, data).then((response: IResponseData<{ url: string }>) => {
					resolve({
						default: `${process.env.VUE_APP_BASE_API}/api/v1/auth/file/get/image?url=${response.data.url}`
					})
				}).catch(error => {
					reject(error)
				})
			})
		})
	}

	// 中止文件上传的方法,可以自行实现(axios中有取消请求的方法,由于代码里axios做了一层封装,这里就不贴详细代码了)
	abort() {}
}
其他配置
到这里基本上可以简单地使用CKEditor5了,这里也只介绍了其中很小的一部分内容,其他的一些基础配置可以参考官方文档,写得蛮详细的(缺点就是全英文的,耐下性子慢慢看,哈哈)
常见问题
ckeditor-duplicated-modules: Some CKEditor 5 modules are duplicated
这里提一下自己在使用过程中遇到的一个问题,就是多种类型编辑器同时使用时会出现下面这样的报错,官方文档中提到不要同时使用两种编译好的编辑器,因为会出现各种冲突:
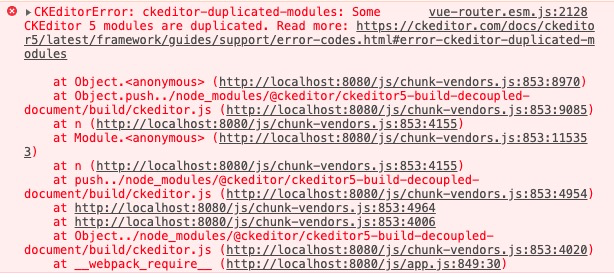
-
出现冲突原因
- 代码的重复度太高,不同编译版本的编辑器,可能会共享超过99%的代码,同时加载2次及以上,会让整个页面变得很笨重
- 一些重复的css样式可能会让编辑器显示出现问题
- 编译版本代码中包含的翻译代码重复可能会导致翻译结果不准确
-
解决办法
官方提供了两种解决办法,一种是在webpack config中构建,另一种是重新构建CKEditor5的代码,本文主要介绍后一种方法,主要的步骤如下:
- 克隆官方的代码(这里以ckeditor5-build-classic为例)
git clone -b stable https://github.com/ckeditor/ckeditor5-build-classic.git cd ckeditor5-build-classic npm install- 安装其他版本的编辑器(这里将inline/ballon/document都放进来),注意这里安装是不是构建好的版本,是editor不是build
npm install --save-dev @ckeditor/ckeditor5-editor-inline @ckeditor/ckeditor5-editor-ballon @ckeditor/ckeditor5-editor-decoupled- 重写webpack入口文件src/ckeditor.js
// 需要用到的编辑器 import ClassicEditorBase from '@ckeditor/ckeditor5-editor-classic/src/classiceditor'; import InlineEditorBase from '@ckeditor/ckeditor5-editor-inline/src/inlineeditor'; import DecoupledEditorBase from '@ckeditor/ckeditor5-editor-decoupled/src/decouplededitor'; import BalloonEditorBase from '@ckeditor/ckeditor5-editor-balloon/src/ballooneditor'; class ClassicEditor extends ClassicEditorBase { } class InlineEditor extends InlineEditorBase { } class DecoupledEditor extends DecoupledEditorBase { } class BalloonEditor extends BalloonEditorBase { } // 初始加载的插件 const plugins = [...] ClassicEditor.builtinPlugins = plugins InlineEditor.builtinPlugins = plugins DecoupledEditor.builtinPlugins = plugins BalloonEditor.builtinPlugins = plugins // 初始配置 const config = {...} ClassicEditor.defaultConfig = config; InlineEditor.defaultConfig = config; DecoupledEditor.defaultConfig = config; BalloonEditor.defaultConfig = config; export default { ClassicEditor, InlineEditor, DecoupledEditor, BalloonEditor }- 重新定义webpack中全局变量名
// webpack.config.js output: { // library: 'ClassicEditor' library: 'CKEditor' }- 重新编译
// 当完成src/ckeditor.js和webpack.config.js的改变后,需要执行npm build,重新编译下代码 npm run build- 使用测试
// 完成后可以在samples/index.html中进行测试 <!DOCTYPE html> <html lang="en"> <head> <meta charset="utf-8"> <title>CKEditor 5 – super build</title> <style> body { max-width: 800px; margin: 20px auto; } </style> </head> <body> <h1>CKEditor 5 – super build</h1> <div id="classic-editor"> <h2>classic editor</h2> <p>This is an instance of the <a href="https://ckeditor.com/docs/ckeditor5/latest/builds/guides/overview.html#classic-editor">classic editor build</a>.</p> </div> <div id="inline-editor"> <h2>inline editor</h2> <p>This is an instance of the <a href="https://ckeditor.com/docs/ckeditor5/latest/builds/guides/overview.html#inline-editor">inline editor build</a>.</p> </div> <div id="document-editor"> <h2>document editor</h2> <p>This is an instance of the <a href="https://ckeditor.com/docs/ckeditor5/latest/builds/guides/overview.html#document-editor">document editor build</a>.</p> </div> <div id="balloon-editor"> <h2>balloon editor</h2> <p>This is an instance of the <a href="https://ckeditor.com/docs/ckeditor5/latest/builds/guides/overview.html#balloon-editor">balloon editor build</a>.</p> </div> <script src="../build/ckeditor.js"></script> <script> CKEditor.ClassicEditor .create(document.querySelector('#classic-editor')) .catch(err => { console.error(err.stack); }); CKEditor.InlineEditor .create(document.querySelector('#inline-editor')) .catch(err => { console.error(err.stack); }); CKEditor.DecoupledEditor .create(document.querySelector('#document-editor')) .catch(err => { console.error(err.stack); }); CKEditor.BalloonEditor .create(document.querySelector('#balloon-editor')) .catch(err => { console.error(err.stack); }); </script> </body> </html>- 完成编译后的使用方式
- 发布到npm仓库
- 直接在script中引入编译好的js文件
如果你没有同时使用多种编辑器,那很有可能是版本的问题,把CKEditor相关的版本都升到最新,然后删掉package-lock.json和node_modules文件夹,重新执行下`npm install`
