

前言
写此文前特意google了一下,因为有较详细的开发教程我再写意义不大,有把插件封装成组件的教程,有把自己的组件封住成插件的教程,本文主要说明如何把第三方的插件封装成vue插件,简化配置,一键安装,主要提供思路,封装方法大同小异·,文章略长要有耐心。
gitment
gitment是一个基于github issues封装的评论插件,以这个插件作为演示,把它封装成vue插件。vue-gitment,该插件已发布到npm,并在自己的开源项目Essays中安装使用
项目初始化
封装vue的插件用webpack-simple很合适,vue init webpack-simple vue-gitment此命令创建我们的项目的目录,创建文件夹和文件,最后结构是这样的

lib目录是我们的插件目录,其他的默认就好
修改配置项
首先是修改package.json
{
  "name": "vue-gitment",
  "version": "0.1.1",
  "description": "A comment plugin by gitment",
  "main": "dist/vue-gitment.js",
  "directories": {
    "dist": "dist"
  },
  "scripts": {
    "dev": "cross-env NODE_ENV=development webpack-dev-server --open --hot",
    "build": "cross-env NODE_ENV=production webpack --progress --hide-modules"
  },
  "repository": {
    "type": "git",
    "url": "git+https://github.com/vue-blog/vue-gitment.git"
  },
  "dependencies": {
    "gitment": "^0.0.3",
    "vue": "^2.3.3"
  },
  "devDependencies": {
  },
  "author": "wmui",
  "license": "MIT",
  "bugs": {
    "url": "https://github.com/vue-blog/vue-gitment/issues"
  },
  "homepage": "https://github.com/vue-blog/vue-gitment#readme"
}
把依赖性gitment添加到dependencies,main是我们打包后的文件入口,你可以用npm init命令生成一个package.json
修改webpack.config.js
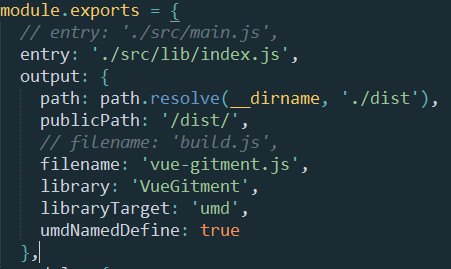
我们只需配置入口和出口,不要删除默认的配置,因为后面开发好插件,我们需要查看工作效果
修改index.html
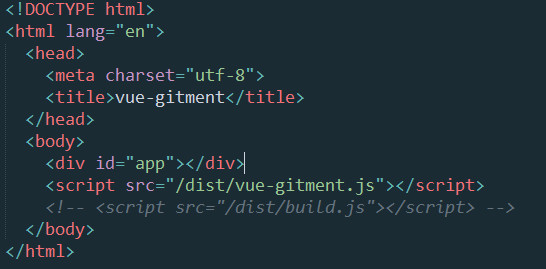
因为我们修改了webpack配置,自然要把script的src修改一下
封装插件
VueComment.vue内容如下
<template>
  <div v-comment="options"></div>
</template>
<script>
// 引入依赖项
import Gitment from 'gitment'
export default {
  name: 'vue-comment',
  props: ['options'],
  directives: {
    // 自定义指令
    comment: {
      bind: function (el, binding) {
        const gitment = new Gitment({
          id: binding.value.id + '',
          owner: binding.value.owner,
          repo: binding.value.repo,
          oauth: {
            client_id: binding.value.oauth.client_id,
            client_secret: binding.value.oauth.client_secret
          }
        })
        gitment.render(el)
      }
    }
  }
}
</script>
相信熟悉vue的一眼都看懂了,render函数是gitment对象的方法,不用关心,和我们开发组件是一样一样的
index.js封装组件
import VueComment from './VueComment.vue'
const comment = {
  install: function(Vue) {
    Vue.component(VueComment.name, VueComment)
  }
}
// 这里的判断很重要
if (typeof window !== 'undefined' && window.Vue) {
	window.Vue.use(comment)
}
export default comment
我们在webpack配置的入口文件就是他,install是挂载组件的方法,有了它我们就可以在外部use一个插件了,简单吧
测试插件
首先测试build是否成功
npm run builddist目录会生成如下文件

我们需要把package和webpack的修改一下,这就是为什么我前面说不要删除而是注释掉 ,把package.json的main修改为dist/build.js,wepack的entry和filename换成默认配置,index.html的src也换成默认的
在main.js中引入我们的组件
import VueComment from './lib/index.js'
Vue.use(VueComment)
App.vue中使用我们的插件
<template>
  <div id="app">
    <vue-comment :options="options" v-if="options"></vue-comment>
  </div>
</template>
<script>
export default {
  name: 'App',
  data() {
    return {
      options: {
        id: 'article id',
        owner: 'Your GitHub ID',
        repo: 'The repo to store comments',
        oauth: {
          client_id: 'Your client ID',
          client_secret: 'Your client secret',
        }
      }
    }
  }
}
</script>
<style>
	@import '~gitment/style/default.css';
</style>
执行npm run dev
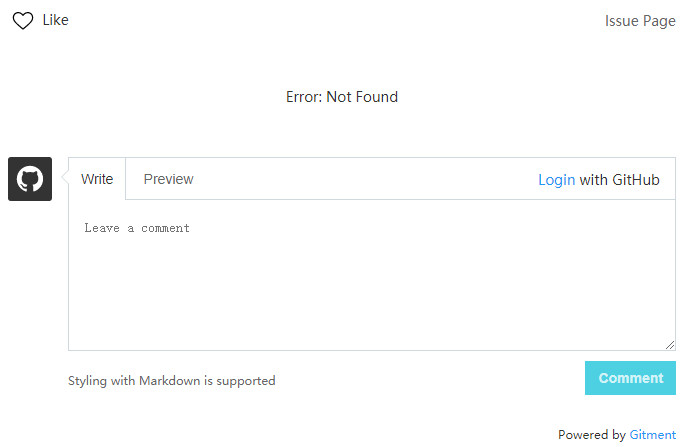
Error: Not Found是因为我没配置client_id。
发布插件
完成测试工作后我们就可以发布到npm了,这个就比较见到了,注册个npm账号,在你要发布的项目目录执行npm login,输入账号密码和邮箱,然后npm publish就发布成功了,npm install vue-gitment查看效果,建议直接看源代码,因为真的很简单。
结语
自己动手丰衣足食,我觉得每个前端开发者都要一个属于自己的轮子(虽然vue-gitment不是轮子),一个属于自己轮子,在造轮子的工程中你能学到很多很多,没错,接下来我可能,,,哼哼
