

说明
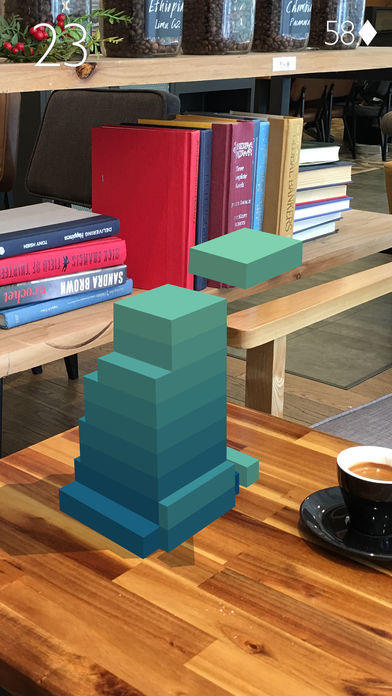
在本教程中,你将会学习如何制作一个类似Stack AR这样的游戏.
本教程将包含以下内容:
- 第1步:利用ARKit识别出平面.
- 第2步:修改上一篇中Stack游戏场景.
- 第3步:将原3D版游戏移植到AR场景中.
- 第4步:修复合并后的bug和逻辑错误
step1:利用ARKit识别平面
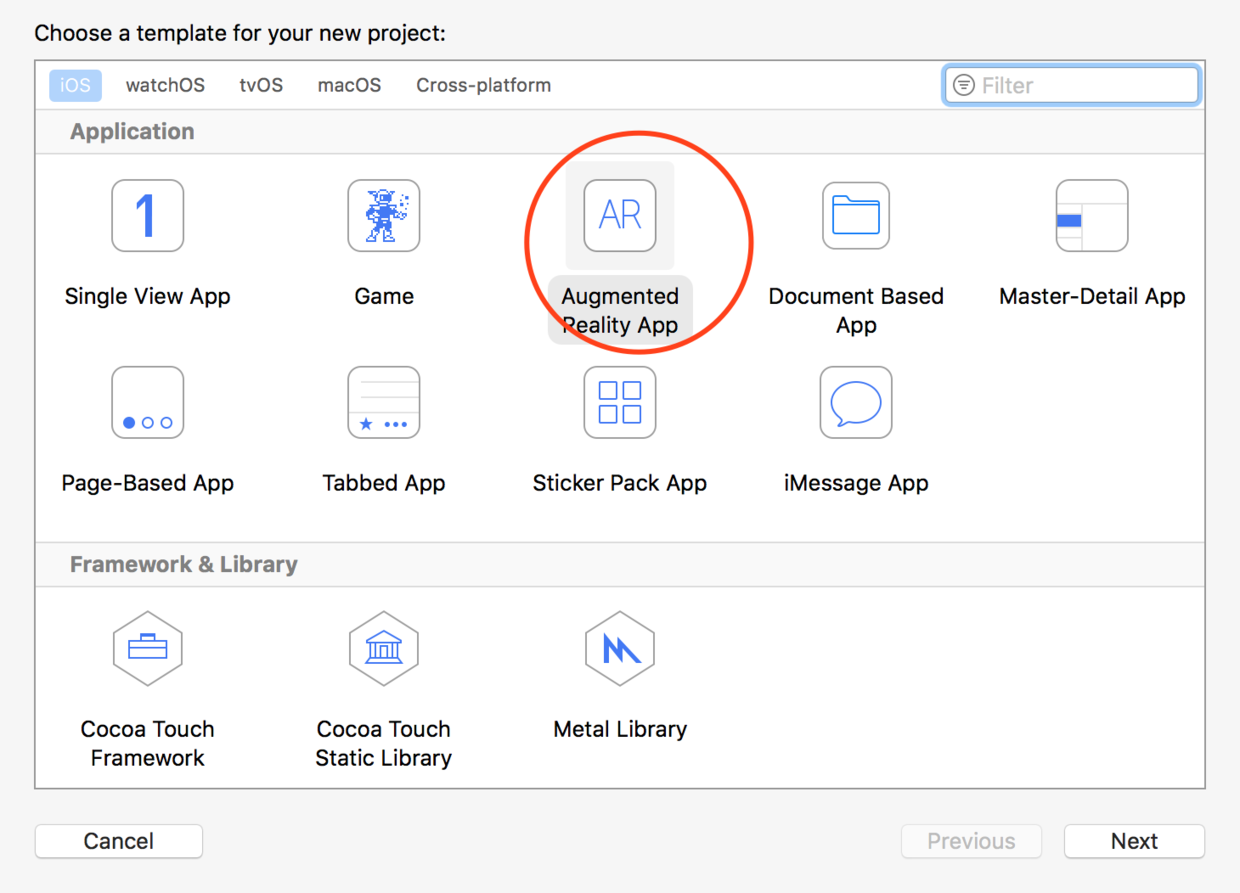
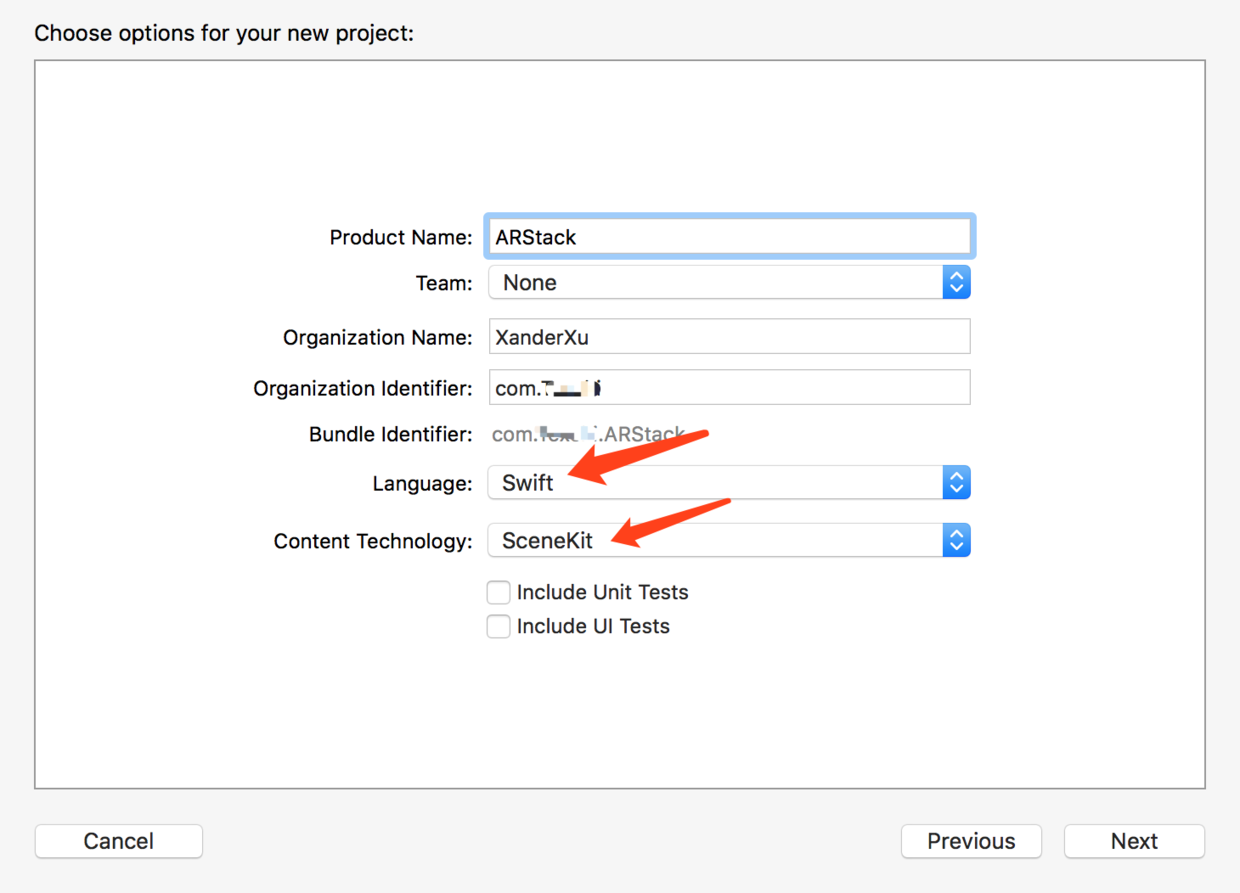
首先,打开Xcode,新建一个AR项目,选择swift和SceneKit,创建项目
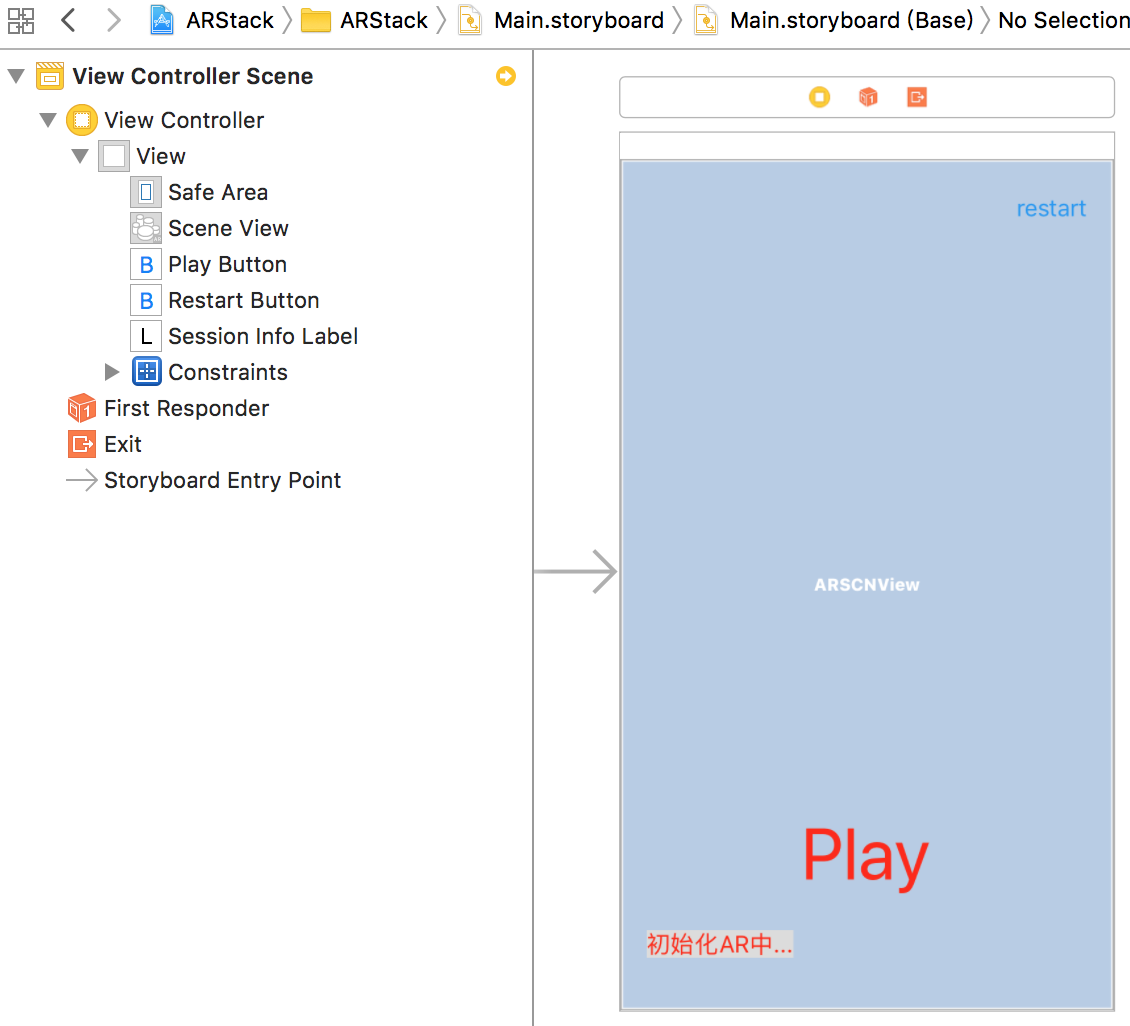
对storyboard中进行适当改造,添加: 信息label---显示AR场景信息 Play按钮---识别到场景后点击进入游戏 reset按钮---重置AR场景识别和游戏
此外,还有三个属性,用来控制场景识别:
  // 识别出平面后,放上游戏的基础节点,相对固定于真实世界场景中
    weak var baseNode: SCNNode?
  // 识别出平面锚点后,显示的平面节点,会不断刷新大小和位置
    weak var planeNode: SCNNode?
  // 刷新次数,超过一定次数才说明这个平面足够明显,足够稳定
    var updateCount: NSInteger = 0
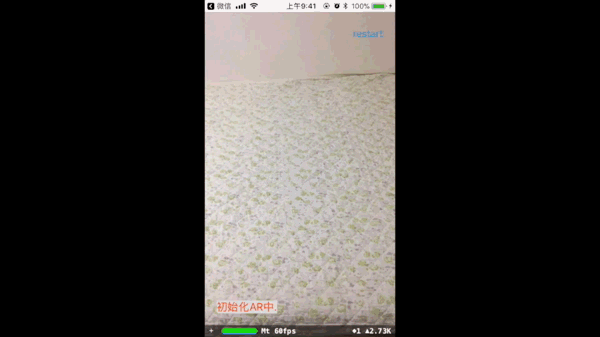
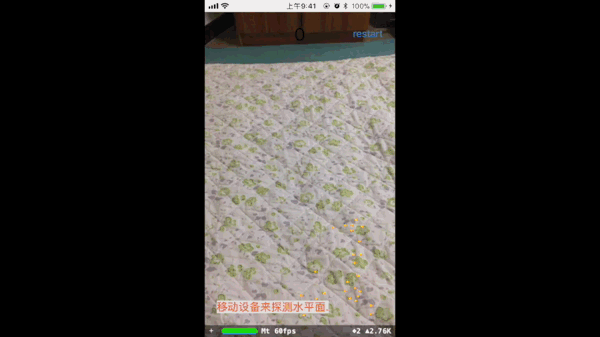
在viewDidLoad方法中,删除加载默认素材,先用一个空的场景代替,并打开特征点显示(art.scnassets里面的飞机模型也可以删除了):
override func viewDidLoad() {
        super.viewDidLoad()
        playButton.isHidden = true
        // Set the view's delegate
        sceneView.delegate = self

        // Show statistics such as fps and timing information
        sceneView.showsStatistics = true
        //显示debug特征点
        sceneView.debugOptions = [ARSCNDebugOptions.showFeaturePoints]
        // Create a new scene
        let scene = SCNScene()
        // Set the scene to the view
        sceneView.scene = scene

    }
在viewWillAppear里面配置追踪选项
override func viewWillAppear(_ animated: Bool) {
        super.viewWillAppear(animated)
        guard ARWorldTrackingConfiguration.isSupported else {
            fatalError("""
                ARKit is not available on this device. For apps that require ARKit
                for core functionality, use the `arkit` key in the key in the
                `UIRequiredDeviceCapabilities` section of the Info.plist to prevent
                the app from installing. (If the app can't be installed, this error
                can't be triggered in a production scenario.)
                In apps where AR is an additive feature, use `isSupported` to
                determine whether to show UI for launching AR experiences.
            """) // For details, see https://developer.apple.com/documentation/arkit
        }
        //重置界面,参数,追踪配置
        resetAll()
    }

    private func resetAll() {
        //0.显示按钮
        playButton.isHidden = true
        sessionInfoLabel.isHidden = false
        //1.重置平面检测配置,重启检测
        resetTracking()
        //2.重置更新次数
        updateCount = 0
        sceneView.debugOptions = [ARSCNDebugOptions.showFeaturePoints]
    }
处理Play按钮点击和reset按钮点击:
    @IBAction func playButtonClick(_ sender: UIButton) {
        //0.隐藏按钮
        playButton.isHidden = true
        sessionInfoLabel.isHidden = true
        //1.停止平面检测
        stopTracking()
        //2.不显示辅助点
        sceneView.debugOptions = []
        //3.更改平面的透明度和颜色
        planeNode?.geometry?.firstMaterial?.diffuse.contents = UIColor.clear
        planeNode?.opacity = 1
        //4.载入游戏场景

    }
    @IBAction func restartButtonClick(_ sender: UIButton) {
        resetAll()
    }
这里说一下resetAll方法里的问题,一定要先停止追踪,再重置updateCount,否则,可能重置为0后,又更新了AR场景, updateCount+=1,造成下一次识别出平面后不能显示出来.
为了更清晰,我们在单独的extension中处理ARSCNViewDelegate的代理方法,注意这个协议里除了自带的方法外,还有SCNSceneRendererDelegate和ARSessionObserver,如果还不够用,还可以成为session的代理后,使用ARSessionDelegate中的方法:
extension ViewController:ARSCNViewDelegate {
// MARK: - ARSCNViewDelegate
// 识别到新的锚点后,添加什么样的node.不实现该代理的话,会添加一个默认的空的node
// ARKit会自动管理这个node的可见性及transform等属性等,所以一般把自己要显示的内容添加在这个node下面作为子节点
// func renderer(_ renderer: SCNSceneRenderer, nodeFor anchor: ARAnchor) -> SCNNode? {
//
// let node = SCNNode()
//
// return node
// }
// node添加到新的锚点上之后(一般在这个方法中添加几何体节点,作为node的子节点)
func renderer(_ renderer: SCNSceneRenderer, didAdd node: SCNNode, for anchor: ARAnchor) {
//1.获取捕捉到的平地锚点,只识别并添加一个平面
if let planeAnchor = anchor as? ARPlaneAnchor,node.childNodes.count < 1,updateCount < 1 {
print("捕捉到平地")
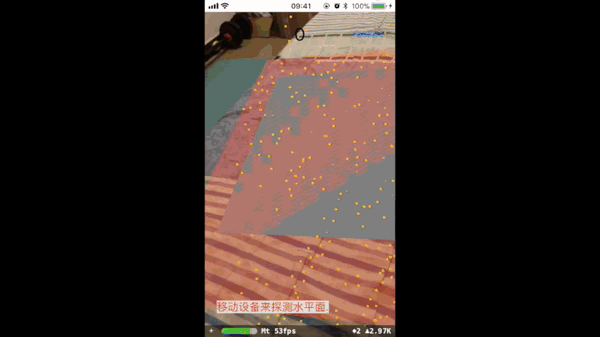
//2.创建一个平面 (系统捕捉到的平地是一个不规则大小的长方形,这里笔者将其变成一个长方形)
let plane = SCNPlane(width: CGFloat(planeAnchor.extent.x), height: CGFloat(planeAnchor.extent.z))
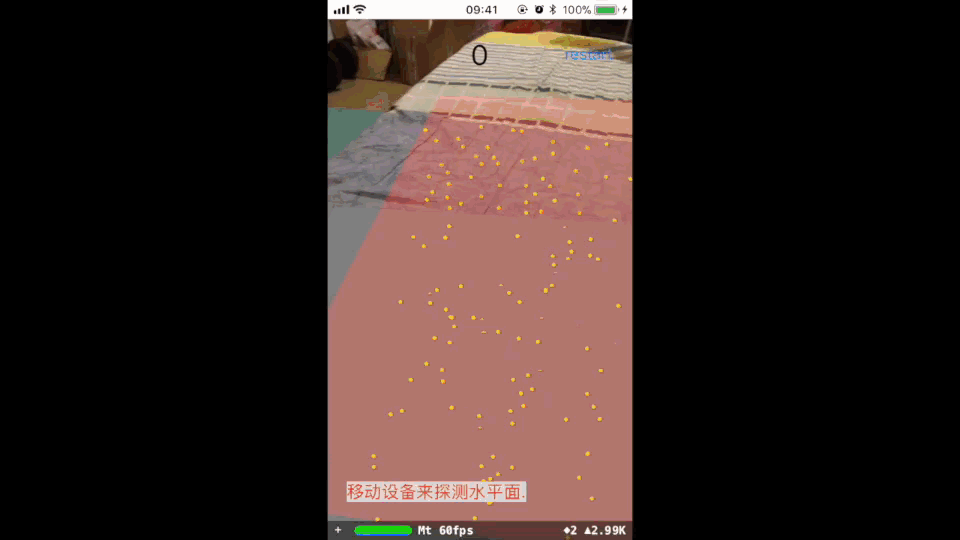
//3.使用Material渲染3D模型(默认模型是白色的,这里笔者改成红色)
plane.firstMaterial?.diffuse.contents = UIColor.red
//4.创建一个基于3D物体模型的节点
planeNode = SCNNode(geometry: plane)
//5.设置节点的位置为捕捉到的平地的锚点的中心位置 SceneKit框架中节点的位置position是一个基于3D坐标系的矢量坐标SCNVector3Make
planeNode?.simdPosition = float3(planeAnchor.center.x, 0, planeAnchor.center.z)
//6.`SCNPlane`默认是竖着的,所以旋转一下以匹配水平的`ARPlaneAnchor`
planeNode?.eulerAngles.x = -.pi / 2
//7.更改透明度
planeNode?.opacity = 0.25
//8.添加到父节点中
node.addChildNode(planeNode!)
//9.上面的planeNode节点,大小/位置会随着检测到的平面而不断变化,方便起见,再添加一个相对固定的基准平面,用来放置游戏场景
let base = SCNBox(width: 0.5, height: 0, length: 0.5, chamferRadius: 0);
base.firstMaterial?.diffuse.contents = UIColor.gray;
baseNode = SCNNode(geometry:base);
baseNode?.position = SCNVector3Make(planeAnchor.center.x, 0, planeAnchor.center.z);
node.addChildNode(baseNode!)
}
}
// 更新锚点和对应的node之前调用,ARKit会自动更新anchor和node,使其相匹配
func renderer(_ renderer: SCNSceneRenderer, willUpdate node: SCNNode, for anchor: ARAnchor) {
// 只更新在`renderer(_:didAdd:for:)`中得到的配对的锚点和节点.
guard let planeAnchor = anchor as? ARPlaneAnchor,
let planeNode = node.childNodes.first,
let plane = planeNode.geometry as? SCNPlane
else { return }
updateCount += 1
if updateCount > 20 {//平面超过更新20次,捕捉到的特征点已经足够多了,可以显示进入游戏按钮
DispatchQueue.main.async {
self.playButton.isHidden = false
}
}
// 平面的中心点可以会变动.
planeNode.simdPosition = float3(planeAnchor.center.x, 0, planeAnchor.center.z)
/*
平面尺寸可能会变大,或者把几个小平面合并为一个大平面.合并时,`ARSCNView`自动删除同一个平面上的相应节点,然后调用该方法来更新保留的另一个平面的尺寸.(经过测试,合并时,保留第一个检测到的平面和对应节点)
*/
plane.width = CGFloat(planeAnchor.extent.x)
plane.height = CGFloat(planeAnchor.extent.z)
}
// 更新锚点和对应的node之后调用
func renderer(_ renderer: SCNSceneRenderer, didUpdate node: SCNNode, for anchor: ARAnchor) {
}
// 移除锚点和对应node后
func renderer(_ renderer: SCNSceneRenderer, didRemove node: SCNNode, for anchor: ARAnchor) {
}
// MARK: - ARSessionObserver
func session(_ session: ARSession, didFailWithError error: Error) {
sessionInfoLabel.text = "Session失败: \(error.localizedDescription)"
resetTracking()
}
func sessionWasInterrupted(_ session: ARSession) {
sessionInfoLabel.text = "Session被打断"
}
func sessionInterruptionEnded(_ session: ARSession) {
sessionInfoLabel.text = "Session打断结束"
resetTracking()
}
func session(_ session: ARSession, cameraDidChangeTrackingState camera: ARCamera) {
updateSessionInfoLabel(for: session.currentFrame!, trackingState: camera.trackingState)
}
}
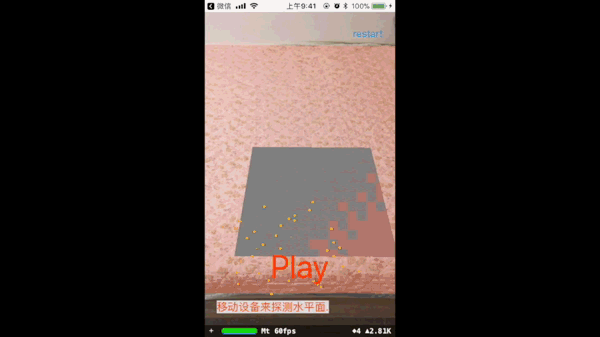
运行一下,顺利识别到平面
点击Play按钮之后,隐藏不需要的UI内容,并停止识别平面
step2:修改3D版Stack游戏
3D版最终代码在这里koenig-media.raywenderlich.com/uploads/201… 首先,我们要做的是:移除摄像机代码,允许cameraControl
3D游戏中,需要控制摄像机来展现不同场景,包括实现动画;而AR中,手机就是摄像机,不能再控制摄像机的位置了.因此将原来加在mainCamera上的动作,改为加在scnScene.rootNode上面即可,当然动作方向也需要反转一下,比如原来gameover方法:
func gameOver() {
    let mainCamera = scnScene.rootNode.childNode(withName: "Main Camera", recursively: false)!

    let fullAction = SCNAction.customAction(duration: 0.3) { _,_ in
      let moveAction = SCNAction.move(to: SCNVector3Make(mainCamera.position.x, mainCamera.position.y * (3/4), mainCamera.position.z), duration: 0.3)
      mainCamera.runAction(moveAction)
      if self.height <= 15 {
        mainCamera.camera?.orthographicScale = 1
      } else {
        mainCamera.camera?.orthographicScale = Double(Float(self.height/2) / mainCamera.position.y)
      }
    }

    mainCamera.runAction(fullAction)
    playButton.isHidden = false
  }
改过之后中的gameOver方法:
func gameOver() {

    let fullAction = SCNAction.customAction(duration: 0.3) { _,_ in
      let moveAction = SCNAction.move(to: SCNVector3Make(0, 0, 0), duration: 0.3)
      self.scnScene.rootNode.runAction(moveAction)
    }

    scnScene.rootNode.runAction(fullAction)
    playButton.isHidden = false
  }
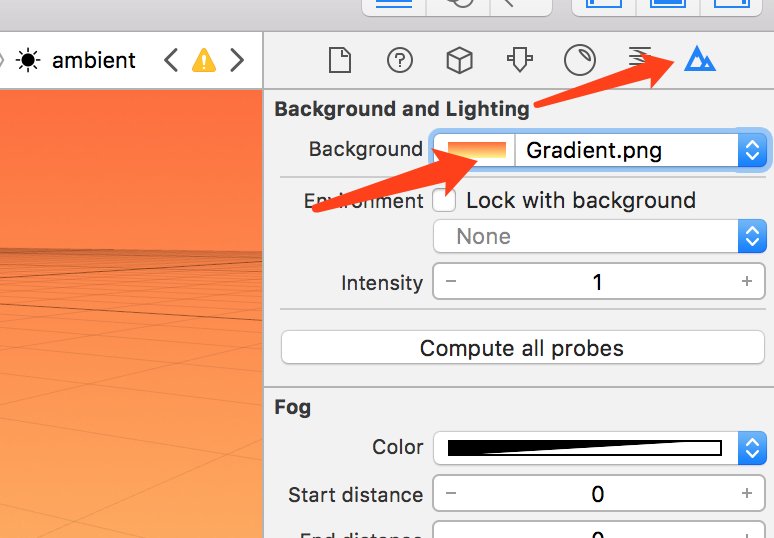
接着,我们在GameScene.scn中编辑场景:
- 删除相机---代码中已经删除了摄像机,这里也不需要了;
- 删除背景图---AR中不需要背景图片;
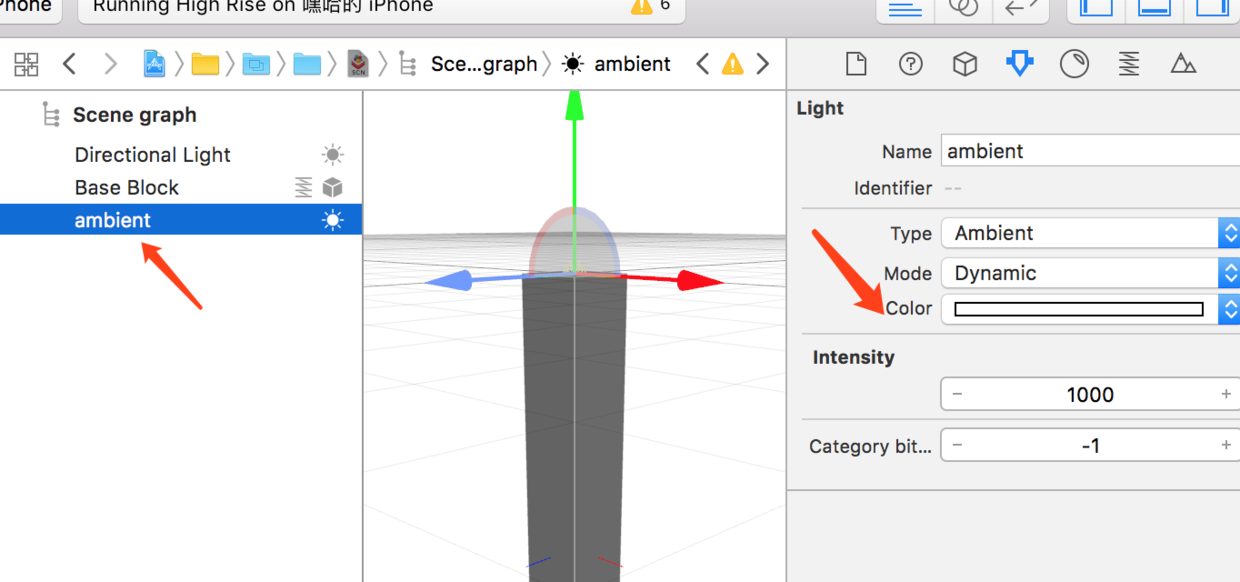
- 添加白色的环境光---AR中可以移动手机,看到方块后面,所以需要把后面也照亮
- 底座改小一些---因为原来的尺寸:(1,0.2,1)意味着长1米,高0.2米,宽1米.这对于AR场景来说实在太大了.
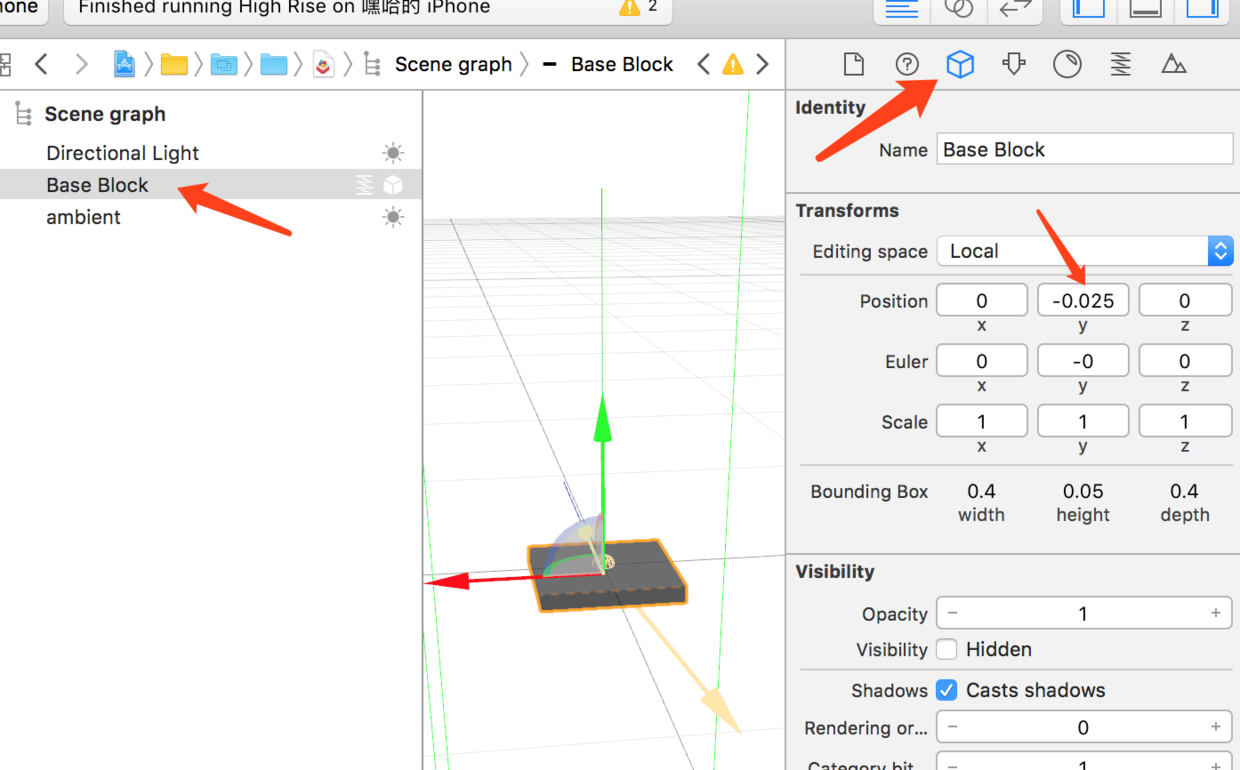
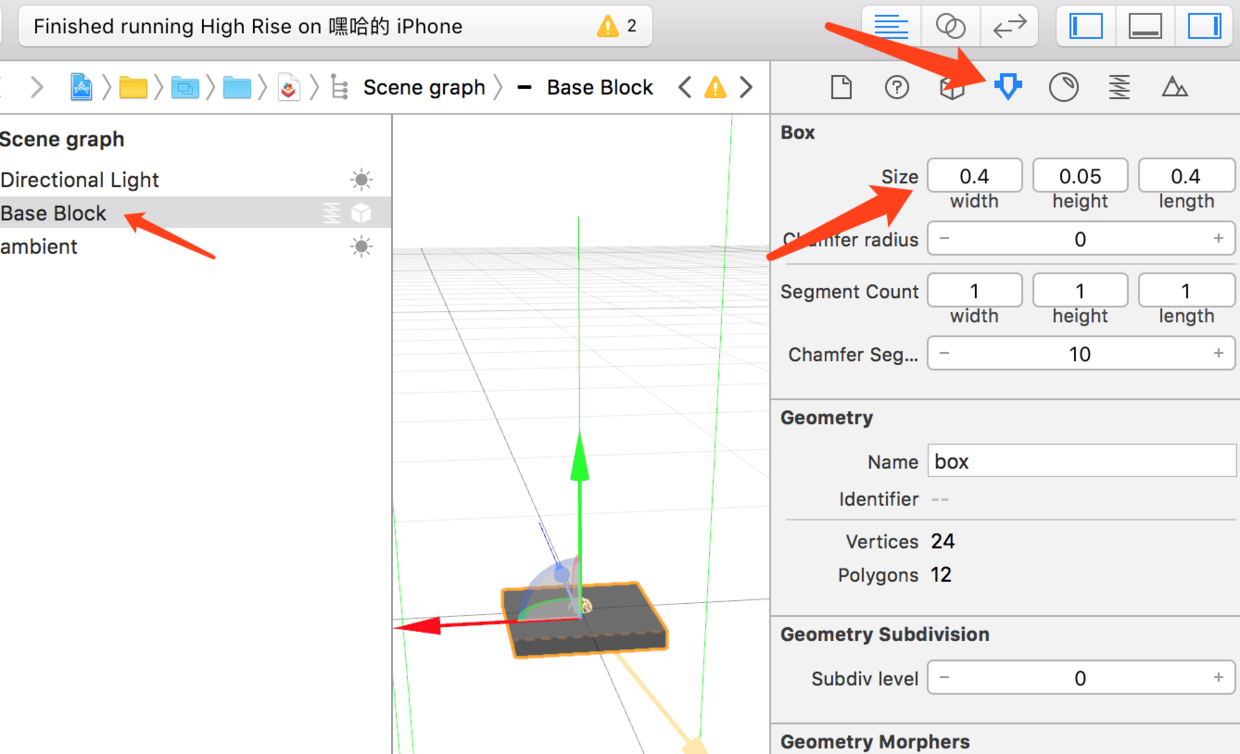
下一步,修改代码中的方块尺寸,运动速度,完美对齐的匹配精度等 在文件开头定义一些全局常量,方便我们修改
let boxheight:CGFloat = 0.05 //原来为0.2
let boxLengthWidth:CGFloat = 0.4 //原来为1
let actionOffet:Float = 0.6 //原来为1.25
let actionSpeed:Float = 0.011 //原来为0.3
难度不大,但要修改的地方比较多,认真一些就可以了.
最后,发现方块的颜色不会改变,所以修改一下颜色,将原来各个节点的:
//以brokenBoxNode为例,其余类似
brokenBoxNode.geometry?.firstMaterial?.diffuse.contents = UIColor(colorLiteralRed: 0.01 * Float(height), green: 0, blue: 1, alpha: 1)
改为:
brokenBoxNode.geometry?.firstMaterial?.diffuse.contents = UIColor(red: 0.1 * CGFloat(height % 10), green: 0.03*CGFloat(height%30), blue: 1-0.1 * CGFloat(height % 10), alpha: 1)
这样颜色差异更明显一些.另外新出现的方块颜色总是和上一个相同,放上去后才改变颜色,是因为创建newNode时利用了原来方块的geometry导致的. 需要修改addNewBlock方法:
  func addNewBlock(_ currentBoxNode: SCNNode) {
// 此处直接新建一个SCNBox
    let newBoxNode = SCNNode(geometry: SCNBox(width: CGFloat(newSize.x), height: boxheight, length: CGFloat(newSize.z), chamferRadius: 0))
    newBoxNode.position = SCNVector3Make(currentBoxNode.position.x, currentPosition.y + Float(boxheight), currentBoxNode.position.z)
    newBoxNode.name = "Block\(height+1)"
// 此处颜色改为height+1层
    newBoxNode.geometry?.firstMaterial?.diffuse.contents = UIColor(red: 0.1 * CGFloat((height+1) % 10), green: 0.03*CGFloat((height+1)%30), blue: 1-0.1 * CGFloat((height+1) % 10), alpha: 1)

    if height % 2 == 0 {
      newBoxNode.position.x = -actionOffet
    } else {
      newBoxNode.position.z = -actionOffet
    }

    scnScene.rootNode.addChildNode(newBoxNode)
  }
另外handleTap方法中也需要另外设置颜色,否则放置好的方块会没有颜色,会变白色.
currentBoxNode.geometry?.firstMaterial?.diffuse.contents = UIColor(red: 0.1 * CGFloat(height % 10), green: 0.03*CGFloat(height%30), blue: 1-0.1 * CGFloat(height % 10), alpha: 1)
运行一下,可以看到场景中的物体变小了,摄像机也可以随便移动了,颜色改变了,后面也有光照了...
step3:合并两个项目,完成AR版Stack堆方块游戏
首先,在ARStack中添加ScoreLabel和点击手势
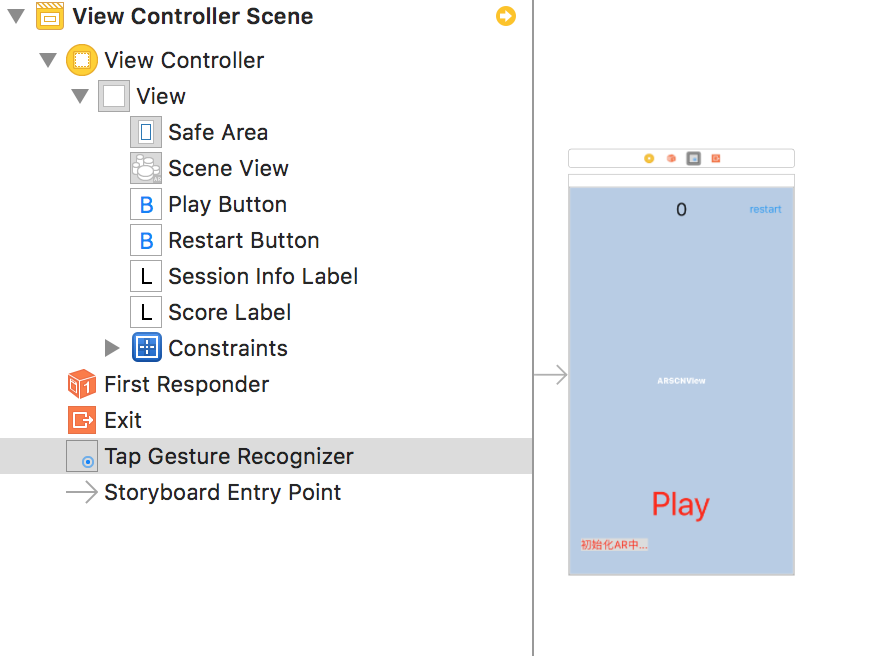
然后第2步项目中复制.scn素材,音频文件,还有一个分类到第1步项目.
添加一个属性,代表游戏节点:
var gameNode:SCNNode?
复制进入游戏的代码过来,在playButtonClick方法中4.后面继续写:
//4.载入游戏场景

        gameNode?.removeFromParentNode()//移除前一次游戏的场景节点
        gameNode = SCNNode()
        let gameChildNodes = SCNScene(named: "art.scnassets/Scenes/GameScene.scn")!.rootNode.childNodes
        for node in gameChildNodes {
            gameNode?.addChildNode(node)
        }
        baseNode?.addChildNode(gameNode!)

        resetGameData() //重置游戏数据

// 复制过来的代码.....
复制其他代码,注意音频文件地址改为art.scnassets.
其余各处的scnView.rootNode.addChildNode()改为gameNode?.addChildNode(boxNode)
然后,resetAll() 方法中需要重置游戏的参数,并将resetGameData方法抽出:
private func resetAll() {
        //0.显示按钮
        playButton.isHidden = true
        sessionInfoLabel.isHidden = false
        //1.重置平面检测配置,重启检测
        resetTracking()
        //2.重置更新次数
        updateCount = 0
        sceneView.debugOptions = [ARSCNDebugOptions.showFeaturePoints]
        //3.重置游戏数据
        resetGameData()
        print("resetAll")
    }
    private func resetGameData() {
        height = 0
        scoreLabel.text = "\(height)"

        direction = true
        perfectMatches = 0
        previousSize = SCNVector3(boxLengthWidth, boxheight, boxLengthWidth)
        previousPosition = SCNVector3(0, boxheight*0.5, 0)
        currentSize = SCNVector3(boxLengthWidth, boxheight, boxLengthWidth)
        currentPosition = SCNVector3Zero

        offset = SCNVector3Zero
        absoluteOffset = SCNVector3Zero
        newSize = SCNVector3Zero
    }
并添加从后台唤醒的监听,当从后台进入前台时,也调用resetAll:
 NotificationCenter.default.addObserver(forName: NSNotification.Name.UIApplicationWillEnterForeground, object: nil, queue: nil) { (noti) in
            self.resetAll()
        }
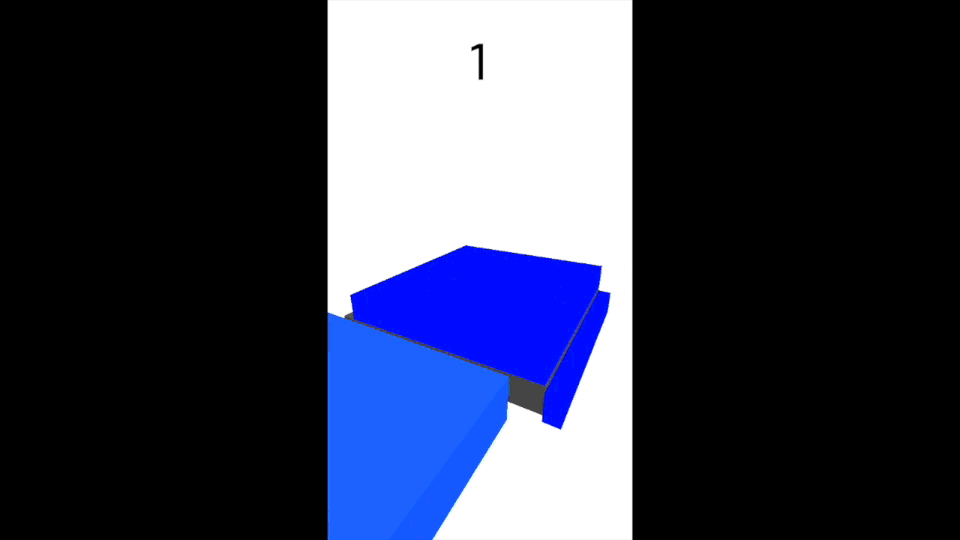
运行一下,效果出来了
虽然还是有很多问题,不过基本功能已经完成了.
step4:修复合并后的bug和逻辑错误
bug主要有两个:
- 没对齐被切下的碎片掉落不正常,有些停留在原来位置,飘在空中;
- 级数超过5后,自动下沉,但低于识别平面的部分仍然可见,造成视觉错误;
bug1:先来修复第一个bug,碎片掉落不正常的问题.
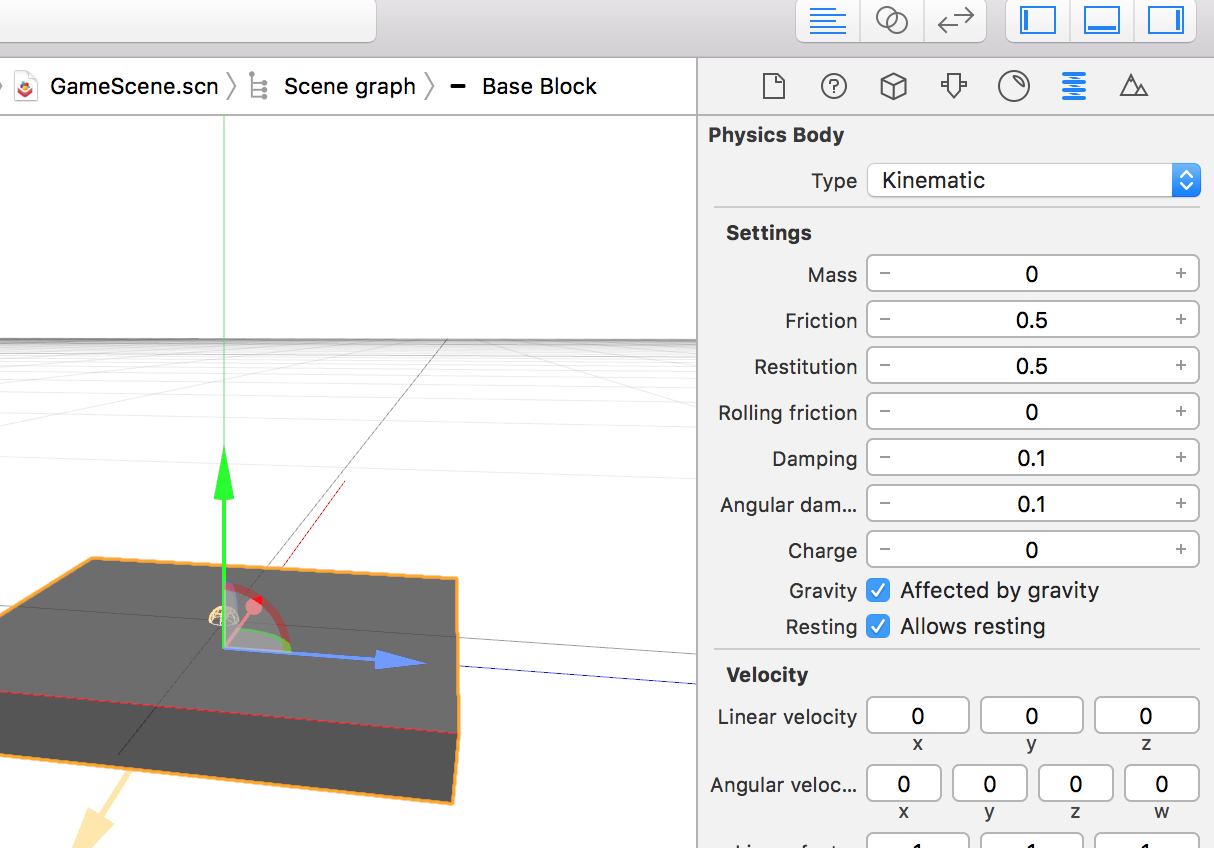
这是因为方块的物理形体类型SCNPhysicsBodyType不正确导致的.原来的游戏中,方块放好后就不动了,所以设置为.static类型,这种类型在执行Action动作时位置并没有真正移动,所以需要改为.kinematic类型,这种类型可以让我们随意移动,并可以与掉落的碎片碰撞,但自身不受碰撞的影响,一般用于电梯,传送机等.
需要更改的地方包括GameScene.scn文件中的底座,playButtonClick方法中的第一个方块,handleTap方法中已对齐方块,还有新生成的方块方法addNewBlock中
//playButtonClick中
boxNode.physicsBody = SCNPhysicsBody(type: .kinematic, shape: SCNPhysicsShape(geometry: boxNode.geometry!, options: nil))

//handleTap中
currentBoxNode.physicsBody = SCNPhysicsBody(type: .kinematic, shape: SCNPhysicsShape(geometry: currentBoxNode.geometry!, options: nil))

//addNewBlock中
newBoxNode.physicsBody = SCNPhysicsBody(type: .kinematic, shape: SCNPhysicsShape(geometry: newBoxNode.geometry!, options: nil))
再运行一次,碎片掉落,碰撞,都已经正常了.
bug2:下沉到时低于识别平面的方块仍然可见
这个问题解决起来也很简单:我们在下沉时遍历各个节点,发现位置低于某个值,就把它隐藏掉;gomeOver后,再把所有节点显示出来;
被隐藏的节点不再参与物理效果运算(比如碰撞等),看起来效果不错.需要注意的是,灯光节点就不要隐藏了.
在handleTap方法中,执行Action之前,添加代码,隐藏低于某个高度的节点
gameNode?.enumerateChildNodes({ (node, stop) in
         if node.light != nil {//灯光节点不隐藏
                        return
         }
         if node.position.y < Float(self.height-5) * Float(boxheight) {
              node.isHidden = true
        }
 })
在gameOver方法的末尾,添加显示节点的代码
gameNode?.enumerateChildNodes({ (node, stop) in

    node.isHidden = false

})
最终版效果
各个步骤的项目代码已发布在github上github.com/XanderXu/AR…
