

0.0 简述
文章内容包括:
- AFNetworking简介
- ATS和HTTPS介绍
- AF中的证书验证介绍
- 如何创建服务端和客户端自签名证书
- 如何创建简单的https服务器
- 对CA正式证书和自签名证书的各种情况进行代码验证
文中所涉及的文件和脚本代码请看这里。
1.0 AFNetworking简介
AFNetworking(下面简称AF)是一个优秀的网络框架,从事iOS开发工作的同学几乎都用过它。
同时,AF也是一个简单,高效的网络框架。
AF3.0版本(3.2.1)是对NSURLSession的封装。NSURLSession是苹果公司的HTTP协议实现,它尽可能完整地实现了所有功能,但是同苹果的Autolayout有相同的问题,就是API复杂难用。
因此在项目实践中,即使我们不使用AF,我们也需要对NSURLSession进行适度封装才能够得心应手。AF帮你做了这件事,而且可能做的更好。
AF将NSURLSession的复杂调用封装到框架内部,并向外提供了更加简单易懂的接口,它主要包含如下功能:
- 提供了AFHTTPSessionManager用于HTTP请求(GET,POST,...)
- 提供AFURLRequestSerialization用于请求封装,添加参数,设置header,传递数据
- 提供AFURLResponseSerialization用于服务端返回数据的解析和过滤
- 提供AFSecurityPolicy用于HTTPS协议证书验证
- 提供了AFNetworkReachabilityManager用于网络状态监听
- 提供了UIKit主要可用于图片缓存,类似于SDWebImage
AF3.0的代码足够简单,各个模块也很容易理解,就不过多介绍了,我们着重分析一下AFSecurityPolicy这个模块。
2.0 ATS
iOS9.0版本中,包含了一个叫ATS的验证机制,要求App网络请求必须是安全的。主要包含2点:
- 必须使用https
- https证书必须是公信机构颁发的证书
对于其中上面的第二点,在代码层次没有强制要求,使用自签名证书也是可以正常请求的,可能会在审核阶段有此要求。
3.0 AF中的证书验证
AF中实现了对服务端证书的验证功能,验证通过之后,即可正常进行网络请求。
但是它没有实现客户端证书,所以如果服务器要求双向验证的时候,我们就需要对AF进行一些扩展了。
关于https的介绍可以参考这里。
服务端验证证书的代码在:AFURLSessionManager.m
- (void)URLSession:(NSURLSession *)session
didReceiveChallenge:(NSURLAuthenticationChallenge *)challenge
 completionHandler:(void (^)(NSURLSessionAuthChallengeDisposition disposition, NSURLCredential *credential))completionHandler
{
    NSURLSessionAuthChallengeDisposition disposition = NSURLSessionAuthChallengePerformDefaultHandling;
    __block NSURLCredential *credential = nil;

    if (self.sessionDidReceiveAuthenticationChallenge) {
        disposition = self.sessionDidReceiveAuthenticationChallenge(session, challenge, &credential);
    } else {
        if ([challenge.protectionSpace.authenticationMethod isEqualToString:NSURLAuthenticationMethodServerTrust]) {
            if ([self.securityPolicy evaluateServerTrust:challenge.protectionSpace.serverTrust forDomain:challenge.protectionSpace.host]) {
                credential = [NSURLCredential credentialForTrust:challenge.protectionSpace.serverTrust];
                if (credential) {
                    disposition = NSURLSessionAuthChallengeUseCredential;
                } else {
                    disposition = NSURLSessionAuthChallengePerformDefaultHandling;
                }
            } else {
                disposition = NSURLSessionAuthChallengeCancelAuthenticationChallenge;
            }
        }
    }

    if (completionHandler) {
        completionHandler(disposition, credential);
    }
}
在NSURLSession中,当请求https的接口时,会触发- (void)URLSession:(NSURLSession *)session didReceiveChallenge:(NSURLAuthenticationChallenge *)challenge completionHandler:(void (^)(NSURLSessionAuthChallengeDisposition disposition, NSURLCredential *credential))completionHandler回调,在这个回调中,你需要验证服务端发送过来的证书,并返回一个NSURLCredential对象。
其中 disposition 这个变量用于表示你对证书的验证结果,NSURLSessionAuthChallengeUseCredential表示验证通过,其他值都表示验证失败。
challenge.protectionSpace.authenticationMethod 这个枚举字符串表示的是回调触发的原因,其中,NSURLAuthenticationMethodServerTrust表示服务端发来证书,NSURLAuthenticationMethodClientCertificate表示服务端请求验证客户端证书。
验证证书的方法在AFSecurityPolicy.m中
- (BOOL)evaluateServerTrust:(SecTrustRef)serverTrust
                  forDomain:(NSString *)domain
{
    if (domain && self.allowInvalidCertificates && self.validatesDomainName && (self.SSLPinningMode == AFSSLPinningModeNone || [self.pinnedCertificates count] == 0)) {
        // https://developer.apple.com/library/mac/documentation/NetworkingInternet/Conceptual/NetworkingTopics/Articles/OverridingSSLChainValidationCorrectly.html
        //  According to the docs, you should only trust your provided certs for evaluation.
        //  Pinned certificates are added to the trust. Without pinned certificates,
        //  there is nothing to evaluate against.
        //
        //  From Apple Docs:
        //          "Do not implicitly trust self-signed certificates as anchors (kSecTrustOptionImplicitAnchors).
        //           Instead, add your own (self-signed) CA certificate to the list of trusted anchors."
        NSLog(@"In order to validate a domain name for self signed certificates, you MUST use pinning.");
        return NO;
    }

    NSMutableArray *policies = [NSMutableArray array];
    if (self.validatesDomainName) {
        [policies addObject:(__bridge_transfer id)SecPolicyCreateSSL(true, (__bridge CFStringRef)domain)];
    } else {
        [policies addObject:(__bridge_transfer id)SecPolicyCreateBasicX509()];
    }

    SecTrustSetPolicies(serverTrust, (__bridge CFArrayRef)policies);

    if (self.SSLPinningMode == AFSSLPinningModeNone) {
        return self.allowInvalidCertificates || AFServerTrustIsValid(serverTrust);
    } else if (!AFServerTrustIsValid(serverTrust) && !self.allowInvalidCertificates) {
        return NO;
    }

    switch (self.SSLPinningMode) {
        case AFSSLPinningModeNone:
        default:
            return NO;
        case AFSSLPinningModeCertificate: {
            NSMutableArray *pinnedCertificates = [NSMutableArray array];
            for (NSData *certificateData in self.pinnedCertificates) {
                [pinnedCertificates addObject:(__bridge_transfer id)SecCertificateCreateWithData(NULL, (__bridge CFDataRef)certificateData)];
            }
            SecTrustSetAnchorCertificates(serverTrust, (__bridge CFArrayRef)pinnedCertificates);

            if (!AFServerTrustIsValid(serverTrust)) {
                return NO;
            }

            // obtain the chain after being validated, which *should* contain the pinned certificate in the last position (if it's the Root CA)
            NSArray *serverCertificates = AFCertificateTrustChainForServerTrust(serverTrust);

            for (NSData *trustChainCertificate in [serverCertificates reverseObjectEnumerator]) {
                if ([self.pinnedCertificates containsObject:trustChainCertificate]) {
                    return YES;
                }
            }

            return NO;
        }
        case AFSSLPinningModePublicKey: {
            NSUInteger trustedPublicKeyCount = 0;
            NSArray *publicKeys = AFPublicKeyTrustChainForServerTrust(serverTrust);

            for (id trustChainPublicKey in publicKeys) {
                for (id pinnedPublicKey in self.pinnedPublicKeys) {
                    if (AFSecKeyIsEqualToKey((__bridge SecKeyRef)trustChainPublicKey, (__bridge SecKeyRef)pinnedPublicKey)) {
                        trustedPublicKeyCount += 1;
                    }
                }
            }
            return trustedPublicKeyCount > 0;
        }
    }

    return NO;
}
代码解析:
-
函数第一行就是一长串的逻辑判断,乍一看,这里看的人很懵,它包含的信息很多。但实际上它的作用是用来处理
服务端自签名证书的。其他情况无需考虑此处逻辑。根据后面代码来看,如果你服务端证书使用的是自签名证书,AFSecurityPolicy的allowInvalidCertificates属性必须设为YES,所以这里判断会带上self.allowInvalidCertificates。 -
接下来就是验证服务端证书的过程,
SSLPinningMode有3个值,AFSSLPinningModeNone表示服务端使用的是CA机构签发的正式证书,另外2个值表示服务端使用的是自签名证书。 -
AFServerTrustIsValid这个函数使用的是Security.framework中的方法,用于验证服务端发送来的证书是否是可信任的,只要证书链中任何一个证书是已经信任的证书,那么这个服务端证书就是合法的。详细过程已经被Security.framework处理了,不需要我们做额外工作。关于证书链可以参考这里。 -
第三部分代码就是
服务端自签名证书的验证了,这种情况下,需要把服务端证书也放到客户端中一份。根据SSLPinningMode,你可以选择使用服务端证书或者服务端证书内的公钥。 -
AFSSLPinningModeCertificate表示客户端需要保存一个服务端根证书,用于验证服务端证书是否合法。客户端需要将服务端证书的证书链上的任意一个证书拖入xcode工程中。 -
自签名证书需要设置
pinnedCertificates属性,把拖入xcode的证书加载到内存中,保存在pinnedCertificates数组中。通过SecTrustSetAnchorCertificates方法把数组中的证书同服务端返回的证书做证书链绑定,然后就可以用AFServerTrustIsValid方法验证证书是否合法了,如果服务端证书和我们客户端保存的证书可以正确匹配,这个函数就会返回YES。 -
AFSSLPinningModePublicKey表示客户端需要保存一个服务端根证书公钥,用于验证服务端证书是否合法。客户端需要将服务端证书链上的任意一证书的公钥拖入xcode工程中。 -
若使用公钥验证,则需要从服务端证书中取出公钥,同时取出客户端中保存的公钥,逐一比较,如果有匹配的就认为验证成功。
根据上述分析,客户端对于证书的使用,有下面的3种情况:
- 服务端使用CA机构颁发的正式证书
- 服务端使用自签名证书
- 服务端要验证客户端证书时,客户端使用自签名证书
4.0 证书验证实践
我们对上面所述3种证书使用情形进行逐一验证。
验证之前,我们需要做3个准备工作:
- 第一是要把所需的证书创建出来
- 第二是搭建简单的服务器用于测试
- 第三是创建客户端工程引入AF3.0准备测试
4.1 创建证书
https使用的证书都是基于X.509格式的。
CA机构的正式证书一般是要花钱购买的,当然也有免费的,我之前在阿里云买过免费的证书。一般申请通过后,你可以把证书下载下来,其中主要包含私钥和各种格式的证书。
自签名的证书就比较容易了,在mac中可以使用openssl命令来生成。
我写了一个简单的脚本,用于生成各种自签名证书,你可以把它保存到文件(文件名为:create.sh)中,在终端里执行。
脚本会生成3种证书:根证书,客户端证书,服务端证书。
其中不同的证书没有本质区别,只是用在不同的地方而已。
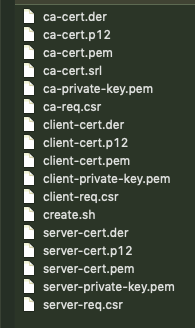
每种证书包含5个文件,分别是:
- .der格式证书
- .pem格式证书
- .p12格式证书
- .pem格式私钥
- .csr格式证书申请文件
#!/bin/sh

locale='CN' #地区
province='Beijing' #省份
city=$province #城市
company='xxx' #公司
unit='yyy' #部门
hostname='127.0.0.1' #域名
email='hr@suning.com' #邮箱

#clean
function clean(){
	echo '清理文件...'
	ls | grep -v create.sh | xargs rm -rf
}

#用法
function usage(){
	echo 'usage: ./create.sh
		[-l [localevalue]]
		[-p [provincevalue]]
		[-c [cityvalue]]
		[-d [companyvalue]]
		[-u [unitvalue]]
		[-h [hostnamevalue]]
		[-e [emailvalue]]
	'
	exit
}

#参数
if [ $# -gt 0 ]; then
	while getopts "cl:p:c:d:u:h:e" arg;
	do
		case $arg in
			c)
				clean && exit
				;;
			l)
				locale=$OPTARG
				;;
			p)
				province=$OPTARG
				;;
			c)
				city=$OPTARG
				;;
			d)
				company=$OPTARG
				;;
			u)
				unit=$OPTARG
				;;
			h)
				hostname=$OPTARG
				;;
			e)
				email=$OPTARG
				;;
			?)
				usage
				;;
		esac
	done
fi

clean

echo '开始创建根证书...'

openssl genrsa -out ca-private-key.pem 1024
openssl req -new -out ca-req.csr -key ca-private-key.pem <<EOF
${locale}
${province}
${city}
${company}
${unit}
${hostname}
${email}

EOF
openssl x509 -req -in ca-req.csr -out ca-cert.pem -outform PEM -signkey ca-private-key.pem -days 3650
openssl x509 -req -in ca-req.csr -out ca-cert.der -outform DER -signkey ca-private-key.pem -days 3650
echo '请输入根证书p12文件密码,直接回车表示密码为空字符串...'
openssl pkcs12 -export -clcerts -in ca-cert.pem -inkey ca-private-key.pem -out ca-cert.p12

echo '开始创建服务端证书...'

openssl genrsa -out server-private-key.pem 1024
openssl req -new -out server-req.csr -key server-private-key.pem << EOF
${locale}
${province}
${city}
${company}
${unit}
${hostname}
${email}

EOF
openssl x509 -req -in server-req.csr -out server-cert.pem -outform PEM -signkey server-private-key.pem -CA ca-cert.pem -CAkey ca-private-key.pem -CAcreateserial -days 3650
openssl x509 -req -in server-req.csr -out server-cert.der -outform DER -signkey server-private-key.pem -CA ca-cert.pem -CAkey ca-private-key.pem -CAcreateserial -days 3650
echo '请输入服务端证书p12文件密码,直接回车表示密码为空字符串...'
openssl pkcs12 -export -clcerts -in server-cert.pem -inkey server-private-key.pem -out server-cert.p12

echo '开始创建客户端证书...'

openssl genrsa -out client-private-key.pem 1024
openssl req -new -out client-req.csr -key client-private-key.pem << EOF
${locale}
${province}
${city}
${company}
${unit}
${hostname}
${email}

EOF
openssl x509 -req -in client-req.csr -out client-cert.pem -outform PEM -signkey client-private-key.pem -CA ca-cert.pem -CAkey ca-private-key.pem -CAcreateserial -days 3650
openssl x509 -req -in client-req.csr -out client-cert.der -outform DER -signkey client-private-key.pem -CA ca-cert.pem -CAkey ca-private-key.pem -CAcreateserial -days 3650
echo '请输入客户端证书p12文件密码,直接回车表示密码为空字符串...'
openssl pkcs12 -export -clcerts -in client-cert.pem -inkey client-private-key.pem -out client-cert.p12

echo 'finishied'
你可以按照步骤操作:
-
复制脚本内容,保存到文件中,文件名为
create.sh -
打开终端,通过
cd命令进入create.sh所在的文件夹 -
在终端内输入:
chmod +x create.sh点击回车 -
在终端输入:
./create.sh -h,此时会打印用法usage: ./create.sh [-l [localevalue]] [-p [provincevalue]] [-c [cityvalue]] [-d [companyvalue]] [-u [unitvalue]] [-h [hostnamevalue]] [-e [emailvalue]]脚本有下面几种用法:
./create.sh -h打印用法./create.sh -c会清空生成的所有文件./create.sh直接回车,会使用默认参数生成证书./create.sh + 用法中所述选项会使用自定义的参数生成证书
脚本执行成功后,应该会生成下面的文件:
4.2 搭建简单的HTTPS服务器
我们使用nodejs来搭建https服务器,请按照如下步骤操作:
- 首先下载nodejs并安装
- 建立一个文件夹,文件夹内创建一个文件,名字为
package.json,内容如下:
{
    "name": "test-https",
    "version": "1.0.0",
    "main": "app.js",
    "scripts": {
        "start": "node app.js"
    },
    "debug": true,
    "dependencies": {
        "koa": "2.5.2",
        "koa-router": "7.4.0"
    }
}
- 建立另一个文件,名字为
app.js,内容如下:
const Koa = require('koa');
const https = require('https');
const fs = require('fs');
const router = require('koa-router')();

const app = new Koa();

//路由
router.get('/', (ctx, next) => {
    ctx.response.body = 'this is a simple node js https server response';
})
app.use(router.routes());

//https
https.createServer({
    key: fs.readFileSync('./yourServerCertPrivatekey.key'),
    cert: fs.readFileSync('./yourServerCert.pem'),
    requestCert: true,
    ca:[fs.readFileSync('./yourClientCert.pem')]
}, app.callback()).listen(3000);

console.log(`https app started at port 3000`)
- 打开终端,使用
cd命令进入我们创建的服务器文件夹,然后执行命令:npm install,等待命令完成(可能会比较慢,根据网络情况而定)。如出现下列字样表示安装成功(不一定完全相同):
added 40 packages from 21 contributors and audited 53 packages in 8.446s
found 0 vulnerabilities
- 至此我们的简易https服务器就搭建完成了。我们可以使用命令:
node app.js来启动服务器。但是你会发现会报错,这是因为fs.readFileSync(filename)这句代码表示要读取一个证书文件,要确保文件存在才可以。我们后续根据需求来修改此处文件路径即可。 - 服务器启动成功后,你可以在终端看到下面的文字:
https app started at port 3000
4.3 建立客户端工程
这个比较简单,就不多说了。我们使用下列基本代码来做证书测试。
-(void) test{
	AFHTTPSessionManager *manager = [[AFHTTPSessionManager alloc] init];

    //HTTPS验证代码,我们主要修改这里
    AFSecurityPolicy *policy = [AFSecurityPolicy defaultPolicy];
    policy.validatesDomainName = NO;//不验证域名,是为了测试方便,否则你需要修改host文件了
    manager.securityPolicy = policy;

    manager.responseSerializer = [AFHTTPResponseSerializer serializer];
    //请求地址就写这个
    [manager GET:@"https://127.0.0.1:3000/" parameters:nil progress:nil success:^(NSURLSessionDataTask * _Nonnull task, id  _Nullable responseObject) {
        NSLog(@"succ and response = [%@]", [[NSString alloc] initWithData:responseObject encoding:NSUTF8StringEncoding]);
    } failure:^(NSURLSessionDataTask * _Nullable task, NSError * _Nonnull error) {
        NSLog(@"fail");
    }];
}
4.4 服务端使用CA机构颁发的正式证书
这个是最简单的情况,AF已经支持,我们不需要做任何额外工作就能够支持。
首先,我们将服务端的代码中的证书路径指向我们在CA机构申请好的服务端证书路径,其中key表示证书私钥,cert表示pem格式证书。另外将requestCert和ca这两个字段先删除,然后重新启动服务器。像下面这样:
... ...
//https
https.createServer({
    key: fs.readFileSync(这里改成你的私钥路径),
    cert: fs.readFileSync(这里改成你的pem格式证书路径)
}, app.callback()).listen(3000);
... ...
然后,客户端的代码不需要修改。直接运行xcode,正常情况下你可以看到如下输出:
succ and response = [this is a simple node js https server response]
4.5 服务端使用自签名证书
服务端代码不变,只是将证书和私钥路径修改为我们自签名的证书路径。
上文中,我们已经创建过自签名的证书。
首先把证书文件夹的私钥文件server-private-key.pem和证书文件server-cert.pem复制到服务器文件夹下。
然后服务器代码修改如下:
... ...
//https
https.createServer({
    key: fs.readFileSync('./server-private-key.pem'),
    cert: fs.readFileSync('./server-cert.pem')
}, app.callback()).listen(3000);
... ...
重启服务器。
客户端需要把证书文件夹内的server-cert.der文件拖入xcode中,然后将xcode中的证书修改名字为server-cert.cer。
客户端代码做如下修改(请看注释):
-(void) test{
	//使用服务器自签名证书,需要指定baseUrl属性。
    AFHTTPSessionManager *manager = [[AFHTTPSessionManager alloc] initWithBaseURL:[NSURL URLWithString:@"https://127.0.0.1:3000"]];

    //AFSSLPinningModeCertificate表示使用自签名证书
    AFSecurityPolicy *policy = [AFSecurityPolicy policyWithPinningMode:AFSSLPinningModeCertificate];
    //为了测试方便不验证域名,若要验证域名,则请求时的域名要和创建证书(创建证书的脚本执行时可指定域名)时的域名一致
    policy.validatesDomainName = NO;
    //自签名服务器证书需要设置allowInvalidCertificates为YES
    policy.allowInvalidCertificates = YES;
    //指定本地证书路径
    policy.pinnedCertificates = [AFSecurityPolicy certificatesInBundle:[NSBundle mainBundle]];

    manager.responseSerializer = [AFHTTPResponseSerializer serializer];
    [manager GET:@"https://127.0.0.1:3000/" parameters:nil progress:nil success:^(NSURLSessionDataTask * _Nonnull task, id  _Nullable responseObject) {
        NSLog(@"succ and response = [%@]", [[NSString alloc] initWithData:responseObject encoding:NSUTF8StringEncoding]);
    } failure:^(NSURLSessionDataTask * _Nullable task, NSError * _Nonnull error) {
        NSLog(@"fail");
    }];
}
运行工程,正常情况下,可以看到正确输出。
4.6 服务端验证客户端证书
这叫做双向验证,客户端验证服务端无误之后,服务端也可以验证客户端证书,这样可以保证数据传输双方都是自己想要的目标。
首先,把证书文件夹内的client-cert.pem文件复制到服务器文件夹内。
然后修改服务端代码:
... ...
//https
https.createServer({
    key: fs.readFileSync('./server-private-key.pem'),
    cert: fs.readFileSync('./server-cert.pem'),
    requestCert: true,//表示客户端需要证书
    ca:[fs.readFileSync('./client-cert.pem')]//用于匹配客户端证书
}, app.callback()).listen(3000);
... ...
重启服务器。
客户端需要把证书文件夹内的client-cert.p12文件拖到xcode中。
客户端请求代码不需要修改。
因为AF3.0并没有提供对客户端证书的支持,所以我们需要修改AF的代码。
找到AFURLSessionManager.m文件,在- (void)URLSession:(NSURLSession *)session didReceiveChallenge:(NSURLAuthenticationChallenge *)challenge completionHandler:(void (^)(NSURLSessionAuthChallengeDisposition disposition, NSURLCredential *credential))completionHandler方法。
- (void)URLSession:(NSURLSession *)session
didReceiveChallenge:(NSURLAuthenticationChallenge *)challenge
 completionHandler:(void (^)(NSURLSessionAuthChallengeDisposition disposition, NSURLCredential *credential))completionHandler
{
    NSURLSessionAuthChallengeDisposition disposition = NSURLSessionAuthChallengePerformDefaultHandling;
    __block NSURLCredential *credential = nil;

    if (self.sessionDidReceiveAuthenticationChallenge) {
        disposition = self.sessionDidReceiveAuthenticationChallenge(session, challenge, &credential);
    } else {
        NSString *authMethod = challenge.protectionSpace.authenticationMethod;
        if ([authMethod isEqualToString:NSURLAuthenticationMethodServerTrust]) {
            if ([self.securityPolicy evaluateServerTrust:challenge.protectionSpace.serverTrust forDomain:challenge.protectionSpace.host]) {
                credential = [NSURLCredential credentialForTrust:challenge.protectionSpace.serverTrust];
                if (credential) {
                    disposition = NSURLSessionAuthChallengeUseCredential;
                } else {
                    disposition = NSURLSessionAuthChallengePerformDefaultHandling;
                }
            } else {
                disposition = NSURLSessionAuthChallengeCancelAuthenticationChallenge;
            }
        } else if([authMethod isEqualToString:NSURLAuthenticationMethodClientCertificate]){
            NSData *p12Data = [NSData dataWithContentsOfFile:[NSBundle pathForResource:@"client-cert" ofType:@"p12" inDirectory:[NSBundle mainBundle].bundlePath]];
            if([p12Data isKindOfClass:[NSData class]]){
                SecTrustRef trust = NULL;
                SecIdentityRef identity = NULL;
                [[self class] extractIdentity:&identity andTrust:&trust fromPKCS12Data:p12Data];
                if(identity){
                    SecCertificateRef certificate = NULL;
                    SecIdentityCopyCertificate(identity, &certificate);
                    const void *certs[] = {certificate};
                    CFArrayRef certArray =CFArrayCreate(kCFAllocatorDefault, certs, 1, NULL);
                    credential = [NSURLCredential credentialWithIdentity:identity certificates:(__bridge  NSArray*)certArray persistence:NSURLCredentialPersistencePermanent];
                    disposition = NSURLSessionAuthChallengeUseCredential;
                }else{
                    disposition = NSURLSessionAuthChallengePerformDefaultHandling;
                }
            }else{
                disposition = NSURLSessionAuthChallengePerformDefaultHandling;
            }
        } else {
            disposition = NSURLSessionAuthChallengePerformDefaultHandling;
        }
    }

    if (completionHandler) {
        completionHandler(disposition, credential);
    }
}

+ (BOOL)extractIdentity:(SecIdentityRef*)outIdentity andTrust:(SecTrustRef *)outTrust fromPKCS12Data:(NSData *)inPKCS12Data {
    OSStatus securityError = errSecSuccess;
    //客户端证书密码
    NSDictionary*optionsDictionary = [NSDictionary dictionaryWithObject: @""
                                                                 forKey: (__bridge id)kSecImportExportPassphrase];

    CFArrayRef items = CFArrayCreate(NULL, 0, 0, NULL);
    securityError = SecPKCS12Import((__bridge CFDataRef)inPKCS12Data,(__bridge CFDictionaryRef)optionsDictionary ,&items);

    if(securityError == 0) {
        CFDictionaryRef myIdentityAndTrust = CFArrayGetValueAtIndex(items, 0);
        const void *tempIdentity = NULL;
        tempIdentity = CFDictionaryGetValue(myIdentityAndTrust, kSecImportItemIdentity);
        *outIdentity = (SecIdentityRef)tempIdentity;
        const void *tempTrust = NULL;
        tempTrust = CFDictionaryGetValue(myIdentityAndTrust, kSecImportItemTrust);
        *outTrust = (SecTrustRef)tempTrust;
        return YES;
    } else {
        NSLog(@"SecPKCS12Import is failed with error code %d", (int)securityError);
        return NO;
    }
}
上述代码参考自这里。
值得注意的有2个地方:
- 一个是
p12文件的文件名,我们这里写死了client-cert.p12,可以根据具体情况做修改。 - 还有一个是
p12文件的密码,在extractIdentity:方法的第三行,可以改成你的p12文件密码,密码可以为空。
代码修改好之后,运行工程,可以得到正确的服务端返回。
5.0 总结
文中内容均已经过测试,但仍然可能有错误之处,如发现请留言。
文中所涉及的脚本,证书,服务器代码, 客户端代码,已经上传到github中,点这里,都已经包含了安装环境,下载后直接打开就能使用。
--完--
