

Untold numbers of developers have hacked together an awkward, fragile system for network caching functionality, all because they weren’t aware that NSURLCache could be setup in two lines and do it 100× better. Even more developers have never known the benefits of network caching, and never attempted a solution, causing their apps to make untold numbers of unnecessary requests to the server. 无数开发者尝试自己做一个丑陋而脆弱的系统来实现网络缓存的功能,殊不知NSURLCache只要两行代码就能搞定,并且好上100倍。甚至更多的开发者根本不知道网络缓存的好处,从来没有尝试过解决方案,导致他们的App向服务器发出无数不必要的请求。
iOS系统的缓存策略
上面是引用Mattt大神在NSHipster介绍NSURLCache时的原话。
服务端的缓存策略
先看看服务端的缓存策略。当第一次请求后,客户端会缓存数据,当有第二次请求的时候,客户端会额外在请求头加上If-Modified-Since或者If-None-Match,If-Modified-Since会携带缓存的最后修改时间,服务端会把这个时间和实际文件的最后修改时间进行比较。
- 相同就返回状态码304,且不返回数据,客户端拿出缓存数据,渲染页面
- 不同就返回状态码200,并且返回数据,客户端渲染页面,并且更新缓存
当然类似的还有Cache-Control、Expires和Etag,都是为了校验本地缓存文件和服务端是否一致,这里就带过了。
NSURLCache
NSURLCache是iOS系统提供的内存以及磁盘的综合缓存机制。NSURLCache对象被存储沙盒中Library/cache目录下。在我们只需要在didFinishLaunchingWithOptions函数里面加上下面的代码,就可以满足一般的缓存要求。(是的,搞定NSURLCache就是这么简单)
NSURLCache * sharedCache = [[NSURLCache alloc] initWithMemoryCapacity:20 * 1024 *1024 diskCapacity:100 * 1024 * 1024 diskPath:nil];
[NSURLCache setSharedURLCache:sharedCache];
下面是几个常用的API
//设置内存缓存的最大容量
[cache setMemoryCapacity:1024 * 1024 * 20];

//设置磁盘缓存的最大容量
[cache setDiskCapacity:1024 * 1024 * 100];

//获取某个请求的缓存
[cache cachedResponseForRequest:request];

//清除某个请求的缓存
[cache removeCachedResponseForRequest:request];

//请求策略,设置了系统会自动用NSURLCache进行数据缓存
request.cachePolicy = NSURLRequestReturnCacheDataElseLoad;
iOS常用的缓存策略
NSURLRequestCachePolicy是个枚举,指的是不同的缓存策略,一共有7种,但是能用的只有4种。
typedef NS_ENUM(NSUInteger, NSURLRequestCachePolicy)
{
    //如果有协议,对于特定的URL请求,使用协议实现定义的缓存逻辑。(默认的缓存策略)
    NSURLRequestUseProtocolCachePolicy = 0,

    //请求仅从原始资源加载URL,不使用任何缓存
    NSURLRequestReloadIgnoringLocalCacheData = 1,

    //不仅忽略本地缓存,还要忽略协议缓存和其他缓存 (未实现)
    NSURLRequestReloadIgnoringLocalAndRemoteCacheData = 4,

    //被NSURLRequestReloadIgnoringLocalCacheData替代
    NSURLRequestReloadIgnoringCacheData = NSURLRequestReloadIgnoringLocalCacheData,

    //无视缓存的有效期,有缓存就取缓存,没有缓存就会从原始地址加载
    NSURLRequestReturnCacheDataElseLoad = 2,

    //无视缓存的有效期,有缓存就取缓存,没有缓存就视为失败 (可以用于离线模式)
    NSURLRequestReturnCacheDataDontLoad = 3,

    //会从初始地址校验缓存的合法性,合法就用缓存数据,不合法从原始地址加载数据 (未实现)
    NSURLRequestReloadRevalidatingCacheData = 5, // Unimplemented
};
AFNetworking的缓存策略
之前写了SDWebImage的源码解析 里面介绍过SDWebImage的缓存策略,有两条线根据时间和空间来管理缓存和AFNetworking很相似。AFNetworking中AFImageDownloader使用AFAutoPurgingImageCache和NSURLCache管理图片缓存。
AFNetworking中的NSURLCache
AFImageDownloader中设置NSURLCache,低版本iOS版本中设置内存容量和磁盘容量会闪退(这个我没有考证,iOS 7的手机还真没有)
if ([[[UIDevice currentDevice] systemVersion] compare:@"8.2" options:NSNumericSearch] == NSOrderedAscending)
{
    return [NSURLCache sharedURLCache];
}
return [[NSURLCache alloc] initWithMemoryCapacity:20 * 1024 * 1024 diskCapacity:150 * 1024 * 1024 diskPath:@"com.alamofire.imagedownloader"];
AFNetworking中的AFAutoPurgingImageCache
AFAutoPurgingImageCache是专门用来图片缓存的。可以看到内部有三个属性,一个是用来装载AFImageCache对象的字典容器,一个是可以用内存空间大小、一个同步队列。AFAutoPurgingImageCache在初始化的时候,会注册UIApplicationDidReceiveMemoryWarningNotification通知,收到内存警告的时候会清除所有缓存。
@interface AFAutoPurgingImageCache ()
@property (nonatomic, strong) NSMutableDictionary <NSString* , AFCachedImage*> *cachedImages;
@property (nonatomic, assign) UInt64 currentMemoryUsage;
@property (nonatomic, strong) dispatch_queue_t synchronizationQueue;
@end
AFCachedImage是单个图片缓存对象
@property (nonatomic, strong) UIImage *image;

//标志符(这个值就是图片的请路径 request.URL.absoluteString)
@property (nonatomic, strong) NSString *identifier;

//图片大小
@property (nonatomic, assign) UInt64 totalBytes;

//缓存日期
@property (nonatomic, strong) NSDate *lastAccessDate;

//当前可用内存空间大小
@property (nonatomic, assign) UInt64 currentMemoryUsage;
来看看AFCachedImage初始化的时候。iOS使用图标标准是ARGB_8888,即一像素占位4个字节。内存大小 = 宽×高×每像素字节数。
-(instancetype)initWithImage:(UIImage *)image identifier:(NSString *)identifier
{
    if (self = [self init])
    {
        self.image = image;
        self.identifier = identifier;

        CGSize imageSize = CGSizeMake(image.size.width * image.scale, image.size.height * image.scale);
        CGFloat bytesPerPixel = 4.0;
        CGFloat bytesPerSize = imageSize.width * imageSize.height;
        self.totalBytes = (UInt64)bytesPerPixel * (UInt64)bytesPerSize;
        self.lastAccessDate = [NSDate date];
    }
    return self;
}
来看看添加缓存的代码,用了dispatch_barrier_async栅栏函数将添加操作和删除缓存操作分割开来。每添加一个缓存对象,都重新计算当前缓存大小和可用空间大小。当内存超过设定值时,会按照日期的倒序来遍历缓存图片,删除最早日期的缓存,一直到满足缓存空间为止。
- (void)addImage:(UIImage *)image withIdentifier:(NSString *)identifier
{
    dispatch_barrier_async(self.synchronizationQueue, ^{
        AFCachedImage *cacheImage = [[AFCachedImage alloc] initWithImage:image identifier:identifier];

        AFCachedImage *previousCachedImage = self.cachedImages[identifier];
        if (previousCachedImage != nil)
        {
            self.currentMemoryUsage -= previousCachedImage.totalBytes;
        }

        self.cachedImages[identifier] = cacheImage;
        self.currentMemoryUsage += cacheImage.totalBytes;
    });

    dispatch_barrier_async(self.synchronizationQueue, ^{
        if (self.currentMemoryUsage > self.memoryCapacity)
        {
            UInt64 bytesToPurge = self.currentMemoryUsage - self.preferredMemoryUsageAfterPurge;
            NSMutableArray <AFCachedImage*> *sortedImages = [NSMutableArray arrayWithArray:self.cachedImages.allValues];
            NSSortDescriptor *sortDescriptor = [[NSSortDescriptor alloc] initWithKey:@"lastAccessDate" ascending:YES];
            [sortedImages sortUsingDescriptors:@[sortDescriptor]];

            UInt64 bytesPurged = 0;

            for (AFCachedImage *cachedImage in sortedImages)
            {
                [self.cachedImages removeObjectForKey:cachedImage.identifier];
                bytesPurged += cachedImage.totalBytes;
                if (bytesPurged >= bytesToPurge)
                {
                    break ;
                }
            }
            self.currentMemoryUsage -= bytesPurged;
        }
    });
}
YTKNetwork的缓存策略
YTKNetwork是猿题库技术团队开源的一个网络请求框架,内部封装了AFNetworking。它把每个请求实例化,管理它的生命周期,也可以管理多个请求。笔者在一个电商的PaaS项目中就是使用YTKNetwork,它的特点还有支持请求结果缓存,支持批量请求,支持多请求依赖等。
准备请求之前
先来看看请求基类YTKRequest在请求之前做了什么
- (void)start
{

    //忽略缓存的标志 手动设置 是否利用缓存
    if (self.ignoreCache)
    {
        [self startWithoutCache];
        return;
    }

    // 还有未完成的请求 是否还有未完成的请求
    if (self.resumableDownloadPath)
    {
        [self startWithoutCache];
        return;
    }

    //加载缓存是否成功
    if (![self loadCacheWithError:nil])
    {
        [self startWithoutCache];
        return;
    }

    _dataFromCache = YES;

    dispatch_async(dispatch_get_main_queue(), ^{

        //将请求数据写入文件
        [self requestCompletePreprocessor];
        [self requestCompleteFilter];

        //这个时候直接去相应 请求成功的delegate和block ,没有发送请求
        YTKRequest *strongSelf = self;
        [strongSelf.delegate requestFinished:strongSelf];
        if (strongSelf.successCompletionBlock)
        {
            strongSelf.successCompletionBlock(strongSelf);
        }

        //将block置空
        [strongSelf clearCompletionBlock];
    });
}
缓存数据写入文件
- (void)requestCompletePreprocessor
{
    [super requestCompletePreprocessor];

    if (self.writeCacheAsynchronously)
    {
        dispatch_async(ytkrequest_cache_writing_queue(), ^{
            [self saveResponseDataToCacheFile:[super responseData]];
        });
    }
    else
    {
        [self saveResponseDataToCacheFile:[super responseData]];
    }
}
ytkrequest_cache_writing_queue是一个优先级比较低的串行队列,当标志dataFromCache为YES的时候,确定能拿到数据,在这个串行队列中异步的写入文件。来看看写入缓存的具体操作。
- (void)saveResponseDataToCacheFile:(NSData *)data
{
    if ([self cacheTimeInSeconds] > 0 && ![self isDataFromCache])
    {
        if (data != nil)
        {
            @try {
                // New data will always overwrite old data.
                [data writeToFile:[self cacheFilePath] atomically:YES];

                YTKCacheMetadata *metadata = [[YTKCacheMetadata alloc] init];
                metadata.version = [self cacheVersion];
                metadata.sensitiveDataString = ((NSObject *)[self cacheSensitiveData]).description;
                metadata.stringEncoding = [YTKNetworkUtils stringEncodingWithRequest:self];
                metadata.creationDate = [NSDate date];
                metadata.appVersionString = [YTKNetworkUtils appVersionString];
                [NSKeyedArchiver archiveRootObject:metadata toFile:[self cacheMetadataFilePath]];
            } @catch (NSException *exception) {
                YTKLog(@"Save cache failed, reason = %@", exception.reason);
            }
        }
    }
}
除了请求数据文件,YTK还会生成一个记录缓存数据信息的元数据YTKCacheMetadata对象。YTKCacheMetadata记录了缓存的版本号、敏感信息、缓存日期和App的版本号。
@property (nonatomic, assign) long long version;
@property (nonatomic, strong) NSString *sensitiveDataString;
@property (nonatomic, assign) NSStringEncoding stringEncoding;
@property (nonatomic, strong) NSDate *creationDate;
@property (nonatomic, strong) NSString *appVersionString;
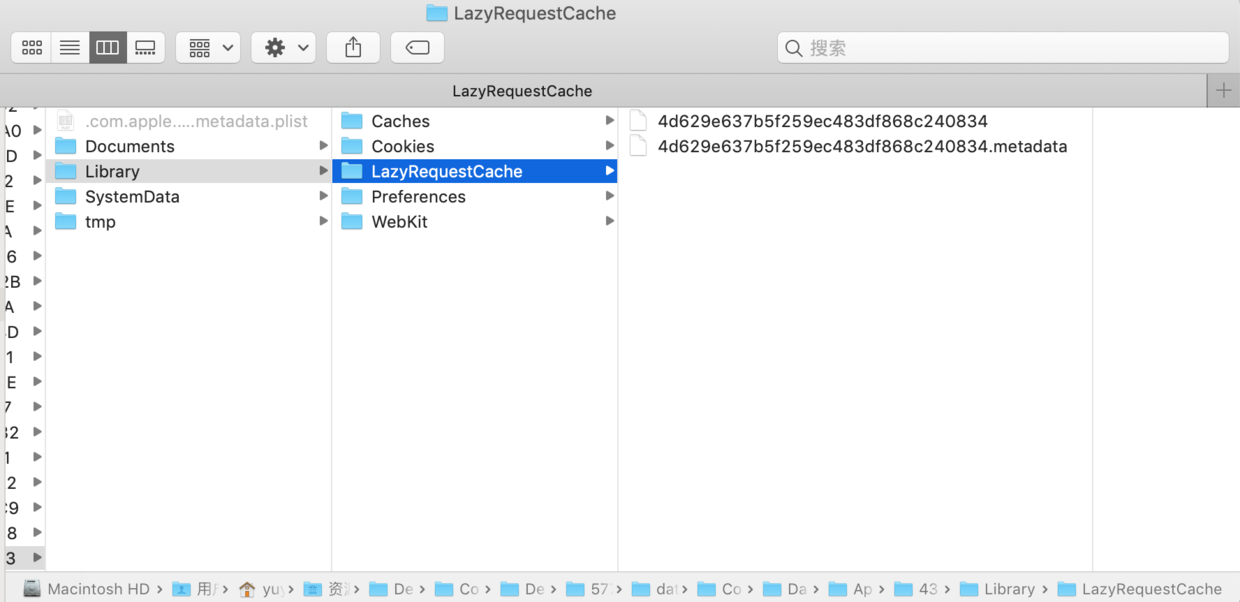
然后把请求方法、请求域名、请求URL和请求参数组成的字符串进行一次MD5加密,作为缓存文件的名称。YTKCacheMetadata和缓存文件同名,多了一个.metadata的后缀作为区分。文件写入的路径是沙盒中Library/LazyRequestCache目录下。
- (NSString *)cacheFileName
{
    NSString *requestUrl = [self requestUrl];
    NSString *baseUrl = [YTKNetworkConfig sharedConfig].baseUrl;
    id argument = [self cacheFileNameFilterForRequestArgument:[self requestArgument]];
    NSString *requestInfo = [NSString stringWithFormat:@"Method:%ld Host:%@ Url:%@ Argument:%@",
    (long)[self requestMethod], baseUrl, requestUrl, argument];
    NSString *cacheFileName = [YTKNetworkUtils md5StringFromString:requestInfo];
    return cacheFileName;
}
校验缓存
回到start方法中,loadCacheWithError是校验缓存能不能成功加载出来,loadCacheWithError中会调用validateCacheWithError来检验缓存的合法性,校验的依据正是YTKCacheMetadata和cacheTimeInSeconds。要想使用缓存数据,请求实例要重写cacheTimeInSeconds设置一个大于0的值,而且缓存还支持版本、App的版本。在实际项目上应用,get请求实例设置一个cacheTimeInSeconds就够用了。
- (BOOL)validateCacheWithError:(NSError * _Nullable __autoreleasing *)error
{
    // Date
    NSDate *creationDate = self.cacheMetadata.creationDate;
    NSTimeInterval duration = -[creationDate timeIntervalSinceNow];
    if (duration < 0 || duration > [self cacheTimeInSeconds])
    {
        if (error)
        {
            *error = [NSError errorWithDomain:YTKRequestCacheErrorDomain code:YTKRequestCacheErrorExpired userInfo:@{ NSLocalizedDescriptionKey:@"Cache expired"}];
        }
        return NO;
    }
    // Version
    long long cacheVersionFileContent = self.cacheMetadata.version;
    if (cacheVersionFileContent != [self cacheVersion])
    {
        if (error)
        {
            *error = [NSError errorWithDomain:YTKRequestCacheErrorDomain code:YTKRequestCacheErrorVersionMismatch userInfo:@{ NSLocalizedDescriptionKey:@"Cache version mismatch"}];
        }
        return NO;
    }
    // Sensitive data
    NSString *sensitiveDataString = self.cacheMetadata.sensitiveDataString;
    NSString *currentSensitiveDataString = ((NSObject *)[self cacheSensitiveData]).description;
    if (sensitiveDataString || currentSensitiveDataString)
    {
        // If one of the strings is nil, short-circuit evaluation will trigger
        if (sensitiveDataString.length != currentSensitiveDataString.length || ![sensitiveDataString isEqualToString:currentSensitiveDataString])
        {
            if (error)
            {
                *error = [NSError errorWithDomain:YTKRequestCacheErrorDomain code:YTKRequestCacheErrorSensitiveDataMismatch userInfo:@{ NSLocalizedDescriptionKey:@"Cache sensitive data mismatch"}];
            }
            return NO;
        }
    }
    // App version
    NSString *appVersionString = self.cacheMetadata.appVersionString;
    NSString *currentAppVersionString = [YTKNetworkUtils appVersionString];
    if (appVersionString || currentAppVersionString)
    {
        if (appVersionString.length != currentAppVersionString.length || ![appVersionString isEqualToString:currentAppVersionString])
        {
            if (error)
            {
                *error = [NSError errorWithDomain:YTKRequestCacheErrorDomain code:YTKRequestCacheErrorAppVersionMismatch userInfo:@{ NSLocalizedDescriptionKey:@"App version mismatch"}];
            }
            return NO;
        }
    }
    return YES;
}
清除缓存
因为缓存的目录是Library/LazyRequestCache,清除缓存就直接清空目录下所有文件就可以了。调用[[YTKNetworkConfig sharedConfig] clearCacheDirPathFilter]就行。
结语
缓存的本质是用空间换取时间。大学里面学过的《计算机组成原理》中就有介绍cache,除了磁盘和内存,还有L1和L2,对于iOS开发者来说,一般关注disk和memory就够了。阅读SDWebImage、AFNetworking、YTKNetwork的源码后,可以看出他们都非常重视数据的多线程的读写安全,在做深度优化时候,因地制宜,及时清理缓存文件。
