

欢迎来互换友链:记一次Blog迁移到Ghost
记一次Blog迁移到Ghost
之前的用了Hexo搭建了Blog,不过由于某次的操作失误导致Hexo本地的source源文件全部丢失.留下的只有网页的Html文件,众所周知,Hexo是一个本地编译部署类型的Blog系统,个人感觉这种类型的Blog特别不稳定,如果本地出了一些问题那么线上就GG了,当然,使用git是可以管理源文件,但是源文件里又包含很多图片的情况下,download和upload一次的时间也会比较长,虽然说这几年都流行这种类型的Blog,但个人看来还是WEB比较实在。
Blog选型
自己对Blog也玩了一些,不算特别多,主要是wordpress(php),这次在看Blog系统的时候,第一时间考虑的是wordpress,说起来当时也是wordpress比较早的使用患者了,wordpress的扩展性强,尤其是目前版本的wordpress,结合主题文件和自定义function,完全可以玩出很多花样,并且支持各种插件balabala,最新的版本还支持REST-API,开发起来也极为方便,那么为什么我没有选用wordpress?之前做了一些wordpress的研究,发现在结合某些主题的时候,wordpress会极慢(php7.2,ssd,i7-7700hq,16gb),本地跑都极慢,当然这个锅wordpress肯定不背的,但是我在自己开发主题的情况下,写了一个rest-api
   /**
     * 构建导航
     * @param $res          所有的nav导航list
     * @param $hash      承载导航的hash表
     */
    private function buildNav(&$res,&$hash){
        //组装导航
        foreach($hash as $i =>$value){
            $id = $value->ID;

            $b =$this->findAndDelete($res,$id);
            $value->sub= $b;

            // 是否有子目录
            if(count($b)>0){
                $this->buildNav($res,$value->sub);
            }
        }
    }

    public function getNav($request){
        $menu_name = 'main-menu';   // 获取主导航位置
        $locations = get_nav_menu_locations();
        $menu_id = $locations[ $menu_name ] ;
        $menu = wp_get_nav_menu_object($menu_id);    //根据locations反查menu
        $res = wp_get_nav_menu_items($menu->term_id);

        // 组装嵌套的导航,
        $hash = $this->findAndDelete($res,0);

        $this->buildNav($res,$hash);

        return rest_ensure_response( $hash );
    }
}
代码比较简单,获取后台的主导航,循环遍历组装成嵌套的数组结构,我在后台新建了3个导航,结果调用这个API(PHP5.6)的情况需要花费500ms-1s,在PHP7的情况需要花费200-500ms,这个波动太大了,数据库链接地址也用了127.0.0.1,再加上自己不怎么会拍黄片(CURD级别而已),所以虽然爱的深沉,最后还是弃用了。
那么可选择的还有go语言的那款和ghost了,本人虽然很想去学Go语言,奈何头发已不多,还是选择了自己熟悉的node.js使用了ghost,这样后续开发起来也比较方便。
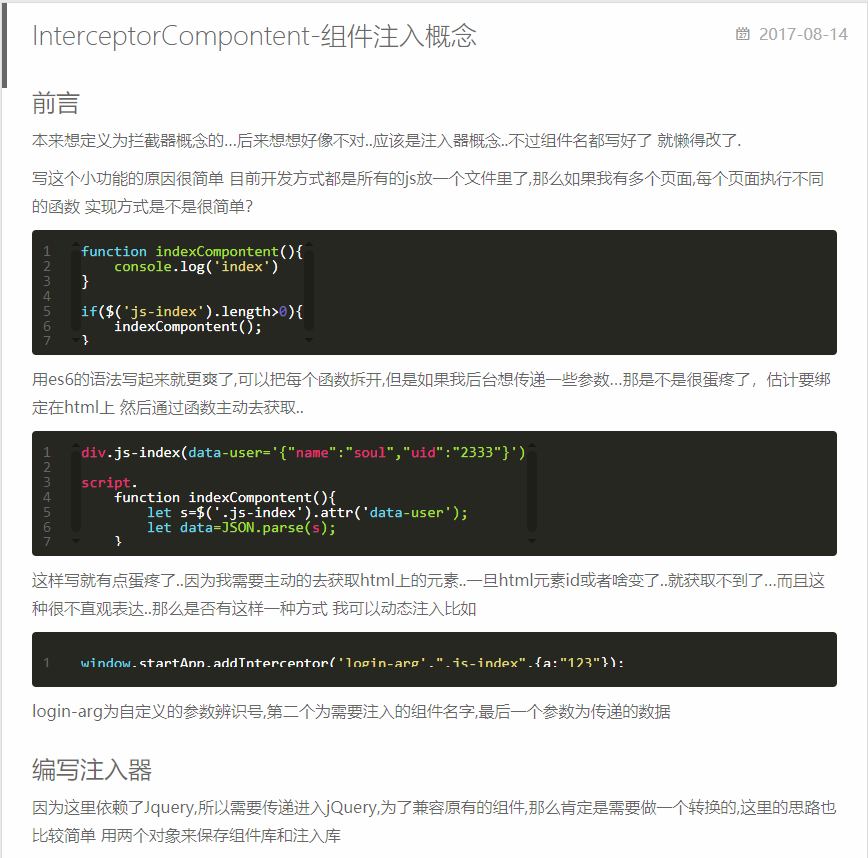
老Blog的html2markdown
因为只有html文件了,那么这个时候得想办法把html转markdown,本来想简单点,说话的方式...咳咳,试用了市面上的html2markdown,虽然早知不会达到理想的效果,当然结果也是不出所料的,故只能自己根据文本规则去写一套转换器了.
html分析
首先利用http-server本地搭建起一套静态服务器,接着对网页的html结构进行分析。
实现的最终效果如下 原文
转换后
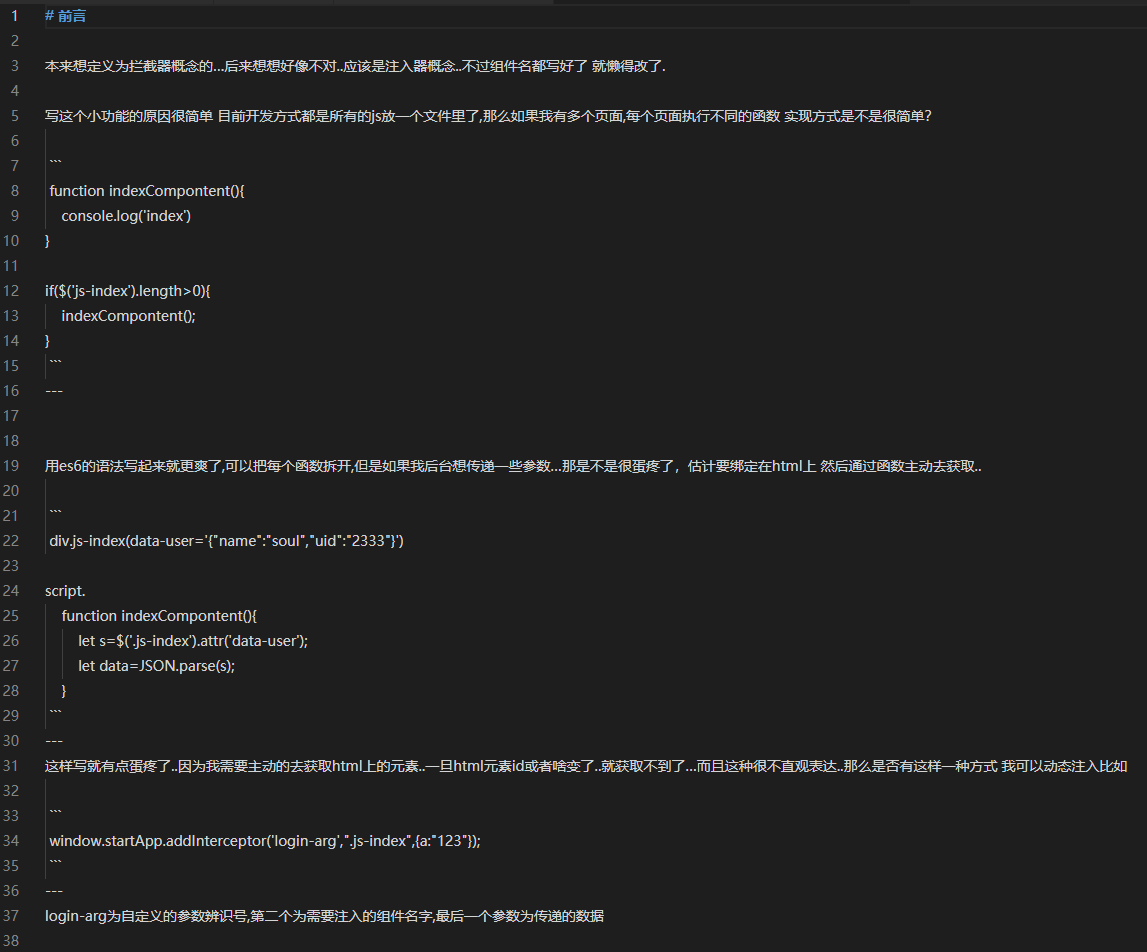
页面的title是.article-title此class的文本,页面的所有内容的wrap是.article-entry,其中需要转化的markdown的html就是.article-entry >*,得知了这些信息和结构后就开始着手写转化规则了,比如h2 -> ## h2;首先建立rule列表,写入常用的标签,这里的$是nodejs的cheerio,elem是htmlparse2转换出来的,所以在浏览器的某些属性是没办法在nodejs看到的
const ruleFunc = {
h1: function ($, elem) {
return `# ${$(elem).text()} \r\n`;
},
img: function ($, elem) {
return `.attr('src')}) \r\n`;
},
....
}
当然,这些只是常用的标签,光这些标签还不够,比如遇到文本节点类型,举个例子
<p>
我要
<a href="/">我的</a>
滋味
</p>
那么你不能单纯的获取p.text()而是要去遍历其内部还包含了哪些标签,并且转换出来,比如上述的例子就包含了
文本节点(text)
a标签(a)
文本节点(text)
对应转化出来的markdown应该是
我要
[我的](/)
滋味
还好,由markdown生成出来的html不算特别坑爹,什么意思呢,不会p标签里面嵌套乱七八糟的东西(其实这跟hexo主题有关,还好我用的主题比较叼,代码什么的都很规范),那么这个时候就要开始建立p标签的遍历规则
 p: function ($, elem) {
        let markdown = '';
        const $subElem = $(elem).contents(); // 获取当前p标签下的所有子节点
        $subElem.each((index, subElem) => {
            const type = subElem.type; // 当前子节点的type是 text 还是 tag
            let name = subElem.name || type; // name属性===nodeName 也就是当前标签名
            name = name.toLowerCase();
            if (ruleFunc[name]) { // 是否在当前解析规则找到
                let res = ruleFunc[name]($, subElem); // 如果找到的话则递归解析
                if (name != 'br' || name != 'text') { // 如果当前节点不是br或者文本节点 都把\r\n给去掉,要不然会出现本来一行的文本因为中间加了某些内容会换行
                    res = res.replace(/\r\n/gi, '');
                }
                markdown += res;
            }
        });
        return markdown + '\r\n'; // \r\n为换行符
    },
那么p标签的解析规则写完后,要开始考虑ul和ol这种序号类型了,不过这种类型的也有嵌套的
- web
-   - js
-   - css
-   - html
- backend
-   -   node.js
像这种嵌套类型的也需要去用递归处理一下
    ul: function ($, elem) {
        const name = elem.name.toLowerCase();
        return __list({$, elem, type: name})
    },
    ol: function ($, elem) {
        const name = elem.name.toLowerCase();
        return __list({$, elem, type: name})
    },

    /**
 * @param splitStr 默认的开始符是 -
 * @param {*} param0
 */
function __list({$, elem, type = 'ul', splitStr = '-', index = 0}) {
    let subNodeName = 'li'; // 默认的子节点是li 实际上ol,ul的子节点都是li
    let markdown = ``;
    splitStr += `\t`; // 默认的分隔符是 制表符
    if (type == 'ol') {
        splitStr = `${index}.\t` // 如果是ol类型的 则是从0开始的index 实际上这一步有点多余,在下文有做重新替换
    }
    $(elem).find(`> ${subNodeName}`).each((subIndex, subElem) => {
        const $subList = $(subElem).find(type); //当前子节点下面是否有ul || ol 标签?
        if ($subList.length <= 0) {
            if (type == 'ol') {
                splitStr = splitStr.replace(index, index + 1); // 如果是ol标签 则开始符号为 1. 2. 3. 这种类型的
                index++;
            }
            return markdown += `${splitStr} ${$(subElem).text()} \r\n`
        } else {
            // 如果存在 ul || ol 则进行二次递归处理
            let nextSplitStr = splitStr + '-';
            if (type == 'ol') {
                nextSplitStr = splitStr.replace(index, index + 1);
            }
            const res = __list({$, elem: $subList, type, splitStr: nextSplitStr, index: index + 1}); // 递归处理当前内部的ul节点
            markdown += res;
        }
    });
    return markdown;
}
接着处理代码类型的,这里要注意的就是转义和换行,要不然ghost的markdown不识别
    figure:function ($,elem) {
        const $line = $(elem).find('.code pre .line');
        let text = '';
        $line.each((index,elem)=>{
            text+=`${$(elem).text()} \r\n`;
        });
        return ` \`\`\` \r\n ${text} \`\`\` \r\n---`
    },
那么做完这两步后,基本上解析规则已经完成了80%,什么?你说table和序列图类型?...这个坑就等着你们来填啦,我的Blog很少用到这两种类型的。
抓取html
抓取html这里则可以使用request+cheerio来处理,抓取我Blog中的所有文章,并且建立urlArray,然后遍历解析就行
async function getUrl(url) {

    let list = []
    const options = {
        uri: url,
        transform: function (body) {
            return cheerio.load(body);
        }
    };
    console.info(`获取URL:${url} done`);
    const $ = await rp(options);
    let $urlList = $('.archives-wrap .archive-article-title');
    $urlList.each((index, elem) => {
        list.push($(elem).attr('href'))
    });
    return list;
}

async function start() {
    let list = [];
    let url = `http://127.0.0.1:8080/archives/`;
    list.push(...await getUrl(url));

    for (let i = 2; i <=9; i++) {
        let currentUrl = url +'page/'+ i;
        list.push(...await getUrl(currentUrl));
    }

    console.log('所有页面获取完毕',list);

    for(let i of list){
       await html2Markdown({url:`http://127.0.0.1:8080${encodeURI(i)}`})
    }
}
上述要注意的就是,抓取到的href如果是中文的话,是不会url编码的,所以在发起请求的时候最好额外处理一下,因为熟悉自己的Blog,所以有些数值都写死啦~
ghost的搭建
这里我要单独说一下,ghost的搭建是恶心到我了,虽然能够快速搭建起来,但是如果想简简单单的线上使用,那就是图样图森破了,因为需要额外的配置,
安装
npm install ghost-cli -g // ghost管理cli
ghost install local // 正式安装
运行
ghost start
第一次运行成功后先别急着打开web填信息,先去配置一下mysql模式,sqlit后期扩展性太差了。
找到ghost安装目录下生成的config.development.json配置
  "database": {
    "client": "mysql",
    "connection": {
      "host": "127.0.0.1",
      "port": 3306,
      "user": "root",
      "password": "123456",
      "database": "testghost"
    }
  },

  ------

  "url": "https://relsoul.com/",
把database替换为上述的mysql配置,然后把url替换为线上url,接着执行ghost restart即可
NGINX+SSL
这里利用https://letsencrypt.org 来获取免费的SSL证书 结合NGINX来配置(服务器为centos7)
首先需要申请两个证书 一个是*.relsoul.com 一个是 relsoul.com
安装
    yum install -y epel-release
    wget https://dl.eff.org/certbot-auto --no-check-certificate
    chmod +x ./certbot-auto
申请通配符 参考此文章进行通配符申请
./certbot-auto certonly -d *.relsoul.com --manual --preferred-challenges dns --server https://acme-v02.api.letsencrypt.org/directory
申请单个证书 参考此篇文章进行单个申请
./certbot-auto certonly --manual --email relsoul@outlook.com --agree-tos --no-eff-email -w /home/wwwroot/challenges/ -d relsoul.com
注意的是一定要加上--manual,不知道为啥如果不用手动模式,自动的话不会生成验证文件到我的根目录,按照命令行的交互提示手动添加验证文件到网站目录。
配置
这里直接给出nginx的配置,基本上比较简单,80端口访问默认跳转443端口就行
server {
    listen 80;
    server_name www.relsoul.com relsoul.com;
    location ^~ /.well-known/acme-challenge/ {
        alias /home/wwwroot/challenges/; # 这一步很重要,验证文件的目录放置的
        try_files $uri =404;
    }
# enforce https
    location / {
        return 301 https://www.relsoul.com$request_uri;
    }
}

server {
    listen 443  ssl http2;
#listen [::]:80;
    server_name relsoul.com;
    ssl_certificate /etc/letsencrypt/live/relsoul.com-0001/fullchain.pem;
    ssl_certificate_key /etc/letsencrypt/live/relsoul.com-0001/privkey.pem;
# Example SSL/TLS configuration. Please read into the manual of NGINX before applying these.
    ssl_session_timeout 5m;
    ssl_protocols TLSv1 TLSv1.1 TLSv1.2;
    ssl_prefer_server_ciphers on;
    keepalive_timeout 70;
    ssl_stapling on;
    ssl_stapling_verify on;
    index index.html index.htm index.php default.html default.htm default.php;
    # root /home/wwwroot/ghost;
    location / {
        proxy_pass http://127.0.0.1:9891; # ghost后台端口
        proxy_set_header Host $host;
        proxy_set_header X-Real-IP $remote_addr;
        proxy_set_header X-Forwarded-For $proxy_add_x_forwarded_for;
        proxy_set_header X-Forwarded-Host $server_name;
        proxy_read_timeout 1200s;
# used for view/edit office file via Office Online Server
        client_max_body_size 0;
    }
#error_page   404   /404.html;
    # location ~ .*\.(gif|jpg|jpeg|png|bmp|swf)$ {
    #     expires 30d;
    # }
    # location ~ .*\.(js|css)?$ {
    #     expires 12h;
    # }
    include none.conf;
    access_log off;
}

server {
    listen 443  ssl http2;
#listen [::]:80;
    server_name  www.relsoul.com;
    ssl_certificate /etc/letsencrypt/live/relsoul.com/fullchain.pem;
    ssl_certificate_key /etc/letsencrypt/live/relsoul.com/privkey.pem;
# Example SSL/TLS configuration. Please read into the manual of NGINX before applying these.
    ssl_session_timeout 5m;
    ssl_protocols TLSv1 TLSv1.1 TLSv1.2;
    ssl_prefer_server_ciphers on;
    keepalive_timeout 70;
    ssl_stapling on;
    ssl_stapling_verify on;
    index index.html index.htm index.php default.html default.htm default.php;
    # root /home/wwwroot/ghost;
    location / {
        proxy_pass http://127.0.0.1:9891; # ghost后台端口,进行反向代理
        proxy_set_header Host $host;
        proxy_set_header X-Real-IP $remote_addr;
        proxy_set_header X-Forwarded-For $proxy_add_x_forwarded_for;
        proxy_set_header X-Forwarded-Host $server_name;
        proxy_read_timeout 1200s;
# used for view/edit office file via Office Online Server
        client_max_body_size 0;
    }
#error_page   404   /404.html;
    # location ~ .*\.(gif|jpg|jpeg|png|bmp|swf)$ {
    #     expires 30d;
    # }
    # location ~ .*\.(js|css)?$ {
    #     expires 12h;
    # }
    include none.conf;
    access_log off;
}
做完上面几步后就可以访问网站进行设置了,默认的设置地址为http://relsoul.com/ghost
导入文章至ghost
ghost的API是有点蛋疼的,首先ghost有两种API,一种是PublicApi,一种是AdminApi
PublicApi目前只支持读,也就是Get,不支持POST,而AdminApi则是处于改版的阶段,不过还是能用的,官方也没具体说什么时候废除,这里只针对AdminApi进行说明,因为PublicApi的调用太简单了,文档也比较全,AdminApi就蛋疼了
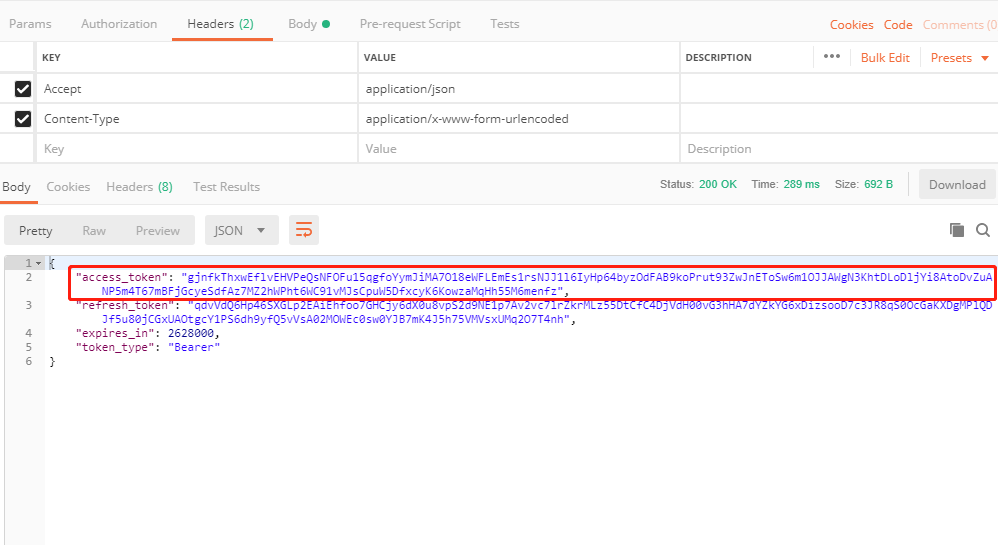
获取验证Token
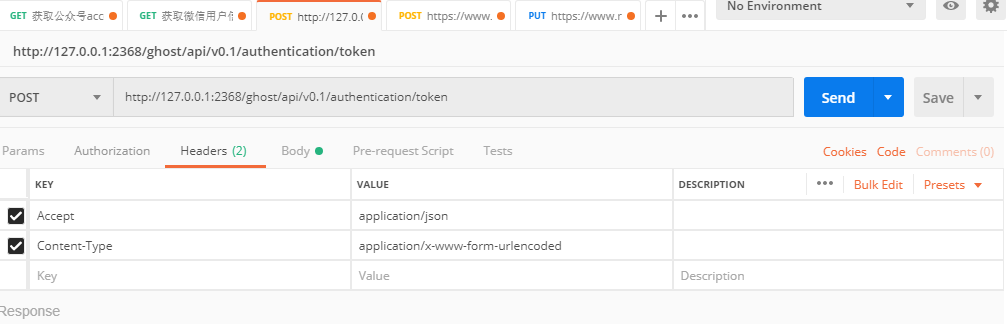
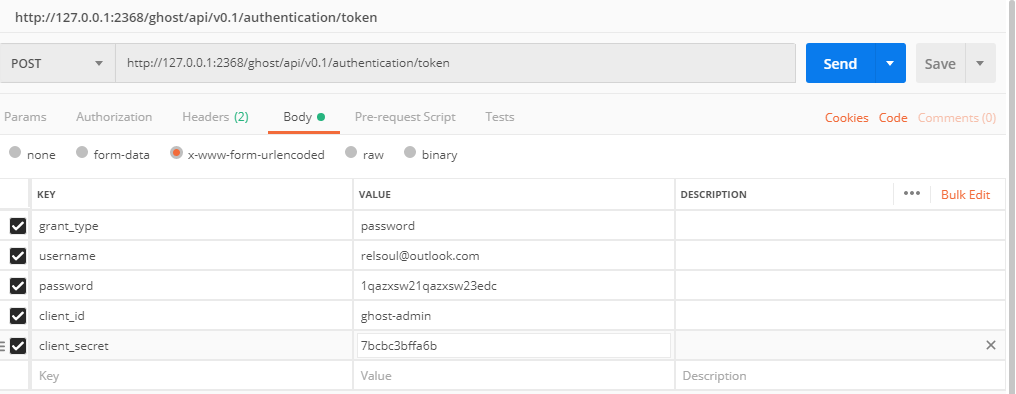
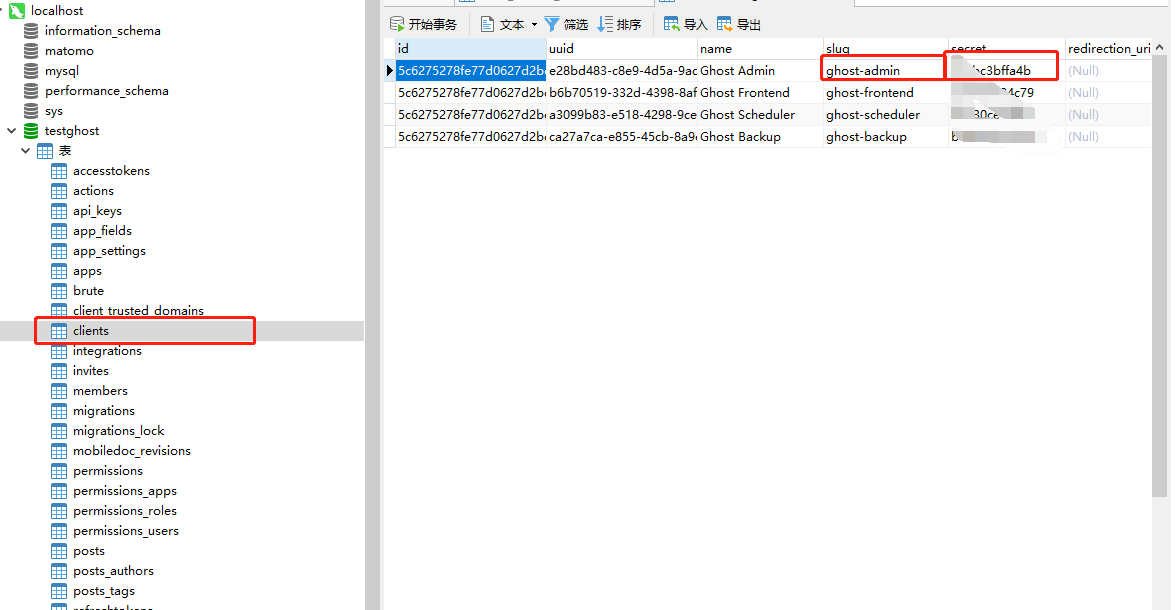
client_secret这个字段!!!真的很恶心,因为你基本上在后台是找不到的,因为官方也说了AdminApi其实目前是私有的,所以你需要在数据库找 具体的表看下图
POST文章
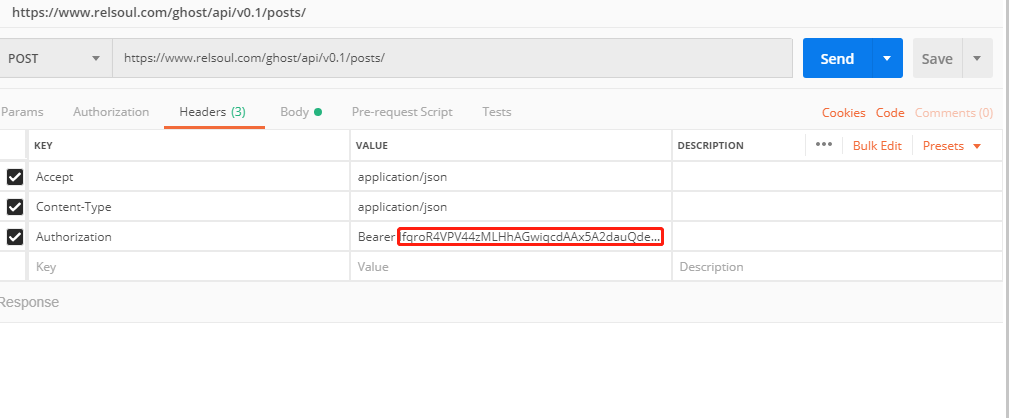
Authorization字段这里的话前面的字符串是固定的Bearer <access-token>,接着看BODY这项
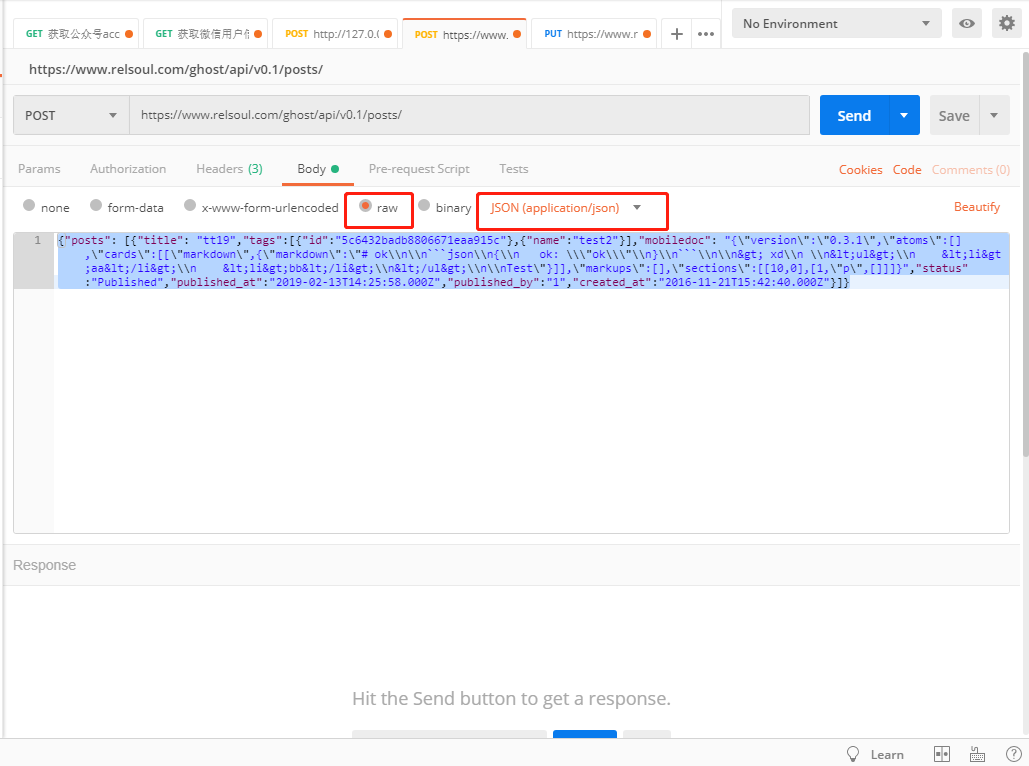
{
    "posts":[
        {
            "title":"tt19", // 文章的title
            "tags":[ // tags必须为此格式,可以是具体tag的id,也可以是未存在tag的name,会自动给你新建的,我推荐用{name:xxx} 来做上传
                {
                    "id":"5c6432badb8806671eaa915c"
                },
                {
                    "name":"test2"
                }
            ],
            "mobiledoc":"{"version":"0.3.1","atoms":[],"cards":[["markdown",{"markdown":"# ok\n\n```json\n{\n ok: \"ok\"\n}\n```\n\n> xd\n \n<ul>\n <li>aa</li>\n <li>bb</li>\n</ul>\n\nTest"}]],"markups":[],"sections":[[10,0],[1,"p",[]]]}",
            "status":"published", // 设置状态为发布
            "published_at":"2019-02-13T14:25:58.000Z", // 发布时间
            "published_by":"1", // 默认为1就行
            "created_at":"2016-11-21T15:42:40.000Z" // 创建时间
        }
    ]
}
到了这里还有一个比较重要的字段就是mobiledoc,对,提交不是markdown,也不是html,而是要符合mobiledoc规范的,我一开始也懵逼了,以为需要我调用此库把markdown再转一次,后来发现是我想复杂了,其实只需要
{
            "version": "0.3.1",
            "atoms": [],
            "cards": [["markdown", {"markdown": markdown}]],
            "markups": [],
            "sections": [[10, 0], [1, "p", []]]
        };
按照这种格式拼装一下,变量markdown是转换出来的markdown,拼接好后切记转为JSON字符串JSON.stringify(mobiledoc),那么了解了提交格式等,接下来就可以开始写代码了
NODEJS提交文章
async function postBlog({markdown, title, tags, time}) {
    const mobiledoc =
        {
            "version": "0.3.1",
            "atoms": [],
            "cards": [["markdown", {"markdown": markdown}]],
            "markups": [],
            "sections": [[10, 0], [1, "p", []]]
        };

    var options = {
        method: 'POST',
        uri: 'https://www.relsoul.com/ghost/api/v0.1/posts/',
        body: {
            "posts": [{
                "title": title,
                "mobiledoc": JSON.stringify(mobiledoc),
                "status": "published",
                "published_at": time,
                "published_by": "1",
                tags: tags,
                "created_at": time,
                "created_by": time
            }]
        },
        headers: {
            Accept: "application/json",
            "Content-Type": "application/json",
            Authorization: "Bearer token"
        },
        json: true // Automatically stringifies the body to JSON
    };

    const res = await rp(options);
    if (res['posts']) {
        console.log('插入成功', title)
    } else {
        console.error('插入失败', res);
    }

}
