

注意:下文中,反复提到"实例"一词,如无特别交代,它指的是第三篇章的instance的这个概念。
在react中,“component”概念可以理解为一个身份的象征。假如我们将root virtual DOM节点比作virtual DOM世界的周天子的话,那么“component”就是管辖着一块或大或小疆域的分封诸侯。只不过,这块疆域不是土地,而是“virtual DOM”。
在没有引入“component”这个概念之前,我们面临这以下几个问题:
- state是全局的。
- 每更新一次界面,都需要手动地调用一次个render函数。
- 对render函数的调用,会导致整树协调的发生,界面渲染性能不高。
因此,为了解决以上几个问题,我们引入“component”这个概念。“component”通过自身的两个特征来解决以上问题:
- local state。代表component所处的界面状态。
- setState API。通过调用它来修改local state,从而使协调在整颗子树上发生。
通过调用setState来更新UI,就是我们所要实现的子树协调。
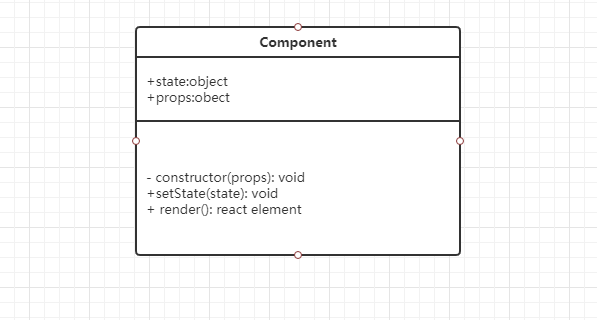
“component”概念的落地工作,首先从实现base class开始。熟悉react的读者大概都知道,component的定义中,唯一不能缺少的方法是render方法。所以这个父类的类图大概是这样的:
好,下面我们一起来实现这个父类大概的shape:
class Component {
    constructor(props){
        this.props = props || {}
        this.state = this.state || {}
    }

    setState(partialState){
        this.state = Object.assign({},this.state,partialState)
    }

    render(){
        console.error('You should implement your own render method!')
    }
}
上面的代码其实就是做了两个事:
- 将用户调用setState时传入的局部state合并到已有的state当中去。
- 提醒用户,render方法必须自己实现。
为了区分,react把DOM elment和text element分别称为“DOM Component”和“Text Component”,把我们这里的“component”称之为“Composite Component”。在引入“component”这个概念后,我们也沿用这些叫法。
目前为止,我们还没让local state跟子树的协调联系起来。我们调用setState,界面将不会发生任何变化。要想local state改变能跟协调算法联动起来,本质上就是要求我们先后回答三个问题:
一. 如何对接jsx的编译?
目前我们createElement的实现是这样的:
function createElement(type, props, ...childrens) {
  const newProps = Object.assign({}, props);
  const hasChildren = childrens.length > 0;
  const rawChildren = hasChildren ? [].concat(...childrens) : [];
  newProps.children = rawChildren
    .filter(child => !!child)
    .map(child => {
      return child instanceof Object ? child : createTextElement(child);
    });
  return {
    type,
    props: newProps
  };
}
这一次,我们不动createElement的实现。因为我们可以通过改动转换jsx的babel插件的具体实现来满足我们的需求。大概原理是,让babel插件将以大写字母开头的标签识别为Composite Component,然后原封不动地把用户自定义的组件类传给我们。我们通过在后续的实例化(面向对象意义上的实例化),来拿到我们想要的数据。届时,我们写的是这样的jsx:
class App extends Component {
    render(){.......}
}

render(<App />,rootDOM)
转换jsx的babel插件将结合我们实现的createElment函数编译为:
class App extends Component {
    render(){.......}
}

render(createElement(App,{}),rootDOM)
对Composite Component调用createElement返回的virtual DOM的数据将会是这样的:
{
    type:App,// 从ES6的角度看,APP是一个“类”;从ES5的角度来看,它还是一个函数
    props:{
        children:[]
    }
}
如何改动jsx转换babel插件不在我们的讨论范围内,故略过不表。 凡是认真阅读过第一篇章的读者可能就注意到了,Composite Component跟DOM Component和Text Component所对应的virtual DOM结构不同的一点就是:type字段的值的类型是函数(提醒:ES6的类最后还是会被编译为function),而不是string了。这一点很重要。Composite Component的实例化对接工作正是基于这一点。
二. 如何对接“实例”概念?
这个问题包含了两个问题。
第一是:Composite Component所对应的instance的数据结构是如何?
第二是:如何被实例化?
这两位问题对应两个任务:
task1: 确定Composite Component所对应实例的数据结构。
显然,Composite Component跟DOM Component和Text Component都是属于“组件”概念范畴的,它也需要被挂载到具体的DOM节点上,也有对应的element,也应该有childInstance。只不过不同于先前的DOM Component和Text Component,这些字段的取值基于Composite Component的特殊性,肯定会有所不同。在react的源码中,Composite Component所对应的instance确实有子实例的字段,只不过这个子实例的含义并不能跟我们从jsx结构所看到的层级关系对应上。举个例子,DOM component里面,如果我们看到
<div>
    我是文本节点
    <span>我是另外一个节点</span>
</div>
这种结构,我们就可以说我是文本节点和<span>我是另外一个节点</span>所对应的实例是<div>组件的子实例。在Composite Component的概念里,情况就不一样了。也就是说,如果我们看到
<MyComponent>
    我是文本节点
    <span>我是另外一个节点</span
<MyComponent>
这种结构,我们不能说我是文本节点和<span>我是另外一个节点</span>所对应的实例是<MyComponent>组件的子实例。实际上,<MyComponent>组件的子实例是另有其人。它就是组件的render函数所返回的react element所对应的实例,为什么呢?原因很简单,有二:
<MyComponent>只是一个身份的象征,象征着组件render方法所返回的react element。这好比日本的天皇是没有实权的,他只是一个国家的象征而已,掌握实权的是日本的首相。<MyComponent>的子组件(我是文本节点和<span>我是另外一个节点</span>)最后都是被render方法通过this.props.children消费掉,成为它返回的react element的一部分。
所以,从实现的角度来说,render方法返回的element所对应的实例才是<MyComponent>的子实例。
因为render方法只能返回一个element,所以Composite Component只有一个子实例,也就是说Composite Component所对应的的子实例的值并不是由子实例组成的数组,只是单个实例而已。同样的,因为组件名只是一个象征而已,那么Composite Component对应实例的dom节点的值应该是由子实例所对应的DOM节点来充当。最后一点,如果我们想把Composite Component的实例和它的真正实例(这里的真正实例就是指通过new操作符调用函数所返回的对象,react里面称之为publicInstance。为了区分,第三篇章所引入instance概念又称之为internalInstance)对应起来,那么我们都需要在彼此的身上保存对方的引用。综上所述,Composite Component所对应的实例的数据结构如下:
const instance = {
    dom: DOMObject,
    element:reactElement,
    childInstance:childInstance,
    publicInstance:realInstance // 组件类通过new操作符运算所返回的真正意义上的实例
}
task2: 用代码实现Composite Component的实例化。
既然上面已经弄清楚Composite Component所对应实例的数据结构(有什么字段,字段的值是什么),那么实现它的实例化也是顺水推舟的事了,我们在原有的代码上添加上Composite Component所对应的条件分支:
function instantiate(element) {
  const { type, props } = element;
  // 根据type字段值的类型来判断是否是Composite Component
  const isDomElement = typeof type === "string";

  // 创建对应的DOM节点
  if(isDomElement){ // 实例化DOM Component 和 Text Component
    const isTextElement = type === "TEXT_ELEMENT";
    const domNode = isTextElement
      ? document.createTextNode("")
      : document.createElement(type);

    // 设置属性
    updateDomProperties(domNode, {}, props);

    // 对children element递归调用instantiate函数
    const children = props.children;
    let childInstances = [];
    if (children && children.length) {
      childInstances = children.map(childElement => instantiate(childElement));
      const childDoms = childInstances.map(childInstance => childInstance.dom);
      childDoms.forEach(childDom => domNode.appendChild(childDom));
    }

    const instance = {
      dom: domNode,
      element,
      childInstances
    };

    return instance;
  }else { // 实例化Composite Component
     const { type, props } = element;
     const instance = {};
     // component类的真正实例化
     const publicInstance = new type(props);

     // 将render方法返回的element的this指向publicInstance
     // 结合“this关键字的指向是由它执行的上下文所决定的”这句话来理解一下
     const childElement = publicInstance.render();

     // 对于Composite Component来说,render方法返回element对应的instance的dom就是它对应实例的dom
     const childInstance = instantiate(childElement);
     const dom = childInstance.dom;

     // 按照我们在task1讨论出的数据结构,组装component element所对应的实例
     Object.assign(instance, { dom, element, childInstance, publicInstance });

     // 最后,把 Composite Component所对应实例的引用保存在publicInstance身上,打通两者之间的访问
     publicInstance.__internalInstance = instance;
     return instance;
  }

}
三. 如何对接“协调”概念?
Composite Component在协调算法中,对应的“初始挂载”,“删除”和“替换”的实现跟DOM component和Text component的实现也是一样的,比较简单。两者之间不同的是“更新”部分的实现逻辑。我们先来看看reconcile函数的签名:
reconcile:(instance, element, domContainer) => instance
在这系列接近尾声的时候,大家可能也观察出来了。reconcile函数的第一参数instance,第二参数element是reconcile函数语义上的标志。换句话说,协调,协调,协调的对象是谁跟谁呢?答曰:正是instance和elment。我们要记住,无论何时何刻,传入reconcile函数的element参数都是代表着我们渲染界面的最新意图。而instance从设计开始,它就被定义为用于保存当前这一帧界面的相关信息。简而言之,我们可以简单地把instance理解为“旧的”,而element理解为“新的”。我们需要实现的协调,本质上就是看看目前“旧的”有什么东西是可以复用的。回到“component”对接“协调”概念上来,大致步骤也是一样,不过细节有所不同。归纳起来可以分为三步走:
- 更新publicInstance的state。
- 更新publicInstance的props。
- 更新childInstance。
这里值得一提的是,第一步的完成不是在reconcile函数的内部来完成的,而是在我们提供给开发者的component父类中去完成。所以,我们得更新一下父类的实现:
class Component {
  constructor(props) {
    this.props = props;
    this.state = this.state || {};
  }

  setState(partialState) {
   // 1. 更新publicInstance的state
    this.state = Object.assign({}, this.state, partialState);
    const {
      dom,
      element
    } = this.__internalInstance
    const parentDom = dom.parentNode;
    reconcile(this.__internalInstance, element,parentDom);
  }
}
第一步完成之后,我们通过在setState内部调用reconcile函数进入第二和第三步:
function reconcile(instance, element, domContainer) {
  let newInstance = {};
  // 整树的初始挂载
  if (instance === null) {
  // .......
  } else if (element === null) { // 整树的删除
  // .......
  }else if(element.type !== instance.element.type){ // 整树的替换
    // .......
  } else { // 整树的更新
    //  DOM component或者Text component
    if(typeof element.type === 'string'){
    // .......
    }else { // composite component

    // 2.更新publicInstance的props
    instance.publicInstance.props = element.props;

    // 3.更新childInstance
    const childElement = instance.publicInstance.render();
    const oldChildInstance = instance.childInstance;
    const childInstance = reconcile(oldChildInstance, childElement,domContainer);

    // 跟实例化过程一样, 更新后的childInstance就是Composite Component所对应instance的childInstance;
    // 更新后的childInstance的dom就是Composite Component所对应instance的dom。
    // element原封不动地挂载上去即可
    instance.dom = childInstance.dom;
    instance.childInstance = childInstance;
    instance.element = element;
    return instance;
    }
  }
  return newInstance;
}
至此,我们已经完成了“component”概念和“协调”概念的对接工作。也就是说,现在如果我们想要局部更新UI的话,只需要定义自己的component,然后调用setState API,这个局部UI所对应的子树的协调就会发生了。
《循序渐进DIY一个react》系列到此结束。虽然,这是一个玩具版的react,但是通过这个DIY过程,我加深了对react思想,概念和基本原理的理解。当然,还有很多基本react feature没有实现,比如:ref,key,生命周期函数等等,更不用说改用Fiber架构之后所带来的新feature啦。最后,真心希望这个系列能对你理解react世界带来些许帮助,至于完整的代码,我稍后再整理,放到codepen或者codesandbox供大家玩弄玩弄。
再见!
