

一.介绍:
本内容只做技术交流使用,请勿做商业用途。本方法验证采用本地自建服务器的形式来对所介绍的算法做验证
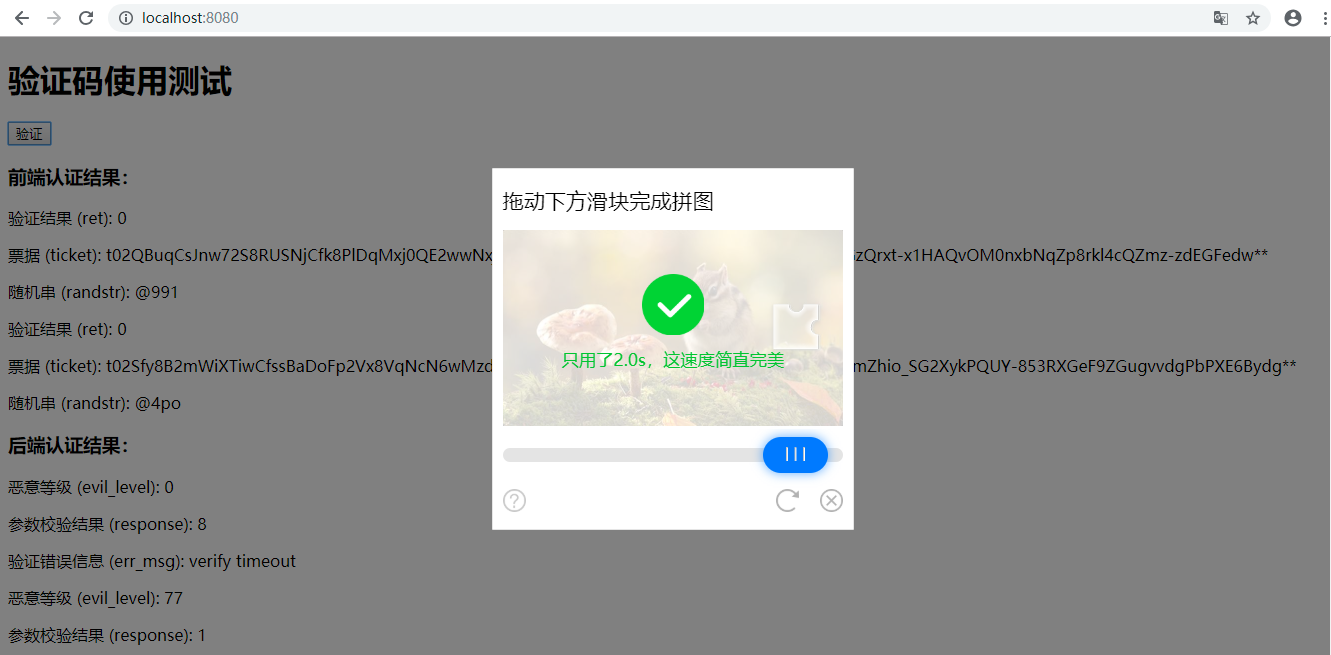
滑动验证码如下图所示:
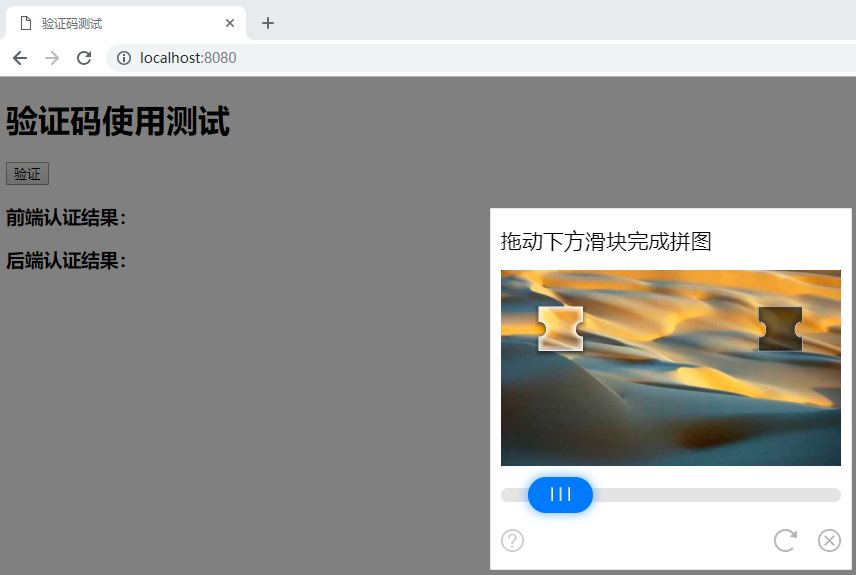
二.本地测试环境构建
本地测试环境的构建CSDN已有文章做了详细的介绍,详细参见[博客地址](https://blog.csdn.net/mouday/article/details/83384633)
[demo地址](https://github.com/mouday/TencentCaptcha)
三.识别思路介绍
** 滑动验证需要解决的问题:滑动距离的计算、滑动轨迹模拟、模拟滑动 **
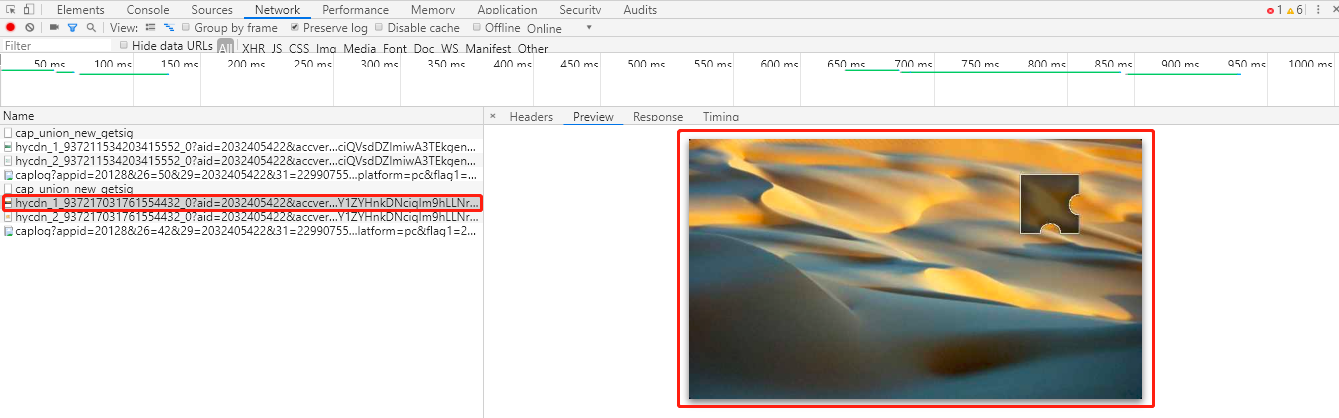
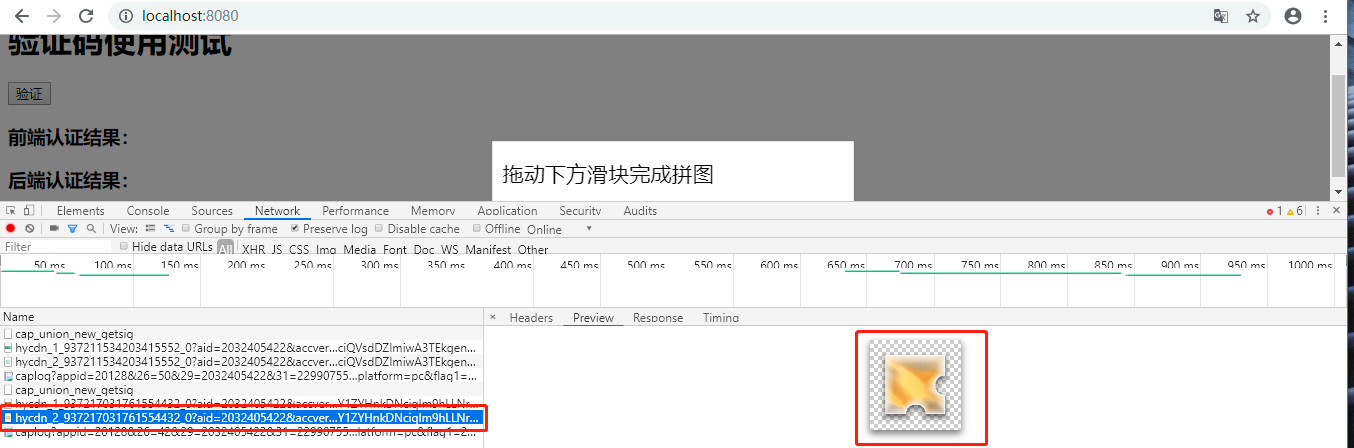
1.滑动距离计算
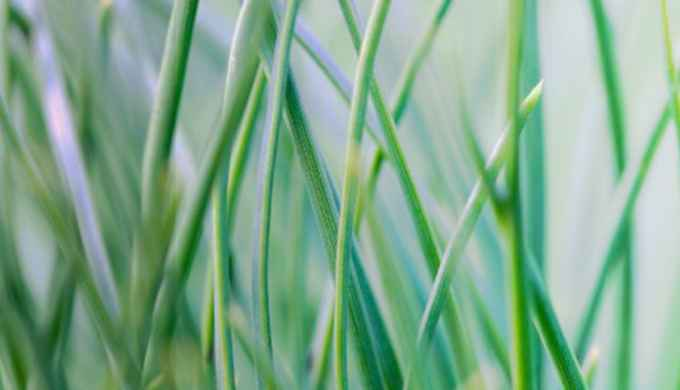
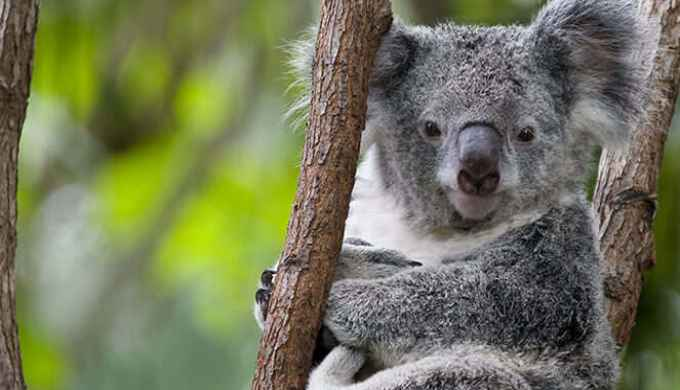
通过抓包获取验证码发现,此验证码会返回如下两张图片:
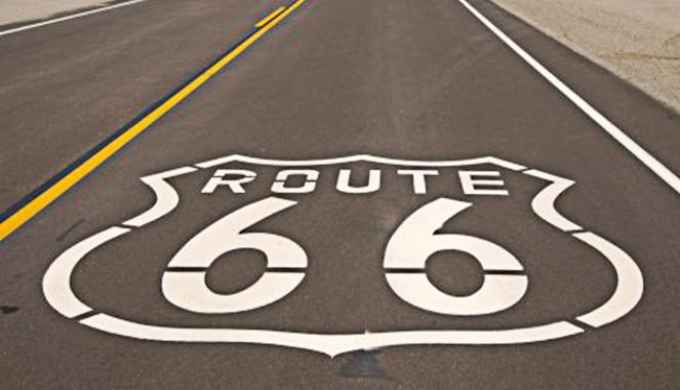
2.无缺口完整背景图片获取:
完整背景图片的获取除了网上文章已提到的通过大量有缺口图片切分重组构造完整背景图和滑动完成验证之后截图两种方案外,其实还可以直接通过接口获取到完整背景图片,由于涉及相关平台利益,所以此处对通过接口直接获取完整背景图片的方法不做详细介绍。但是会把涉及到的10张背景图片给出:


3.拿到有缺口图片后如何从10张背景图中找到对应的无缺口图:
算法1:直接用有缺口图片和10张背景图片做减法,统计差值大于阈值的像素点的个数,阈值设置60,像素点个数设置为缺口大小,大概6000个点,如果差值大于60的点个数超过6000则认为图片不是对应的完整背景图,与10张背景图循环遍历,找到对应的背景图返回对应目标图路径
def get_full_pic(bg_image):
    '''
    :param gap_pic: 缺口图片
    :return: (str)背景图片路径
    '''
    #转换图像到灰度
    img1 = bg_image.convert('L')
    distance = 68     #由于缺口位置都在图片的后边,为减少计算,可以减少一部分比较
    threshold = 60
    dir = ""
    for k in range(1,11):
        dir = "../background/"+str(k)+".jpg"
        fullbg_image = Image.open(dir)
        img2 = fullbg_image.convert('L')
        diff = 0
        for i in range(distance, img1.size[0]):
            # 遍历像素点纵坐标
            for j in range(img1.size[1]):
                # 如果不是相同像素
                img1_pixe = img1.load()[i,j]
                img2_pixe = img2.load()[i,j]
                if abs(img1_pixe - img2_pixe) > threshold:
                    diff = diff + 1
            if diff > 6000:
                break
                # 不同的像素超过一定值直接认为不匹配,
                # 后期计算时可以优化一下结合图片验证码返回初始位置数据,
                # 比较图片时可以去除图片部分区域数据
            elif i == img1.size[0]-1 and j == img1.size[1]-1:
                print("Find the target")
                return dir
    return dir
算法2:由于算法1需要的计算量比较大,测试时发现找目标大概需要花费1s时间。所以改成只需要比对图片上的四个点,这四个点的选择原则是,尽量分散(相邻点像素值比较接近)。
代码如下:选择图片上的(50,50)(50,250),(250,50),(250,250)四点的像素作为比较点,改进算法比算法1节省1s时间
#寻找背景目标图片
def get_full_pic_new(bg_image):
    img1 = bg_image.convert("L")
    dir = ""
    threshold = 60
    for k in range(1,11):
        dir = "../background/"+str(k)+".jpg"   #10张背景图对应的路径
        fullbg_image = Image.open(dir)
        img2 = fullbg_image.convert('L')       #不需要三个通道做比较
        pix11 = img1.load()[50, 50]
        pix12 = img1.load()[50, 250]
        pix13 = img1.load()[250, 50]
        pix14 = img1.load()[250, 250]

        pix21 = img2.load()[50, 50]
        pix22 = img2.load()[50, 250]
        pix23 = img2.load()[250, 50]
        pix24 = img2.load()[250, 250]
        if abs(pix11 - pix21)>threshold or abs(pix12 - pix22)>threshold or abs(pix13 - pix23)>threshold or abs(pix14 - pix24)>threshold:
            continue
        else:
            if abs(pix11 - pix21)<threshold and abs(pix12 - pix22)<threshold and abs(pix13 - pix23)<threshold and abs(pix14 - pix24)<threshold:
                print("Find the target:", dir)
                break
            else:
                print("Not found")
                dir = None
    return dir
找到对应背景图片之后,计算距离的算法和极验验证码计算方法一致,此处不做详细介绍,完整的距离计算模块如下:
#!/usr/bin/env python
# -*- coding: utf-8 -*-
# @Time    : 2019/3/22 13:25
# @File    : get_distance.py
from PIL import Image
def is_pixel_equal(img1, img2, x, y):
    """
    判断两个像素是否相同
    :param image1: 图片1
    :param image2: 图片2
    :param x: 位置x
    :param y: 位置y
    :return: 像素是否相同
    """
    # 取两个图片的像素点
    pix1 = img1.load()[x, y]
    pix2 = img2.load()[x, y]
    threshold = 68
    if (abs(pix1[0] - pix2[0] < threshold) and abs(pix1[1] - pix2[1] < threshold) and abs(pix1[2] - pix2[2] < threshold )):
        return True
    else:
        return False
def get_gap(img1, img2):
    """
    获取缺口偏移量
    :param img1: 不带缺口图片
    :param img2: 带缺口图片
    :return:
    """
    left = 68
    for i in range(left, img1.size[0]):
        for j in range(img1.size[1]):
            if not is_pixel_equal(img1, img2, i, j):
                left = i
                print(i)
                return left
    return left
def get_full_pic_new(bg_image):
    img1 = bg_image.convert("L")
    dir = ""
    threshold = 60
    for k in range(1,11):
        dir = "../background/"+str(k)+".jpg"
        fullbg_image = Image.open(dir)
        img2 = fullbg_image.convert('L')
        pix11 = img1.load()[50, 50]
        pix12 = img1.load()[50, 250]
        pix13 = img1.load()[250, 50]
        pix14 = img1.load()[250, 250]

        pix21 = img2.load()[50, 50]
        pix22 = img2.load()[50, 250]
        pix23 = img2.load()[250, 50]
        pix24 = img2.load()[250, 250]
        if abs(pix11 - pix21)>threshold or abs(pix12 - pix22)>threshold or abs(pix13 - pix23)>threshold or abs(pix14 - pix24)>threshold:
            continue
        else:
            if abs(pix11 - pix21)<threshold and abs(pix12 - pix22)<threshold and abs(pix13 - pix23)<threshold and abs(pix14 - pix24)<threshold:
                print("Find the target:", dir)
                break
            else:
                print("Not found")
                dir = None
    return dir
def get_full_pic(bg_image):
    '''
    :param gap_pic: 缺口图片
    :return: (str)背景图片路径
    '''
    #转换图像到灰度
    img1 = bg_image.convert('L')
    distance = 68
    threshold = 60
    dir = ""
    for k in range(1,11):
        dir = "../background/"+str(k)+".jpg"
        fullbg_image = Image.open(dir)
        img2 = fullbg_image.convert('L')
        diff = 0
        for i in range(distance, img1.size[0]):
            # 遍历像素点纵坐标
            for j in range(img1.size[1]):
                # 如果不是相同像素
                img1_pixe = img1.load()[i,j]
                img2_pixe = img2.load()[i,j]
                if abs(img1_pixe - img2_pixe) > threshold:
                    diff = diff + 1
            if diff > 6000:
                break
                # 不同的像素超过一定值直接认为不匹配,
                # 后期计算时可以优化一下结合图片验证码返回初始位置数据,
                # 比较图片时可以去图片部分区域数据
            elif i == img1.size[0]-1 and j == img1.size[1]-1:
                print("Find the target")
                return dir
    return dir
def get_distanct(bg_image):
    bg_img = Image.open(bg_image)
    full_dir = get_full_pic_new(bg_img)
    full_img = Image.open(full_dir)
    return get_gap(full_img, bg_img)
if __name__=="__main__":
    import time
    time_start = time.time()
    print("--"*20+"run"+"--"*20)
    dir = "../gap_pic/8.jpg"
    distanct = get_distanct(dir)
    time_end = time.time()
    print('totally cost', time_end - time_start)
    print(distanct)
四.滑动验证完整demo
#!/usr/bin/env python
# -*- coding: utf-8 -*-
# @Time    : 2019/4/1 11:12
# @File    : tx_test.py

import json
from selenium import webdriver
from selenium.webdriver.common.by import By
from selenium.webdriver.support.ui import WebDriverWait
from selenium.webdriver.support import expected_conditions as EC
from selenium.common.exceptions import TimeoutException
from selenium.webdriver.common.action_chains import ActionChains

from lxml import etree
from get_distanct import get_distanct
import time
import requests
import random
import numpy as np
from scipy import stats
import math

class tx_test(object):
    def __init__(self):

        self.driver = webdriver.Chrome()
        self.driver.maximize_window()
        # 设置一个智能等待
        self.wait = WebDriverWait(self.driver, 5)
        self.url = "http://127.0.0.1:8080/"
    def get_track(self, distance):
        """
        根据偏移量获取移动轨迹
        :param distance: 偏移量
        :return: 移动轨迹
        """
        # 移动轨迹
        track = []
        # 当前位移
        current = 0
        # 减速阈值
        mid = distance * 4 / 5
        # 计算间隔
        t = 0.2
        # 初速度
        v = 0.1
        r = [1.1, 1.2, 1.3, 1.4, 1.5]
        p = [2, 2.5, 2.8, 3, 3.5, 3.6]
        q = 5.0
        i = 0
        while current < distance:
            if current < mid:
                # 加速度为正2
                a = 2
                q = q * 0.9
            else:
                # 加速度为负3
                q = 1.0
                a = -3
            # 初速度v0
            v0 = v
            # 当前速度v = v0 + at
            v = v0 + a * t
            # 移动距离x = v0t + 1/2 * a * t^2
            r1 = random.choice(r)
            p1 = random.choice(p)
            move = r1 * v0 * t + 1 / p1 * a * t * t * q
            # 当前位移
            if i == 2:
                currentdis = (distance - current) / random.choice([3.5, 4.0, 4.5, 5.0])
                current += currentdis
                track.append(round(currentdis))
            elif i == 4:
                currentdis = (distance - current) / random.choice([4.0, 5.0, 6.0, 7.0])
                current += currentdis
                track.append(round(currentdis))
            else:
                current += move
                track.append(round(move))
            # 加入轨迹
            i = i + 1
        return track
    def get_slider(self, browser):
        """
        获取滑块
        :return: 滑块对象
        """
        slider = None
        while True:
            try:
                slider = self.wait.until(EC.presence_of_element_located((By.XPATH,'//*[@id="tcaptcha_drag_thumb"]')))
                break
            except:
                break
        return slider

    def move_to_gap(self, browser, slider, track):
        """
        拖动滑块到缺口处
        :param slider: 滑块
        :param track: 轨迹
        :return:
        """
        ActionChains(browser).click_and_hold(slider).perform()
        time.sleep(0.5)
        while track:
            x = random.choice(track)
            y = random.choice([-2, -1, 0, 1, 2])
            ActionChains(browser).move_by_offset(xoffset=x, yoffset=y).perform()
            track.remove(x)
            t = random.choice([0.002,0.003,0.004,0.005,0.006])
            time.sleep(t)
        time.sleep(1)
        ActionChains(browser).release(on_element=slider).perform()
    def login(self):
        while True:
            self.driver.get(self.url)
            self.driver.delete_all_cookies()
            currhandle = self.driver.current_window_handle
            while True:
                try:
                    self.driver.switch_to_window(currhandle)
                except Exception as e:
                    print(e)
                try:
                    verify_Bt = self.wait.until(EC.element_to_be_clickable((By.XPATH,'//*[@id="TencentCaptcha"]')))   #按钮是否可点击
                    verify_Bt.click()
                except Exception as e:
                    self.driver.refresh()
                    continue
                try:
                    # if flag is not 0:
                    iframe = self.wait.until(EC.presence_of_element_located((By.XPATH, '//*[@id="tcaptcha_iframe"]')))
                    time.sleep(5)
                    self.driver.switch_to.frame(iframe)     #切换到iframe失败
                    #检测是否有滑动验证码,有滑动验证码就滑动
                    Sliding_Pic = self.wait.until(EC.presence_of_element_located((By.XPATH,'//*[@id="slideBgWrap"]/img')))
                    for i in range(5):
                        page = self.driver.page_source
                        selector = etree.HTML(page)
                        bg_imgSrc = selector.xpath('//*[@id="slideBgWrap"]/img/@src')[0]
                        res = requests.get(bg_imgSrc)
                        with open("./bg_img.jpg","wb") as fp:
                            fp.write(res.content)
                        #计算滑块滑动距离
                        dist = get_distanct("./bg_img.jpg")
                        print("打印滑动距离:",dist)
                        dist = int((dist)/2-34)
                        #获取滑动轨迹
                        print(dist)
                        track = self.get_track(dist)
                        print(track)
                        print(sum(track))
                        err = (dist-sum(track))   #距离修正值
                        print(err)
                        #获取滑块
                        track.append(err)
                        slide = self.get_slider(self.driver)
                        #滑动滑块
                        self.move_to_gap(self.driver,slide,track)
                        time.sleep(2)
                        slide = self.get_slider(self.driver)
                        if slide:
                            continue
                        else:
                            print("滑动验证通过")
                            break
                except Exception as e:
                    print("滑动异常")
                    time.sleep(5)
                    break
if __name__=="__main__":
    print("test\n")
    login = tx_test()
    login.login()
总结及说明
代码只需要把tx_test.py、get_distance.py及创建背景图片文件夹background(内存放10张背景图片,图片命名为1.jpg~10.jpg即可,然后启动本地滑动测试环境,ip端口配置自己实际服务器地址端口即可,启动tx_test.py模块即可验证整个滑动识别模块)滑动完成之后截图如下:轨迹算法是在参考其他极验轨迹模拟算法的基础上增加了一些调整,具体参看代码。
滑动验证码除了通过selenium直接模拟滑动实现自动识别以外,还可以通过直接构造提交参数的方式来识别。具体的原理和分析会在下一篇文章做详细介绍,同时下一篇文章会给出另外一种轨迹模拟算法(基于正态分布曲线轨迹模拟算法)
