

阅读说明:
- 本文假设读者已掌握如何使用
ConstraintLayout。 - 本文假设读者已对
MotionLayout有了基本了解,知道如何创建MotionScene文件,以及如何使用MotionLayout在两个layout布局文件间创建过渡动画。如您完全不了解这些,建议您阅读 《MotionLayout 基础教程》。 - 建议读者在阅读过程中动手实践,有助于更好的理解,如您现在不方便,建议稍后阅读。
- 由于官方文档不全,部分内容来自笔者的个人理解,如有错误,欢迎指正。
本文是 《MotionLayout 基础教程》 的第 2 篇,主要向读者介绍如何在 MotionScene 文件中定义场景约束以及如何使用自定义属性。
在 MotionScene 文件中定义约束
可以在 <MotionScene> 元素中使用 <ConstraintSet> 子元素定义一个场景约束集,并在 <ConstraintSet> 元素中使用 <Constraint> 元素定义单个 View 的属性约束。
例:在 MotionScene 文件中定义 End 场景的约束集
<?xml version="1.0" encoding="utf-8"?>
<MotionScene xmlns:android="http://schemas.android.com/apk/res/android"
    xmlns:app="http://schemas.android.com/apk/res-auto">

    <!-- 定义 End 场景的约束集 -->
    <ConstraintSet android:id="@+id/activity_main_end">

        <!-- 定义布局中 id 为 image 的 View 的属性约束 -->
        <Constraint
            android:id="@+id/button"
            android:layout_width="56dp"
            android:layout_height="56dp"
            app:layout_constraintBottom_toBottomOf="parent"
            app:layout_constraintLeft_toLeftOf="parent"
            app:layout_constraintRight_toRightOf="parent"
            app:layout_constraintTop_toTopOf="parent"
            app:layout_constraintVertical_bias="0.0" />

    </ConstraintSet>

    <!-- Start 场景是布局文件,End 场景是定义在 MotionScene 文件中的约束集 -->
    <Transition
        app:constraintSetStart="@layout/activity_main"
        app:constraintSetEnd="@id/activity_main_end"
        app:duration="1000">

        <OnClick
            app:clickAction="toggle"
            app:targetId="@id/button" />

    </Transition>

</MotionScene>
实际上,你即可以把 Start 场景的约束集定义在 MotionScene 文件中,也可以把 End 场景的约束集定义在 MotionScene 文件中。或者仅在 MotionScene 文件中定义这两者之一,另一个场景使用 layout 布局文件定义。
建议:建议把
Start场景和End场景的约束集都定义在MotionScene文件中。因为MotionLayout框架某些特性(例如自定义属性(下节会介绍))依赖于MotionScene文件中Start场景,如果Start场景没有定义在MotionScene文件中,这些特性可能会无法使用。
例:在 MotionScene 文件中定义 Start 场景约束与 End 场景约束(本示例分为以下两步)
1. 创建布局文件:
文件名:
activity_main.xml
<?xml version="1.0" encoding="utf-8"?>
<androidx.constraintlayout.motion.widget.MotionLayout
    xmlns:android="http://schemas.android.com/apk/res/android"
    xmlns:app="http://schemas.android.com/apk/res-auto"
    android:id="@+id/motionLayout"
    android:layout_width="match_parent"
    android:layout_height="match_parent"
    app:layoutDescription="@xml/activity_main_motion_scene">

    <Button
        android:id="@+id/button"
        android:layout_width="56dp"
        android:layout_height="56dp"
        android:background="@color/colorPrimary"
        app:layout_constraintBottom_toBottomOf="parent"
        app:layout_constraintLeft_toLeftOf="parent"
        app:layout_constraintRight_toRightOf="parent"
        app:layout_constraintTop_toTopOf="parent"
        app:layout_constraintVertical_bias="1.0" />

</androidx.constraintlayout.motion.widget.MotionLayout>
提示:布局文件还是要有的,并不是说将
Start场景约束和End场景约束都定义在了MotionScene文件中就可以不需要布局文件了。
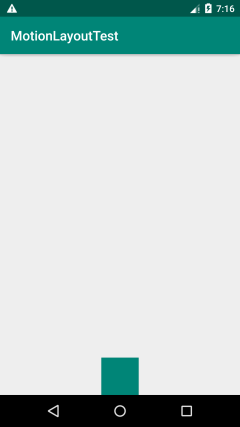
布局文件预览:
2. 创建 MotionScene 文件:
文件名:
activity_main_motion_scene.xml
<?xml version="1.0" encoding="utf-8"?>
<MotionScene xmlns:android="http://schemas.android.com/apk/res/android"
    xmlns:app="http://schemas.android.com/apk/res-auto">

    <!-- 定义 Start 场景的属性约束集 -->
    <ConstraintSet android:id="@+id/activity_main_start">

        <!-- 定义布局中 id 为 button 的 View 的属性约束 -->
        <Constraint
            android:id="@id/button"
            android:layout_width="56dp"
            android:layout_height="56dp"
            app:layout_constraintBottom_toBottomOf="parent"
            app:layout_constraintLeft_toLeftOf="parent"
            app:layout_constraintRight_toRightOf="parent"
            app:layout_constraintTop_toTopOf="parent"
            app:layout_constraintVertical_bias="1.0" />

    </ConstraintSet>


    <!-- 定义 End 场景的属性约束集 -->
    <ConstraintSet android:id="@+id/activity_main_end">

        <!-- 定义布局中 id 为 button 的 View 的属性约束 -->
        <Constraint
            android:id="@+id/button"
            android:layout_width="56dp"
            android:layout_height="56dp"
            app:layout_constraintBottom_toBottomOf="parent"
            app:layout_constraintLeft_toLeftOf="parent"
            app:layout_constraintRight_toRightOf="parent"
            app:layout_constraintTop_toTopOf="parent"
            app:layout_constraintVertical_bias="0.0" />

    </ConstraintSet>

    <!-- Start 场景与 End 场景都是定义在 MotionScene 文件中的约束集 -->
    <Transition
        app:constraintSetStart="@id/activity_main_start"
        app:constraintSetEnd="@id/activity_main_end"
        app:duration="1000">

        <OnClick
            app:clickAction="toggle"
            app:targetId="@id/button" />

    </Transition>

</MotionScene>
<ConstraintSet> 元素属性说明:
android:id:设置当前约束集的id。这个id值可被<Transition>元素的app:constraintSetStart或者app:constraintSetEnd引用。
<Constraint> 元素属性说明:
android:id:当前约束关联到的那个View的id。app:transitionEasing:定义动画到此点时使用的缓动曲线,该值可以是一个字符串(例如"curve(1.0,0,0,1.0)")还可以是以下几个枚举值之一:standard:标准accelerate:加速decelerate:减速linear:线性
提示
1:<Constraint>元素的app:transitionEasing属性与<Transition>元素的app:motionInterpolator属性类似,都是用来定义过渡动画的插值器的。不同的是,<Constraint>元素的app:transitionEasing属性定义的是单独某个View的过渡动画的插值器,而<Transition>元素的app:motionInterpolator定义的是整个过渡动画的插值器。
提示
2:如果为<Constraint>元素指定了app:transitionEasing插值器,这个插值器将与app:motionInterpolator属性指定的全局插值器同时作用于View的过渡动画,而不是替换掉app:motionInterpolator属性指定的全局插值器。
提示
3:<Constraint>元素的app:transitionEasing属性值应该在Start场景中指定,(经测试)仅在End场景中指定app:transitionEasing无法生效。
提示
4:(经测试,似乎无效)可以使用形如"curve(1.0,0,0,1.0)"的字符串来为<Constraint>元素的app:transitionEasing属性设置一个缓动曲线,MotionLayout框架将根据这个缓动曲线来生成一个插值器。
app:transitionPathRotate:【浮点值】相对于所采用的路径旋转对象(弧形路径/关键帧 相关)。app:drawPath:绘制过渡动画路径(调试用,关键帧相关)。可以是以下几个枚举值之一:nonepathpathRelativedeltaRelativeasConfiguredrectangles
app:progress:【浮点值】在关联的View上调用setProgress(float)方法(用于与嵌套的ConstraintLayout交互)
前面说过,<Constraint> 元素用来定义单个 View 的属性约束,它支持对 View 的所有 ConstraintLayout 属性定义约束,以及对 View 的下面这些标准属性定义约束:
android:visibilityandroid:alphaandroid:elevationandroid:rotationandroid:rotationXandroid:rotationYandroid:scaleXandroid:scaleYandroid:translationXandroid:translationYandroid:translationZ
当 View 的标准属性或者 ConstraintLayout 属性发生改变时,MotionLayout 会自动应用过渡动画。
自定义属性
MotionLayout 控件只会检测标准属性和 ConstraintLayout 属性这类布局相关的属性变动,对于其他的属性变动,如 View 的背景颜色变动是无法检测出来的,因此就需要使用自定义属性。
在 <Constraint> 元素中使用 <CustomAttribute> 子元素来指定自定义属性。
例:
<?xml version="1.0" encoding="utf-8"?>
<MotionScene xmlns:android="http://schemas.android.com/apk/res/android"
    xmlns:app="http://schemas.android.com/apk/res-auto">

    <!-- 定义 Start 场景的属性约束集 -->
    <ConstraintSet android:id="@+id/activity_main_start">

        <!-- 定义布局中 id 为 image 的 View 的属性约束 -->
        <Constraint
            android:id="@id/button"
            android:layout_width="56dp"
            android:layout_height="56dp"
            app:layout_constraintBottom_toBottomOf="parent"
            app:layout_constraintLeft_toLeftOf="parent"
            app:layout_constraintRight_toRightOf="parent"
            app:layout_constraintTop_toTopOf="parent"
            app:layout_constraintVertical_bias="1.0">

            <!-- 使用自定义属性 -->
            <CustomAttribute
                app:attributeName="backgroundColor"
                app:customColorValue="@color/colorPrimary" />

        </Constraint>

    </ConstraintSet>


    <!-- 定义 End 场景的属性约束集 -->
    <ConstraintSet android:id="@+id/activity_main_end">

        <!-- 定义布局中 id 为 image 的 View 的属性约束 -->
        <Constraint
            android:id="@+id/button"
            android:layout_width="56dp"
            android:layout_height="56dp"
            app:layout_constraintBottom_toBottomOf="parent"
            app:layout_constraintLeft_toLeftOf="parent"
            app:layout_constraintRight_toRightOf="parent"
            app:layout_constraintTop_toTopOf="parent"
            app:layout_constraintVertical_bias="0.0">

            <!-- 使用自定义属性 -->
            <CustomAttribute
                app:attributeName="backgroundColor"
                app:customColorValue="@color/colorAccent" />

        </Constraint>

    </ConstraintSet>

    <Transition
        app:constraintSetEnd="@id/activity_main_end"
        app:constraintSetStart="@id/activity_main_start"
        app:duration="1000">

        <OnClick
            app:clickAction="toggle"
            app:targetId="@id/button" />

    </Transition>

</MotionScene>
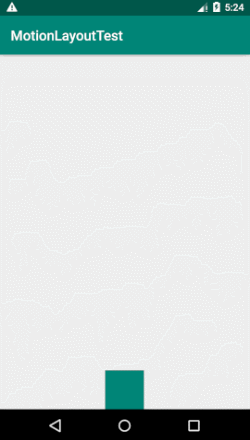
效果预览:
<CustomAttribute> 元素属性说明:
app:attributeName属性用来指定自定义属性的名字(例如"backgroundColor")。关联的View必须要有一对与这个名字相关的getter/setter方法(例如getBackgroundColor()/setBackgroundColor(int color))。- 剩下的其他属性都是用来设置自定义属性的值的。需要根据自定义属性的值类型使用以下
XML属性之一来设置自定义属性的值:app:customColorValue:设置属性的值(颜色类型)。app:customColorDrawableValue:设置属性的值(颜色类型)。app:customIntegerValue:设置属性的值(整数类型)。app:customFloatValue:设置属性的值(浮点类型)。app:customStringValue:设置属性的值(字符串类型)。app:customDimension:设置属性的值(尺寸类型)。app:customPixelDimension:设置属性的值(尺寸类型)。app:customBoolean:设置属性的值(布尔类型)。
结语
本篇文章是 《MotionLayout 基础教程》 的第 2 篇,阅读完这两篇文章后您基本就能掌握 MotionLayout 的基础内容了。
写这两篇文章的主要目的是为了向读者介绍 MotionLayout 的基础内容,让读者能够入门,并在此基础上进一步学习。如您想要了解更多 MotionLayout 内容,推荐您阅读以下 3 篇文章:
