

前言

ES6 已经不必在过多介绍,在 ES6 之前,装饰器可能并没有那么重要,因为你只需要加一层 wrapper 就好了,但是现在,由于语法糖 class 的出现,当我们想要去在多个类之间共享或者扩展一些方法的时候,代码会变得错综复杂,难以维护,而这,也正式我们 Decorator 的用武之地。
Object.defineProperty
关于 Object.defineProperty 简单的说,就是该方法可以精准的添加和修改对象的属性
语法
Object.defineProperty(obj,prop,descriptor)
- ojb:要在其上定义属性的对象
- prop:要定义或修改的属性的名称
- descriptor:将被定义或修改的属性描述符
该方法返回被传递给函数的对象
在ES6中,由于 Symbol类型的特殊性,用Symbol类型的值来做对象的key与常规的定义或修改不同,而Object.defineProperty 是定义key为Symbol的属性的方法之一。
通过赋值操作添加的普通属性是可枚举的,能够在属性枚举期间呈现出来(for...in 或 Object.keys 方法), 这些属性的值可以被改变,也可以被删除。这个方法允许修改默认的额外选项(或配置)。默认情况下,使用 Object.defineProperty() 添加的属性值是不可修改的
属相描述符
对象里目前存在的属性描述符有两种主要形式:数据描述符和存取描述符。数据描述符是一个具有值的属性,该值可能是可写的,也可能不是可写的。存取描述符是由getter-setter函数对描述的属性。描述符必须是这两种形式之一;不能同时是两者。
数据描述符和存取描述符均具有以下可选键值:
configurable
当且仅当该属性的 configurable 为 true 时,该属性描述符才能够被改变,同时该属性也能从对应的对象上被删除。默认为 false
enumerable
当且仅当该属性的enumerable为true时,该属性才能够出现在对象的枚举属性中。默认为 false。
数据描述符同时具有以下可选键值:
value
该属性对应的值。可以是任何有效的 JavaScript 值(数值,对象,函数等)。默认为 undefined。
writable
当且仅当该属性的writable为true时,value才能被赋值运算符改变。默认为 false
存取描述符同时具有以下可选键值:
get
一个给属性提供 getter 的方法,如果没有 getter 则为 undefined。当访问该属性时,该方法会被执行,方法执行时没有参数传入,但是会传入this对象(由于继承关系,这里的this并不一定是定义该属性的对象)。默认为 undefined。
set
一个给属性提供 setter 的方法,如果没有 setter 则为 undefined。当属性值修改时,触发执行该方法。该方法将接受唯一参数,即该属性新的参数值。默认为 undefined。
如果一个描述符不具有value,writable,get 和 set 任意一个关键字,那么它将被认为是一个数据描述符。如果一个描述符同时有(value或writable)和(get或set)关键字,将会产生一个异常
更多使用实例和介绍,参看:MDN
装饰者模式
在看Decorator之前,我们先看下装饰者模式的使用,我们都知道,装饰者模式能够在不改变对象自身基础上,在程序运行期间给对象添加指责。特点就是不影响之前对象的特性,而新增额外的职责功能。
like...this:

这段比较简单,直接看代码吧:
let Monkey = function () {}
Monkey.prototype.say = function () {
  console.log('目前我只是个野猴子');
}
let TensionMonkey = function (monkey) {
  this.monkey = monkey;
}
TensionMonkey.prototype.say = function () {
  this.monkey.say();
  console.log('带上紧箍咒,我就要忘记世间烦恼!');
}
let monkey = new TensionMonkey(new Monkey());
monkey.say();
执行结果:
Decorator
Decorator其实就是一个语法糖,背后其实就是利用es5的Object.defineProperty(target,name,descriptor),了解Object.defineProperty请移步这个链接:MDN文档
其背后原理大致如下:
class Monkey{
  say(){
    console.log('目前,我只是个野猴子');
  }
}
执行上面的代码,大致代码如下:
Object.defineProperty(Monkey.prototype,'say',{
  value:function(){console.log('目前,我只是个野猴子')},
  enumerable:false,
  configurable:true,
  writable:true
})
如果我们利用装饰器来修饰他
class Monkey{
@readonly
say(){console.log('现在我是只读的了')}
}
在这种装饰器的属性,会在Object.defineProperty为Monkey.prototype注册say属性之前,执行以下代码:
let descriptor = {
  value:specifiedFunction,
  enumerable:false,
  configurable:true,
  writeable:true
};

descriptor = readonly(Monkey.prototype,'say',descriptor)||descriptor;
Object.defineProperty(Monkey.prototype,'say',descriptor);
从上面的伪代码我们可以看出,Decorator只是在Object.defineProperty为Monkey.prototype注册属性之前,执行了一个装饰函数,其属于一个类对Object.defineProperty的拦截。所以它和Object.defineProperty具有一致的形参:
- obj:作用的目标对象
- prop:作用的属性名
- descriptor:针对该属性的描述符
下面看下简单的使用
在class中的使用
- 创建一个新的class继承自原有的class,并添加属性
@name
class Person{
  sayHello(){
    console.log(`hello ,my name is ${this.name}`)
  }
}

function name(constructor) {
  return class extends constructor{
    name="Nealyang"
  }
}

new Person().sayHello()
//hello ,my name is Nealyang
- 针对当前class修改(类似mixin)
@name
@seal
class Person {
  sayHello() {
    console.log(`hello ,my name is ${this.name}`)
  }
}

function name(constructor) {
  Object.defineProperty(constructor.prototype,'name',{
    value:'一凨'
  })
}
new Person().sayHello()

//若修改一个属性

function seal(constructor) {
  let descriptor = Object.getOwnPropertyDescriptor(constructor.prototype, 'sayHello')
  Object.defineProperty(constructor.prototype, 'sayHello', {
    ...descriptor,
    writable: false
  })
}

new Person().sayHello = 1;// Cannot assign to read only property 'sayHello' of object '#<Person>'
上面说到mixin,那么我就来模拟一个mixin吧
class A {
  run() {
    console.log('我会跑步!')
  }
}

class B {
  jump() {
    console.log('我会跳!')
  }
}

@mixin(A, B)
class C {}

function mixin(...args) {
  return function (constructor) {
    for (const arg of args) {
      for (let key of Object.getOwnPropertyNames(arg.prototype)) {
        if (key === 'constructor') continue;
        Object.defineProperty(constructor.prototype, key, Object.getOwnPropertyDescriptor(arg.prototype, key));
      }
    }
  }
}

let c = new C();
c.jump();
c.run();
// 我会跳!
// 我会跑步!
截止目前我們貌似写了非常多的代码了,对。。。这篇,为了彻底搞投Decorator,这。。。只是开始。。。

在class成员中的使用
这类的装饰器的写法应该就是我们最为熟知了,会接受三个参数:
- 如果装饰器挂载在静态成员上,则会返回构造函数,如果挂载在实例成员上,则返回类的原型
- 装饰器挂载的成员名称
- Object.getOwnPropertyDescriptor的返回值
首先,我们明确下静态成员和实例成员的区别
class Model{
  //实例成员
  method1(){}
  method2 = ()=>{}

  // 靜態成員
  static method3(){}
  static method4 = ()=>{}
}
method1 和method2 是实例成员,但是method1存在于prototype上,method2只有实例化对象以后才有。
method3和method4是静态成员,两者的区别在于是否可枚举描述符的设置,我们通过babel转码可以看到:
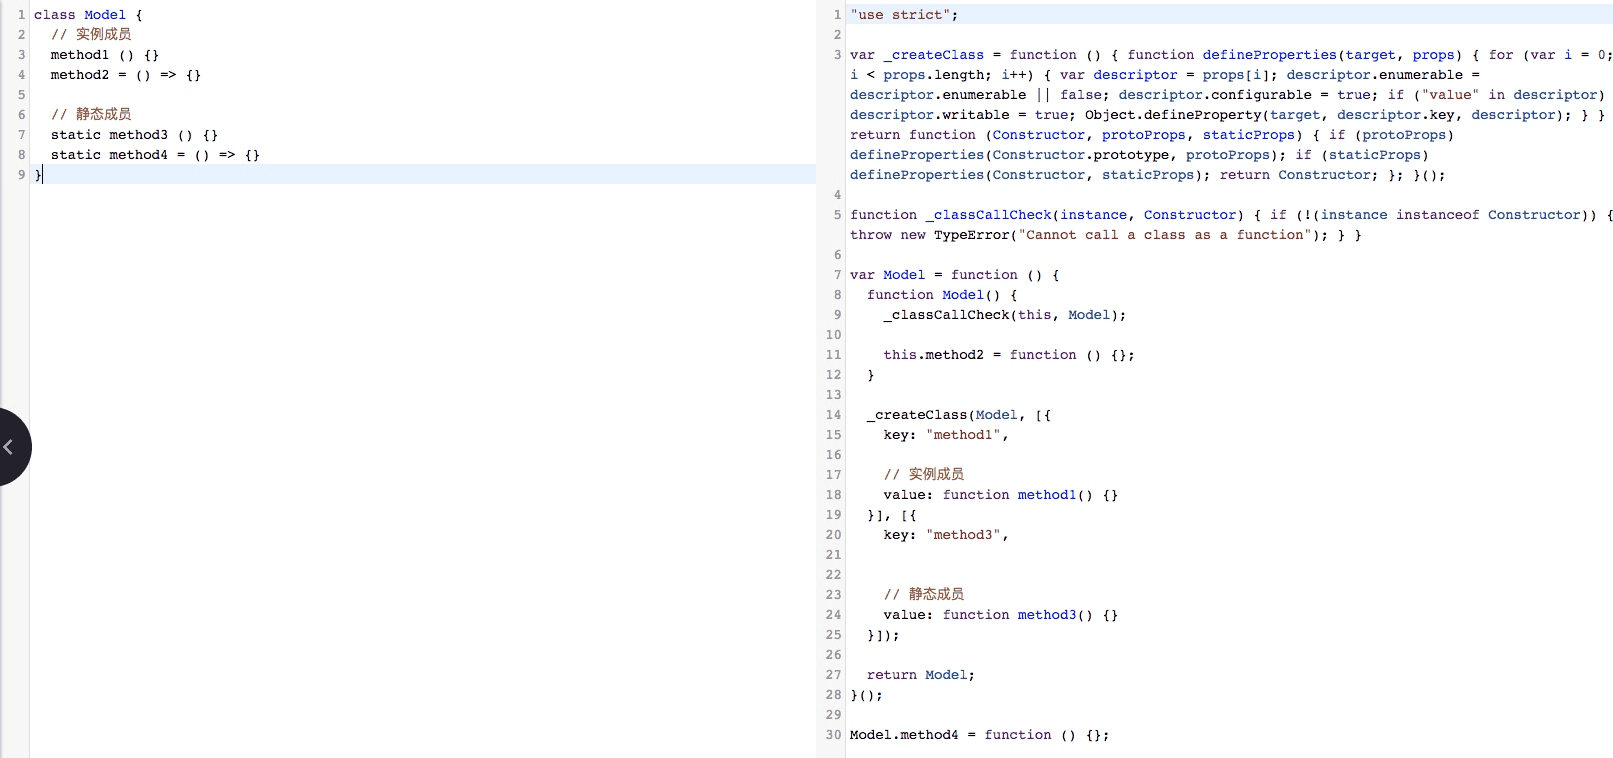
上述代码比较乱,简单的可以理解为:
function Model () {
  // 成员仅在实例化时赋值
  this.method2 = function () {}
}

// 成员被定义在原型链上
Object.defineProperty(Model.prototype, 'method1', {
  value: function () {},
  writable: true,
  enumerable: false,  // 设置不可被枚举
  configurable: true
})

// 成员被定义在构造函数上,且是默认的可被枚举
Model.method4 = function () {}

// 成员被定义在构造函数上
Object.defineProperty(Model, 'method3', {
  value: function () {},
  writable: true,
  enumerable: false,  // 设置不可被枚举
  configurable: true
})
可以看出,只有method2是在实例化时才赋值的,一个不存在的属性是不会有descriptor的,所以这就是为什么在针对Property Decorator不传递第三个参数的原因,至于为什么静态成员也没有传递descriptor,目前没有找到合理的解释,但是如果明确的要使用,是可以手动获取的。
就像上述的示例,我们针对四个成员都添加了装饰器以后,method1和method2第一个参数就是Model.prototype,而method3和method4的第一个参数就是Model。
class Model {
  // 实例成员
  @instance
  method1 () {}
  @instance
  method2 = () => {}

  // 静态成员
  @static
  static method3 () {}
  @static
  static method4 = () => {}
}

function instance(target) {
  console.log(target.constructor === Model)
}

function static(target) {
  console.log(target === Model)
}
函数、访问器、属性 三者装饰器的使用
- 函数装饰器的返回值会默认作为属性的value描述符的存在,如果返回为undefined则忽略
class Model {
  @log1
  getData1() {}
  @log2
  getData2() {}
}

// 方案一,返回新的value描述符
function log1(tag, name, descriptor) {
  return {
    ...descriptor,
    value(...args) {
      let start = new Date().valueOf()
      try {
        return descriptor.value.apply(this, args)
      } finally {
        let end = new Date().valueOf()
        console.log(`start: ${start} end: ${end} consume: ${end - start}`)
      }
    }
  }
}

// 方案二、修改现有描述符
function log2(tag, name, descriptor) {
  let func = descriptor.value // 先获取之前的函数

  // 修改对应的value
  descriptor.value = function (...args) {
    let start = new Date().valueOf()
    try {
      return func.apply(this, args)
    } finally {
      let end = new Date().valueOf()
      console.log(`start: ${start} end: ${end} consume: ${end - start}`)
    }
  }
}
- 访问器的Decorator就是
getset前缀函数了,用于控制属性的赋值、取值操作,在使用上和函数装饰器没有任何区别
class Modal {
  _name = 'Niko'

  @prefix
  get name() { return this._name }
}

function prefix(target, name, descriptor) {
  return {
    ...descriptor,
    get () {
      return `wrap_${this._name}`
    }
  }
}

console.log(new Modal().name) // wrap_Niko
- 对于属性装饰器是没有descriptor返回的,并且装饰器函数的返回值也会被忽略,如果我们需要修改某一个静态属性,则需要自己获取descriptor
class Modal {
  @prefix
  static name1 = 'Niko'
}

function prefix(target, name) {
  let descriptor = Object.getOwnPropertyDescriptor(target, name)

  Object.defineProperty(target, name, {
    ...descriptor,
    value: `wrap_${descriptor.value}`
  })
}

console.log(Modal.name1) // wrap_Niko
对于一个实例的属性,则没有直接修改的方案,不过我们可以结合着一些其他装饰器来曲线救国。
比如,我们有一个类,会传入姓名和年龄作为初始化的参数,然后我们要针对这两个参数设置对应的格式校验
const validateConf = {} // 存储校验信息

@validator
class Person {
  @validate('string')
  name
  @validate('number')
  age

  constructor(name, age) {
    this.name = name
    this.age = age
  }
}

function validator(constructor) {
  return class extends constructor {
    constructor(...args) {
      super(...args)

      // 遍历所有的校验信息进行验证
      for (let [key, type] of Object.entries(validateConf)) {
        if (typeof this[key] !== type) throw new Error(`${key} must be ${type}`)
      }
    }
  }
}

function validate(type) {
  return function (target, name, descriptor) {
    // 向全局对象中传入要校验的属性名及类型
    validateConf[name] = type
  }
}

new Person('Niko', '18')  // throw new error: [age must be number]
函数参数装饰器
const parseConf = {}
class Modal {
  @parseFunc
  addOne(@parse('number') num) {
    return num + 1
  }
}

// 在函数调用前执行格式化操作
function parseFunc (target, name, descriptor) {
  return {
    ...descriptor,
    value (...arg) {
      // 获取格式化配置
      for (let [index, type] of parseConf) {
        switch (type) {
          case 'number':  arg[index] = Number(arg[index])             break
          case 'string':  arg[index] = String(arg[index])             break
          case 'boolean': arg[index] = String(arg[index]) === 'true'  break
        }

        return descriptor.value.apply(this, arg)
      }
    }
  }
}

// 向全局对象中添加对应的格式化信息
function parse(type) {
  return function (target, name, index) {
    parseConf[index] = type
  }
}

console.log(new Modal().addOne('10')) // 11
Decorator 用例

log
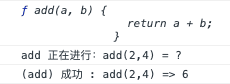
为一个方法添加 log 函数,检查输入的参数
    let log = type => {
      return (target,name,decorator) => {
        const method = decorator.value;
        console.log(method);

        decorator.value = (...args) => {
          console.info(`${type} 正在进行:${name}(${args}) = ?`);
          let result;
          try{
            result = method.apply(target,args);
            console.info(`(${type}) 成功 : ${name}(${args}) => ${result}`);
          }catch(err){
            console.error(`(${type}) 失败: ${name}(${args}) => ${err}`);
          }
          return result;
        }
      }
    }

    class Math {
      @log('add')
      add(a, b) {
        return a + b;
      }
    }

    const math = new Math();

    // (add) 成功 : add(2,4) => 6
    math.add(2, 4);
time
用于统计方法执行的时间:
function time(prefix) {
  let count = 0;
  return function handleDescriptor(target, key, descriptor) {

    const fn = descriptor.value;

    if (prefix == null) {
      prefix = `${target.constructor.name}.${key}`;
    }

    if (typeof fn !== 'function') {
      throw new SyntaxError(`@time can only be used on functions, not: ${fn}`);
    }

    return {
      ...descriptor,
      value() {
        const label = `${prefix}-${count}`;
        count++;
        console.time(label);

        try {
          return fn.apply(this, arguments);
        } finally {
          console.timeEnd(label);
        }
      }
    }
  }
}
debounce
对执行的方法进行防抖处理
class Toggle extends React.Component {

  @debounce(500, true)
  handleClick() {
    console.log('toggle')
  }

  render() {
    return (
      <button onClick={this.handleClick}>
        button
      </button>
    );
  }
}

function _debounce(func, wait, immediate) {

    var timeout;

    return function () {
        var context = this;
        var args = arguments;

        if (timeout) clearTimeout(timeout);
        if (immediate) {
            var callNow = !timeout;
            timeout = setTimeout(function(){
                timeout = null;
            }, wait)
            if (callNow) func.apply(context, args)
        }
        else {
            timeout = setTimeout(function(){
                func.apply(context, args)
            }, wait);
        }
    }
}

function debounce(wait, immediate) {
  return function handleDescriptor(target, key, descriptor) {
    const callback = descriptor.value;

    if (typeof callback !== 'function') {
      throw new SyntaxError('Only functions can be debounced');
    }

    var fn = _debounce(callback, wait, immediate)

    return {
      ...descriptor,
      value() {
        fn()
      }
    };
  }
}
更多关于 core-decorators 的例子后面再 Nealyang/PersonalBlog中补充,再加注释说明。
