最近立了一个flag,要通读 vue-router 源码。压力有点大,希望我能写完。。。
参考版本:
vue-router@v3.0.1
源码在 ./src 下,使用 tree 命令查看下目录结构
.
|-- components           // 组件(view/link)
|   |-- link.js
|   `-- view.js
|-- create-matcher.js    // Route 匹配
|-- create-route-map.js  // Route 映射
|-- history              // Router 处理 (hash模式、html5模式)
|   |-- abstract.js
|   |-- base.js
|   |-- hash.js
|   `-- html5.js
|-- index.js             // Router 入口
|-- install.js           // Router 插件安装
`-- util                 // 工具库
    |-- async.js
    |-- dom.js
    |-- location.js
    |-- params.js
    |-- path.js
    |-- push-state.js
    |-- query.js
    |-- resolve-components.js
    |-- route.js
    |-- scroll.js
    `-- warn.js
根据官网提供的示例: router.vuejs.org/guide/#html
<div id="app">
  <h1>Hello App!</h1>
  <p>
    <!-- 使用 router-link 组件来导航. -->
    <!-- 通过传入 `to` 属性指定链接. -->
    <!-- <router-link> 默认会被渲染成一个 `<a>` 标签 -->
    <router-link to="/foo">Go to Foo</router-link>
    <router-link to="/bar">Go to Bar</router-link>
  </p>
  <!-- 路由出口 -->
  <!-- 路由匹配到的组件将渲染在这里 -->
  <router-view></router-view>
</div>

<script>
  // 0. 如果使用模块化机制编程,导入Vue和VueRouter,要调用 Vue.use(VueRouter)

  // 1. 定义 (路由) 组件。
  // 可以从其他文件 import 进来
  const Foo = { template: '<div>foo</div>' }
  const Bar = { template: '<div>bar</div>' }

  // 2. 定义路由
  // 每个路由应该映射一个组件。 其中"component" 可以是
  // 通过 Vue.extend() 创建的组件构造器,
  // 或者,只是一个组件配置对象。
  // 我们晚点再讨论嵌套路由。
  const routes = [
    { path: '/foo', component: Foo },
    { path: '/bar', component: Bar }
  ]

  // 3. 创建 router 实例,然后传 `routes` 配置
  // 你还可以传别的配置参数, 不过先这么简单着吧。
  const router = new VueRouter({
    routes // (缩写) 相当于 routes: routes
  })

  // 4. 创建和挂载根实例。
  // 记得要通过 router 配置参数注入路由,
  // 从而让整个应用都有路由功能
  const app = new Vue({
    router
  }).$mount('#app')

  // 现在,应用已经启动了!

</script>
简单打印一下:
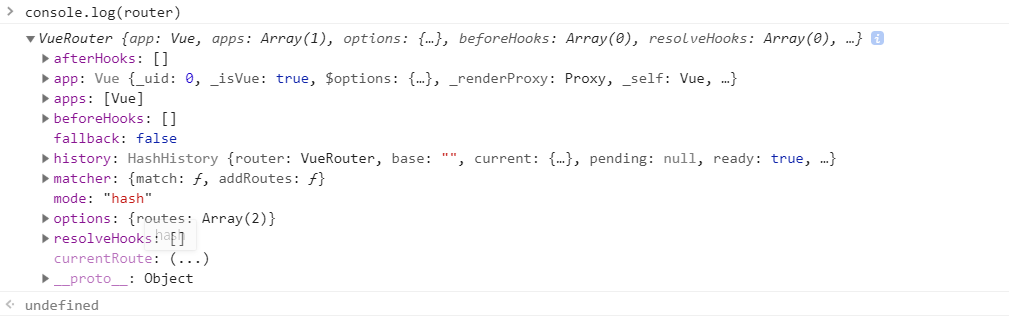
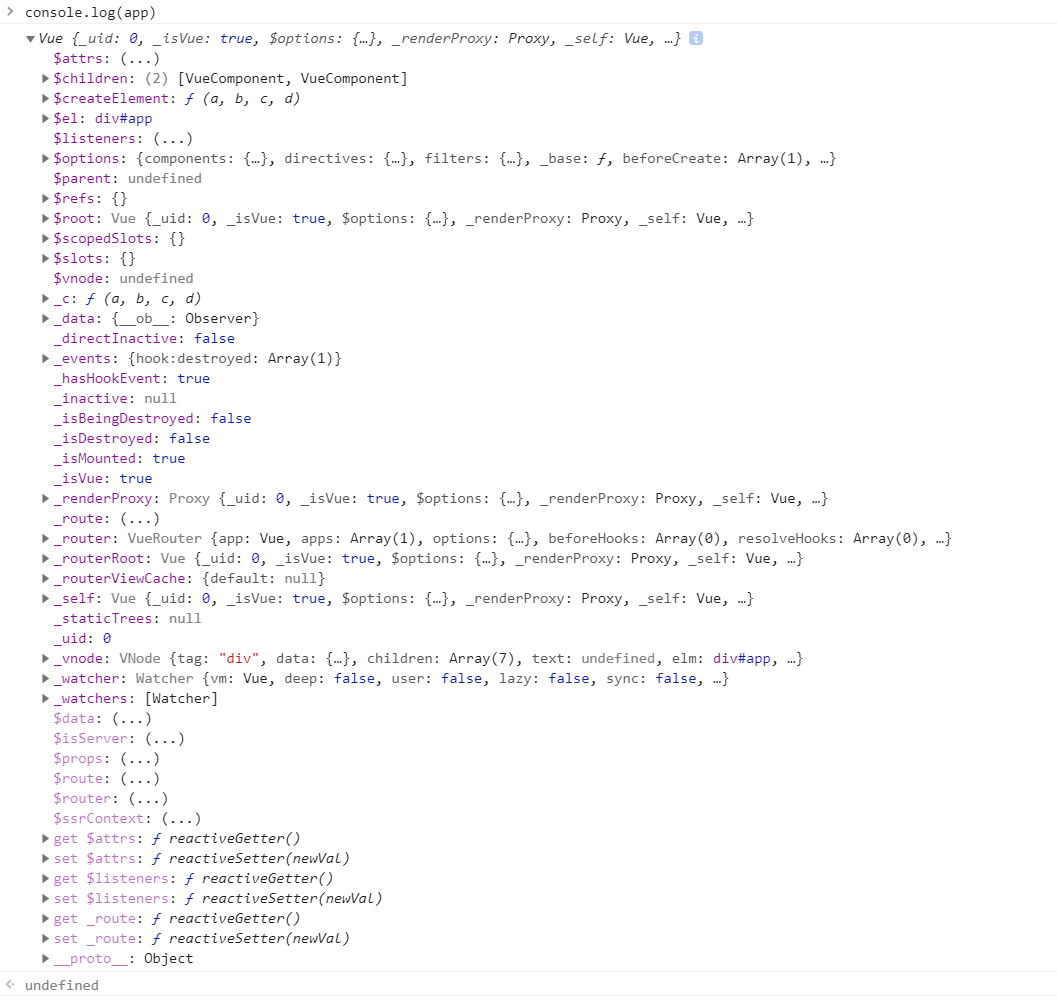
可以发现 app.options.router 等于 router
根据官网示例,可以看出实现 vue-router 大概需要经过一下几步:
1、将 VueRouter 插件注入 Vue 中
2、定义 router-link 、 router-view 两个全局组件供页面跳转使用
3、传入用户自定义的 routes 路由映射关系
插件 vue-router 安装
vue-router 只是 vue 中的一个插件。在 vue 中插件的开发有这几种方式:
// https://cn.vuejs.org/v2/guide/plugins.html#开发插件

MyPlugin.install = function (Vue, options) {
  // 1. 添加全局方法或属性
  Vue.myGlobalMethod = function () {
    // 逻辑...
  }

  // 2. 添加全局资源
  Vue.directive('my-directive', {
    bind (el, binding, vnode, oldVnode) {
      // 逻辑...
    }
    ...
  })

  // 3. 注入组件选项
  Vue.mixin({
    created: function () {
      // 逻辑...
    }
    ...
  })

  // 4. 添加实例方法
  Vue.prototype.$myMethod = function (methodOptions) {
    // 逻辑...
  }
}
index.js
先看下 vue-router 的入口文件 ./src/index.js
VueRouter.install = install
VueRouter.version = '__VERSION__'

if (inBrowser && window.Vue) {
  window.Vue.use(VueRouter)
}
VueRouter 的插入方式在 ./src/install.js 下。
先确保只安装一次
// 插件安装方法
export function install (Vue) {
  if (install.installed && _Vue === Vue) return
  install.installed = true
  // ...
}
然后通过 mixin 在 vue 的生命周期 beforeCreate 内注册实例,在 destroyed 内销毁实例。
export function install (Vue) {
  // ...
  Vue.mixin({
    beforeCreate () {
      // this.$options.router 来自于 VueRouter 的实例化,参考上面的 app = new Vue() 的打印: app.png
      // 判断实例是否已经挂载
      if (isDef(this.$options.router)) {
        this._routerRoot = this
        this._router = this.$options.router
        // 调用 VueRouter 的 init 方法
        this._router.init(this)
        Vue.util.defineReactive(this, '_route', this._router.history.current)
      } else {
        // 将每一个组件的 _routerRoot 都指向根 Vue 实例
        this._routerRoot = (this.$parent && this.$parent._routerRoot) || this
      }
      // 注册 VueComponent
      registerInstance(this, this)
    },
    destroyed () {
      // 销毁 VueComponent
      registerInstance(this)
    }
  })
  // ...
}
使用 mixin 会在每个 .vue 文件处进行 beforeCreate 和 destroyed 。
如在使用 vue-cli 创建的vue项目中,在 HelloWorld.vue 调用 mixin ,则会调用两次 mixin ,分别是父级 App.vue 和自己。
所以通过 this._routerRoot = this 可以将 _routerRoot 绑定至当前组件,即 _routerRoot 指向根节点。
接下来,将 $router 、 $route 挂载到 vue 上
Object.defineProperty(Vue.prototype, '$router', {
  get () { return this._routerRoot._router }
})

Object.defineProperty(Vue.prototype, '$route', {
  get () { return this._routerRoot._route }
})
我们使用 vue 时,访问 this.$router 、 this.$route 就来源于这里。
提示
通过
Object.defineProperty定义get来实现 , 而不使用Vue.prototype.$router = this._routerRoot._router是为了让其只读,不可修改
最后,注册全局组件 router-view 、 router-link
import View from './components/view'
import Link from './components/link'

export function install (Vue) {
  // ...
  Vue.component('router-view', View)
  Vue.component('router-link', Link)
  // ...
}
就可以使用
<router-link to="/foo">Go to Foo</router-link>
<router-link to="/bar">Go to Bar</router-link>

<router-view></router-view>
回到 ./src/index.js 的 VueRouter 下
import { HashHistory } from './history/hash'
import { HTML5History } from './history/html5'
import { AbstractHistory } from './history/abstract'

export default class VueRouter {
  // ...
  constructor (options: RouterOptions = {}) {
    // 默认是 hash 模式
    let mode = options.mode || 'hash'
    // 模式兼容处理
    this.fallback = mode === 'history' && !supportsPushState && options.fallback !== false
    if (this.fallback) {
      mode = 'hash'
    }
    if (!inBrowser) {
      mode = 'abstract'
    }
    this.mode = mode

    switch (mode) {
      case 'history':
        this.history = new HTML5History(this, options.base)
        break
      case 'hash':
        this.history = new HashHistory(this, options.base, this.fallback)
        break
      case 'abstract':
        this.history = new AbstractHistory(this, options.base)
        break
      default:
        if (process.env.NODE_ENV !== 'production') {
          assert(false, `invalid mode: ${mode}`)
        }
    }
  }
  // ...
}
可以看到有三种模式: HTML5History、HashHistory、AbstractHistory ,都来自于 history 目录。
create-matcher.js
示例中的 routes
const routes = [
  { path: '/foo', component: Foo },
  { path: '/bar', component: Bar }
]

const router = new VueRouter({
  routes // (缩写) 相当于 routes: routes
})
来自
import { createMatcher } from './create-matcher'

export default class VueRouter {
  constructor (options: RouterOptions = {}) {
    this.matcher = createMatcher(options.routes || [], this)
  }
}
matcher 来自于 createMatcher 的返回,初步猜测一下, createMatcher 是做了一个路由映射。
./src/create-matcher.js
export function createMatcher (
  routes: Array<RouteConfig>,
  router: VueRouter
): Matcher {
  const { pathList, pathMap, nameMap } = createRouteMap(routes)

  // ...

  return {
    match,
    addRoutes
  }
}
createMatcher 接收2个参数, routes 来自于用户定义的配置、 router 是 new VueRouter 返回的实例,同时返回两个方法 match 、 addRoutes 。
function match (
  raw: RawLocation,
  currentRoute?: Route,
  redirectedFrom?: Location
): Route {
  const location = normalizeLocation(raw, currentRoute, false, router)
  const { name } = location

  if (name) {
    const record = nameMap[name]
    if (process.env.NODE_ENV !== 'production') {
      warn(record, `Route with name '${name}' does not exist`)
    }
    if (!record) return _createRoute(null, location)
    const paramNames = record.regex.keys
      .filter(key => !key.optional)
      .map(key => key.name)

    if (typeof location.params !== 'object') {
      location.params = {}
    }

    if (currentRoute && typeof currentRoute.params === 'object') {
      for (const key in currentRoute.params) {
        if (!(key in location.params) && paramNames.indexOf(key) > -1) {
          location.params[key] = currentRoute.params[key]
        }
      }
    }

    if (record) {
      location.path = fillParams(record.path, location.params, `named route "${name}"`)
      return _createRoute(record, location, redirectedFrom)
    }
  } else if (location.path) {
    location.params = {}
    for (let i = 0; i < pathList.length; i++) {
      const path = pathList[i]
      const record = pathMap[path]
      if (matchRoute(record.regex, location.path, location.params)) {
        return _createRoute(record, location, redirectedFrom)
      }
    }
  }
  // no match
  return _createRoute(null, location)
}
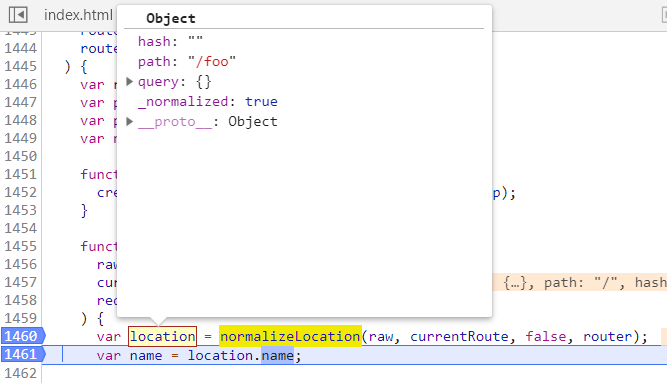
match 函数逻辑如下:
1、调用 normalizeLocation 获取 location 的信息。
2、判断是否有 name ,有的话通过 nameMap 来创建 route
3、判断是否有 path ,有的话通过 pathMap 来创建 route
4、如果 name 、 path 都没有,则直接用 null 创建 route
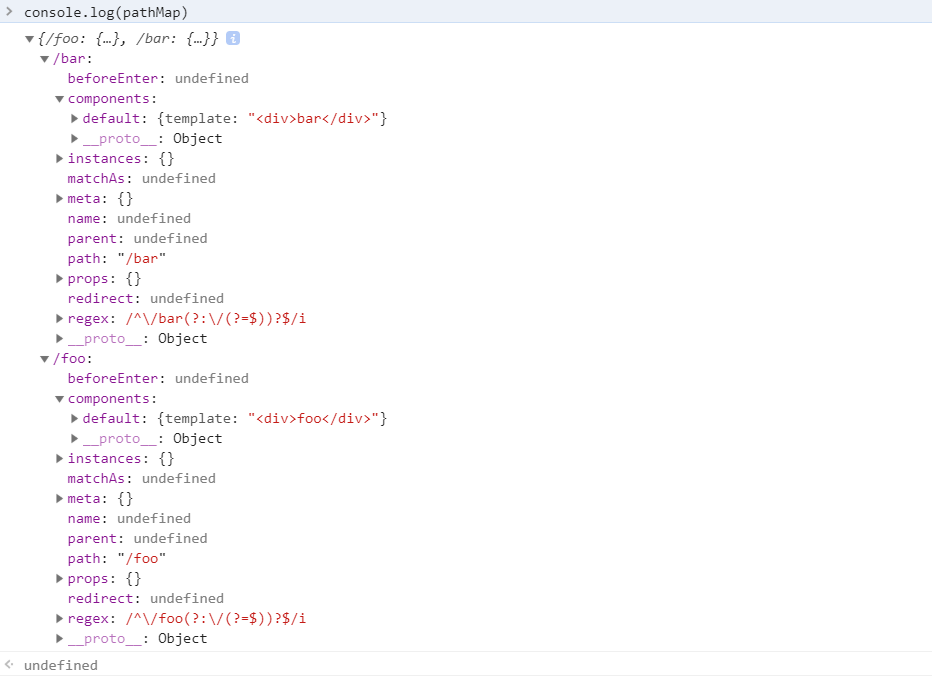
map 是什么?
这里以 pathMap 举例:
const routes = [
  // 有 path 没 name
  { path: '/foo', component: Foo },
  { path: '/bar', component: Bar }
]
match 之后会转换成Object形式
function addRoutes (routes) {
  createRouteMap(routes, pathList, pathMap, nameMap)
}
addRoutes 动态添加路由的方法,如: router.addRoutes()
小结一下, createMatcher 就是暴露出两个方法给 VueRouter ,需要做路由的映射以及动态添加路由的方法。
./src/create-route-map.js
create-route-map.js 中最重要的是 addRouteRecord 函数
function addRouteRecord (
  pathList: Array<string>,
  pathMap: Dictionary<RouteRecord>,
  nameMap: Dictionary<RouteRecord>,
  route: RouteConfig,
  parent?: RouteRecord,
  matchAs?: string
) {

  // ...

  if (route.children) {
    // ...
  }

  if (!pathMap[record.path]) {
    pathList.push(record.path)
    pathMap[record.path] = record
  }

  if (name) {
    if (!nameMap[name]) {
      nameMap[name] = record
    }
  }

  // ...

}
简化一下后,就是有 path 的时候存 pathMap ,有 name 的时候存 nameMap
record: RouteRecord 是什么?
const record: RouteRecord = {
  path: normalizedPath, // 路径
  regex: compileRouteRegex(normalizedPath, pathToRegexpOptions), // 正则匹配路径,如 { path: '/params-with-regex/:id(\\d+)' }
  components: route.components || { default: route.component }, // 对应组件
  instances: {},
  name, // 别名
  parent, // 父亲路由
  matchAs, // alias 会用到
  redirect: route.redirect, // 重定向
  beforeEnter: route.beforeEnter, // 钩子
  meta: route.meta || {},
  props: route.props == null
    ? {}
    : route.components
      ? route.props
      : { default: route.props }
}
即 record 保存着一个路由里所需的信息,比如我们可以通过路径来找到对应要渲染的组件。
如果有 嵌套路由 的话,即当前 route 有 children 属性的话,那就需要通过递归的方式将它们也加入映射之中。
addRouteRecord 的第四个参数 parent ,用于保存当前路由的父路由。
if (route.children) {
  route.children.forEach(child => {
    const childMatchAs = matchAs
      ? cleanPath(`${matchAs}/${child.path}`)
      : undefined
    addRouteRecord(pathList, pathMap, nameMap, child, record, childMatchAs)
  })
}
还有就是如果有别名,如
const routes = [
  {path: '/a', component: A, alias: '/ali'}
]
有别名的情况下, alias 并不会复制一份跟 path 一样的 record ,而是使用第五个参数 matchAs 来保存 path
if (route.alias !== undefined) {
  const aliases = Array.isArray(route.alias)
    ? route.alias
    : [route.alias]

  aliases.forEach(alias => {
    const aliasRoute = {
      path: alias,
      children: route.children
    }
    addRouteRecord(
      pathList,
      pathMap,
      nameMap,
      aliasRoute,
      parent,
      record.path || '/' // matchAs
    )
  })
}
这样,通过 alias 别名就能找到 path 路径,再通过 path 就能找到对应的 record ,从而找到对应的路由信息。
总结讲了这么老半天, ./src/create-matcher.js 中的 createMatcher 函数与 ./src/create-route-map.js 中的 createRouteMap 函数就是为了将数组 routes
const routes = [
  { path: '/foo', component: Foo },
  { path: '/bar', component: Bar }
]
转换成树形结构 map
map = {
  '/foo': {
    component: Foo
  },
  '/bar': {
    component: Bar
  }
}
再加上一个可以动态添加的函数 addRoutes 。
绕这么一大圈,不是很清楚作者为何要改成这样。一般来说本来数组的形式也是可以操作的。
history
路由的两种实现方式
1、 hash 路由
<a href="#/home">首页</a>
<a href="#/about">关于</a>
<div id="html"></div>

<script>
  window.addEventListener('load', function () {
    document.getElementById('html').innerHTML = location.hash.slice(1);
  });
  window.addEventListener('hashchange', function () {
    document.getElementById('html').innerHTML = location.hash.slice(1);
  });
</script>
2、 history 路由
<div onclick="go('/home')">首页</div>
<div onclick="go('/about')">关于</div>
<div id="html"></div>

<script>
  function go(pathname) {
    document.getElementById('html').innerHTML = pathname;
    history.pushState({}, null, pathname);
  }
  window.addEventListener('popstate', function () {
    go(location.pathname);
  });
</script>
注意
创建的
html文件直接打开,有的浏览器执行history.pushState会报错:"DOMException: Failed to execute 'pushState' on 'History': A history state object with URL"
需要创建本地环境
localhost
这是两种的简易实现方式,在源码
history 下有四个文件,基类 base.js 、hash路由 hash.js 、html5路由 html5.js 、abstract模式 abstract.js 。
export class History {
  // url 跳转
  transitionTo (location: RawLocation, onComplete?: Function, onAbort?: Function) {
    // ...
  }
  // 确认跳转
  confirmTransition (route: Route, onComplete: Function, onAbort?: Function) {
    // ...
  }
}
// 得到 base 值
function normalizeBase (base: ?string): string {
  // ...
}
// 交叉比对当前路由的路由记录和现在的这个路由的路由记录来决定调用哪些路由记录的钩子函数
function resolveQueue () {
  // ...
}
先介绍下基类,基类 History 中有个很重要的函数 transitionTo 。
transitionTo 会根据目标 location 与当前路径 this.current 进行匹配。如,从首页跳转到 /bar 页,执行
const route = this.router.match(location, this.current)
this.current 来自
import { START, isSameRoute } from '../util/route'

export class History {
  constructor (router: Router, base: ?string) {
    this.current = START
  }
}
// ./src/util/route.js
export function createRoute (
  record: ?RouteRecord,
  location: Location,
  redirectedFrom?: ?Location,
  router?: VueRouter
): Route {
  const stringifyQuery = router && router.options.stringifyQuery

  let query: any = location.query || {}
  try {
    query = clone(query)
  } catch (e) {}

  const route: Route = {
    name: location.name || (record && record.name),
    meta: (record && record.meta) || {},
    path: location.path || '/',
    hash: location.hash || '',
    query,
    params: location.params || {},
    fullPath: getFullPath(location, stringifyQuery),
    matched: record ? formatMatch(record) : []
  }
  if (redirectedFrom) {
    route.redirectedFrom = getFullPath(redirectedFrom, stringifyQuery)
  }
  return Object.freeze(route)
}

export const START = createRoute(null, {
  path: '/'
})

之后调用 confirmTransition 函数
confirmTransition (route: Route, onComplete: Function, onAbort?: Function) {
  // 路由相同则返回
  if (
    isSameRoute(route, current) &&
    route.matched.length === current.matched.length
  ) {
    this.ensureURL()
    return abort()
  }
}
const {
  updated,
  deactivated,
  activated
} = resolveQueue(this.current.matched, route.matched)
matched 来自 ./src/util/route.js
const route: Route = {
  // ...
  matched: record ? formatMatch(record) : []
}
record 是 Route 的基本单位, formatMatch 函数是拿 record 及它的所有父级组成数组。
function resolveQueue (
  current: Array<RouteRecord>, // 当前页
  next: Array<RouteRecord> // 即将跳转页
): {
  updated: Array<RouteRecord>, // 相同的父级组件
  activated: Array<RouteRecord>, // 跳转页需要更新的组件
  deactivated: Array<RouteRecord> // 当前页需要更新的组件
}
可以理解为,比如:用上面的例子从 /foo 跳转到 /bar ,那么他的父组件是相同的不需要更新,但 /foo 组件需要更新(去掉)、 /bar 组件也需要更新(添上)。
再往下,就是官方说的“导航守卫”
// 导航守卫数组
const queue: Array<?NavigationGuard> = [].concat(
  // 失活的组件钩子
  extractLeaveGuards(deactivated),
  // 全局 beforeEach 钩子
  this.router.beforeHooks,
  // 在当前路由改变,但是该组件被复用时调用
  extractUpdateHooks(updated),
  // 需要渲染组件 enter 守卫钩子
  activated.map(m => m.beforeEnter),
  // 解析异步路由组件
  resolveAsyncComponents(activated)
)
1、给 deactivated 组件加上 beforeRouteLeave 钩子。
extractGuards 从 RouteRecord 数组中提取各个阶段的守卫。 flatMapComponents 方法去从 records 中获取所有的导航。
function extractGuards (
  records: Array<RouteRecord>,
  name: string,
  bind: Function,
  reverse?: boolean
): Array<?Function> {
  const guards = flatMapComponents(records, (def, instance, match, key) => {
    const guard = extractGuard(def, name)
    if (guard) {
      return Array.isArray(guard)
        ? guard.map(guard => bind(guard, instance, match, key))
        : bind(guard, instance, match, key)
    }
  })
  return flatten(reverse ? guards.reverse() : guards)
}
获取到 guard 后,还会调用 bind 方法把组件的实例 instance 作为函数执行的上下文绑定到 guard 上。
function bindGuard (guard: NavigationGuard, instance: ?_Vue): ?NavigationGuard {
  if (instance) {
    return function boundRouteGuard () {
      return guard.apply(instance, arguments)
    }
  }
}
2、添加全局 beforeEach 钩子。
在 ./src/index.js 中定义了 beforeEach 。当用户使用 router.beforeEach ,就会往 router.beforeHooks 添加一个钩子函数,这样 this.router.beforeHooks 获取的就是用户注册的全局 beforeEach 。
beforeEach (fn: Function): Function {
  return registerHook(this.beforeHooks, fn)
}

function registerHook (list: Array<any>, fn: Function): Function {
  list.push(fn)
  return () => {
    const i = list.indexOf(fn)
    if (i > -1) list.splice(i, 1)
  }
}
3、给 updated 组件加上 beforeRouteUpdate 钩子。
与 extractLeaveGuards(deactivated) 相差不大。
4、添加全局 beforeEnter 钩子。
激活的路由配置中定义的 beforeEnter 函数。
5、加载要被激活的异步组件。
resolveAsyncComponents 返回的是一个导航守卫函数,有标准的 to 、 from 、 next 参数。它的内部实现很简单,利用了 flatMapComponents 方法从 matched 中获取到每个组件的定义,判断如果是异步组件,则执行异步组件加载逻辑。
这样在 resolveAsyncComponents(activated) 解析完所有激活的异步组件后,我们就可以拿到这一次所有激活的组件。
6、在被激活的组件里调用 beforeRouteEnter 。
7、调用全局的 beforeResolve 。
beforeResolve (fn: Function): Function {
  return registerHook(this.resolveHooks, fn)
}
8、导航被确认。
9、调用全局的 afterEach 。
执行了 onComplete(route) 后,会执行 this.updateRoute(route) 方法。
10、触发DOM更新。
11、用创建好的实例调用 beforeRouteEnter 守卫传给 next 的回调函数。
const iterator = (hook: NavigationGuard, next) => {
  // ...
}
iterator 函数逻辑很简单,它就是去执行每一个 导航守卫 hook ,并传入 route 、 current 和匿名函数,这些参数对应文档中的 to 、 from 、 next ,当执行了匿名函数,会根据一些条件执行 abort 或 next ,只有执行 next 的时候,才会前进到下一个导航守卫钩子函数中,这也就是为什么官方文档会说只有执行 next 方法来 resolve 这个钩子函数。
那么,怎么执行这些 queue 呢?
创建一个 迭代器模式 的函数
function runQueue (queue, fn, cb) {
  var step = function (index) {
    if (index >= queue.length) {
      cb();
    } else {
      if (queue[index]) {
        fn(queue[index], function () {
          step(index + 1);
        });
      } else {
        step(index + 1);
      }
    }
  };
  step(0);
}
// 示例
// 可以通过是否调用 `next` 让执行随时停止。
var arr = [1,2,3];
runQueue(arr, function (a, next) {
  console.log(a, next);
  // next();
}, function () {
  console.log('callback');
});
组件
<router-view> 组件通过 render 渲染。
const route = parent.$route // 获取当前的路径
<router-view> 支持嵌套
while (parent && parent._routerRoot !== parent) {
  if (parent.$vnode && parent.$vnode.data.routerView) {
    depth++
  }
  if (parent._inactive) {
    inactive = true
  }
  parent = parent.$parent
}
还记得一开始说的吗 _routerRoot 表示的是根 Vue 实例。
同时定义了一个注册路由实例的方法。
data.registerRouteInstance = (vm, val) => {
  // val could be undefined for unregistration
  const current = matched.instances[name]
  if (
    (val && current !== vm) ||
    (!val && current === vm)
  ) {
    matched.instances[name] = val
  }
}
在 ./src/install.js 中,我们会调用该方法去注册路由的实例。
const registerInstance = (vm, callVal) => {
  let i = vm.$options._parentVnode
  if (isDef(i) && isDef(i = i.data) && isDef(i = i.registerRouteInstance)) {
    i(vm, callVal)
  }
}

Vue.mixin({
  beforeCreate () {
    registerInstance(this, this)
  },
  destroyed () {
    registerInstance(this)
  }
})
<router-link> 组件也是通过 render 渲染。
当我们点击 <router-link> 的时候,实际上最终会执行 router.push 。
// ./src/index.js
push (location: RawLocation, onComplete?: Function, onAbort?: Function) {
  this.history.push(location, onComplete, onAbort)
}
我们看下 hash 模式下 push 的实现。
push (location: RawLocation, onComplete?: Function, onAbort?: Function) {
  const { current: fromRoute } = this
  this.transitionTo(location, route => {
    pushHash(route.fullPath)
    handleScroll(this.router, route, fromRoute, false)
    onComplete && onComplete(route)
  }, onAbort)
}
执行 transitionTo 跳转后,调用 pushHash 更新浏览器的 url 地址,并把当前 url 压入历史栈中。
在 history 的初始化中,会设置一个监听器,监听历史栈的变化。
setupListeners () {
  const router = this.router
  const expectScroll = router.options.scrollBehavior
  const supportsScroll = supportsPushState && expectScroll

  if (supportsScroll) {
    setupScroll()
  }

  window.addEventListener(supportsPushState ? 'popstate' : 'hashchange', () => {
    const current = this.current
    if (!ensureSlash()) {
      return
    }
    this.transitionTo(getHash(), route => {
      if (supportsScroll) {
        handleScroll(this.router, route, current, true)
      }
      if (!supportsPushState) {
        replaceHash(route.fullPath)
      }
    })
  })
}
传送门: Vuex源码全解析
终于写完了!!!最后点个赞或者关注公众号“大前端FE”