

前言
如何实现在网页上发邮件功能?方法有很多。如果是自己搭建后台,可以利用express-mailer, Nodemailer等npm包;也有更为方便快捷的方法,即最近很火的概念Serverless(无服务器服务),比如Ali Yun提供的邮件推送服务,直接调用API 即可实现邮件推送;GitHub 上还有利用Google 脚本实现发邮件的方法(github地址)。本文记录了用express搭建Nodejs 服务以及利用Serverless 分别实现邮件推送功能的两种方法。
Express
安装
$ npm install express --save
$ npm install express-mailer
express-mailer 配置
//app.js
var express = require("express");
var mailer = require("express-mailer");
var app = express();

mailer.extend(app, {
    from: "todo-from@163.com", // 你的发送邮箱地址
    host: "smtp.163.com", // hostname
    secureConnection: true, // use SSL, 是否使用SSL
    port: 465, // port for secure SMTP,端口
    transportMethod: "SMTP", // default is SMTP. Accepts anything that nodemailer accepts
    auth: {
        user: "todo-from@163.com", // 你的发送邮箱地址
        pass: "todo-password" // 邮箱密码
    }
});

app.post("/sendemail", function(req, res) {
    const { name, email, mobile, content } = req.body;

    app.mailer.send(
        "email",
        {
            to: "todo-xxx@163.com", // REQUIRED. 必填,邮件接收方地址
            subject: "Test Email", // REQUIRED. 必填,主题。
            name, // All additional properties are also passed to the template as local variables.
            mobile,
        },
        function(err) {
            if (err) {
                // handle error,处理错误
                res.json({ msg: "Slow network, Try later please" });
                return;
            }
            res.json({ msg: "Email Sent Successfully !" });
        }
    );
});

app.listen(3001, function() {
    console.log("web server listening on port 3001");
});
fetch
在前端页面利用isomorphic-unfetch来发送fetch请求。
//sendEmail.js
import fetch from 'isomorphic-unfetch';

//...
const params = { name, mobile };
fetch(
    'http://localhost:3001/sendemail',
    {
        method: 'POST',
        headers: {
            'Content-Type': 'application/x-www-form-urlencoded'
        },
        body: Object.keys(params)
            .map(key => {
                return encodeURIComponent(key) + '=' + encodeURIComponent(params[key]);
            })
            .join('&')
    }
)
    .then(r => r.text())
    .then(data => {
        const resultData = JSON.parse(data);
        if (resultData.result === 'success') {
            console.log('Send Email Successfully!');
        } else {
            console.log('Slow network, try again later~');
        }
    });
踩坑合集
- 如果从
req.body中获取的内容为空,可以使用body-parser中间件
//app.js
var bodyParser = require("body-parser");
app.use(bodyParser.json());
- 如果遇到跨域问题,可以使用
cors,详细配置点击这里
//app.js
var cors = require("cors");
app.use(cors());
- 如果需要设置邮件模板,可以使用
jade
//app.js
app.set("views", __dirname + "/views");
app.set("view engine", "jade");
然后新增文件夹views,创建模板:
// views/email.jade

doctype transitional
html
  head
    meta(http-equiv = 'Content-Type', content = 'text/html; charset=UTF-8')
    title= subject
    body
      h1.h1 It's an email from emai-test website.
      p Name: #{name}
      p Mobile: #{mobile}
【0306 更新】
搜了一下jade 已经改名为 pug,本地调试的时候没什么问题,但是当我部署到now时报错了。换成最新版pug之后就能部署成功了。
运行
$ node app.js
部署
我把项目部署到了ZEIT,只需在项目根目录下新增文件now.json:
{
  "version": 2,
  "builds": [{ "src": "index.js", "use": "@now/node-server" }],
  "routes": [
    {
      "src": "/sendemail", //路由
      "dest": "/index.js", //入 口 文件名称
      "methods": ["POST"] //请求方法
    }
  ]
}
使用命令now即可一键部署~ 输入now dev可查看部署过程中的详细报错。
部署完成后即可访问生成的域名。
Serverless
上述通过express搭建Nodejs 服务的方式看起来不算太复杂,然鹅如果需要在网页上使用,还需将express部署到服务器,如果网页协议是https,则还需解决SSL 证书问题。那么Serverless 的出现则令我们无需考虑这些问题了。
send-email-no-server
- 首先你需要一个gmail 邮箱,邮件是通过该邮箱发送的;
- 修改Google 脚本,填入接收方邮箱地址;
- 然后按照步骤操作下来,实际上是利用Google 脚本部署了一个Web app。
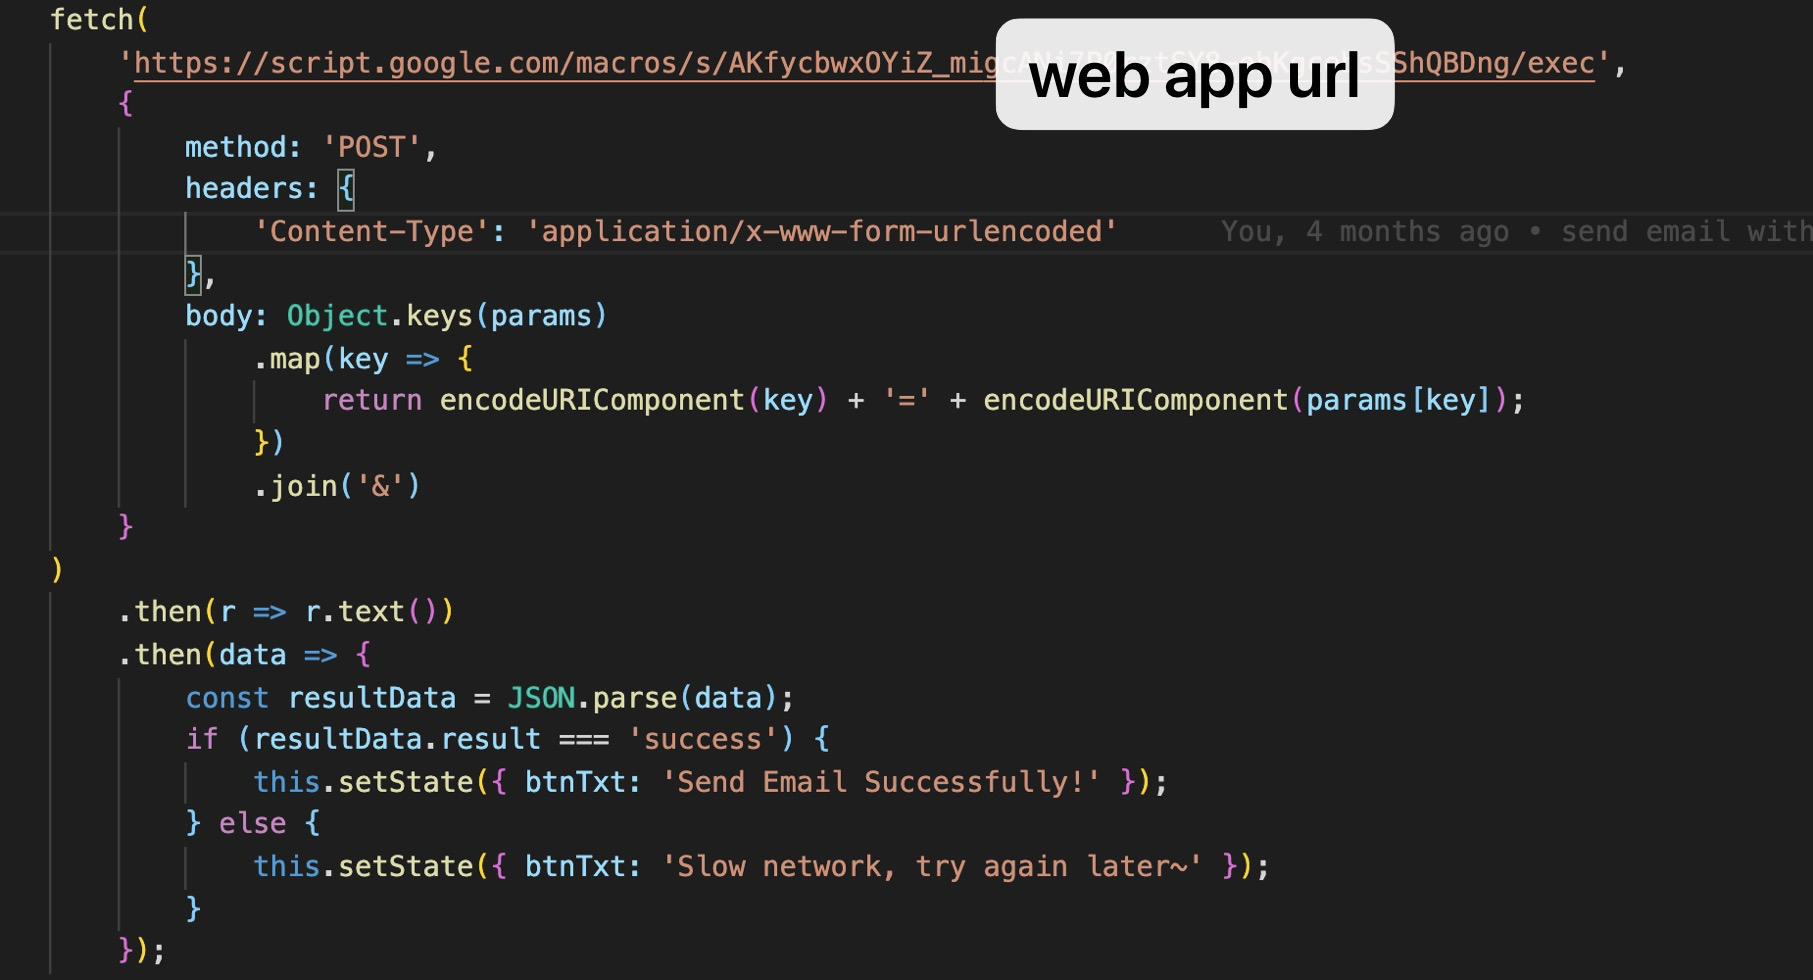
- 将部署好的web app 地址填入前端
fetch方法中,就可以愉快地发邮件了。
对比
综上所述,Express 方法的优点是灵活可控,缺点是较为复杂,成本较高;而利用Google 脚本的方法则更方便快捷,无维护成本,但本方法中的接收方邮箱地址需提前写死在脚本中,不支持在网页上自定义。以上两种方法的优劣对比如下:
| 优点 | 缺点 | |
|---|---|---|
| Express | - 灵活可控 | - 步骤较复杂 - 需一定维护成本 |
| Serverless (Google Web App) |
- 方便快捷 - 无维护成本 - 无服务器成本 |
- 接收方邮箱地址需提前写死在脚本中,只适用于向固定邮箱发送邮件的场景 |
