

前言
使用taro做小程序的时候,发现针对tabBar的配置文章说的都不是很清楚,微信小程序提供的官方例子写法上也有一些差别。所以整理一个比较靠谱的配置方案给大家参考。
关键词:tabBar、custom、custom-tab-bar、getTabBar、scope
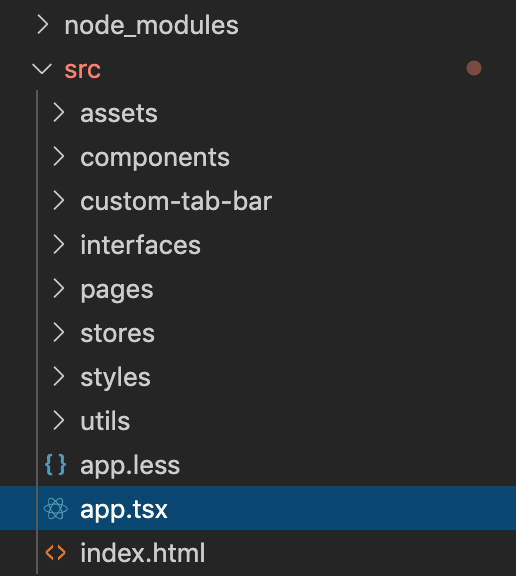
目录结构
第一步
在app.tsx config里面做以下配置
tabBar: {
      // 使用custom-tab-bar
      custom: true,
      color: 'rgba(0, 0, 0, 0.6)',
      selectedColor: 'rgba(0, 162, 0, 1)',
      backgroundColor: '#fff',
      borderStyle: 'white',
      // 这些配置无法省略 同时需要注意pagePath和图片路径的配置
      // 如果这里图片路径没有配置或配置出错的话,图片icon不会显示
      list: [
        {
          pagePath: 'pages/home/index',
          text: '首页',
          iconPath: './assets/icn_tab_home_normal.png',
          selectedIconPath: './assets/icn_tab_home_focus.png',
        },
        {
          pagePath: 'pages/classify/index',
          text: '分类',
          iconPath: './assets/icn_tab_classify_normal.png',
          selectedIconPath: './assets/icn_tab_classify_focus.png',
        },
        {
          pagePath: 'pages/profile/index',
          text: '我的',
          iconPath: './assets/icn_tab_my_normal.png',
          selectedIconPath: './assets/icn_tab_my_focus.png',
        },
      ],
    },
第二步
跟pages同级的目录,新建一个custom-tab-bar文件夹,并添加以下文件;
1、index.tsx文件 代码示例
注意!上面提到过pagePath和图片路径,与app.tsx中配置的区别,文件目录可以参考上面的截图。
import Taro from '@tarojs/taro';
import { CoverView, CoverImage } from '@tarojs/components';
import styles from './index.module.less';

const list = [
  {
    pagePath: '/pages/home/index',
    text: '首页',
    iconPath: '../assets/icn_tab_home_normal.png',
    selectedIconPath: '../assets/icn_tab_home_focus.png',
  },
  {
    pagePath: '/pages/classify/index',
    text: '分类',
    iconPath: '../assets/icn_tab_classify_normal.png',
    selectedIconPath: '../assets/icn_tab_classify_focus.png',
  },
  {
    pagePath: '/pages/profile/index',
    text: '我的',
    iconPath: '../assets/icn_tab_my_normal.png',
    selectedIconPath: '../assets/icn_tab_my_focus.png',
  },
];

class CustomTabBar extends Taro.Component {
  state = {
    // 建立一个全局变量储存selectedIndex
    // 创建方法可以按照自己的方法或taro提供的示例
    // 当然没有这个全局变量也可以解决问题
    selected: global.globalData.selectedIndex,
  };

  switchTab = (item, index) => {
    const url = item.pagePath;
    global.globalData.selectedIndex = index;
    this.setState({ selected: index });
    Taro.switchTab({ url });
  };

  shouldComponentUpdate = (_nextProps, nextState) => {
    return this.state.selected !== nextState.selected;
  };

  render() {
    return (
      <CoverView className={styles.tabBar}>
        <CoverView className={styles.tabBarBorder} />
        {list.map((item, index) => {
          const isSelected = this.state.selected === index;
          return (
            <CoverView
              className={styles.tabBarItem}
              onClick={() => this.switchTab(item, index)}
              data-path={item.pagePath}
              key={item.text}
            >
              <CoverImage src={isSelected ? item.selectedIconPath : item.iconPath} />
              <CoverView
                style={{
                  color: isSelected ? 'rgba(0, 162, 0, 1)' : 'rgba(0, 0, 0, 0.6)',
                }}
              >
                {item.text}
              </CoverView>
            </CoverView>
          );
        })}
      </CoverView>
    );
  }
}

export default CustomTabBar;
2、添加样式文件index.module.less
.tabBar {
  position: fixed;
  bottom: 0;
  left: 0;
  right: 0;
  height: 48px;
  background: white;
  display: flex;
  padding-bottom: env(safe-area-inset-bottom);
}

.tabBarBorder {
  background-color: rgba(0, 0, 0, 0.33);
  position: absolute;
  left: 0;
  top: 0;
  width: 100%;
  height: 1px;
  transform: scaleY(0.5);
}

.tabBarItem {
  flex: 1;
  text-align: center;
  display: flex;
  justify-content: center;
  align-items: center;
  flex-direction: column;
}

.tabBarItem cover-image {
  width: 24px;
  height: 24px;
}

.tabBarItem cover-view {
  font-size: 12px;
}
第三步
在对于的3个页面文件添加更新selectedIndex的方法,以home为例:
import Taro, { useScope, useDidShow } from '@tarojs/taro';

const Home: Taro.FC = () => {
  const scope = useScope();

  useDidShow(() => {
    if (typeof scope.getTabBar === 'function' && scope.getTabBar()) {
      scope.getTabBar().$component.setState({
        // 如果不想用全局变量这里直接写index即可
        selected: globa.globalData.selectedIndex,
      });
    }
  });

  return (
    <View>home</View>
  );
};

Home.config = {
  navigationBarTitleText: '首页',
};

export default Home;
其他几个页面同理
