

背景
- 协同开发时,因各人使用代码格式化不一致,diff 时就很难看出改动点在哪里
- 看到 esint 报红就害怕,觉得上了 eslint 就像上了枷锁
目标
- 🔨 少依赖,只需要开启 ESlint 即可
- 📦"零"配置,减少风格差异选择的争吵
- 🚀 全自动化,自动修复,保持原本的习惯即可
所用知识点
- ESLint
- Prettier
- EditorConfig
- vscode
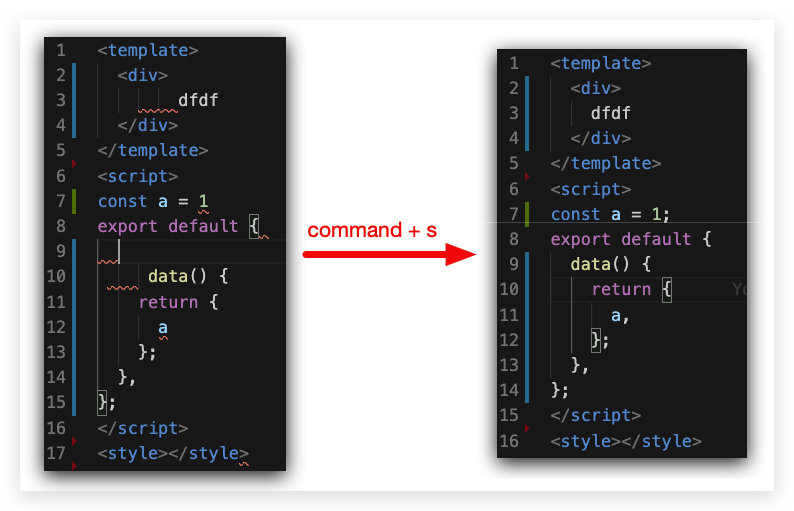
效果
- 点击保存
command + s / Ctrl + s后自动修复
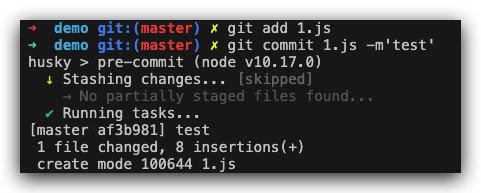
git commit时自动修复
安装流程
ESlint+Prettier 配置
vue 项目
vue add eslint
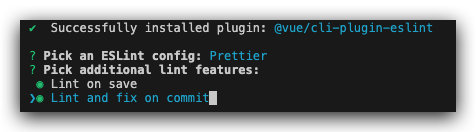
注意:如果想要使用
git commit触发lint操作功能这里可以通过空格来选择这个选项
这里是多选的,非单选
这个时候我们就会看到 Vue 帮我们创建了一个 eslint 配置文件
// .eslintrc.js
module.exports = {
  root: true,
  env: {
    node: true,
  },
  extends: ["plugin:vue/essential", "eslint:recommended", "@vue/prettier"],
  parserOptions: {
    ecmaVersion: 2020,
  },
  rules: {
    "no-console": process.env.NODE_ENV === "production" ? "warn" : "off",
    "no-debugger": process.env.NODE_ENV === "production" ? "warn" : "off",
  },
};
// package.json
{
  "name": "demo-vue-eslint",
  "version": "1.0.0",
  "description": "",
  "author": "",
  "scripts": {
    "test": "echo \"Error: no test specified\" && exit 1",
    "lint": "vue-cli-service lint"
  },
  "main": "index.js",
  "devDependencies": {
    "@vue/cli-plugin-eslint": "^4.3.1",
    "@vue/eslint-config-prettier": "^6.0.0",
    "eslint": "^6.7.2",
    "eslint-plugin-prettier": "^3.1.1",
    "eslint-plugin-vue": "^6.2.2",
    "lint-staged": "^9.5.0",
    "prettier": "^1.19.1"
  },
  "gitHooks": {
    "pre-commit": "lint-staged"
  },
  "keywords": [],
  "license": "ISC",
  "lint-staged": {
    "*.{js,jsx,vue}": ["vue-cli-service lint", "git add"]
  }
}
现在我们就可以通过
npm run lint
来格式化全部代码了
因为这个脚本依赖于
vue-cli-service如果项目中缺少这个依赖就会报错
这个时候我们只要添加这个依赖就可以了
npm i @vue/cli-service -D
React 项目
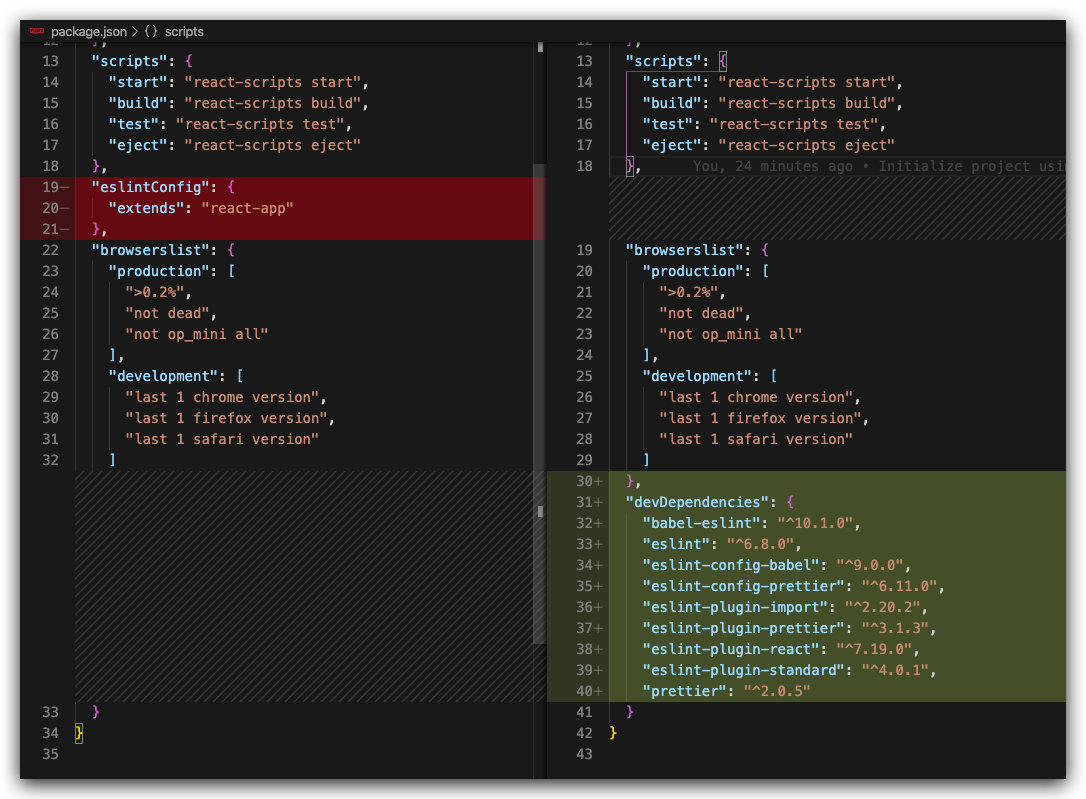
安装依赖
-
删除
eslintCOnfig -
安装依赖
npm i babel-eslint eslint eslint-config-babel eslint-config-prettier eslint-plugin-import eslint-plugin-prettier eslint-plugin-react eslint-plugin-standard prettier -D
最终的效果图如下
配置 Eslint
// .eslintrc.js
module.exports = {
  root: true,
  env: {
    browser: true,
  },
  extends: [
    "prettier",
    "prettier/standard",
    "prettier/react",
    "plugin:react/recommended",
  ],
  plugins: ["prettier"],
  rules: {
    "prettier/prettier": "error",
  },
  parser: "babel-eslint",
  settings: {
    react: {
      pragma: "React",
      version: "detect",
    },
  },
};
#####配置 git hook
npm install pretty-quick husky -D
注意:这里一定要确保提前安装好了
prettier
然后在package.json添加
 "husky": {
    "hooks": {
      "pre-commit": "pretty-quick --staged"
    }
  }

.eslintignore
在根目录创建.eslintignore
build/*.js
src/assets
public
dist
这里是忽略文件的配置,比如我们打包后的文件dist/**,我们当然是不希望格式化的
定制 Prettier
我们使用 Prettier 就是为了零配置
但是默认的东西,总会有不喜欢的
所以 Prettier 还是提供了少许的配置供我们修改
比如:
- 单引号
- 末尾属性保留
, tab宽度为2seim不使用分号- ...
在根目录创建.prettierrc.js
// .prettierrc.js
module.exports = {
  singleQuote: true, // 平常模式使用单引号
  trailingComma: "es5", // 末尾属性添加,
  tabWidth: 2, // tab 为2个空格长度
  semi: false, // 不需要分号
  printWidth: 120, // 单行长度
};
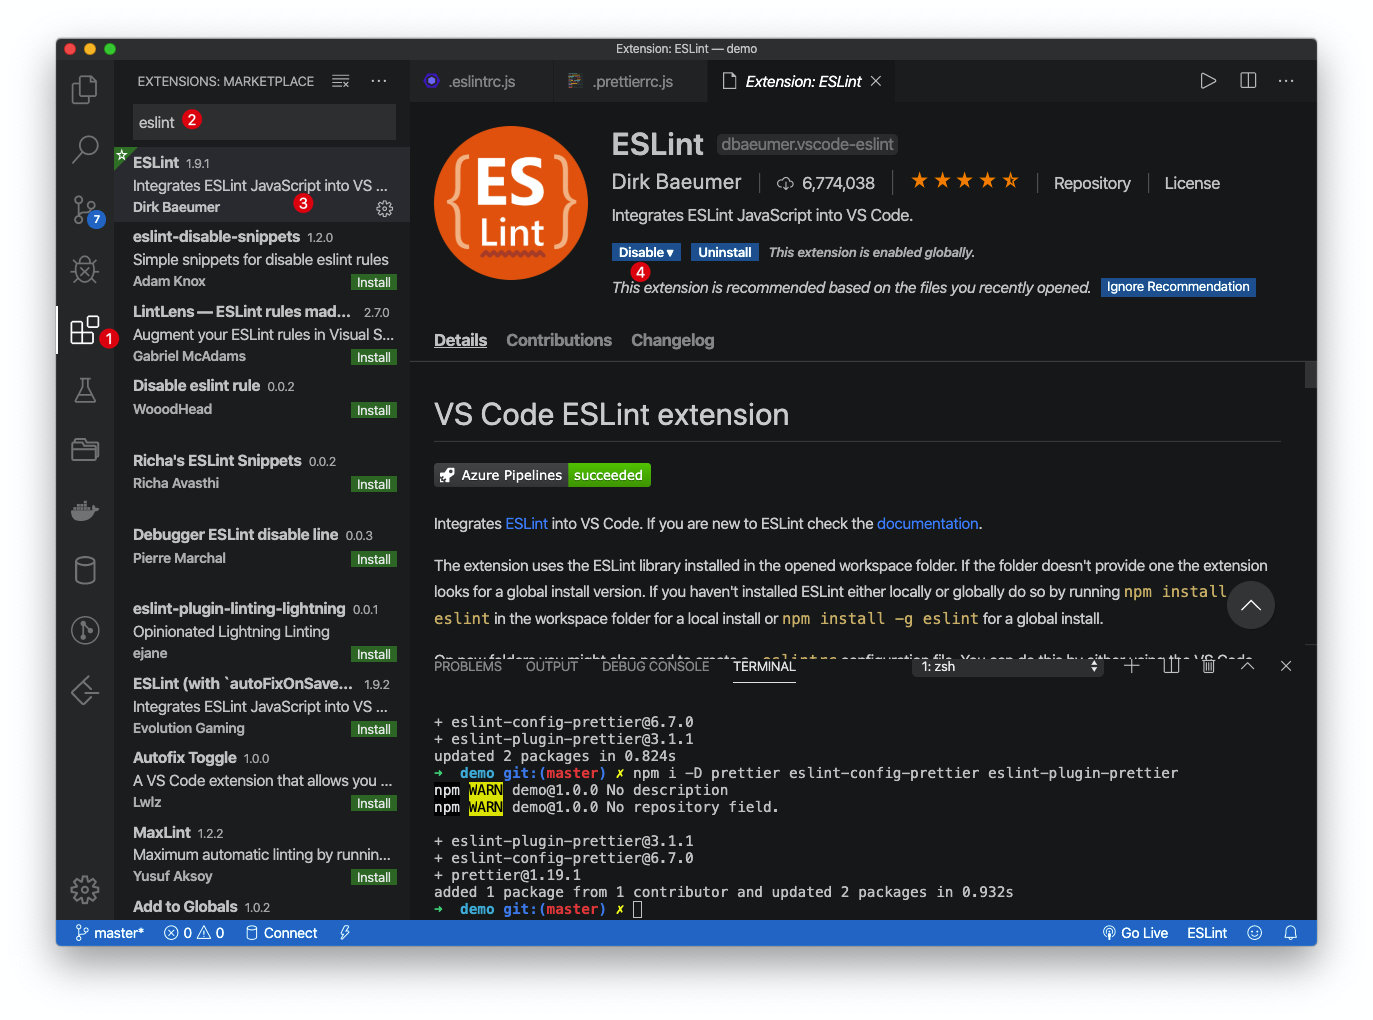
VScode:检查 + 自动修复
安装ESLint插件
这里只对
VScode进行演示
随机创建一个文件测试1.vue
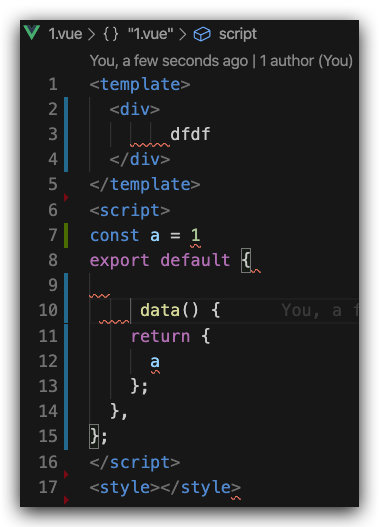
出现红色波浪线,说明ESlint配置成功
现在我们来配置自动修复功能
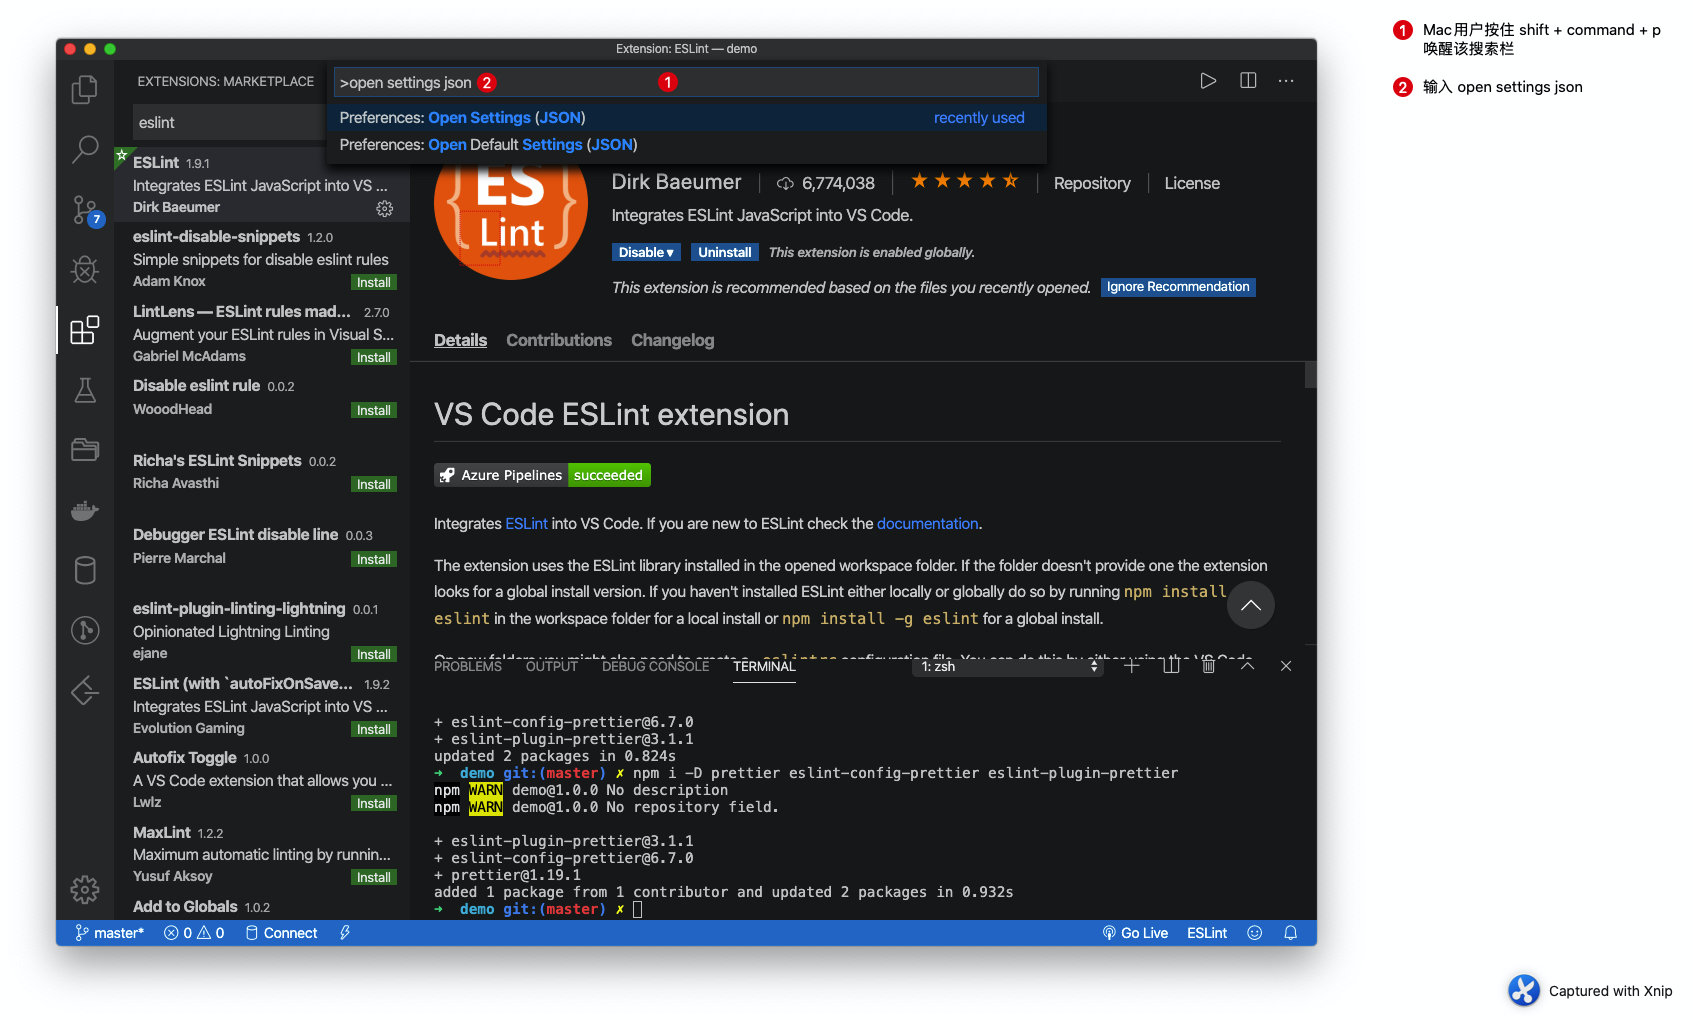
- Mac 用户按住
shift + command + p唤醒搜索栏;Win 用户按F1或者Ctrl + shift + p- 输入
open settings json
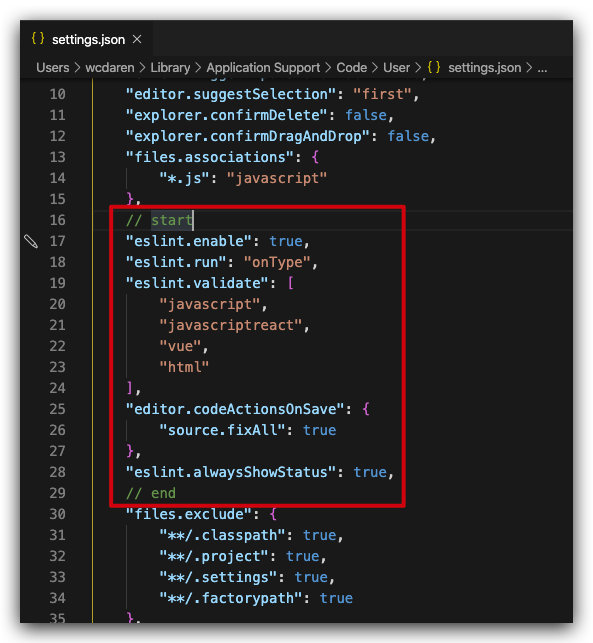
往settings.json里面添加以下语句
"eslint.enable": true,
"eslint.run": "onType",
"eslint.validate": [
  "javascript",
  "javascriptreact",
  "vue",
  "html"
],
"editor.codeActionsOnSave": {
  "source.fixAll": true
},
"eslint.alwaysShowStatus": true,
配置完成
建议使用
command + q彻底关闭vscode后再开启,Win 用户直接关闭 vscode 即可避免后期可能遇到格式化时代码混乱
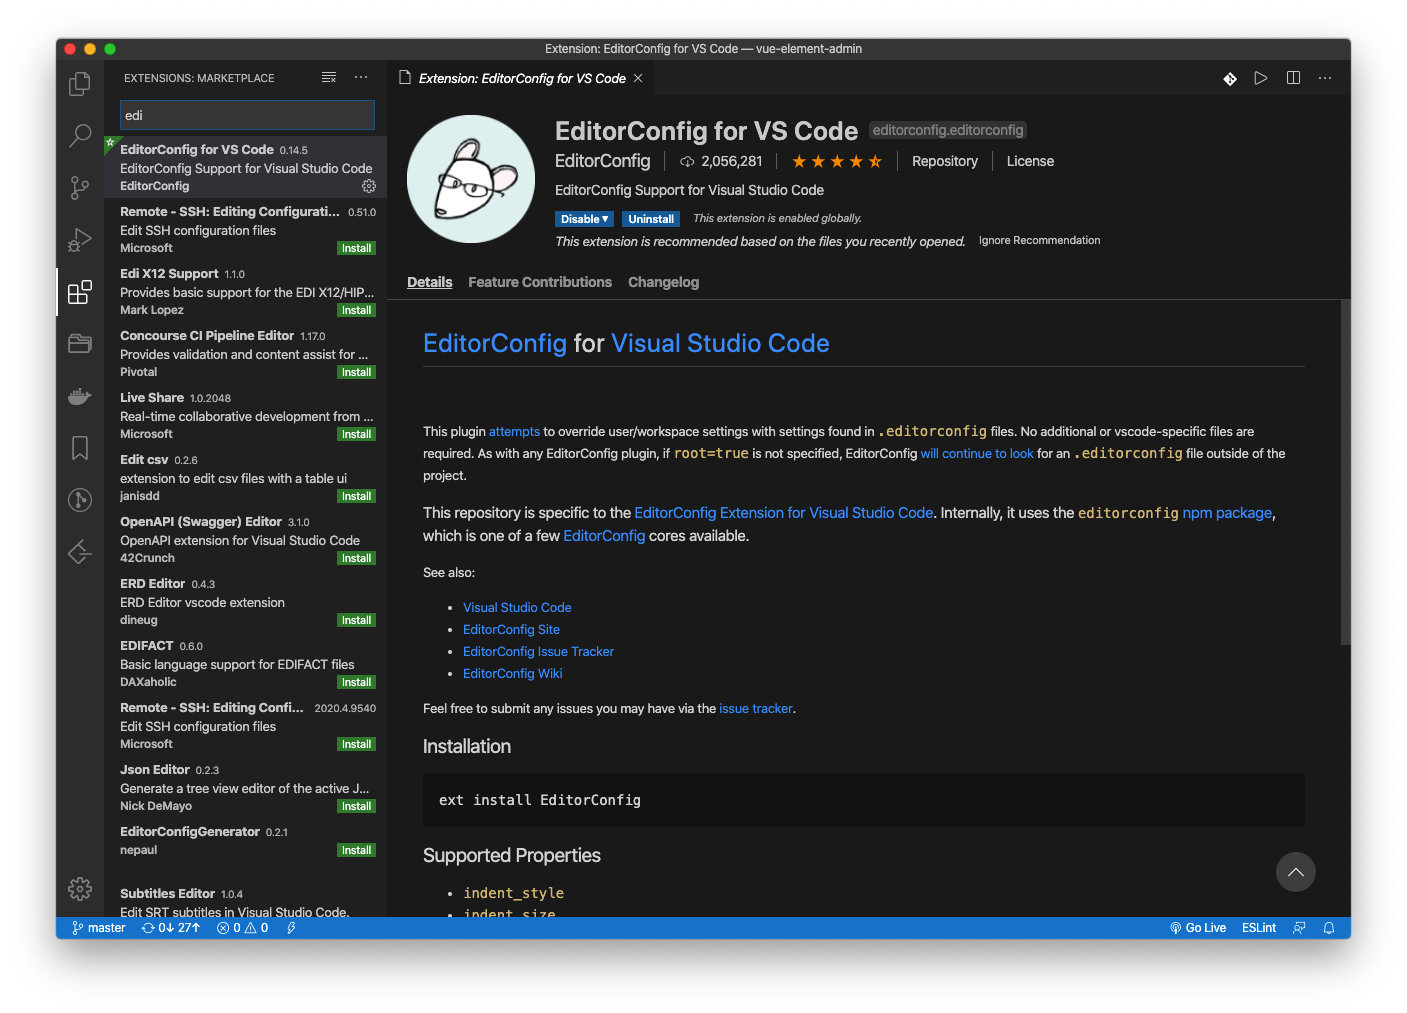
EditorConfig
如果还不清楚EditorConfig是什么的,进入官网查看
在根目录创建.editorconfig
# https://editorconfig.org
root = true

[*]
charset = utf-8
indent_style = space
indent_size = 2
end_of_line = lf
insert_final_newline = true
trim_trailing_whitespace = true
然后再安装插件
如何推广
vscode 提示安装插件
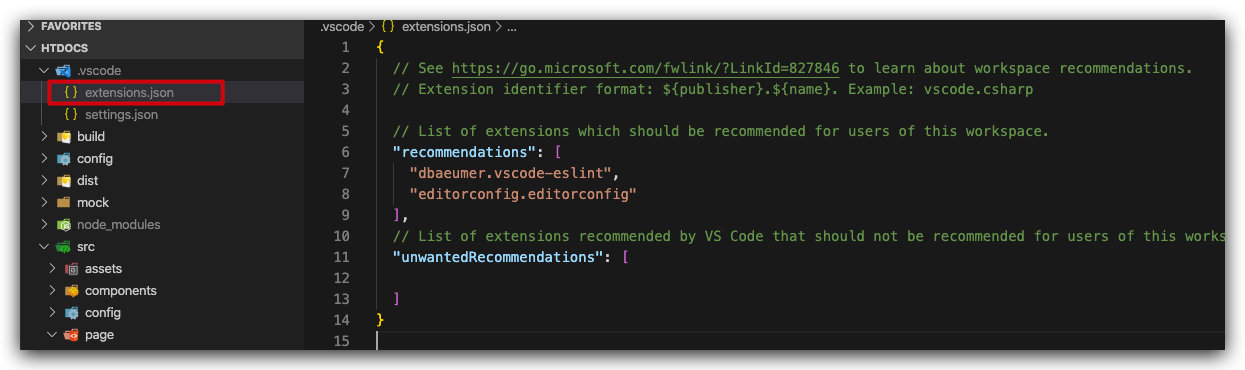
创建.vscode/extensions.json
{
  // See https://go.microsoft.com/fwlink/?LinkId=827846 to learn about workspace recommendations.
  // Extension identifier format: ${publisher}.${name}. Example: vscode.csharp

  // List of extensions which should be recommended for users of this workspace.
  "recommendations": ["dbaeumer.vscode-eslint", "editorconfig.editorconfig"],
  // List of extensions recommended by VS Code that should not be recommended for users of this workspace.
  "unwantedRecommendations": []
}
当新的开发者接手这个项目时
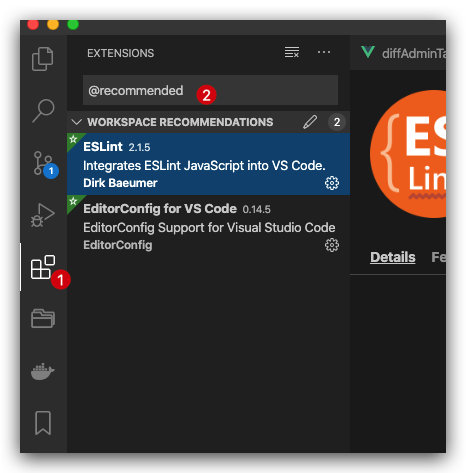
输入@recommended即可看到我们提示用户安装对应的插件
无侵入
如果是按照
React项目安装的,就无需再看了
根据vue add eslint安装的 git hook
 "lint-staged": {
    "*.{js,jsx,vue}": [
      "vue-cli-service lint",
      "git add"
    ]
  }
这样的方案是更改全局的
如果有些项目是手动 diff 的 ,这样无疑会破坏原本线上与开发的版本,到时后续的 diff 不便
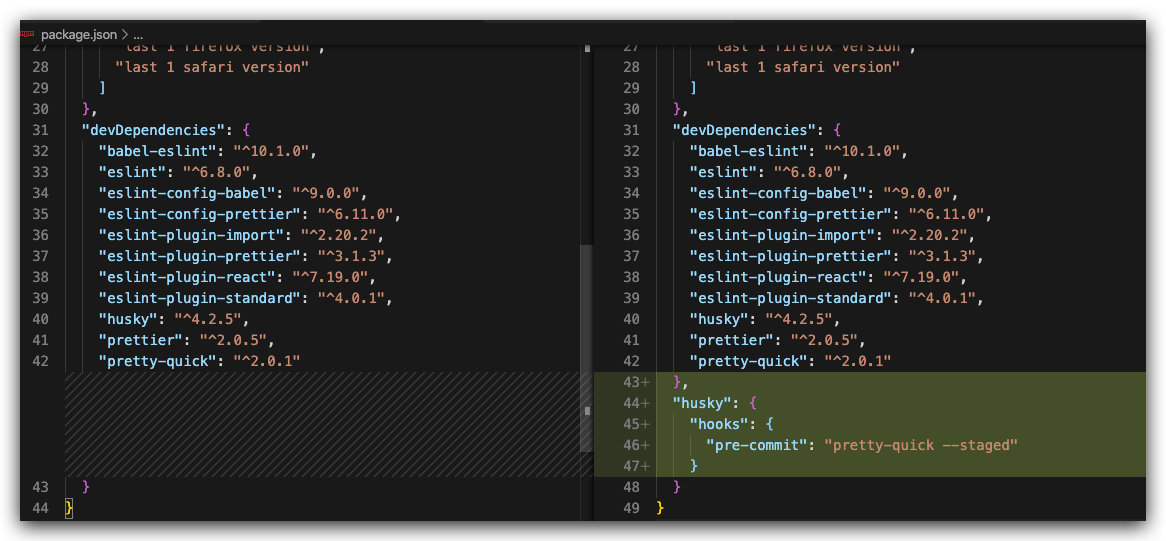
这里如果通过vue add eslint添加 git hook 的改为以下方案
npm install pretty-quick husky -D
注意:这里一定要确保提前安装好了
prettier
然后在package.json添加
 "husky": {
    "hooks": {
      "pre-commit": "pretty-quick --staged"
    }
  }
那么当新的开发者加入,那么对于他来说,本文的全部配置他是无感的,比如没有安装 ESlint 插件,他就不会报错,不报错当然是无感的,他的每次提交也不会全局的破坏原本的项目风格
每次提交只修改提交文件,这种渐进的改变会让别人不知道整个 ESlint 方案的存在
